

1980 Pontiac LeMans Station Wagon - G-T-faux (stuck with it, and can't shake it... like a bad case of herpes)
- Thread starter motorheadmike
- Start date
You are using an out of date browser. It may not display this or other websites correctly.
You should upgrade or use an alternative browser.
You should upgrade or use an alternative browser.
- Status
- Not open for further replies.

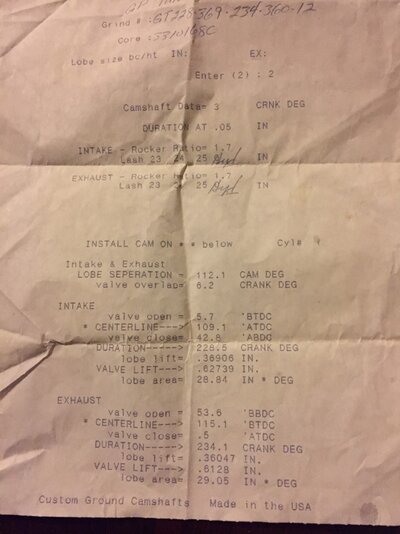
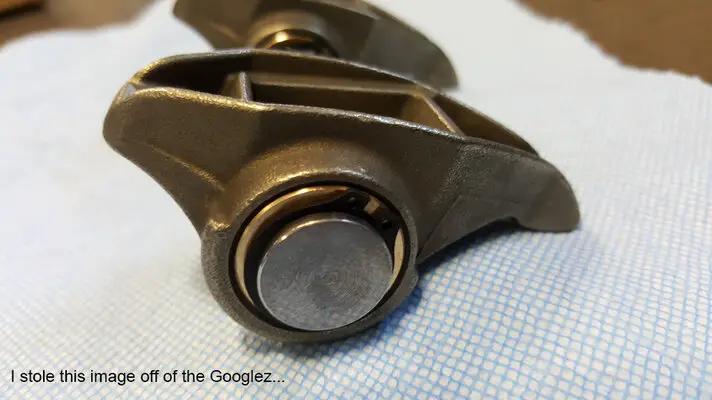
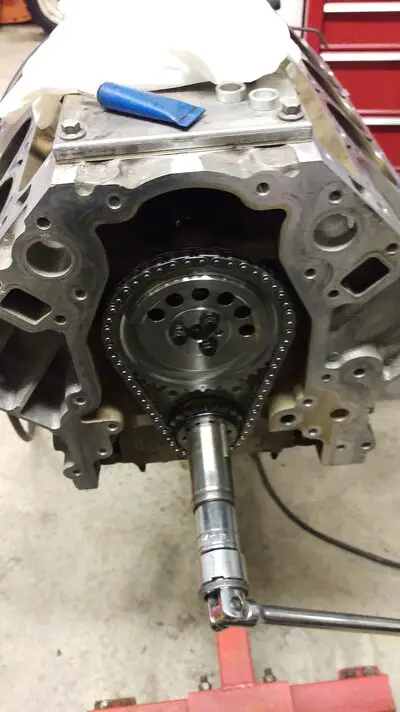
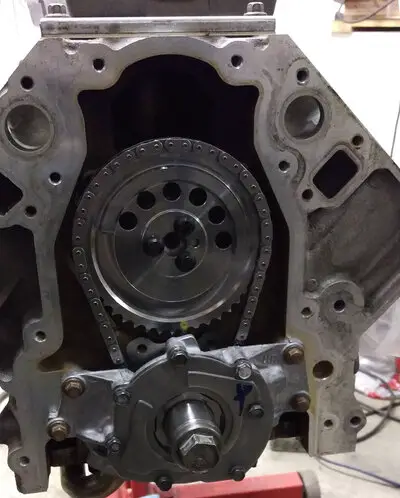
Time to start putting the LS1 in this LS1 swap! Over the last week I have swapped a set of BTR dual valve springs (polished springs and tool steel retainers) onto the PRC Stage 1 LS2/6 (CNC'd 799 castings) heads, stabbed in a Straub trunnion kit, and (today) I got into the internals with a cam swap (CamMotion 228/234 .627"/.612" 112+3, should fit with non-milled heads and stock 5.7L MLS headgasket) and started mocking up the N-Motion single roller chain (which won't work with the TFS damper - FML another aborted idea).
I will get back to fitting parts tomorrow.
I will get back to fitting parts tomorrow.
Attachments
Been fighting a bit of a cold lately, and felt Sunday was better spent with the girls baking and decorating cookies.
Anyway, this engine continues to fight me in one small way or another...
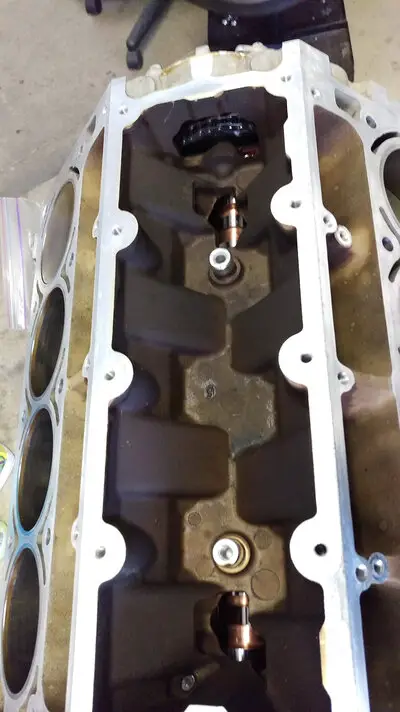
Started off by degreasing the sludge filled oil pan (165K miles and countless hours idling in a cop car will do that), and the front and rear covers. Then it was time to get the oil pump drive on, I left a heat gun set on high pointed at it for a while and then slid it on (melted my neoprene glove it was that hot). Then on went the oil pump centered with a SacCityCorvette Align-It tool. I used a combo of the Kent Moore and SacCityCorvette tools to get the oil pan, and front and rear covers installed - all with new gaskets and seals. Popped on the LS6 valley cover - which went on really easy given this engine is based on an LS6 block. Next the BTR SLR lifters went in with new LS2 lifter trays and bolts, I had to polish one of them up with some 2000 grit sandpaper to get it into the lifter bore - no big deal.
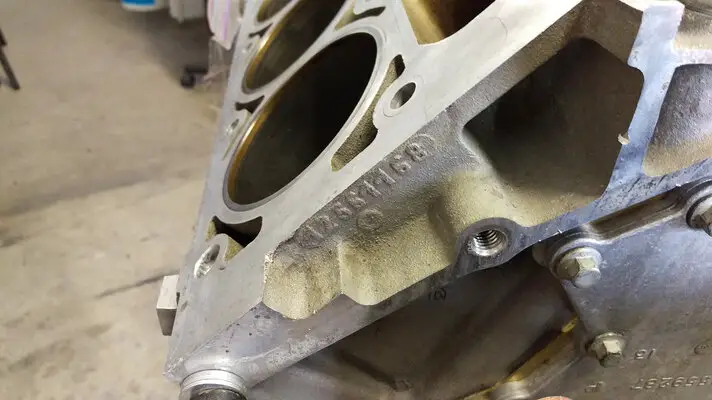
The fun really began when I went to put the heads on and the 11mm (.4331" diameter ) ARP studs wouldn't thread (M11x2.0) into the block without binding/galling - whereby the stock bolts go in without issue. Yes, the threads were chased (6 times per hole) and blown out (with compressed air and solvent). Measured the stock bolts (.423") and the ARP studs (.430") to find a .007" difference. The basic pitch matches in both the bolt and stud, and each measures out at 2.0 with a gauge. ARP's tech line basically said they aspire to a "higher class of bolt" (let's say a Class 3) which may be causing the problem where a regular production class threaded hole (let's say a Class 2), thus the variance in tolerance from one to the next is the root issue of the interference fit. Another possibility is the block is sitting around 10-13*C (~50-55*F) causing the tolerances to close up - but that is a bit of a stretch (bolt pun fully intended).
Thread class article:
https://www.fastenal.com/content/feds/pdf/Article - Screw Threads Design.pdf
Rather than mope - I just cleaned the orange sealant/thread-locker goop off the threads of a set of new GM bolts, coated them with ARP Ultralube, and torqued them down. A pretty easy process by comparison - except that I am out $200+ on the ARP studs. Using this process these bolts were good enough to hold the heads down on my Procharged LS2, and they will hold this thing together.
At this rate it is going to take a week to build this thing...
Anyway, this engine continues to fight me in one small way or another...
Started off by degreasing the sludge filled oil pan (165K miles and countless hours idling in a cop car will do that), and the front and rear covers. Then it was time to get the oil pump drive on, I left a heat gun set on high pointed at it for a while and then slid it on (melted my neoprene glove it was that hot). Then on went the oil pump centered with a SacCityCorvette Align-It tool. I used a combo of the Kent Moore and SacCityCorvette tools to get the oil pan, and front and rear covers installed - all with new gaskets and seals. Popped on the LS6 valley cover - which went on really easy given this engine is based on an LS6 block. Next the BTR SLR lifters went in with new LS2 lifter trays and bolts, I had to polish one of them up with some 2000 grit sandpaper to get it into the lifter bore - no big deal.
The fun really began when I went to put the heads on and the 11mm (.4331" diameter ) ARP studs wouldn't thread (M11x2.0) into the block without binding/galling - whereby the stock bolts go in without issue. Yes, the threads were chased (6 times per hole) and blown out (with compressed air and solvent). Measured the stock bolts (.423") and the ARP studs (.430") to find a .007" difference. The basic pitch matches in both the bolt and stud, and each measures out at 2.0 with a gauge. ARP's tech line basically said they aspire to a "higher class of bolt" (let's say a Class 3) which may be causing the problem where a regular production class threaded hole (let's say a Class 2), thus the variance in tolerance from one to the next is the root issue of the interference fit. Another possibility is the block is sitting around 10-13*C (~50-55*F) causing the tolerances to close up - but that is a bit of a stretch (bolt pun fully intended).
Thread class article:
https://www.fastenal.com/content/feds/pdf/Article - Screw Threads Design.pdf
Rather than mope - I just cleaned the orange sealant/thread-locker goop off the threads of a set of new GM bolts, coated them with ARP Ultralube, and torqued them down. A pretty easy process by comparison - except that I am out $200+ on the ARP studs. Using this process these bolts were good enough to hold the heads down on my Procharged LS2, and they will hold this thing together.
At this rate it is going to take a week to build this thing...
Attachments

Updates are overdue... this thing called Christmas got in the way. Go figure.
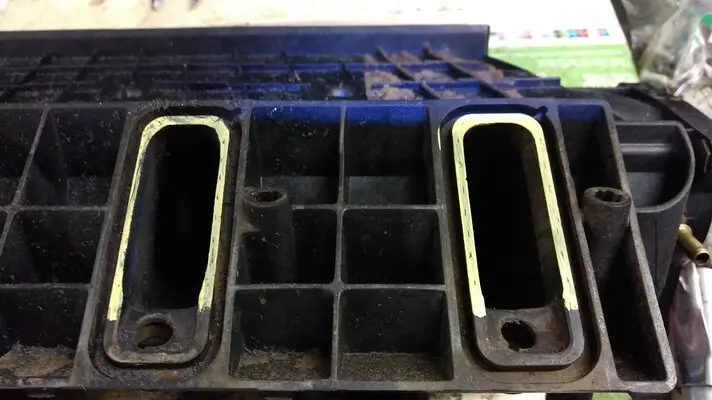
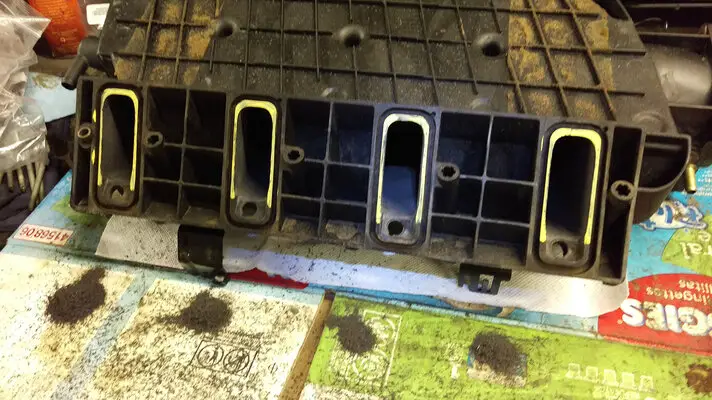
First up... I decided to port the LS6 intake. I couldn't think of a better way to devalue a nice speed part. Long story short the ports are now closer to 1.10" wide (up from .980" stock) to better compliment the PRC heads (1.20" wide), the throat is now a solid 75mm behind the throttle body, and blended corners and deburred what I could. After that was done I decided to re-port (is that a thing?) the throttle body as it wasn't done very when I first did it 10 years ago. So out came the carbides and 80 grit drum rolls... finished it off with some 220 wet/dry sand paper.
First up... I decided to port the LS6 intake. I couldn't think of a better way to devalue a nice speed part. Long story short the ports are now closer to 1.10" wide (up from .980" stock) to better compliment the PRC heads (1.20" wide), the throat is now a solid 75mm behind the throttle body, and blended corners and deburred what I could. After that was done I decided to re-port (is that a thing?) the throttle body as it wasn't done very when I first did it 10 years ago. So out came the carbides and 80 grit drum rolls... finished it off with some 220 wet/dry sand paper.
Attachments

Next up: Making things fit or finding homes for the Speed Hut gauge sensors.
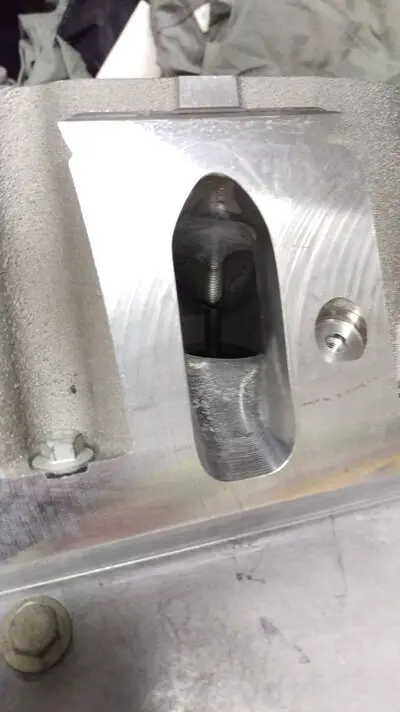
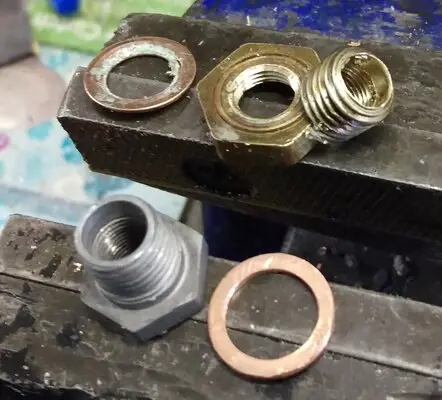
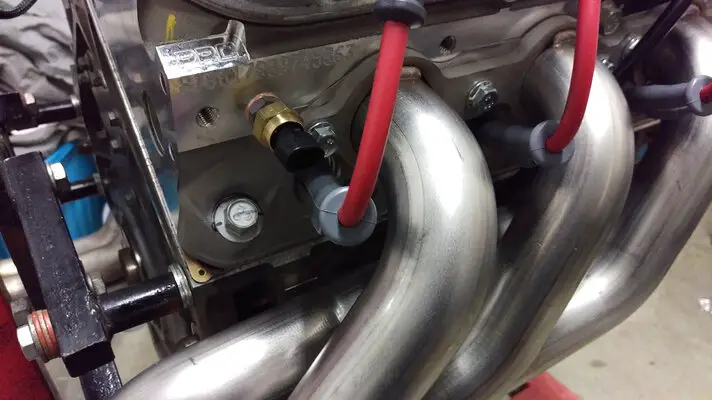
I almost turned a stock coolant temp sensor into an adapter. But, snapped it when I took the tap too deep. FML. The next one was steel and already tapped for 1/8" NPT, I just had to grind down the OD and run a M12x1.5 die over it. It sucked, but worked out okay. The washer? Just a bango bolt copper washer from a brake line.
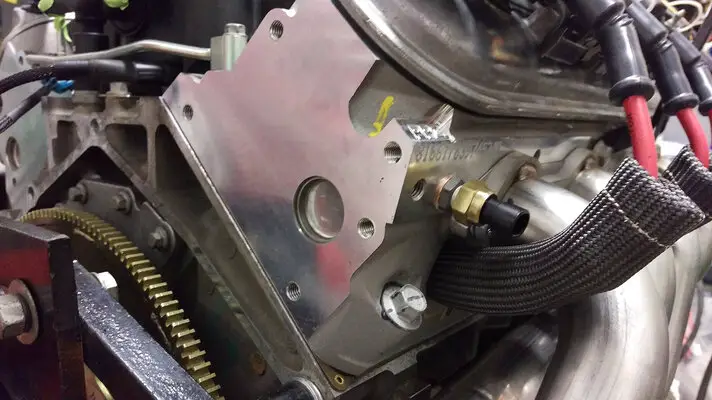
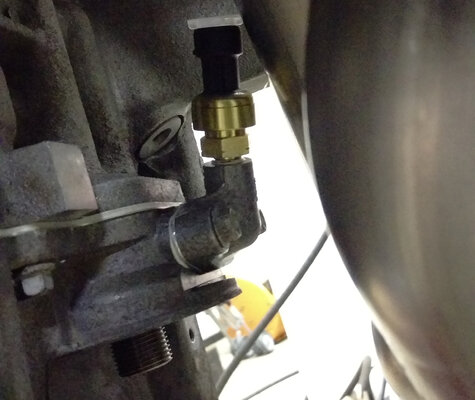
Then it was just a matter of drilling and tapping for the oil pressure gauge. Pretty cut and dry until the headers went on... FML. Time to find another solution/relocation method.
I almost turned a stock coolant temp sensor into an adapter. But, snapped it when I took the tap too deep. FML. The next one was steel and already tapped for 1/8" NPT, I just had to grind down the OD and run a M12x1.5 die over it. It sucked, but worked out okay. The washer? Just a bango bolt copper washer from a brake line.
Then it was just a matter of drilling and tapping for the oil pressure gauge. Pretty cut and dry until the headers went on... FML. Time to find another solution/relocation method.
Attachments
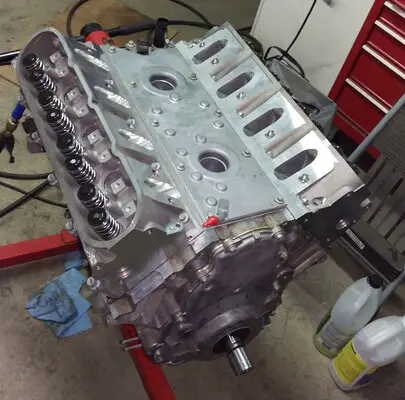
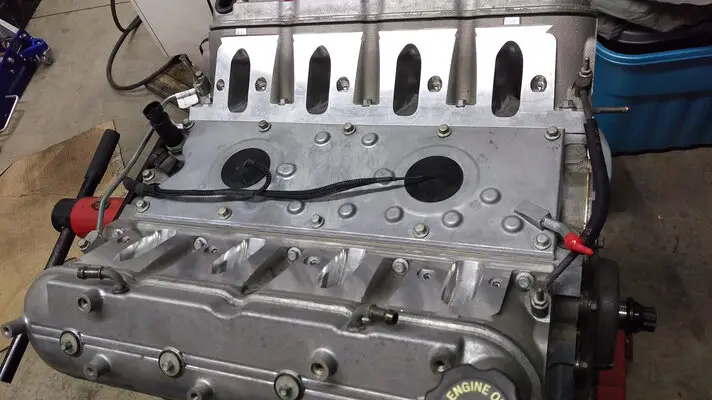
Jammed in a couple of new knock sensors, and added a rear steam pipe (which will get tied into the one at the front) for cheap four corner venting. I did the same thing on our TBSS.
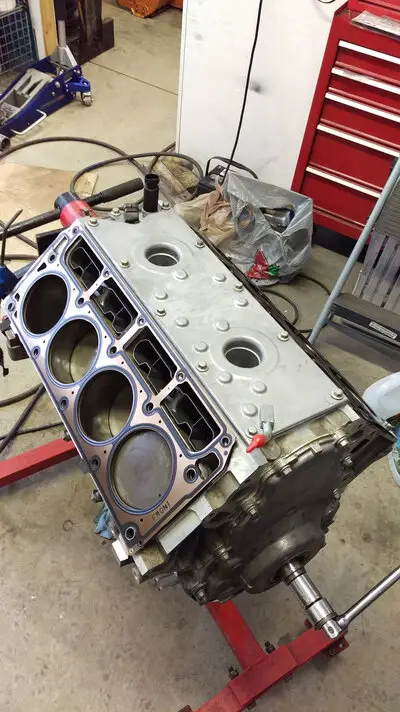
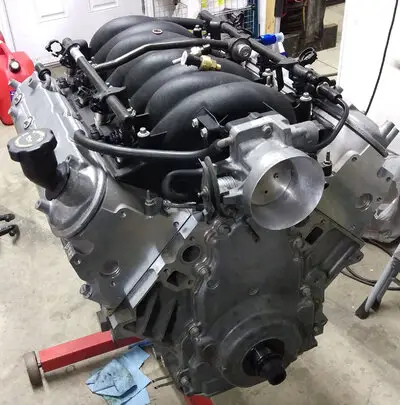
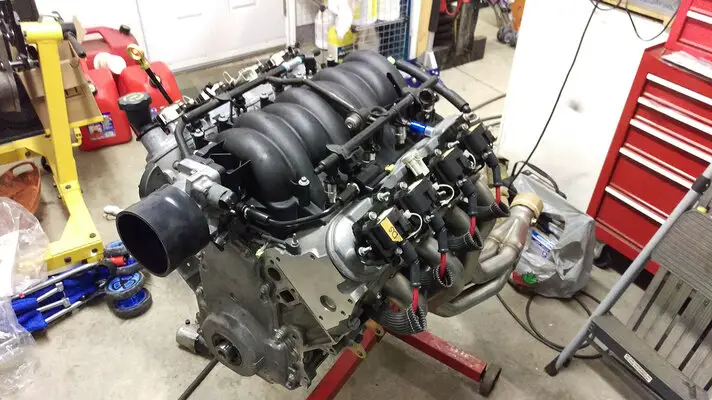
Then the intake was washed out in the kitchen sink (because my wife was out and I needed the deep sink and goose-neck faucet. LOL.) and set in place with some FAST intake port gaskets. Popped in some 40something lb/hr injectors (Racetronix sells them as 37s @ 3 bar) which should provide more than enough fuel for this thing.
Jammed in some TR6s gapped at .040" - because there is a nitrous tank in the back which I haven't forgotten about. For giggles I tried indexing them.
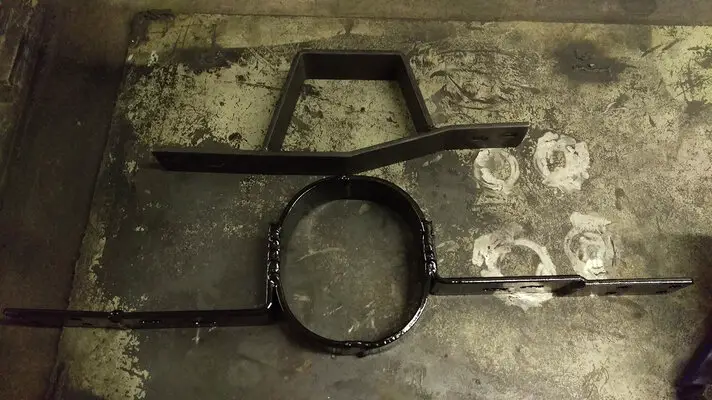
Installed the Carshop Inc adapter plates and Moroso solid mounts. Had a small interference issue on the DS near the pan rail. Nothing a little grinding couldn't fix.
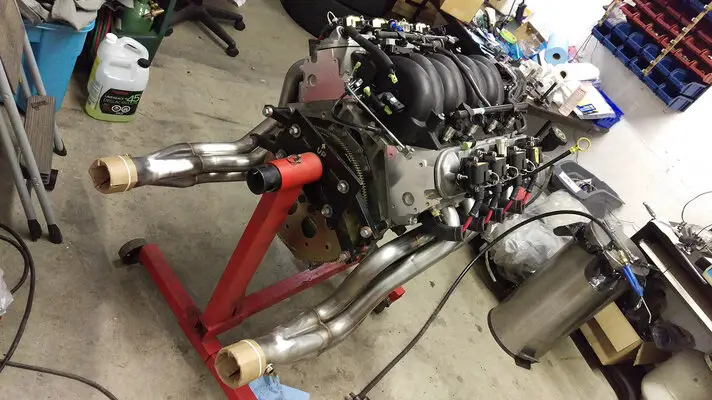
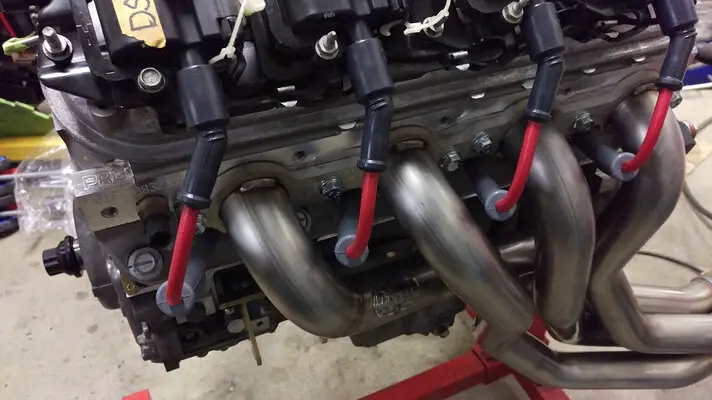
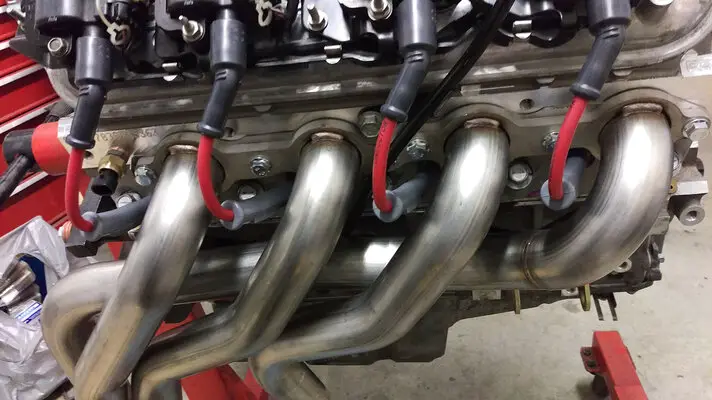
Popped on the Hookers, tweaked the stock dipstick tube a hair, and everything went together very smooth. The fit and finish is really worth the extra money.
Last thing I managed to install today was the Hughes SFI flexplate with some ARP bolts (amazingly they fit!) - need something to hold up to those nitrous hits.
Then the intake was washed out in the kitchen sink (because my wife was out and I needed the deep sink and goose-neck faucet. LOL.) and set in place with some FAST intake port gaskets. Popped in some 40something lb/hr injectors (Racetronix sells them as 37s @ 3 bar) which should provide more than enough fuel for this thing.
Jammed in some TR6s gapped at .040" - because there is a nitrous tank in the back which I haven't forgotten about. For giggles I tried indexing them.
Installed the Carshop Inc adapter plates and Moroso solid mounts. Had a small interference issue on the DS near the pan rail. Nothing a little grinding couldn't fix.
Popped on the Hookers, tweaked the stock dipstick tube a hair, and everything went together very smooth. The fit and finish is really worth the extra money.
Last thing I managed to install today was the Hughes SFI flexplate with some ARP bolts (amazingly they fit!) - need something to hold up to those nitrous hits.
Attachments


- Status
- Not open for further replies.
Similar threads
- Replies
- 2
- Views
- 364
- Replies
- 0
- Views
- 263
- Replies
- 0
- Views
- 420
GBodyForum is a participant in the Amazon Services LLC Associates Program, an affiliate advertising program designed to provide a means for sites to earn advertising fees by advertising and linking to amazon.com. Amazon, the Amazon logo, AmazonSupply, and the AmazonSupply logo are trademarks of Amazon.com, Inc. or its affiliates.