

BUILD THREAD 78 Malibu "#DtoxBu/Caged Beast"
- Thread starter Bumpin1ohmSS
- Start date
You are using an out of date browser. It may not display this or other websites correctly.
You should upgrade or use an alternative browser.
You should upgrade or use an alternative browser.
- Status
- Not open for further replies.
awesome build!!
MAN!! I really appreciate that!!
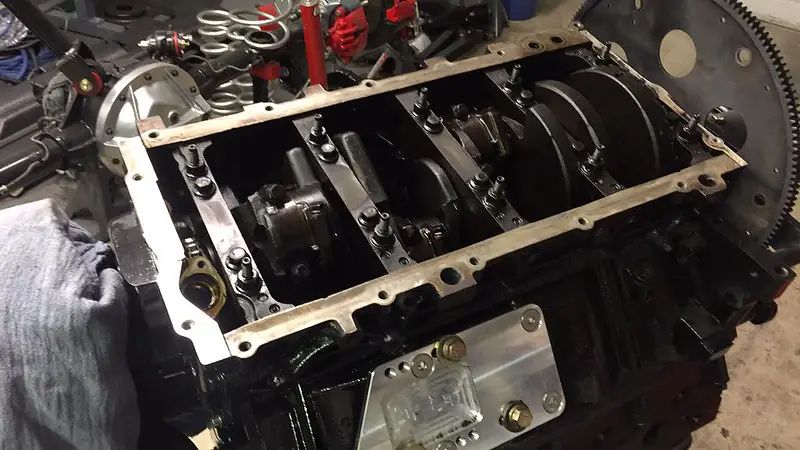
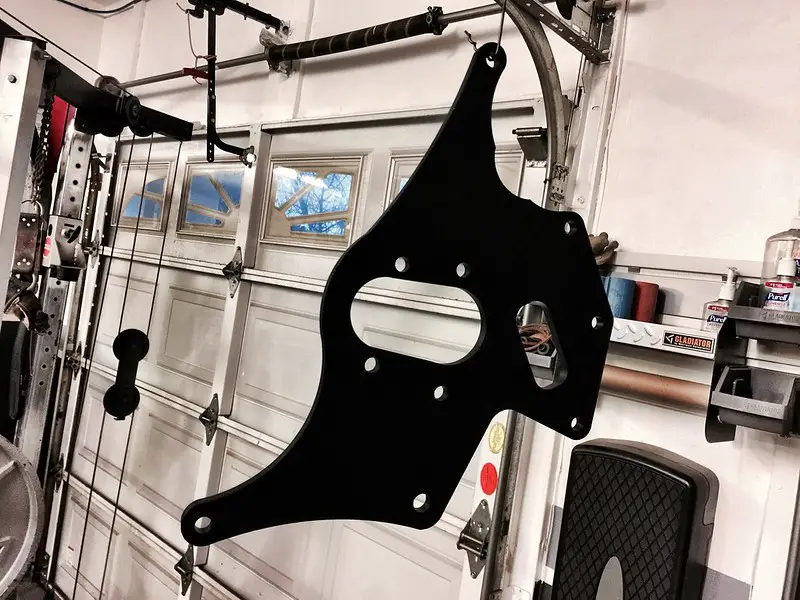
Moving slowly but surely on the LQ4 build. Parts are coming in and Ive been mocking it up. Just ordered the Holley 12-1600-2 fuel pump and that will finish off the fuel distribution. All I need are the -10an and -8an black fuel line. My club bro Jerry blessed me with a clean heavy gauge bracket to mount the Holley pump. Heres a few pics of the progress...
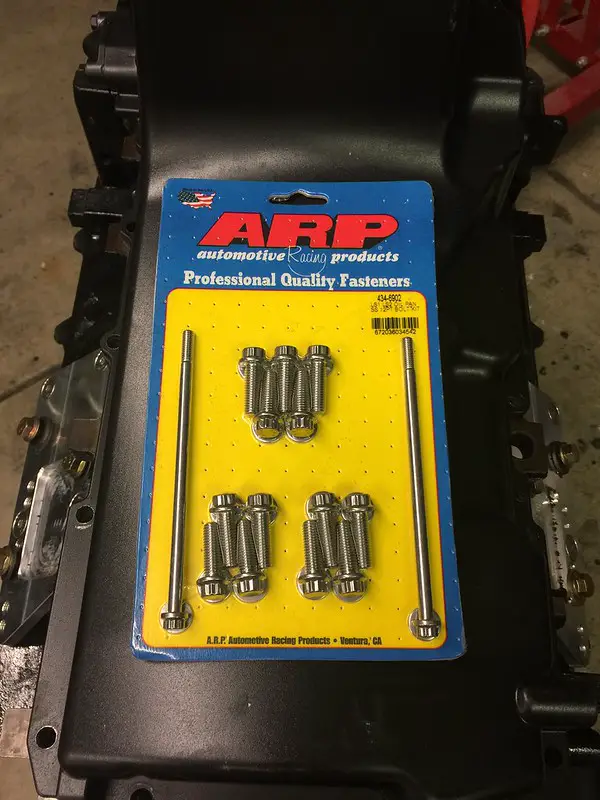
Internals looked great. For now this will be a stock bottom end turbo build BUT with ARP bolts(rods, head studs)
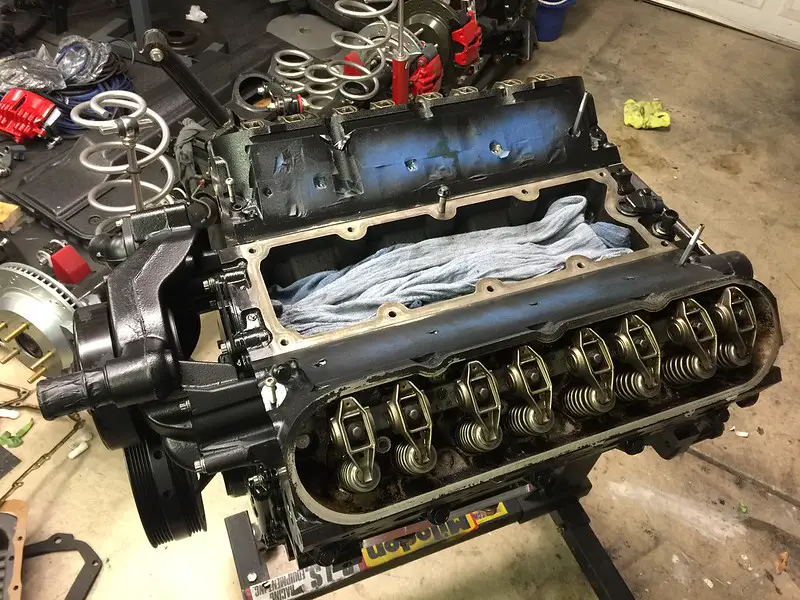
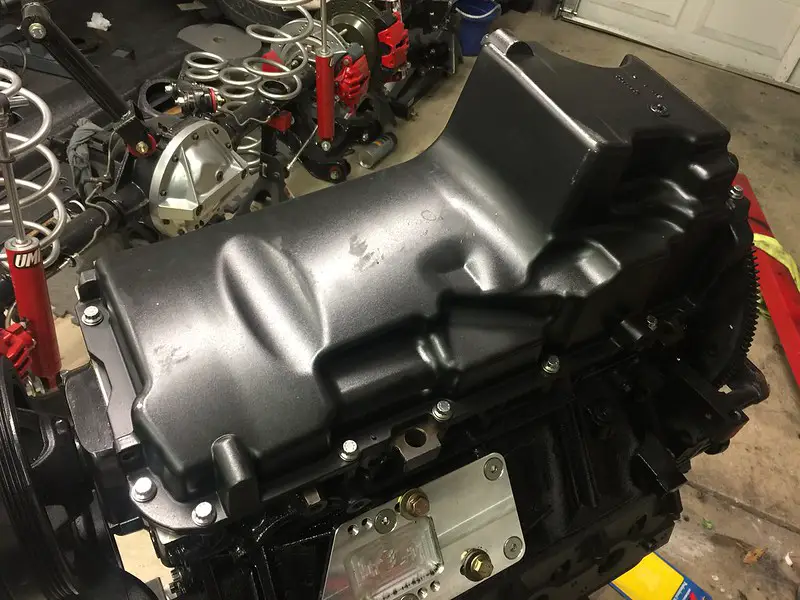
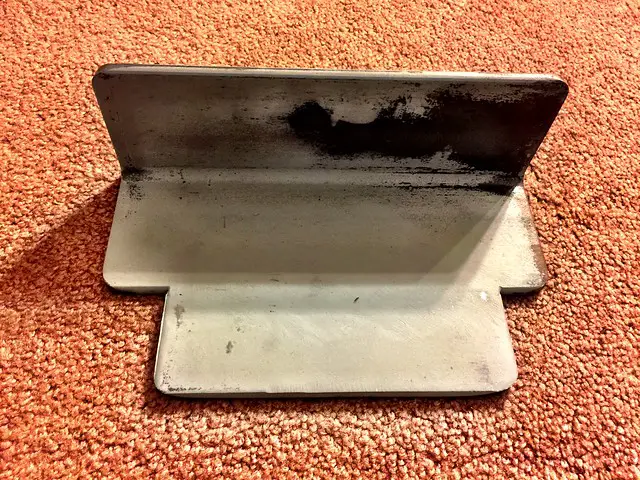
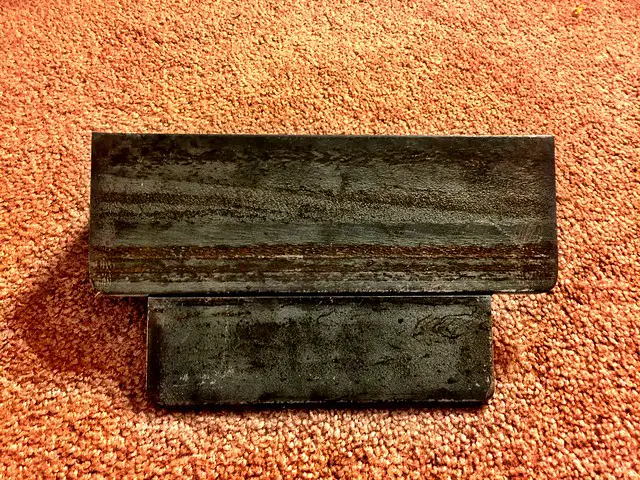
Muscle Car oil pan goodies
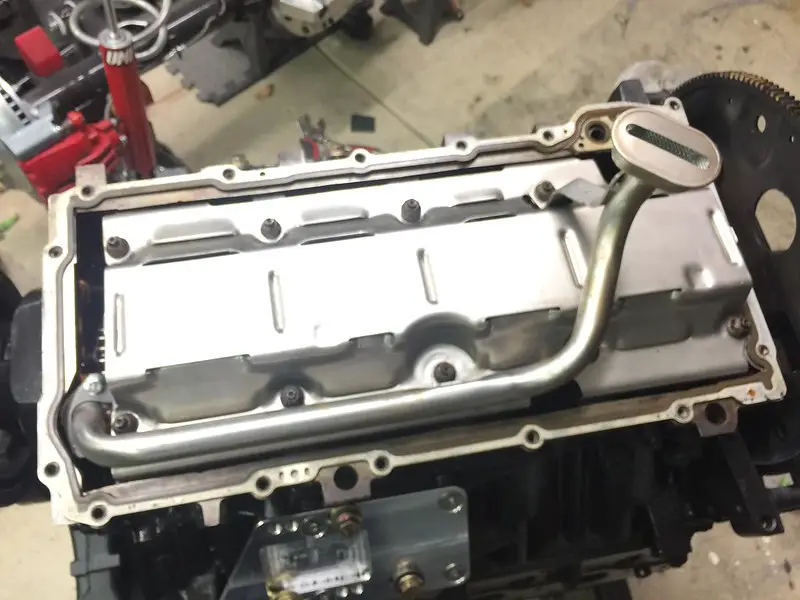
BRP oil pickup girdle
Before..

After

ARP oil pan bolts
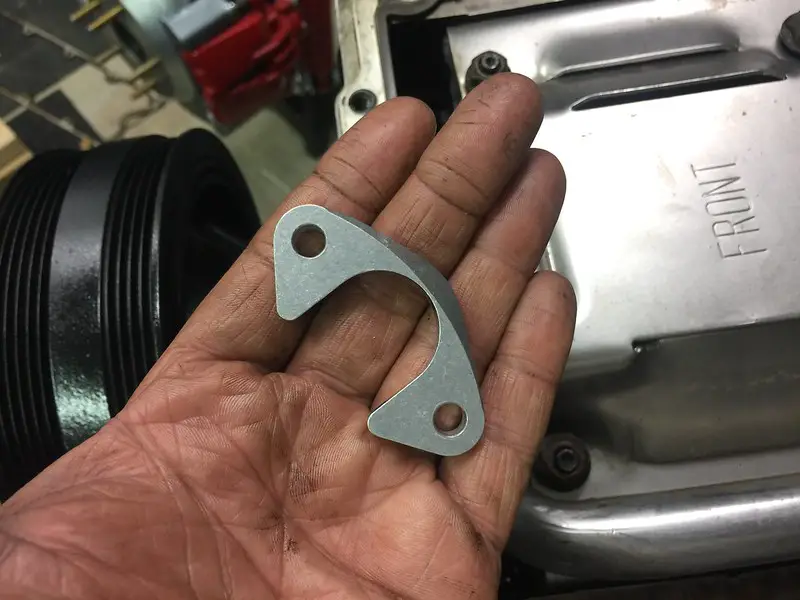
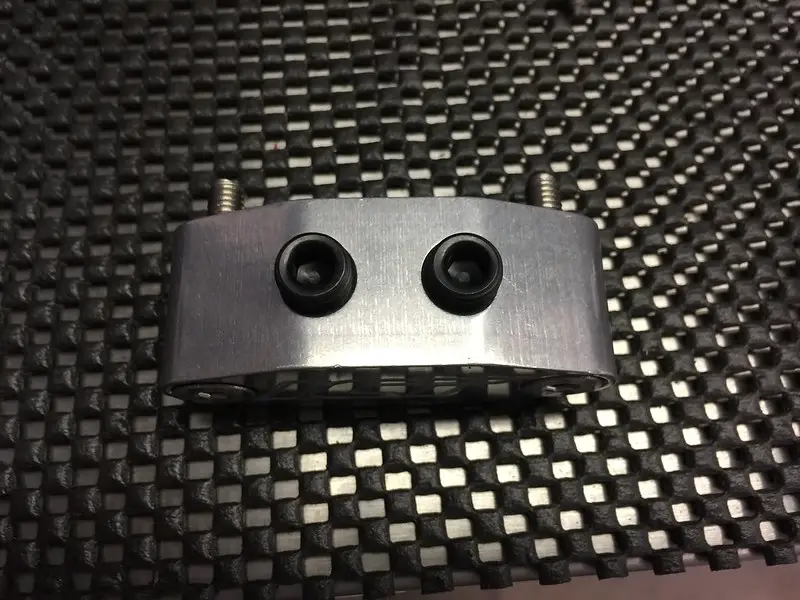
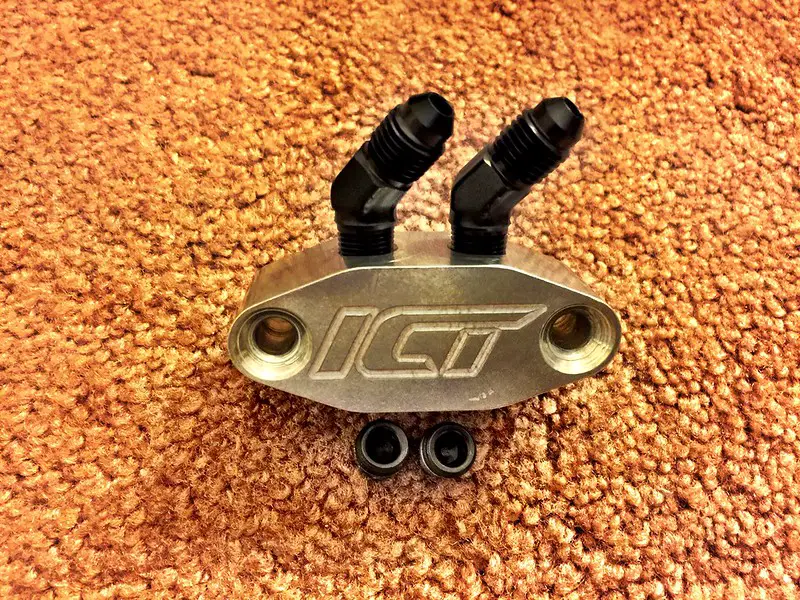
ICT oil block off plate. Dual feed to supply oil to the turbos.

[
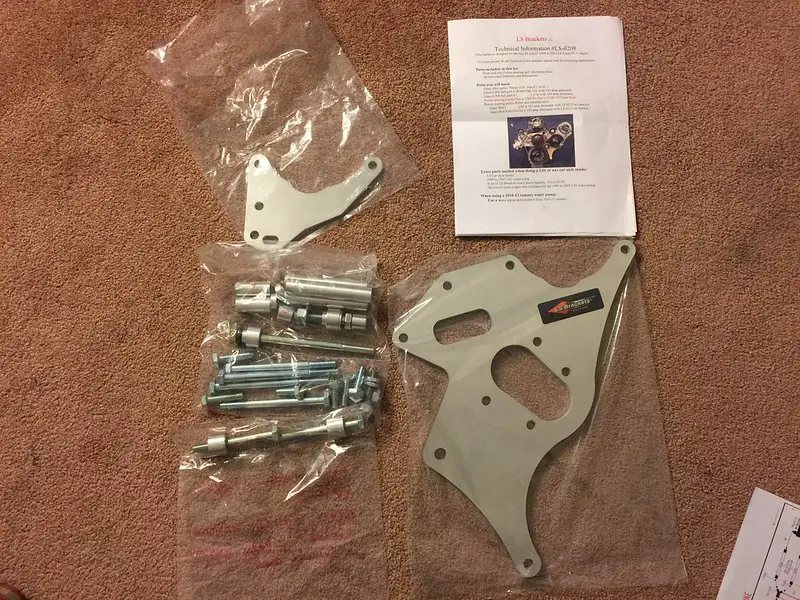
LS Brackets "Turbo" bracket setup. Im running the Hooker manifolds. This setup is trimmed so you can clear the bottom area. The alt is dropped 3/4" and the power steering pump is moved up so it clears the frame.. This setup works with my 2010 ls 3 water pump (truck spacing.
http://lsbrackets.com/category/turbo-brackets/
Mocked it up..
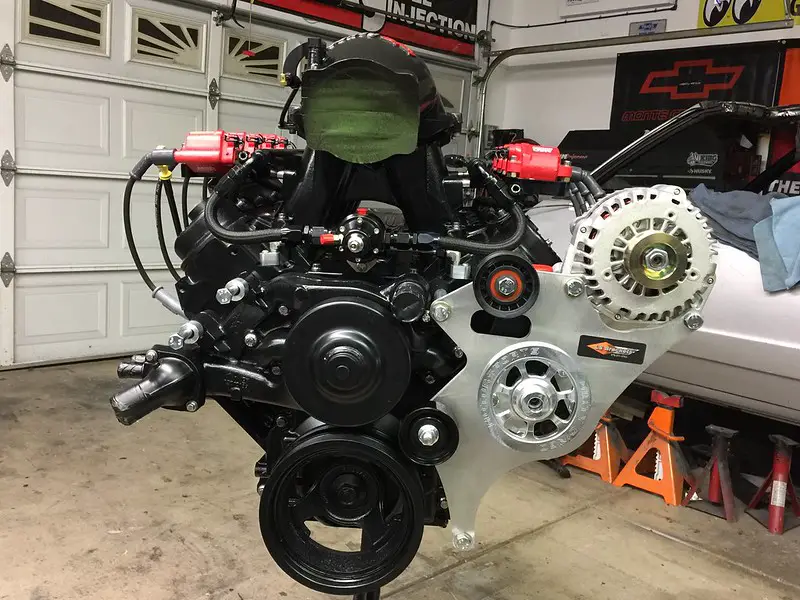
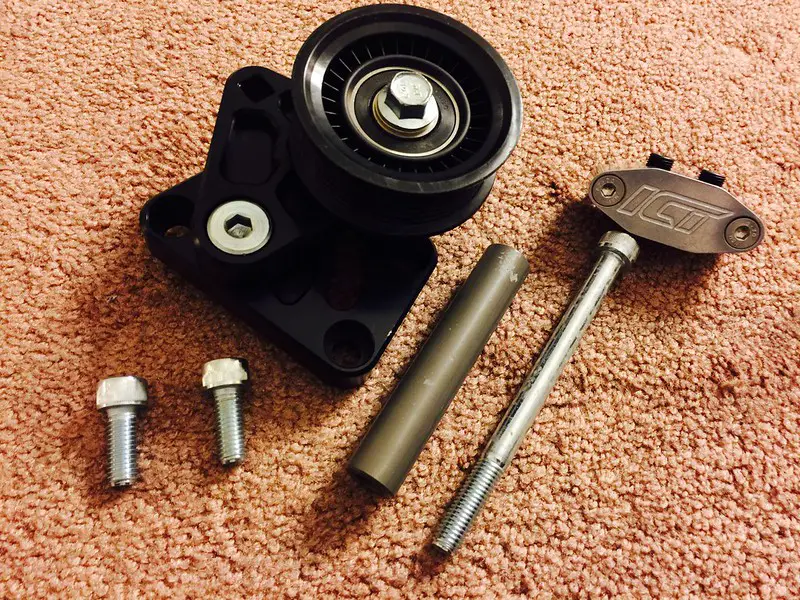
Got my MTI racing manual tensioner. They were cool and send a plastic pulley out so i could mock it up-free of charge. Also ordered a Metco pulley. Waiting on that to show up
New 145 amp alt chowed up and I painted it all up and mocked it up with tape. The billet power steering wheel is from Dirty Dingo. It will be coated black when the Metco wheel shows up. Just painted the brackets to see how it all looks. I may also paint the insters red..
Ill post new pics as the updates come. Thanks for checking back!!
RocShopWarren
So much fine detail! I love this build so far, i cant get over the minute details than have been gone over!!

So much fine detail! I love this build so far, i cant get over the minute details than have been gone over!!
THANKS!!! Really appreciate that! Trying to figure all this turbo stuff out has me pulling what hair I have left out lol!
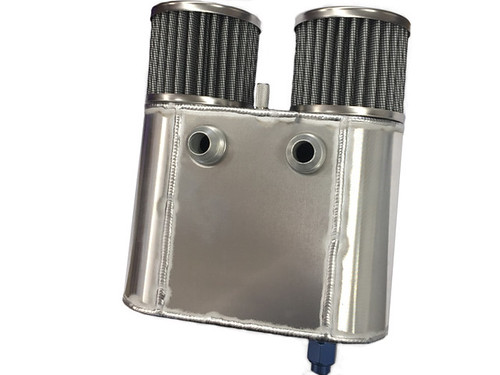
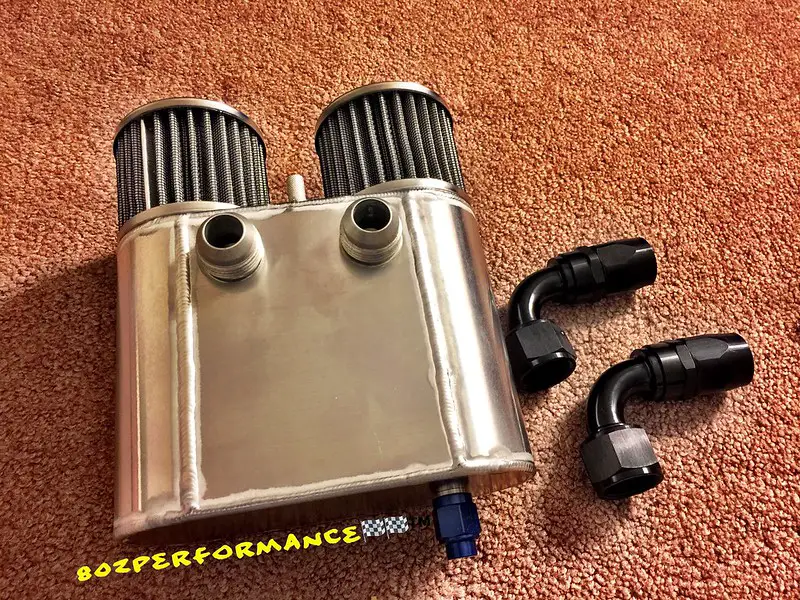
Ordered this clean catch can setup from "Race catch can"
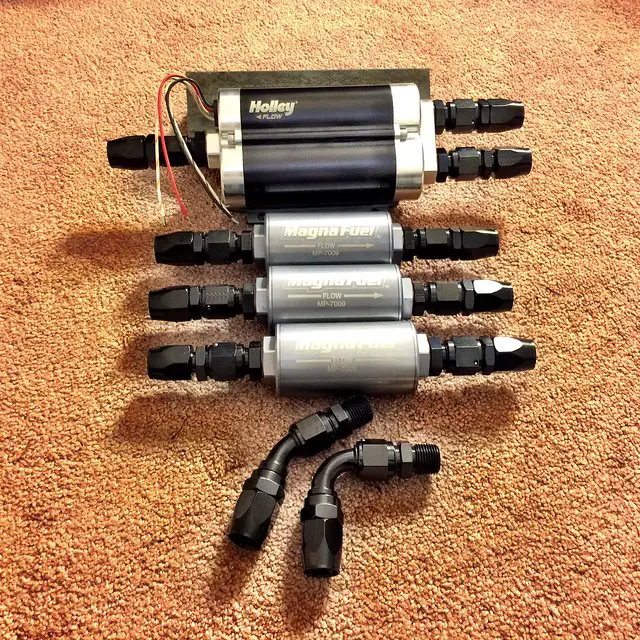
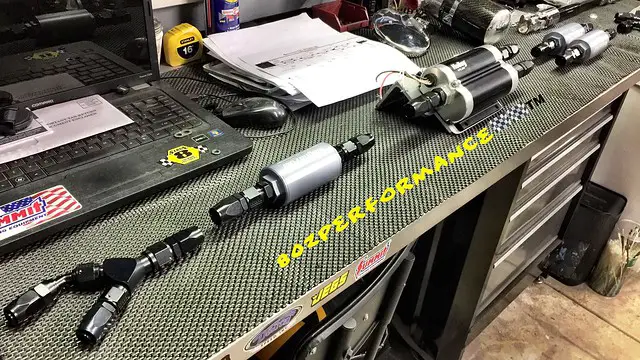
All the fuel parts are in finally. Well... I still need the tank sending unit and an fittings to swap the sending unit over to an line. Holley, Magnafuel and Fragola parts. My club bro Jerry made me a CLEAN bracket to mount the fuel pump.. Ill take it to work and sand blast it and drill the holes out to mount it. Imma line it with some cork and use some rubber "feet" to help dampen the pump a little. Also, it should aid in keeping the air flowing under it for cooling...
Holley 12-1600-2

Holley, Fragola and Magnafuel pre (75 micron filters) and Post 25 micron filers from Motion raceworks..
The Metco Billet Tensioner Pulley came in. Mounted it up to the MTIRacing Belt Tensioner. Im gonna have it coated or may just take it apart and sand blast/VHT paint it...
The ICT Billet oil pan dual feed plate came in. Mocked it up with the -4an fittings. Need to press on the ends on the Fragola "push to lock line" still...

The LilJons Motorsports Holley throttle cable bracket looks clean on the Hi ram. I painted it. Should have just grabbed the black one. All good still..

And it holds the CLEAN black braided Lokar Midnight Series cable. Thus matches the Fragola hose PERFECTLY!!
Just a few more parts left and then I can button it all up. Up next will be the Hooker manifolds and weld on V band ends. Getting to natural iron finish so the ends can be welded on, then sending em out for coating.
Thanks for checking back!!!
80zUP!!!
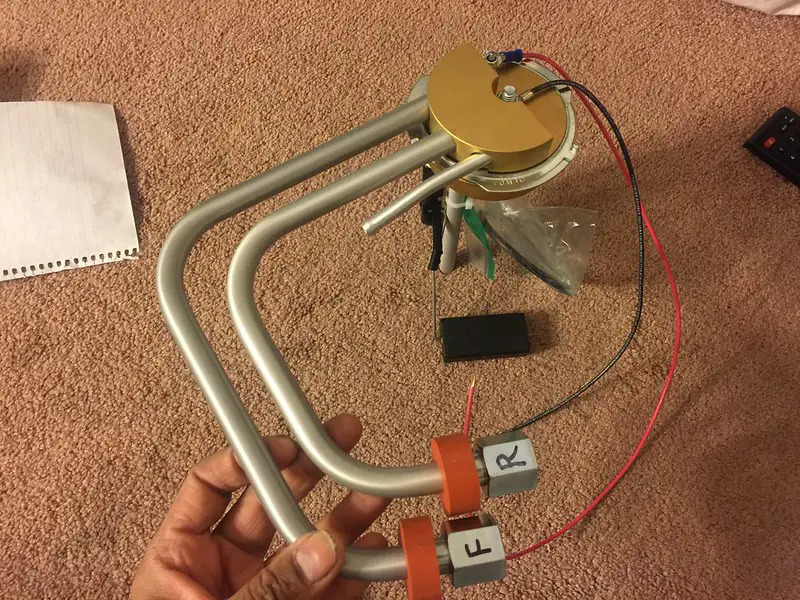
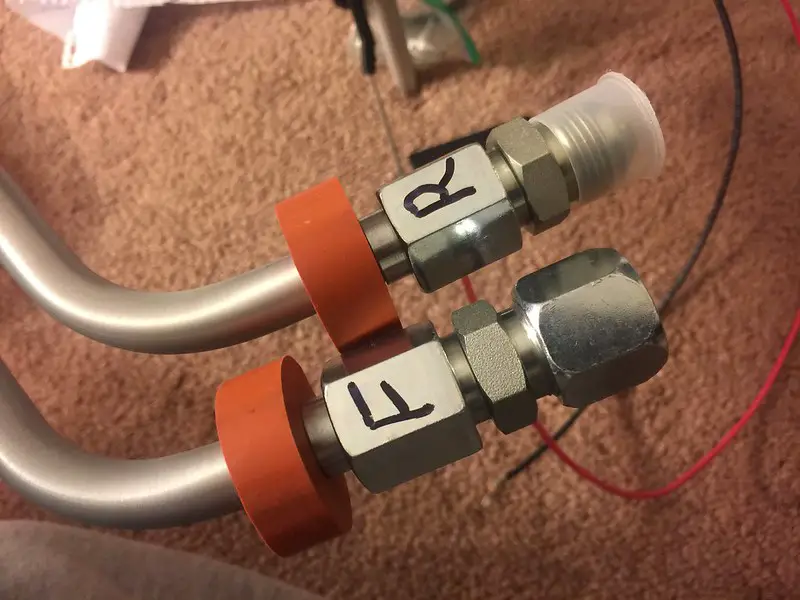
Got the Fuel delivery about 98% finished for the project. Just got the sending/fuel level unit. I was gonna jut get a regular unit but this was a few more bucks from http://www.robbmcperformance.com/products/1088_gmsend.html Ill just use it as a return line since I have the lower sump welded in the new tank.
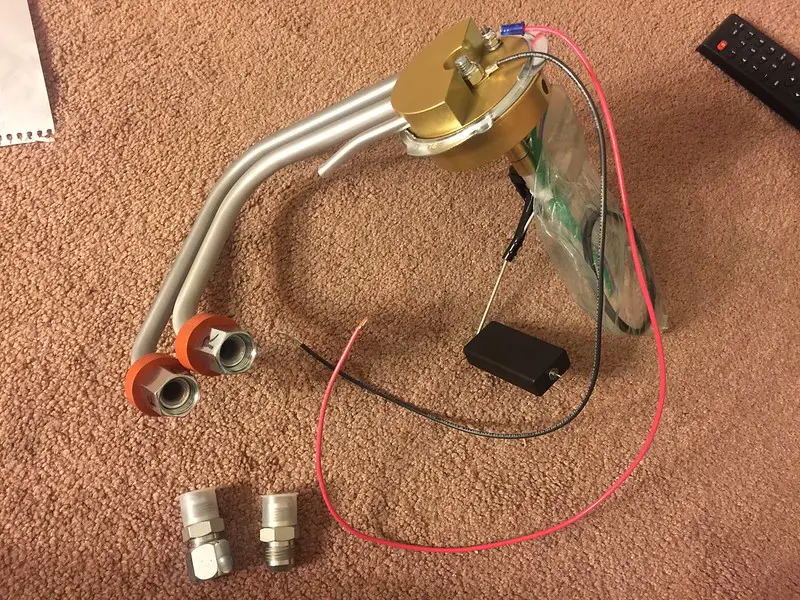
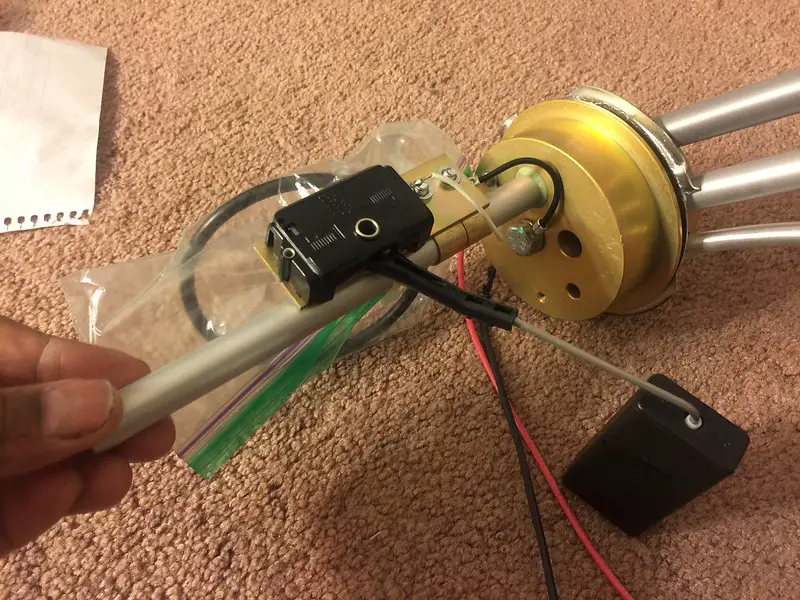
I ordered it with the -8an fittings installed already. He even send a fitting to cap off the line not needed. I'll use a rubber hose and cut off piece of line on the vent side..
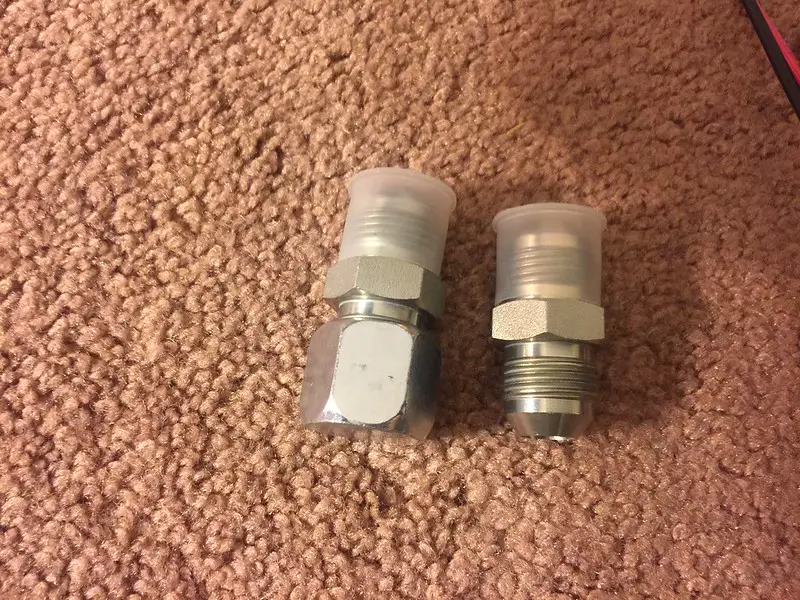
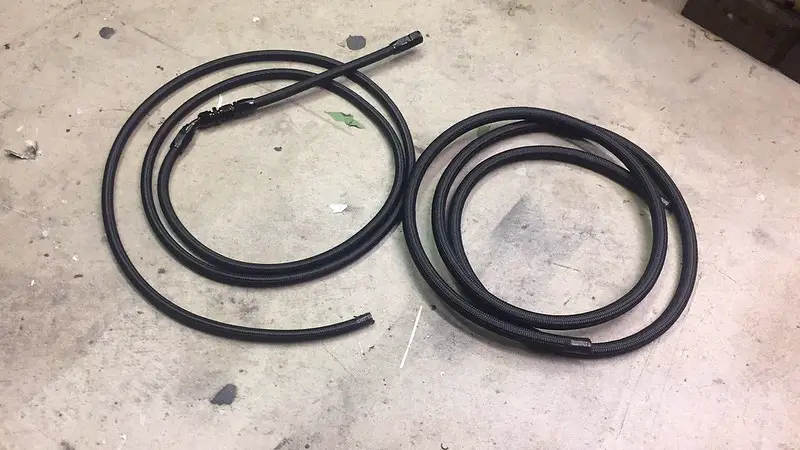
10 feet of -8 and -10 fragola line. Ill order another 5' of each. Should have just went 15' on each size. I rather have more and not need it than to need more and have to use a coupler. Oh well. Coupler it is--if needed...
Few more -8 and -10 fittings, and a jegs 10 micron post filter. I have the Magnafuel 74 pre, 25 post also..
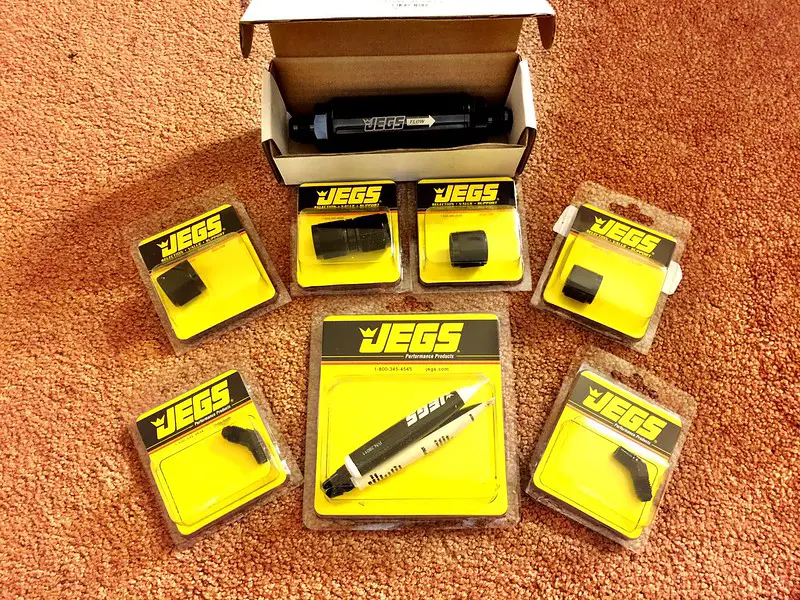
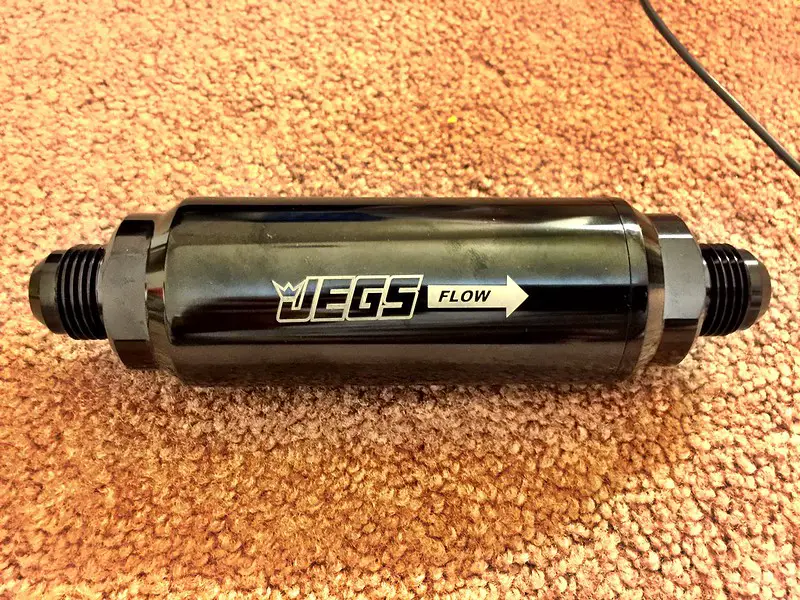
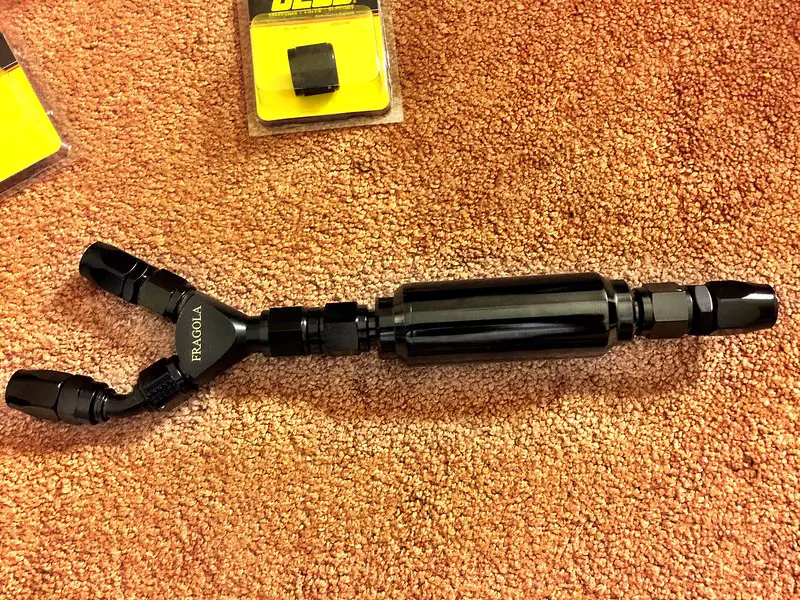
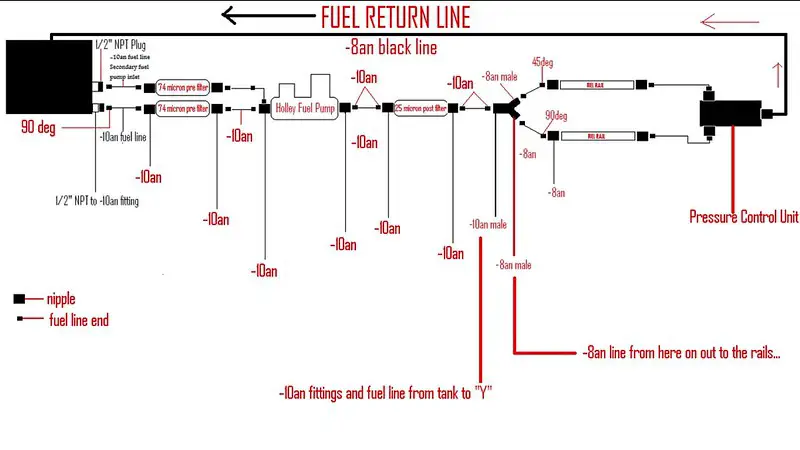
The Jegs -10, 10 micron post filter attaches to the magnafuel -10 to -8 "Y". The clean fuel is then routed up to the -8 Holley fuel rails. All of this is probably overkit. I drew it all up to get a better understanding of it. Decided to give it a try...
First fuel flow diagram I drew out. Ive since added part numbers and the other filter in..
I get asked a lot why i went with this setup and not an "in tank" setup.. I got the brand new tank, sump and already welded for #75!! Couldnt pass it up. My SS will have thw grand national i tank and setup for that project...
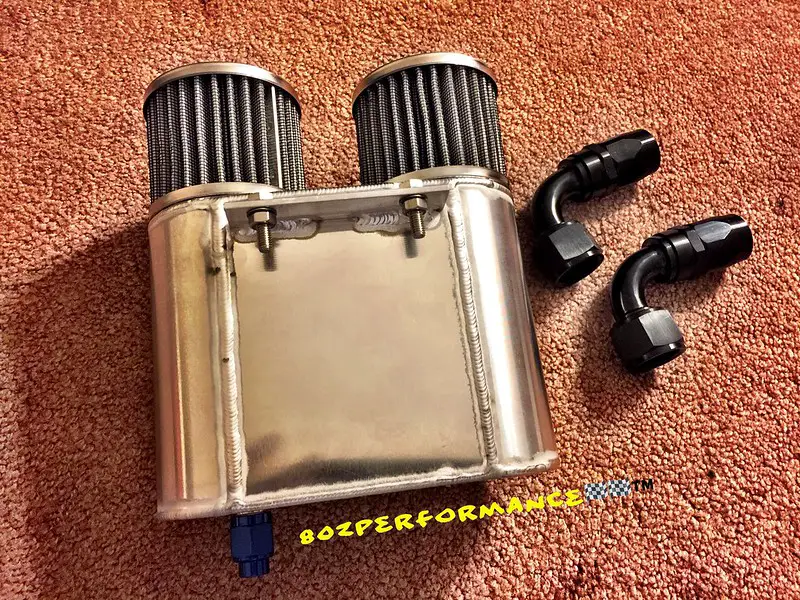
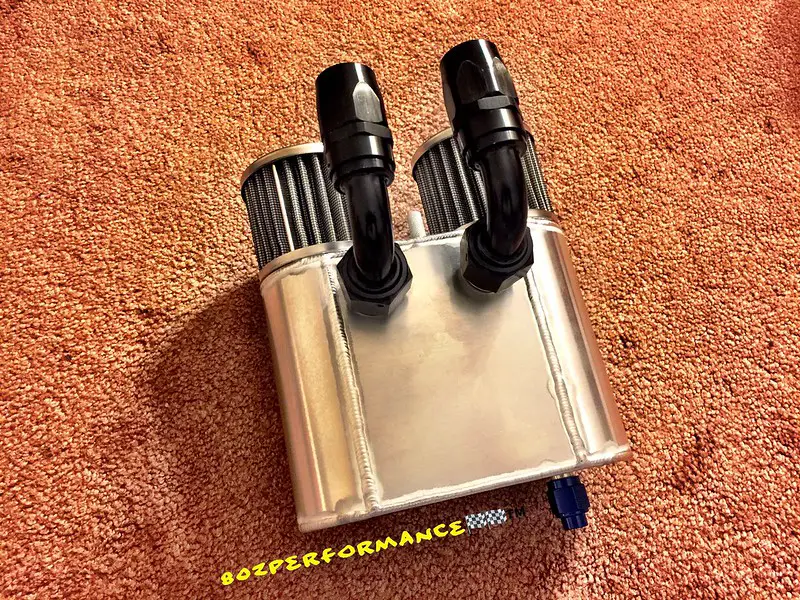
This setup from http://www.racecatchcan.com/ looks clean!! Imma have it powder coated with clear and add the smoke effect like on my suspension parts. It has -12an bungs weled in..
Ill mount it to the firewall using a small piece of angle iron cut, drilled and welded to tje firewall. The -12an fragola line will run off the valve covers and up under the ac delete cowl down into the can. "should" be clean..
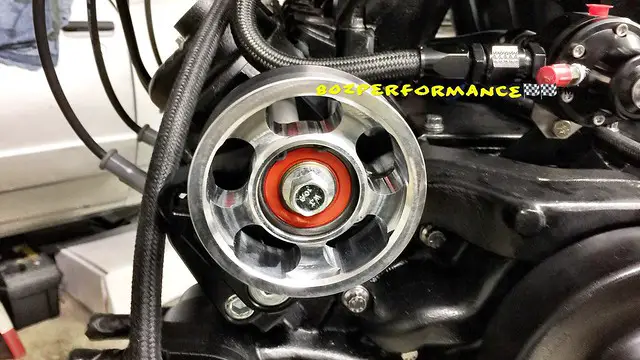
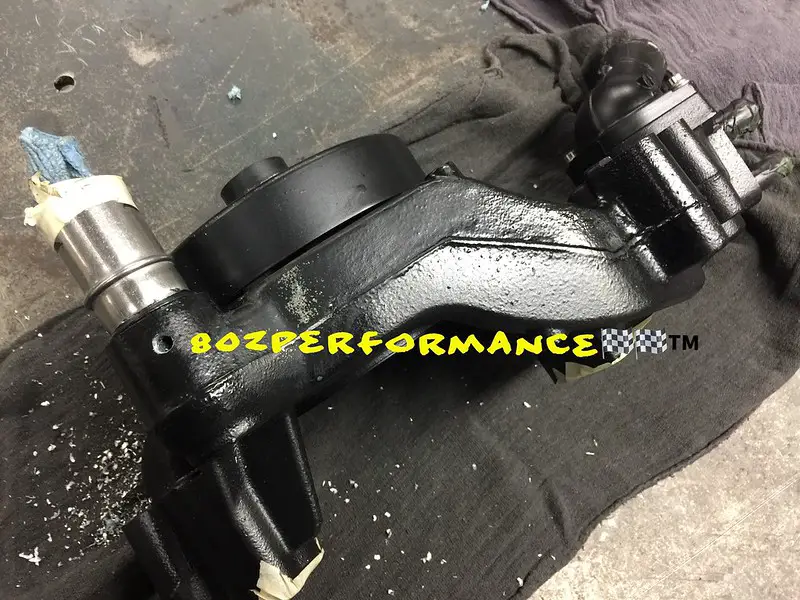
I was gonna tie the steam vent return line in with the upper radiator hose using a Jegs brand billet unition with -4an fittings, but decided to drill and tap the new ls3 water pump instead. Both ways look clean, but i thought running the line to the pump looked a lil cleaner.. Stepped the drill bit up and then used a tap..Didnt have the tools at home and took it to work. My boss helped out a lot!! He was like uhhh this is a new pump are you sure!!?? I said lets do it!
First hole
1/4" tap
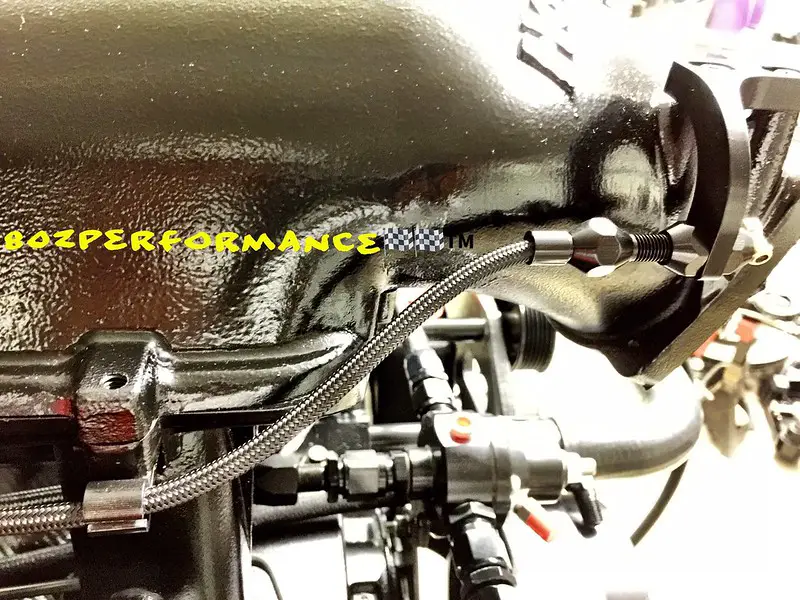
Mocked it up to check the fit. Im using Fragola "push Loc" line. Man this stuff is hard as hell to work with. Im having a helluva time pressing the -4an fittings into it. Used a blow dryer and then tried to boil the line to make the lining soft. WHEW!!
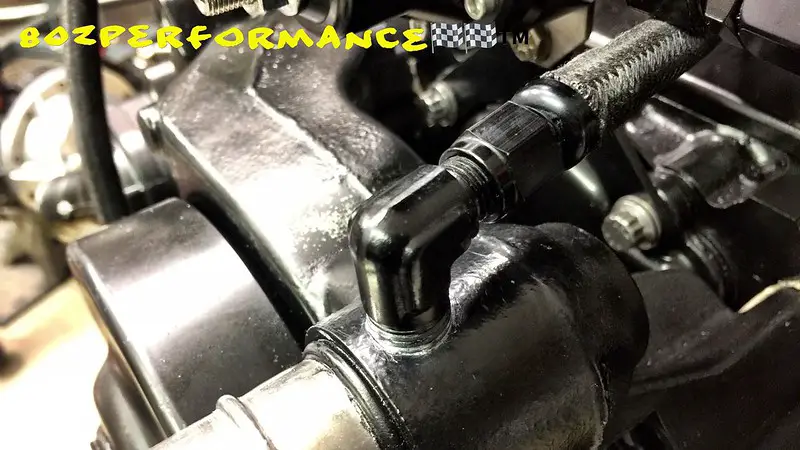
Used a little ARP thread sealer to lubricate the threads and ran it down to check for clearance. My Magnafuel PCU (pressure control unit) line out to the fuel rail runs over the steam line. Needed to see if there was an issue...
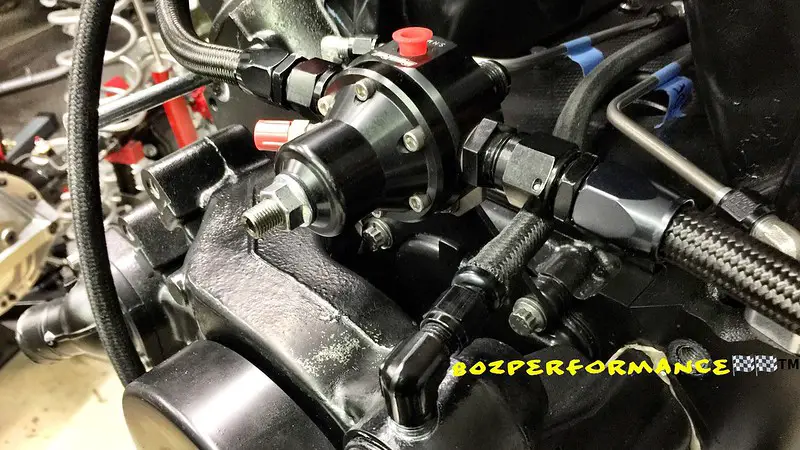
Looks good. Need to press it on just a touch more and then I'll cover the small end with some black shrink wrap...

I got the correct size (-4an) fittings for the turbo oil feed line. Decided to get em in a 45 to angle em off the ICT Billet block...
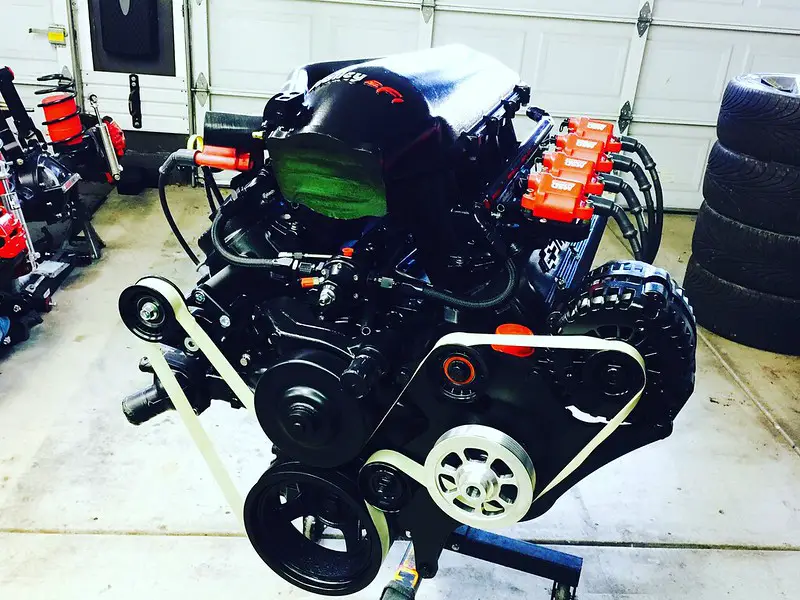
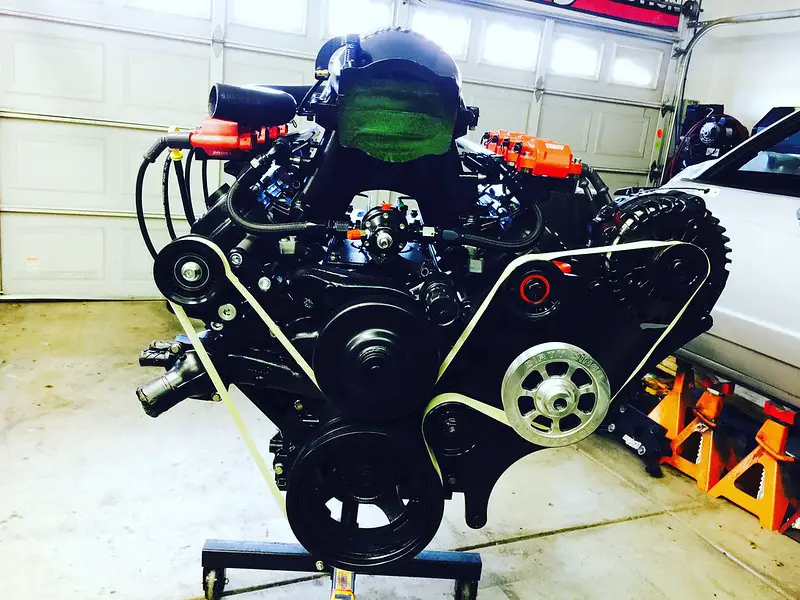
All the brackets and pullies from Metco and Dirty Dingo have been blacked out with VHT satin black. I also did the 145 amp ALT.
I'll be heading out to AZ soon(next Month) to take the frame in for coating. Got tired of waiting to get it notched and all that. I want the car here in cali by May so I said forget it. I can get the frame re notched, boxed and braced in a couple years when the wide 12' wheels come along. Thanks for checking back!!!
I ordered it with the -8an fittings installed already. He even send a fitting to cap off the line not needed. I'll use a rubber hose and cut off piece of line on the vent side..
10 feet of -8 and -10 fragola line. Ill order another 5' of each. Should have just went 15' on each size. I rather have more and not need it than to need more and have to use a coupler. Oh well. Coupler it is--if needed...
Few more -8 and -10 fittings, and a jegs 10 micron post filter. I have the Magnafuel 74 pre, 25 post also..
The Jegs -10, 10 micron post filter attaches to the magnafuel -10 to -8 "Y". The clean fuel is then routed up to the -8 Holley fuel rails. All of this is probably overkit. I drew it all up to get a better understanding of it. Decided to give it a try...
First fuel flow diagram I drew out. Ive since added part numbers and the other filter in..
I get asked a lot why i went with this setup and not an "in tank" setup.. I got the brand new tank, sump and already welded for #75!! Couldnt pass it up. My SS will have thw grand national i tank and setup for that project...
This setup from http://www.racecatchcan.com/ looks clean!! Imma have it powder coated with clear and add the smoke effect like on my suspension parts. It has -12an bungs weled in..
Ill mount it to the firewall using a small piece of angle iron cut, drilled and welded to tje firewall. The -12an fragola line will run off the valve covers and up under the ac delete cowl down into the can. "should" be clean..
I was gonna tie the steam vent return line in with the upper radiator hose using a Jegs brand billet unition with -4an fittings, but decided to drill and tap the new ls3 water pump instead. Both ways look clean, but i thought running the line to the pump looked a lil cleaner.. Stepped the drill bit up and then used a tap..Didnt have the tools at home and took it to work. My boss helped out a lot!! He was like uhhh this is a new pump are you sure!!?? I said lets do it!
First hole
1/4" tap
Mocked it up to check the fit. Im using Fragola "push Loc" line. Man this stuff is hard as hell to work with. Im having a helluva time pressing the -4an fittings into it. Used a blow dryer and then tried to boil the line to make the lining soft. WHEW!!
Used a little ARP thread sealer to lubricate the threads and ran it down to check for clearance. My Magnafuel PCU (pressure control unit) line out to the fuel rail runs over the steam line. Needed to see if there was an issue...
Looks good. Need to press it on just a touch more and then I'll cover the small end with some black shrink wrap...
I got the correct size (-4an) fittings for the turbo oil feed line. Decided to get em in a 45 to angle em off the ICT Billet block...
All the brackets and pullies from Metco and Dirty Dingo have been blacked out with VHT satin black. I also did the 145 amp ALT.
I'll be heading out to AZ soon(next Month) to take the frame in for coating. Got tired of waiting to get it notched and all that. I want the car here in cali by May so I said forget it. I can get the frame re notched, boxed and braced in a couple years when the wide 12' wheels come along. Thanks for checking back!!!
Last edited:
Looking good!! I cant wait for more updates! Looking forward to this build a lot!
Thanks bro!!!! Working to get the car back out here to Cali. Been on the road big time bringing parts back home...
I made a few trips out to Arizona last week on my off days (Tuesday/Wednesday) Man! That was a 20 hour day. My club bros cleared out my parts storage for me and i loaded the bug up and brought parts back to the shop. We decided to just paint the frame, drop the body and bring the Bu back to Cali. We couldnt find a spot to do the frame work so Ill have my dude out here do the frame after he does the SS frame. The goal is to get the SS frame done/coated and make it a roller. Then bring the Bu here and take the SS out to Az to the storage to wait for paint. Then I can focus on mock up, finishing the interior, motor, suspension ect on the Bu. It will be a few months of playing with the bu before I do the frame which is why I wanted to just paint it with some rattle can. I dont want to mock up parts on a rusty looking frame..Im headed backj to Az around 3pm and should arrive there around 7. Then I can start cleaning the frame and paint it right quick. Few pics from my trip last week..
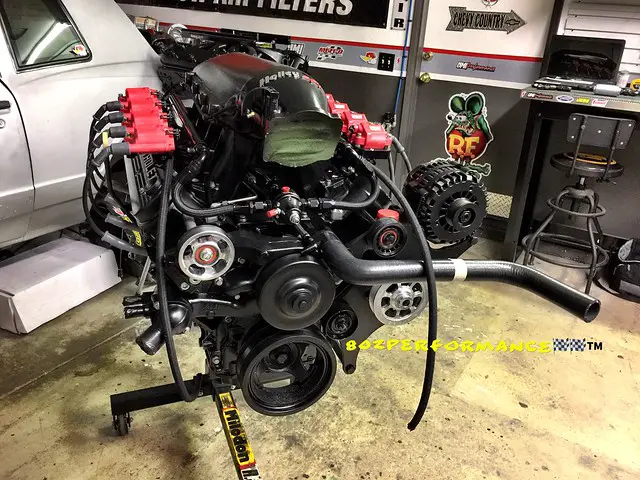
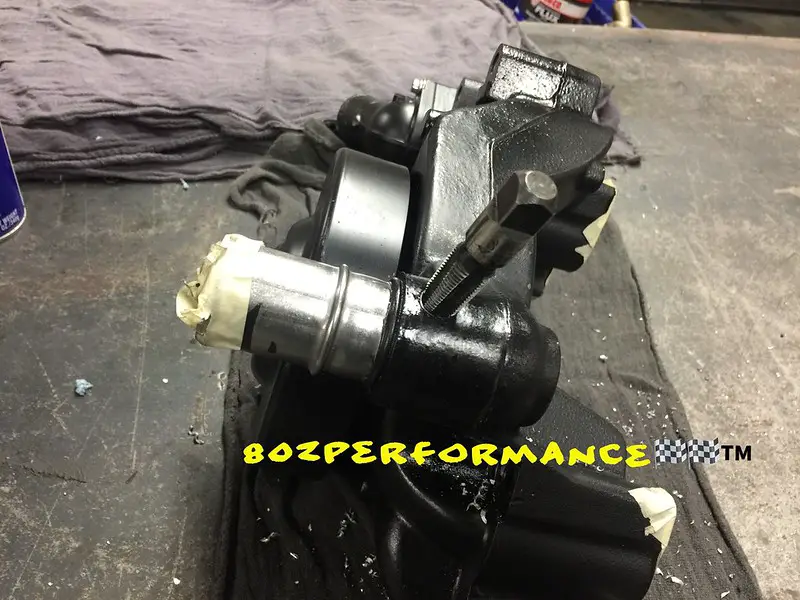
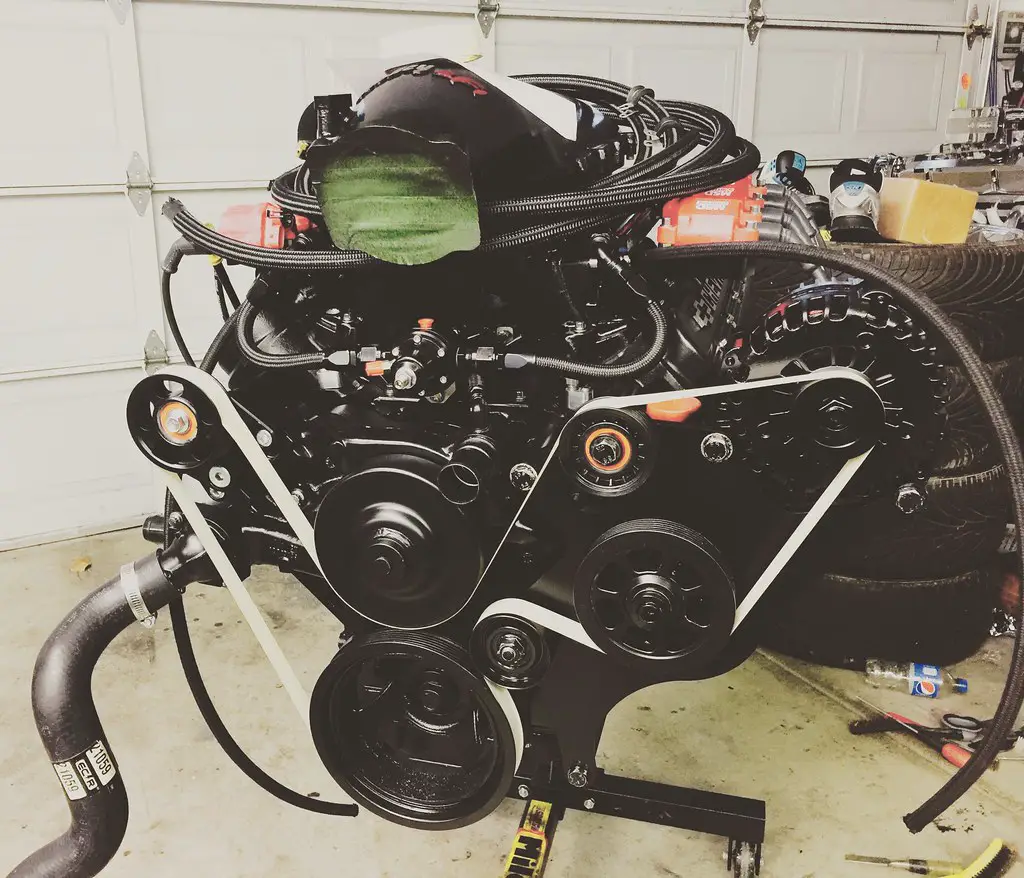
Water pump came together..
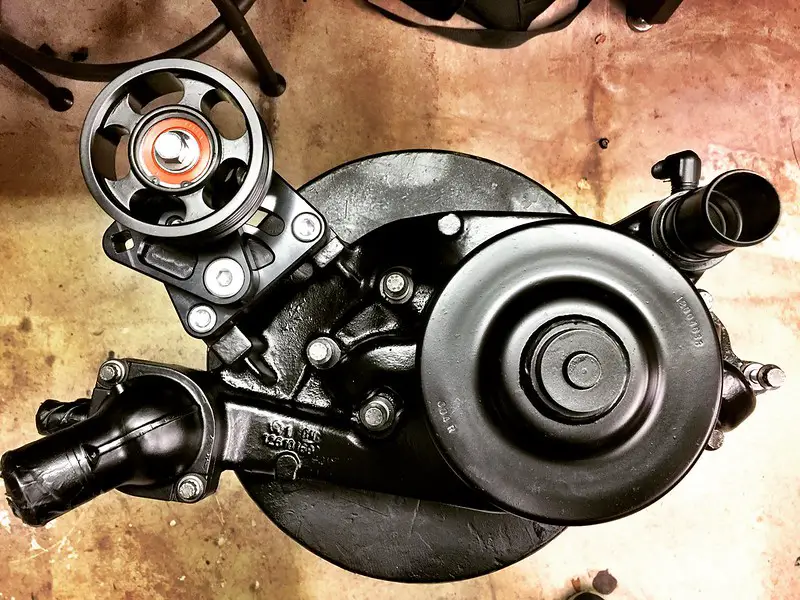
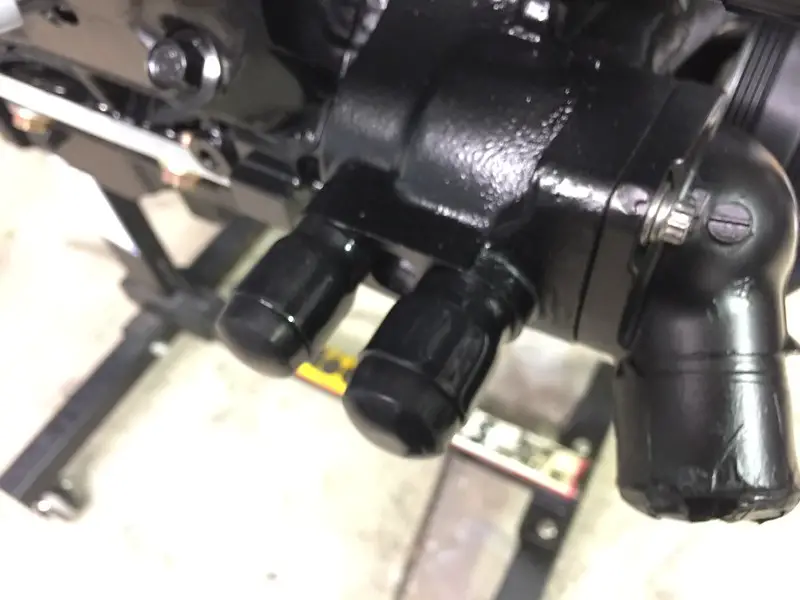
Grabbed a heater block off setup until I get all the parts needed for defrost ect..
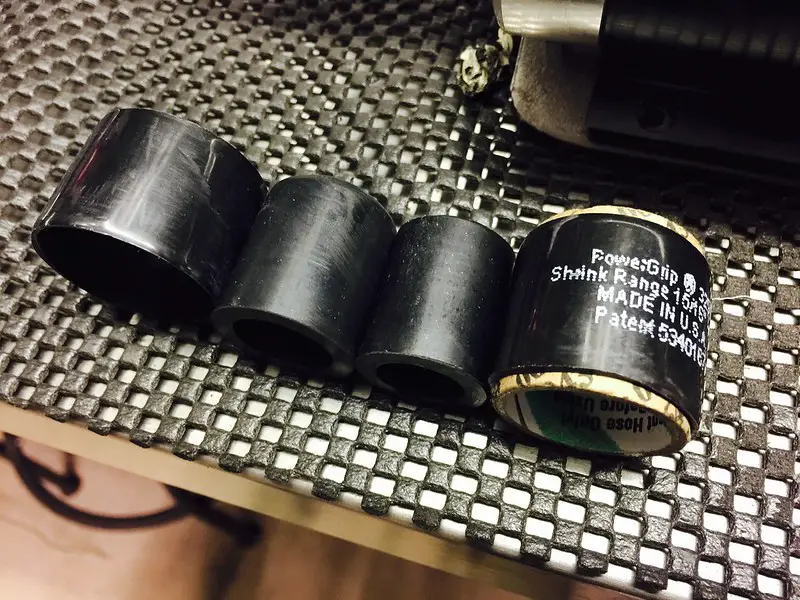
Caps on
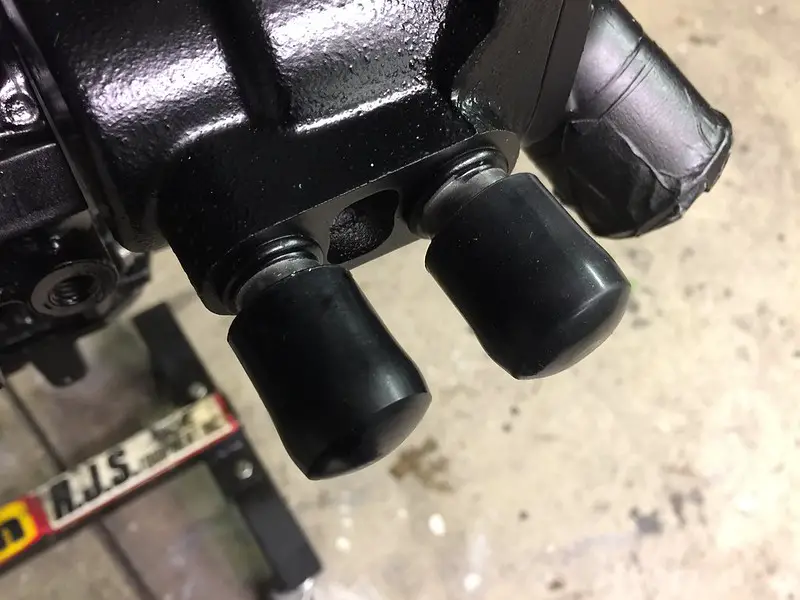
Heat shrink hose clamps
You gotta do the tape serp belt mock up lol

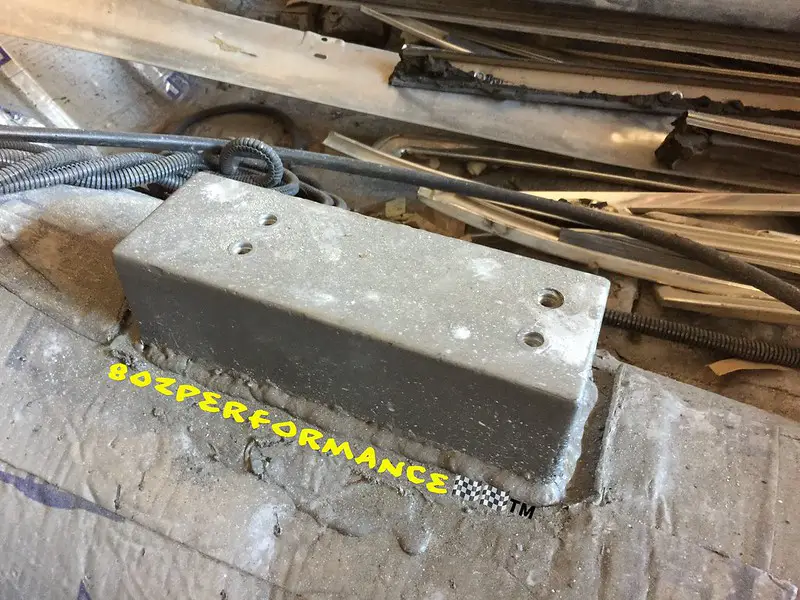
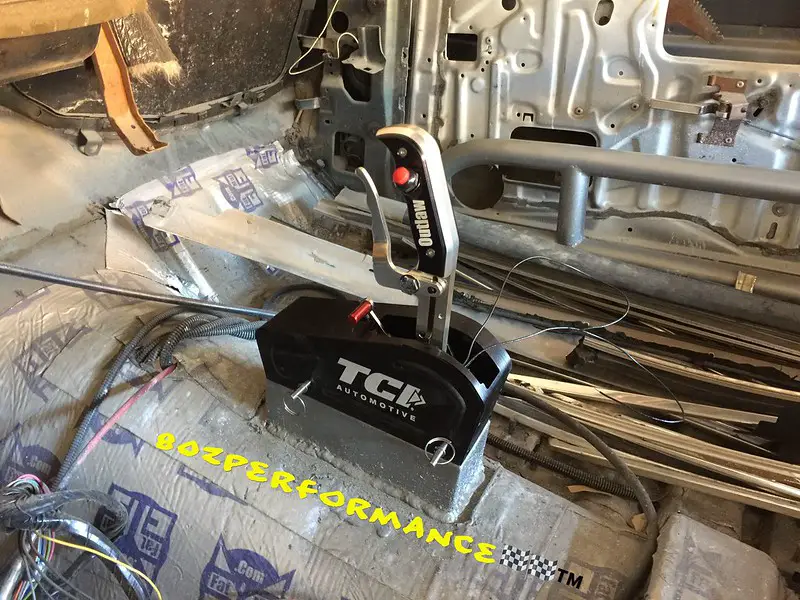
Forgot I had this shifter and a mount made to hold it. Been too long. Ive been going thru all the boxes to what I have for the project...
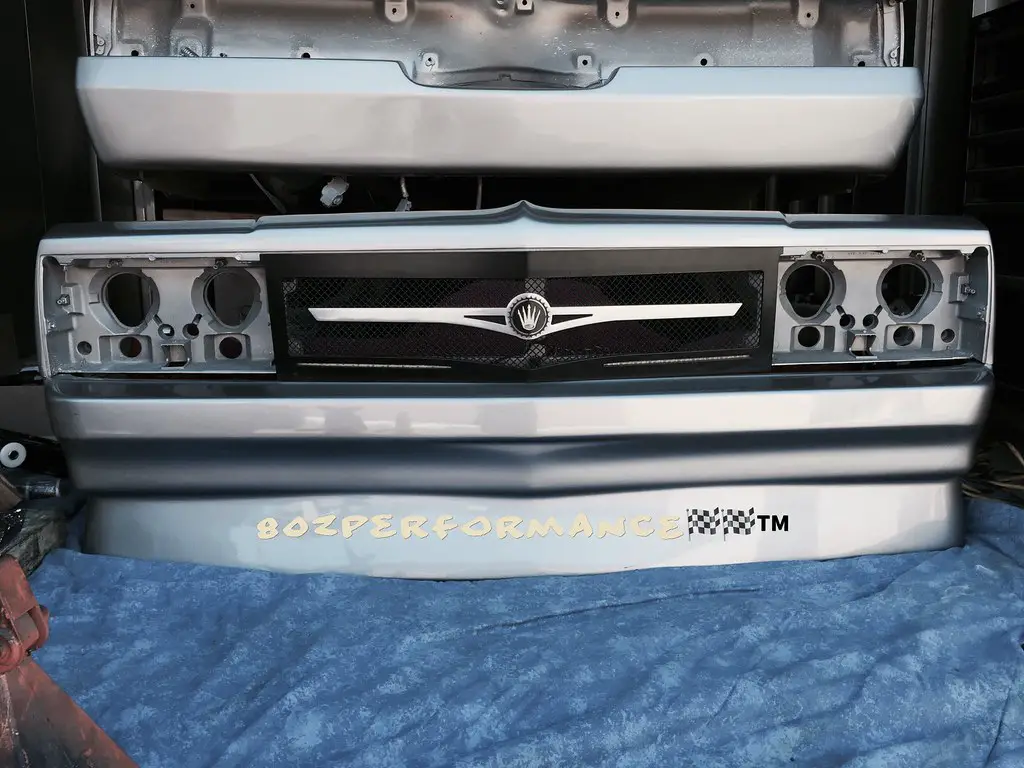
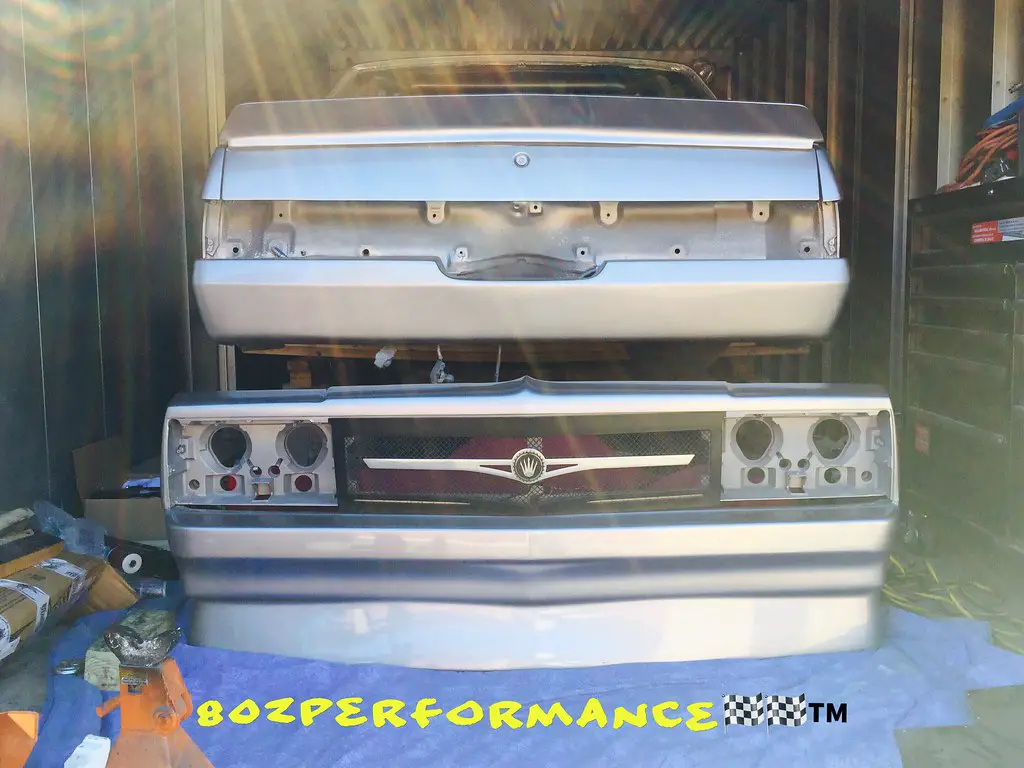
Cant wait to see the headlights and blacked out bezels in..
Headed out Wednesday afternoon. Ill be there around 7pm and the power to all the outlets in the storage will be on. Then I can setup and start the frame cleanup. Hoping to get it painted and start bolting on all the suspension by Friday. Doesnt have to be perfect as it will all be coming back off once we get it here to the shop..(after mocking up the motor)
Thanks for checking back!!

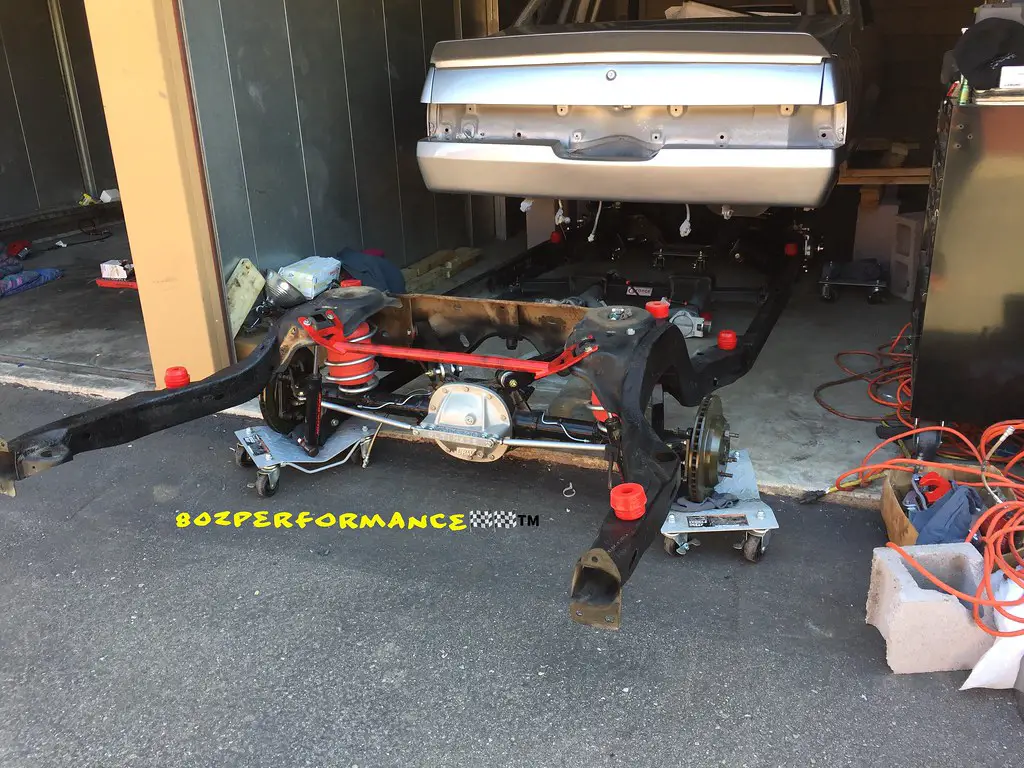
Made the 4 hour trip back out to Arizona to work on the Bu. Moved the frame over to the next storage unit and we cleaned it up a little and sprayed it black. Really wasnt worried about it being "perfect" as the frame will come back out for the re-notch, boxing, bracing and coating. We decided on going with a black coating. Im up in the air if I want it powder coated, or I can use some Eastwood Xtreme chassis black coating. Im thinking that since Im not doing a custom 2 stage color, might as well save a few bucks and just coat it myself. Got the UMI front upper and lower arms in as well as the QA1 coilovers. A good friend gave me a set of 2wd blazer spindles years ago and I had em coated. I was hoping to find a deal on some Belltech 2" drop spindles back then. Would be less stress on th 3" drop coilovers if I did it that way. Hmmm.. If I spray the frame myself, I'll save some cash and can use it for the drop spindles.... Here's some pic. 80zBabiez CC Jerry and the Prez Mel came thru BIIIG TIME for me. I cant thank those guys enough!!!
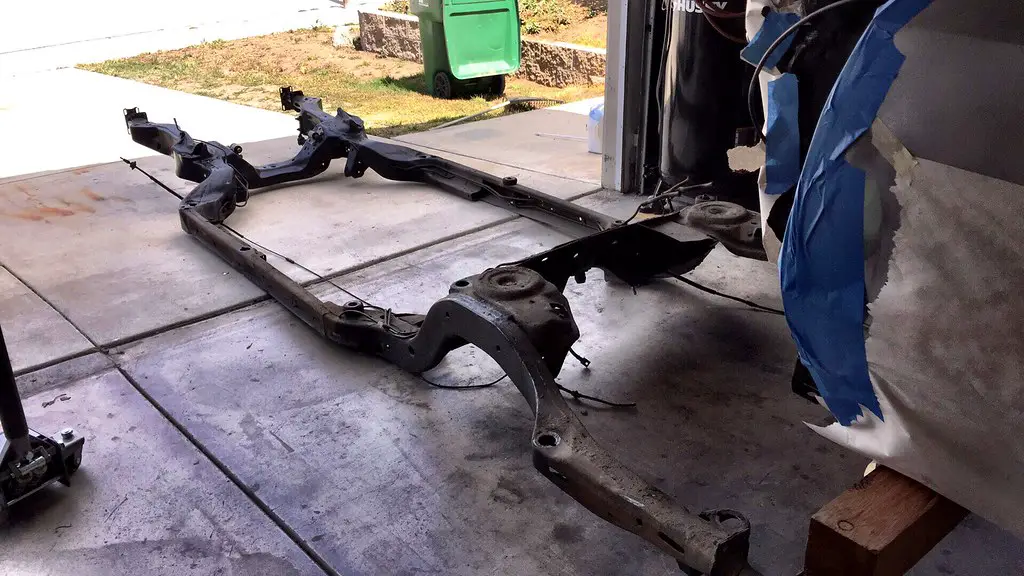
After I cleaned up the storage and purcheased a few wheel dollies to slide the frame out, the fellas yanked all the 39 year old suspension parts and slid the frame out for me. This was a TOTAL surprise that saved me a ton of time
Frame out in the sun...
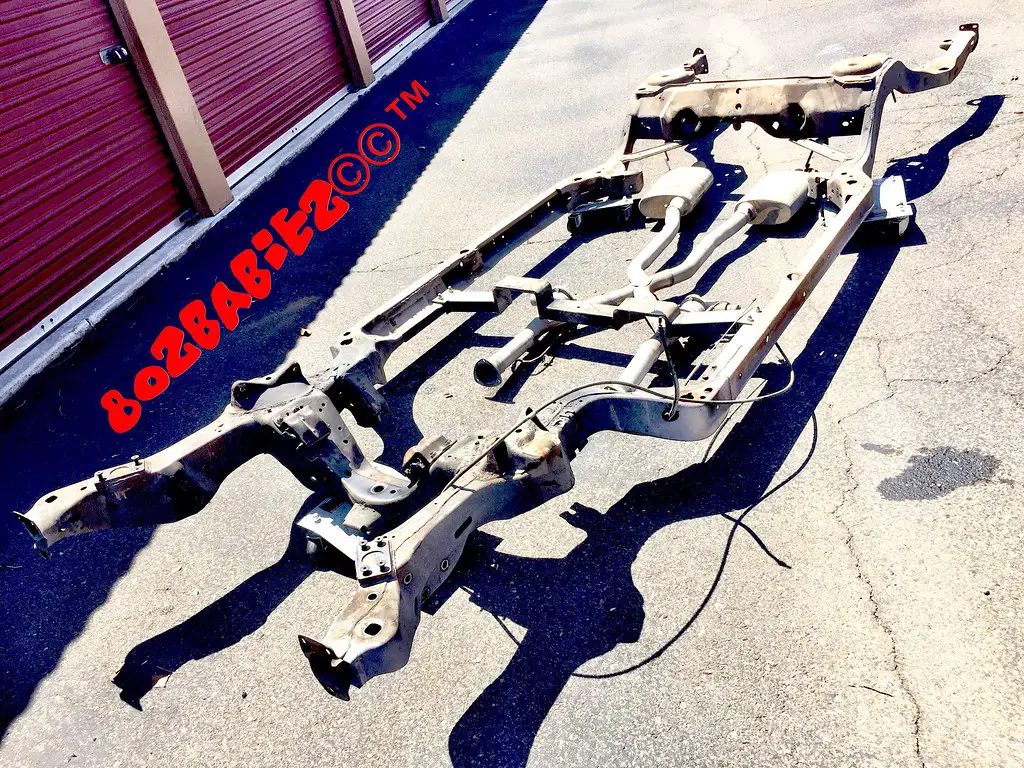
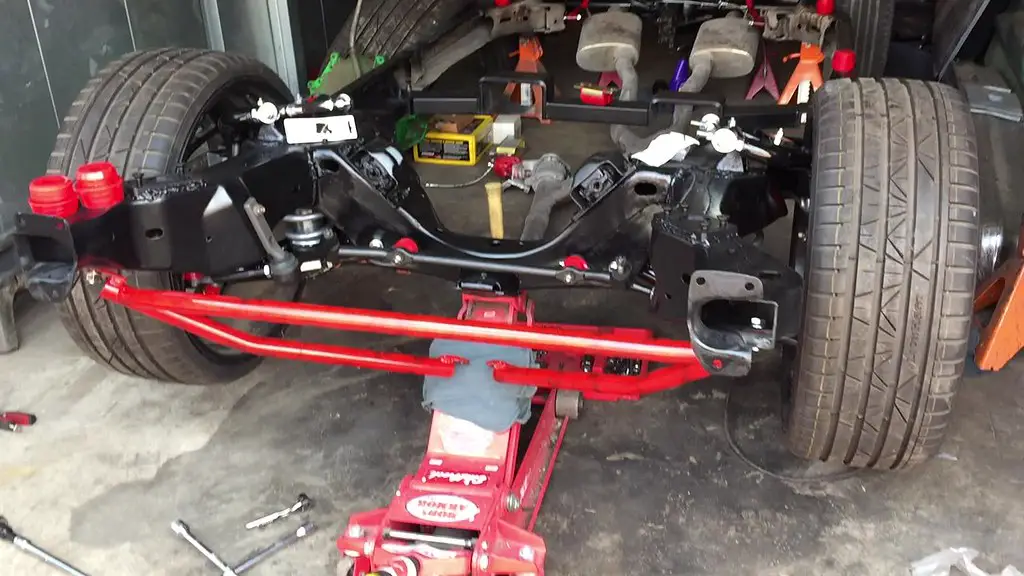
After we cleaned the frame a bit with some purple foaming cleaning agent and TSP with some wire brushes, i just wiped it down with acetone, let flash off and then sprayed with VHT rollbar and chassis paint in satin black. That stuff looks amazing! I didnt really care about runs or uneven spots. This spray was just so I could mock up all the new parts on a decent looking frame. I didnt want a ratty lookinh frame with new stuffs mounted on the "mock up". Once the car is back in Cali, its all coming back off after I mock up the LQ4. Then my guy will come thru and weld the stitch seam, box it and brace it. Im currently working on my SS frame in the mean time..
Unboxing and bolting up finally...
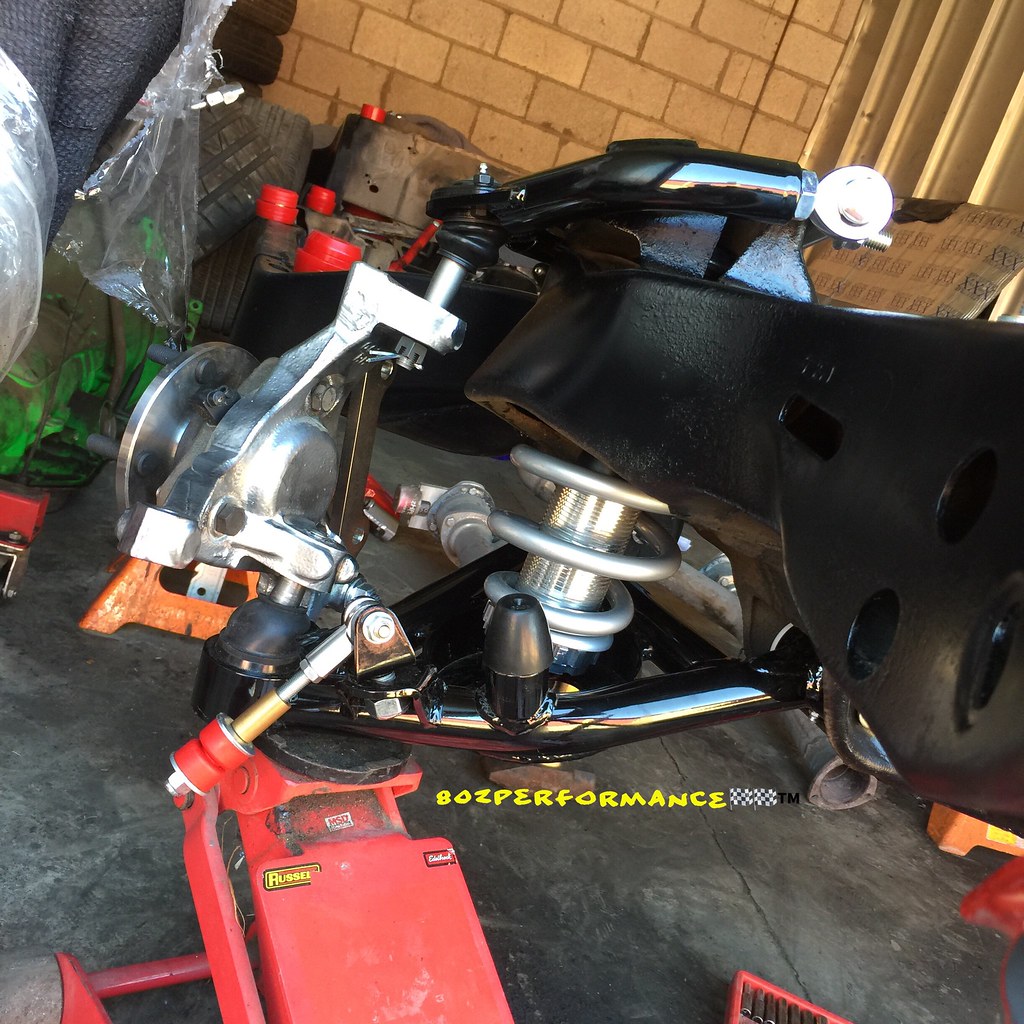
Wish these would stay black...
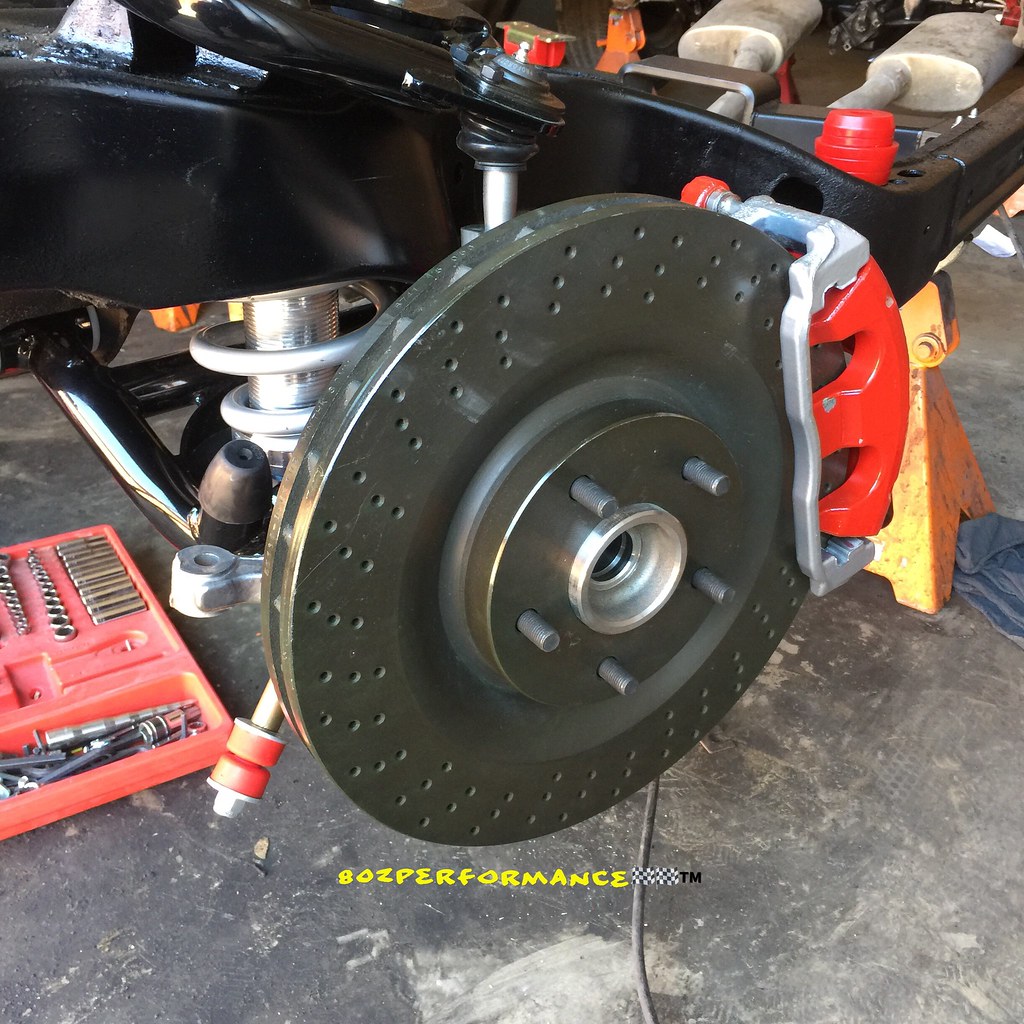
14" rotors, "Z51" PAB, Kore3 "Hybrid" BBK brackets, Kore3 shims, 98-2002 f Body calipers, Kore 3 braided line kit, Speed bleeders on all 4 corners...
Vids on my Flickr page--click link to view... "They see me rollinnnnnn.."
 They see me rolinnnnnn by bumpin1ohm, on Flickr
 They see me rolinnnnnn by bumpin1ohm, on Flickr
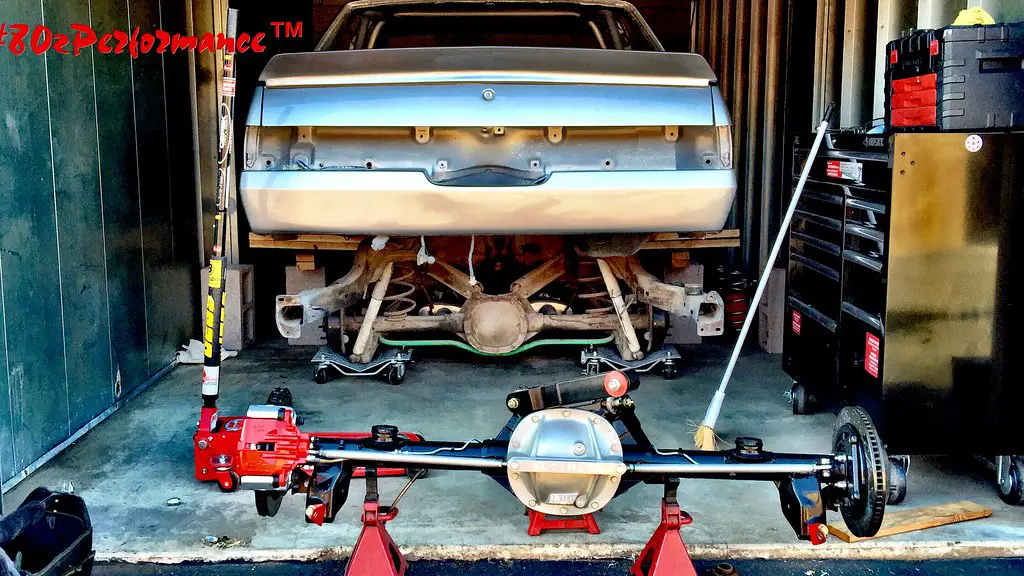
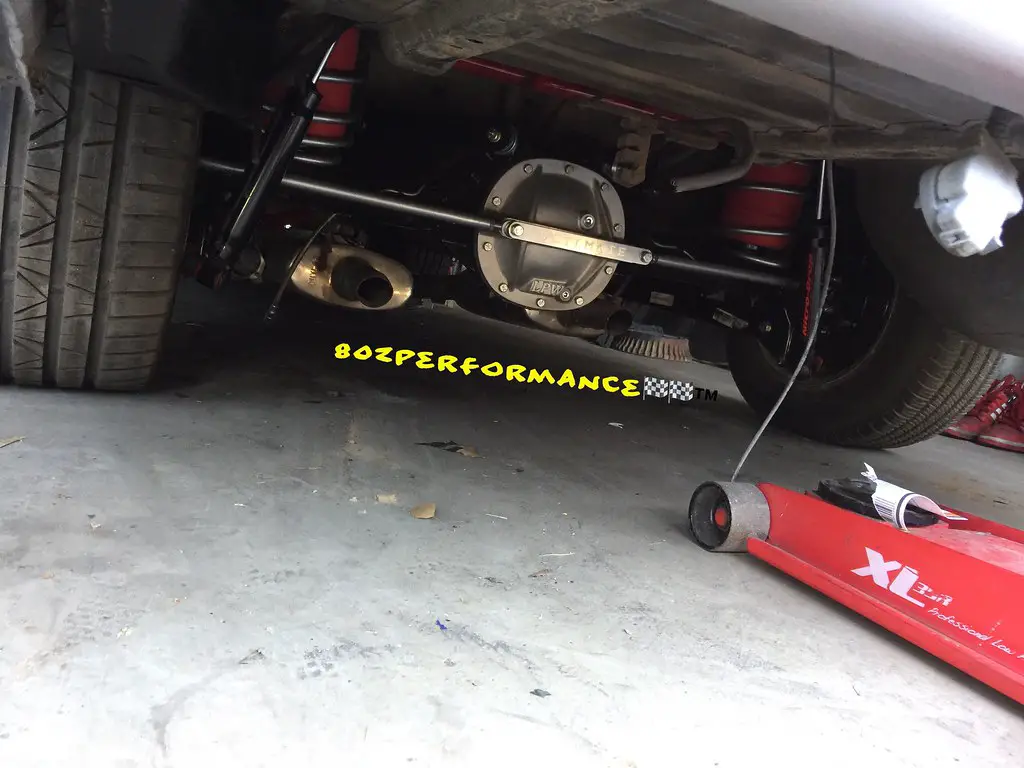
After we got the cleaned up rear end in (built up 7.5), We finished up the rest and rolled the frame out in the sun. The paint is temp and we only concentrated on the areas that could be seen... Still need a thorough cleaning and wire wheel treatment to remove all the scale. I want that frme smooooooooth!
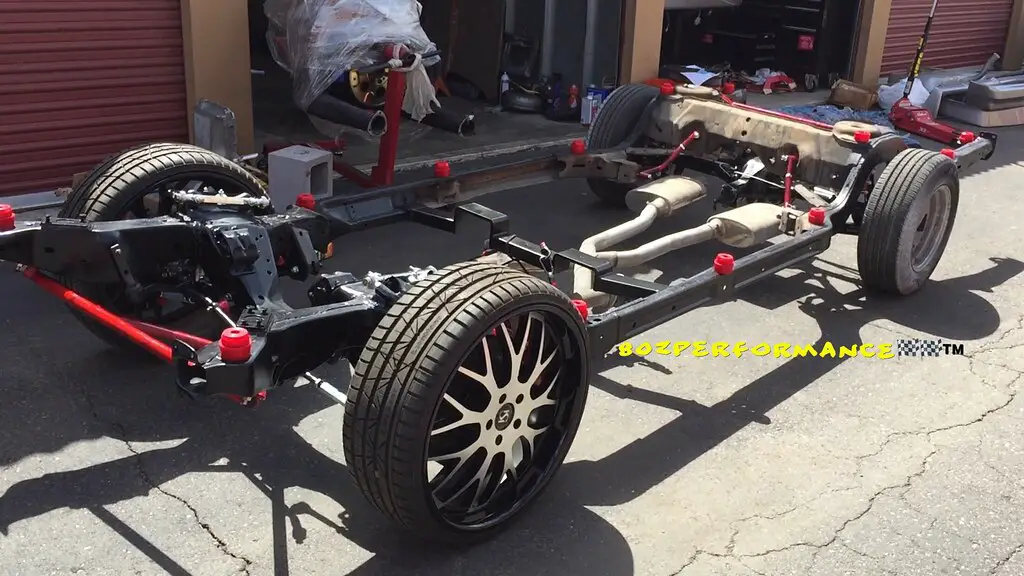
The black rotors look really clean behind the wheel. I gotta find a set that will stay black... Gotta feeling they will be pricey!
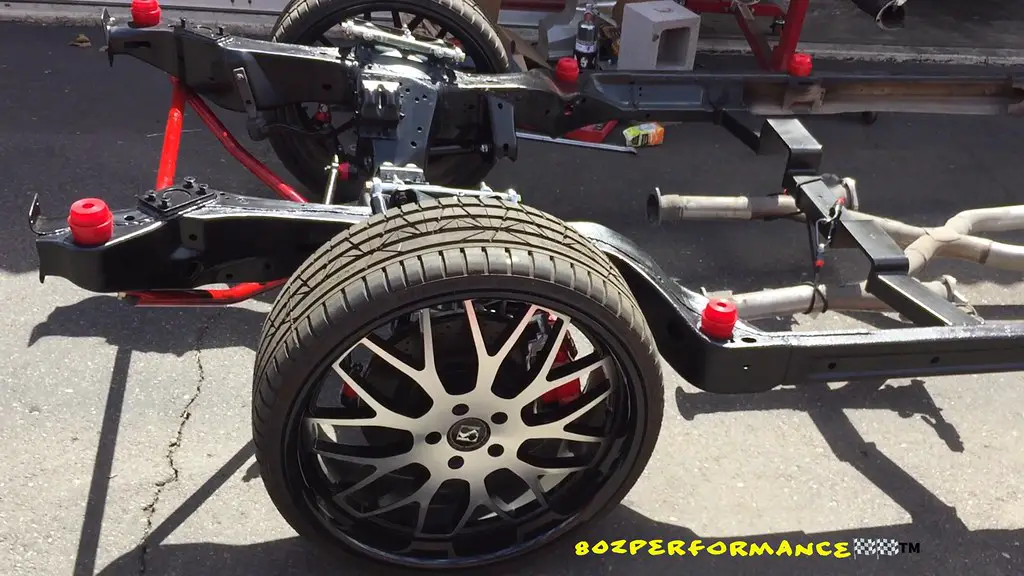
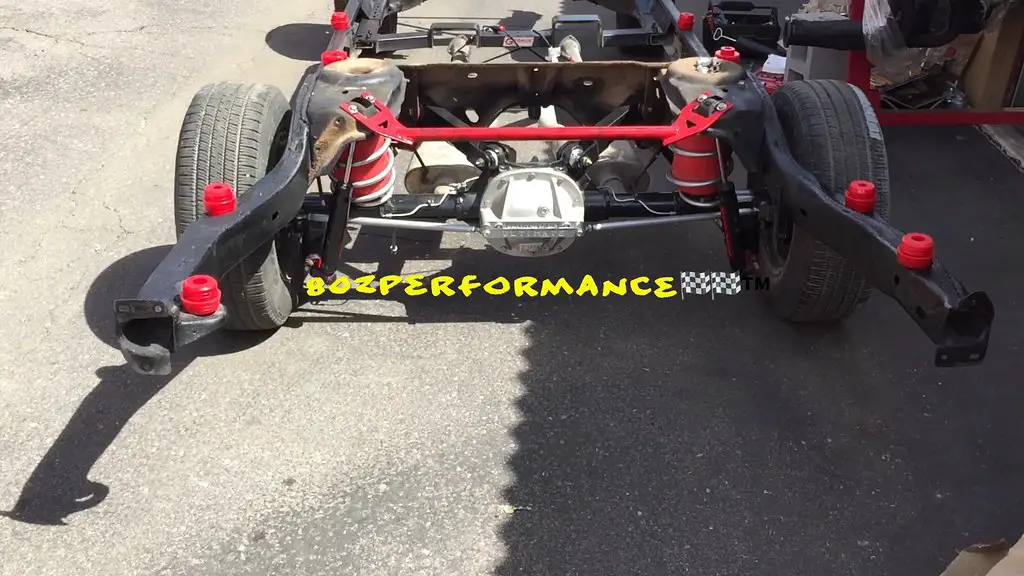
Rear shot....My shock relocate brackets I made worked great. They moved the Belltech Nitro's over and out the way of the rear of the caliper with room to spare. Once I get the Bu back to my lil "shop", Im gonna tack em in once postisioned where I want them. Worried they might slip after driving...
Going back in. The bu wasnt super high, so we just took the wheels off and used the casters to slid it back under. Worked like a charm. I got the idea from Hotrod Regal. This is why I try to document everything and how I did it. It really helps peeps that may be doing something simular. It will at least give them an idea that can be added to or piggybacked on to get htier problem solved..
Back in. We used Energy Suspension poly bushings on this project. I almost ordered a set of solid mounts from Trick Chassis cuz I wasnt sure if I had a set. After so many years of collecting parts and stuff, i forget what all I have. I may still get a set og the Tricks tho..
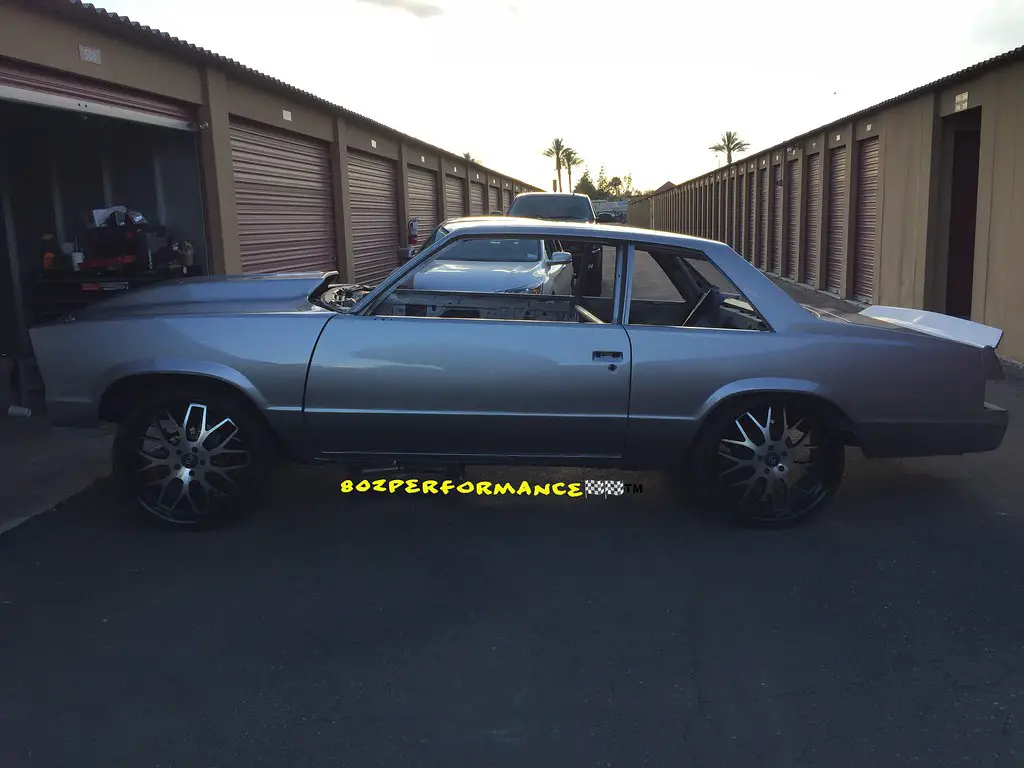
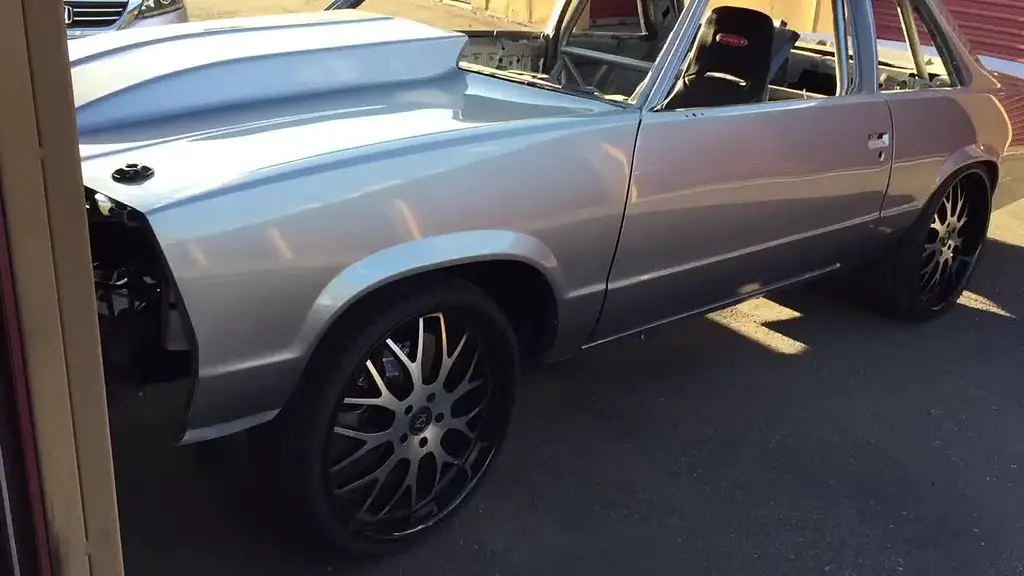
Pulled her out with her heels on for a lil sun. She hasnt been in the sun in over 2 years I think..
Style isnt for everyone, but I love the look..
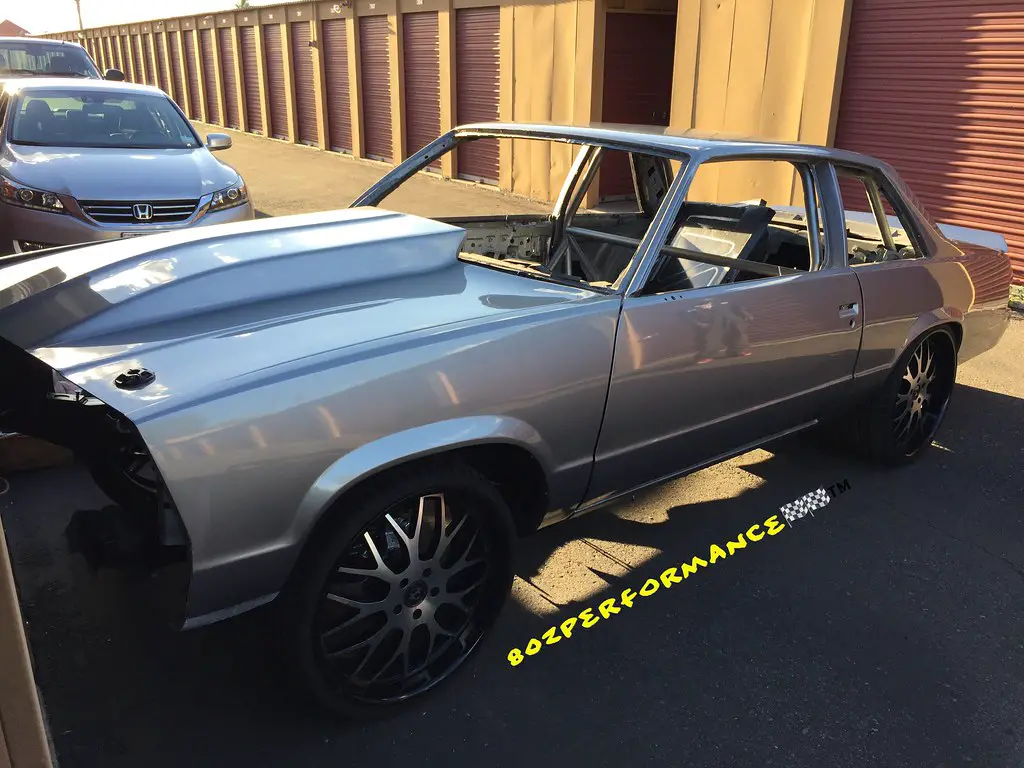
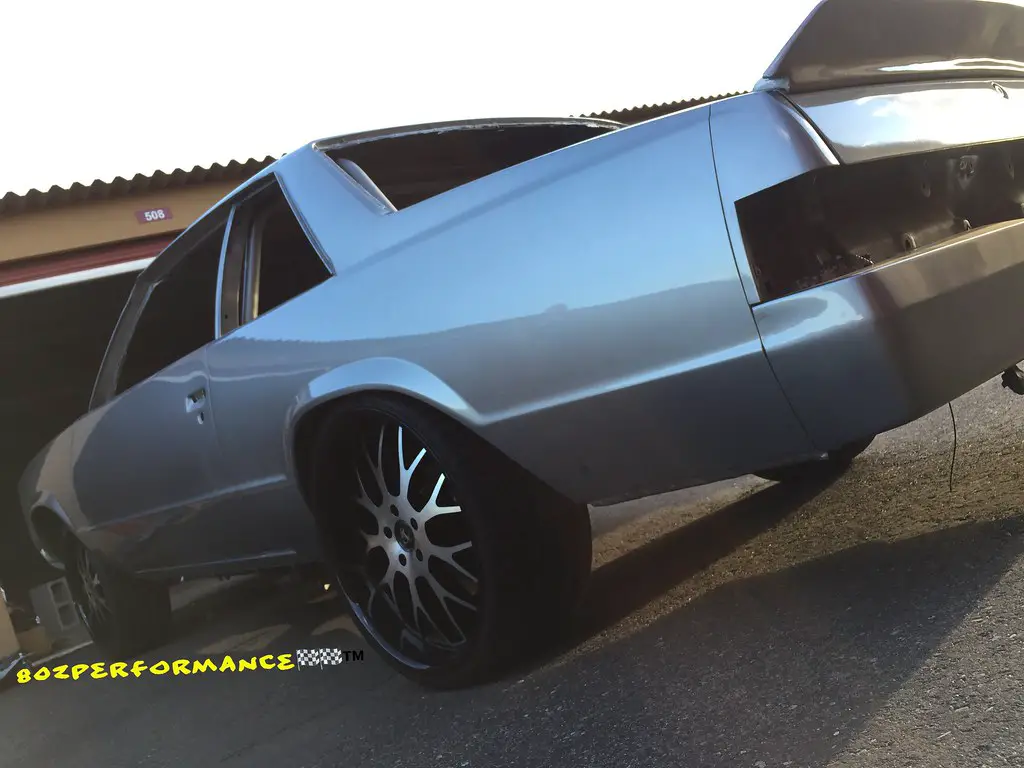
Once the LQ$ and trans are in, she will be sitting nice. I have a 2" drop spring from OPG out back with a set of airlift 1000 drag bags. After the block is in, Imma let it sit so the springs settle, then see if I like that height or go with a 3" drop spring
Walk around vid. click to view on flickr
 #dtoxbu Got her heels on right quick. by bumpin1ohm, on Flickr
It was a VERY productive trip. I put 2000 miles on my lil parts car this past 2 weeks whew! Well worth it. It was nice to finally unbox and get parts on the frame.. I'm back in Cali at the "shop" working on my SS frame now. Just pulled it and power washed it. Time to get him as a roller and then swap cars-SS goes to Az and the Bu comes here..
Fresh off the 78 Bu frame right into the 87 SS frame! We workin!!
Thanks for checking back!!!
After I cleaned up the storage and purcheased a few wheel dollies to slide the frame out, the fellas yanked all the 39 year old suspension parts and slid the frame out for me. This was a TOTAL surprise that saved me a ton of time
Frame out in the sun...
After we cleaned the frame a bit with some purple foaming cleaning agent and TSP with some wire brushes, i just wiped it down with acetone, let flash off and then sprayed with VHT rollbar and chassis paint in satin black. That stuff looks amazing! I didnt really care about runs or uneven spots. This spray was just so I could mock up all the new parts on a decent looking frame. I didnt want a ratty lookinh frame with new stuffs mounted on the "mock up". Once the car is back in Cali, its all coming back off after I mock up the LQ4. Then my guy will come thru and weld the stitch seam, box it and brace it. Im currently working on my SS frame in the mean time..
Unboxing and bolting up finally...
Wish these would stay black...
14" rotors, "Z51" PAB, Kore3 "Hybrid" BBK brackets, Kore3 shims, 98-2002 f Body calipers, Kore 3 braided line kit, Speed bleeders on all 4 corners...
Vids on my Flickr page--click link to view... "They see me rollinnnnnn.."
They see me rolinnnnnn by bumpin1ohm, on Flickr
They see me rolinnnnnn by bumpin1ohm, on FlickrAfter we got the cleaned up rear end in (built up 7.5), We finished up the rest and rolled the frame out in the sun. The paint is temp and we only concentrated on the areas that could be seen... Still need a thorough cleaning and wire wheel treatment to remove all the scale. I want that frme smooooooooth!
The black rotors look really clean behind the wheel. I gotta find a set that will stay black... Gotta feeling they will be pricey!
Rear shot....My shock relocate brackets I made worked great. They moved the Belltech Nitro's over and out the way of the rear of the caliper with room to spare. Once I get the Bu back to my lil "shop", Im gonna tack em in once postisioned where I want them. Worried they might slip after driving...
Going back in. The bu wasnt super high, so we just took the wheels off and used the casters to slid it back under. Worked like a charm. I got the idea from Hotrod Regal. This is why I try to document everything and how I did it. It really helps peeps that may be doing something simular. It will at least give them an idea that can be added to or piggybacked on to get htier problem solved..
Back in. We used Energy Suspension poly bushings on this project. I almost ordered a set of solid mounts from Trick Chassis cuz I wasnt sure if I had a set. After so many years of collecting parts and stuff, i forget what all I have. I may still get a set og the Tricks tho..
Pulled her out with her heels on for a lil sun. She hasnt been in the sun in over 2 years I think..
Style isnt for everyone, but I love the look..
Once the LQ$ and trans are in, she will be sitting nice. I have a 2" drop spring from OPG out back with a set of airlift 1000 drag bags. After the block is in, Imma let it sit so the springs settle, then see if I like that height or go with a 3" drop spring
Walk around vid. click to view on flickr
#dtoxbu Got her heels on right quick. by bumpin1ohm, on FlickrIt was a VERY productive trip. I put 2000 miles on my lil parts car this past 2 weeks whew! Well worth it. It was nice to finally unbox and get parts on the frame.. I'm back in Cali at the "shop" working on my SS frame now. Just pulled it and power washed it. Time to get him as a roller and then swap cars-SS goes to Az and the Bu comes here..
Fresh off the 78 Bu frame right into the 87 SS frame! We workin!!
Thanks for checking back!!!
Tedeje Carlos este hombre tene la toda de cosas para Los gbodies!!! This is why me looking for a bu... putting in the overtime me ce warren!!! ReSSults peeps,reSSults!!! Keep them delivered homie.
este hombre tene la toda de cosas para Los gbodies!!! This is why me looking for a bu... putting in the overtime me ce warren!!! ReSSults peeps,reSSults!!! Keep them delivered homie.Great update!Made the 4 hour trip back out to Arizona to work on the Bu. Moved the frame over to the next storage unit and we cleaned it up a little and sprayed it black. Really wasnt worried about it being "perfect" as the frame will come back out for the re-notch, boxing, bracing and coating. We decided on going with a black coating. Im up in the air if I want it powder coated, or I can use some Eastwood Xtreme chassis black coating. Im thinking that since Im not doing a custom 2 stage color, might as well save a few bucks and just coat it myself. Got the UMI front upper and lower arms in as well as the QA1 coilovers. A good friend gave me a set of 2wd blazer spindles years ago and I had em coated. I was hoping to find a deal on some Belltech 2" drop spindles back then. Would be less stress on th 3" drop coilovers if I did it that way. Hmmm.. If I spray the frame myself, I'll save some cash and can use it for the drop spindles.... Here's some pic. 80zBabiez CC Jerry and the Prez Mel came thru BIIIG TIME for me. I cant thank those guys enough!!!
After I cleaned up the storage and purcheased a few wheel dollies to slide the frame out, the fellas yanked all the 39 year old suspension parts and slid the frame out for me. This was a TOTAL surprise that saved me a ton of time
Frame out in the sun...
After we cleaned the frame a bit with some purple foaming cleaning agent and TSP with some wire brushes, i just wiped it down with acetone, let flash off and then sprayed with VHT rollbar and chassis paint in satin black. That stuff looks amazing! I didnt really care about runs or uneven spots. This spray was just so I could mock up all the new parts on a decent looking frame. I didnt want a ratty lookinh frame with new stuffs mounted on the "mock up". Once the car is back in Cali, its all coming back off after I mock up the LQ4. Then my guy will come thru and weld the stitch seam, box it and brace it. Im currently working on my SS frame in the mean time..
Unboxing and bolting up finally...
Wish these would stay black...
14" rotors, "Z51" PAB, Kore3 "Hybrid" BBK brackets, Kore3 shims, 98-2002 f Body calipers, Kore 3 braided line kit, Speed bleeders on all 4 corners...
Vids on my Flickr page--click link to view... "They see me rollinnnnnn.."
After we got the cleaned up rear end in (built up 7.5), We finished up the rest and rolled the frame out in the sun. The paint is temp and we only concentrated on the areas that could be seen... Still need a thorough cleaning and wire wheel treatment to remove all the scale. I want that frme smooooooooth!
The black rotors look really clean behind the wheel. I gotta find a set that will stay black... Gotta feeling they will be pricey!
Rear shot....My shock relocate brackets I made worked great. They moved the Belltech Nitro's over and out the way of the rear of the caliper with room to spare. Once I get the Bu back to my lil "shop", Im gonna tack em in once postisioned where I want them. Worried they might slip after driving...
Going back in. The bu wasnt super high, so we just took the wheels off and used the casters to slid it back under. Worked like a charm. I got the idea from Hotrod Regal. This is why I try to document everything and how I did it. It really helps peeps that may be doing something simular. It will at least give them an idea that can be added to or piggybacked on to get htier problem solved..
Back in. We used Energy Suspension poly bushings on this project. I almost ordered a set of solid mounts from Trick Chassis cuz I wasnt sure if I had a set. After so many years of collecting parts and stuff, i forget what all I have. I may still get a set og the Tricks tho..
Pulled her out with her heels on for a lil sun. She hasnt been in the sun in over 2 years I think..
Style isnt for everyone, but I love the look..
Once the LQ$ and trans are in, she will be sitting nice. I have a 2" drop spring from OPG out back with a set of airlift 1000 drag bags. After the block is in, Imma let it sit so the springs settle, then see if I like that height or go with a 3" drop spring
Walk around vid. click to view on flickr
It was a VERY productive trip. I put 2000 miles on my lil parts car this past 2 weeks whew! Well worth it. It was nice to finally unbox and get parts on the frame.. I'm back in Cali at the "shop" working on my SS frame now. Just pulled it and power washed it. Time to get him as a roller and then swap cars-SS goes to Az and the Bu comes here..
Fresh off the 78 Bu frame right into the 87 SS frame! We workin!!
Thanks for checking back!!!
- Status
- Not open for further replies.
Similar threads
- Replies
- 0
- Views
- 207
- Replies
- 13
- Views
- 650
- Locked
- Replies
- 0
- Views
- 389
GBodyForum is a participant in the Amazon Services LLC Associates Program, an affiliate advertising program designed to provide a means for sites to earn advertising fees by advertising and linking to amazon.com. Amazon, the Amazon logo, AmazonSupply, and the AmazonSupply logo are trademarks of Amazon.com, Inc. or its affiliates.