83 Monte Carlo LS PFM

Status
Not open for further replies.

TheRestoGuy

Not-quite-so-new-guy
Apr 27, 2017
23
24
3
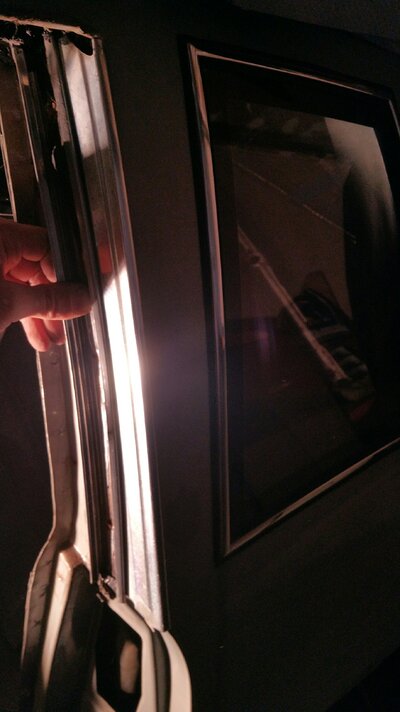
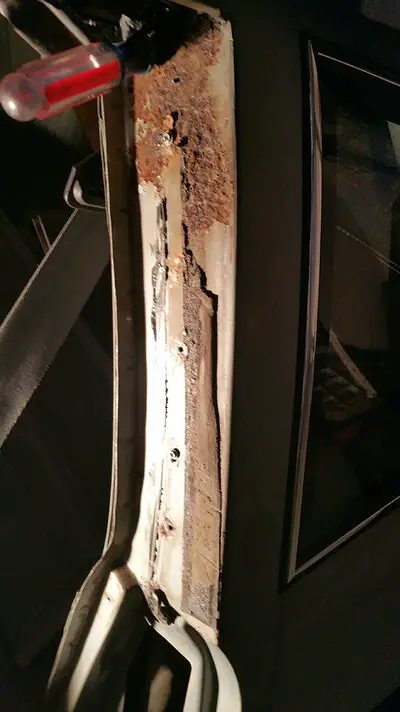
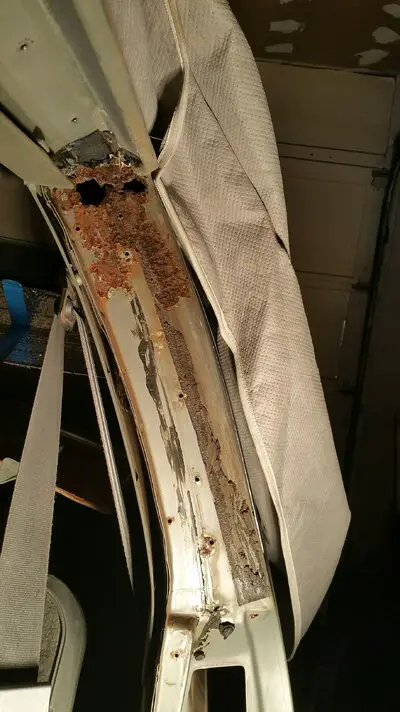
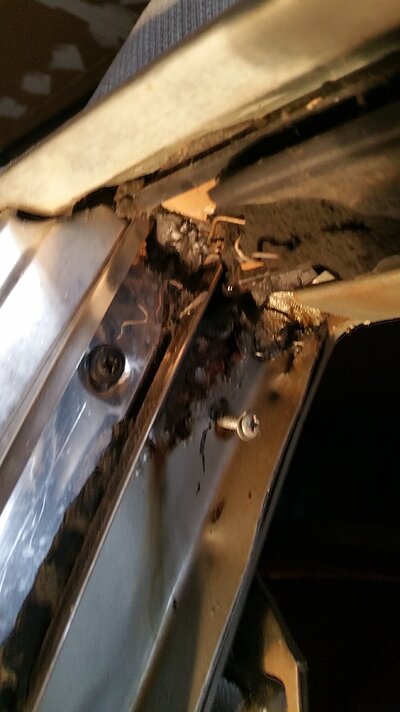
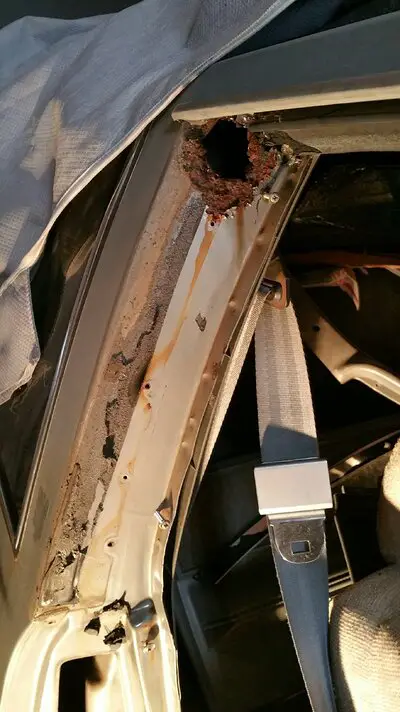
Ok, so I decided to finally start this build thread. Upon receiving this car from my Dad (who has had 5 shops work on it to "finish it") I thought I was only going to have to shim the starter and it would be running soon.. so so my Dad thought. So far I've swapped engines, transmissions, fixed rust in multiple spots, painted, and am getting ready for actual full paint. Specs on the car as of now.

LQ4 6.0 engine, stock from a 2008 Silverado, (holley mounts, holley oil pan)
T-56 (holley mounts)
12 Bolt, 3.73 gears with an auburn unit (narrowed axle, frame rails narrowed)
shortened 3" drive shaft with 1350 u-joints (we'll see how long this lasts)
GN fuel tank with Racetronics fuel pump -8 supply and -6 return fuel lines

Those are all the juicy details I can think of for now. I'll let the pics do the taking and maybe add some commentary along the way.

Alex

DSCN0768.JPG driversint jan16a.jpg engine left jan16a.jpg 20160108_163047.jpg 20160108_070819.jpg
 
  • Like
Reactions: 1 users

TheRestoGuy

Not-quite-so-new-guy
Apr 27, 2017
23
24
3
Having been driving a 1992 S10 for a few years as a daily, I knew the little truck really responded to the rebuild and upgrade of the front components and bushings to polyurethane; I would do the same to the Monte. After I decided to sell the sb 434 due to questionable build quality, I knew I would go LS due to the power they can make and lovely turn key fuel injection qualities they have. Time to make the frame pretty. At this time I would also route the -8 fuel line. I don't know how the previous builder expected to make 500 something HP with 3/8 fuel line (no return) and a cruddy fuel pump. I always believe in over building if it makes sense and this was an easy thing to do here. . I picked up the fuel tank I want to say off of amazon or rock auto, and the 1/2" stainless steel fuel line from McMaster-Carr .

clean frame.jpg painted frame.jpg painted frame 2.jpg new buick GNX fuel tank for fuel injection.jpg new fuel line.jpg
 
  • Like
Reactions: 1 users

TheRestoGuy

Not-quite-so-new-guy
Apr 27, 2017
23
24
3
I then went to Korea for work,. My phone with a lot of other pictures from 2017, bricked and died.. so I'm out a lot of pictures of the initial LQ4 setup and T-56 install. Fast forward to late 2017 and this year.
 
  • Like
Reactions: 1 user

TheRestoGuy

Not-quite-so-new-guy
Apr 27, 2017
23
24
3
Back from Korea and ready to turn wrenches on this thing. I disturb the Monte from its slumber on jack stands. At this point I also decided to go all in with the project and make it the new daily driver, not pseudo race car. Please note, my hydroboost lines are hooked up WRONG in these pictures. When I started the car, I overheated the pump and the pedal got stuck on the floor. So don't use the next few pics of the hydroboost as reference pics.

20171030_192141.jpg 20171110_134454.jpg 20180106_192323.jpg
 
  • Like
Reactions: 1 users

TheRestoGuy

Not-quite-so-new-guy
Apr 27, 2017
23
24
3
While I was in Korea, I looked at a lot of silver and charcoal colors for the car. My Dad wanted the car to be a darker charcoal so that was non-negotiable. Black, while amazing looking in my mind on boxy cars, was also off the table as my Dad hates it on these cars except GN's. haha so balance must be achieved.

In these pics I show how I kinda prepped a fender for paint as a test panel. Hell the car color was already basically primer gray. The colors from left to right or light to dark to medium dark are Mercedes Palladium Silver, GM Nightfall gray metallic / Watkins Glenn Gray / Son of a Gun Gray (yes it has 3 names, maybe more), and furthest right is GM Storm Gray normally found on trucks.

For this car I didn't like any of these colors. Not sure if you can make it out but look at how my zero prep on the panel besides a quick sand with 320 grit and a degrease yields a very crappy paint job (but I knew this would be the case, just helps to show what a cra* paint job looks like). I shot a light coat of clear over all three too to get a feel for the color on the lines of the car.

20171115_154932.jpg 20171116_150030.jpg 20171116_150037.jpg 20171116_150042.jpg
 
  • Like
Reactions: 1 user

TheRestoGuy

Not-quite-so-new-guy
Apr 27, 2017
23
24
3
My last color I looked at was Mercedes Selenite Gray, and I really like this one. I like the "magneto" version they offer and am still torn if I want to shoot matte clear over it. Probably not, but maybe as an accent I'm still not sure. I shot clear over half of the spoiler. Again, zero prep besides a light sanding to knock off the chunks of crud.

Catching the light in photos for this color to make it look like what my eye sees is very difficult.

20171216_154835.jpg 20171216_154904.jpg 20171216_155045.jpg 20171216_155052.jpg 20180216_165210.jpg
 
  • Like
Reactions: 1 user

TheRestoGuy

Not-quite-so-new-guy
Apr 27, 2017
23
24
3
I had to get rid of the dodge neon seats that were in the car, they were mounted very sketchy, looked bad, and had no support to take tuns or just sit in for 5 hrs on a road trip. My back is cra* due to my job.. and I was not about to sit in those seats driving a car every day or cross country.. so new seats. Pricey, but I think worth the investment. I didn't find many pictures of these seats in g-body's , so after the car is done, I'll take better pictures.

20180214_205309.jpg 20180318_212408.jpg 20180318_212444.jpg
 
  • Like
Reactions: 1 users

TheRestoGuy

Not-quite-so-new-guy
Apr 27, 2017
23
24
3
For a while I was trying to figure out how to paint the car.. I couldn't paint it all at once and get the inner fenders / hood.. so I shot the inner part of the fenders with the decided color, Mercedes Selenite Gray.
 

Attachments

  • 20180218_170953.jpg
    20180218_170953.jpg
    2.9 MB · Views: 199
  • 20180218_170956.jpg
    20180218_170956.jpg
    1.5 MB · Views: 190
  • 20180218_174912.jpg
    20180218_174912.jpg
    2.7 MB · Views: 219
  • 20180219_131930.jpg
    20180219_131930.jpg
    3.3 MB · Views: 217
  • Like
Reactions: 1 user

TheRestoGuy

Not-quite-so-new-guy
Apr 27, 2017
23
24
3
Second major hiccup besides the engine / transmission swap to LS stuff.. RUST. Both my dad and I knew there was a leak in the car somewhere. The rear part of the floor would be soaked after a rain storm and we couldn't find the leak. We both thought it was the quarter windows or the rear glass... I fulled all the door gaskets and trim to "cut in" for painting the rest of the car.. I didn't want to have to do door jambs when I shot the car, just the exterior as metal flake isn't my strongest paint job. I was greeted by this. ... on both sides.
 

Attachments

  • 20180218_132630.jpg
    20180218_132630.jpg
    1.7 MB · Views: 211
  • 20180218_132642.jpg
    20180218_132642.jpg
    1.4 MB · Views: 220
  • 20180218_133852.jpg
    20180218_133852.jpg
    1.8 MB · Views: 216
  • 20180218_135950.jpg
    20180218_135950.jpg
    1.5 MB · Views: 208
  • 20180218_140427.jpg
    20180218_140427.jpg
    618.8 KB · Views: 196
  • 20180218_140827.jpg
    20180218_140827.jpg
    1.6 MB · Views: 201

TheRestoGuy

Not-quite-so-new-guy
Apr 27, 2017
23
24
3
Cut the rust out, create a patch piece, weld in. The 3rd picture shows how close I got to the filler line. oops. luckily, you won't see that.

20180225_132840.jpg 20180225_133939.jpg 20180225_142644.jpg 20180225_144737.jpg 20180225_145350.jpg 20180225_153244.jpg 20180225_163354.jpg
 
  • Like
Reactions: 1 user
Status
Not open for further replies.

GBodyForum is a participant in the Amazon Services LLC Associates Program, an affiliate advertising program designed to provide a means for sites to earn advertising fees by advertising and linking to amazon.com. Amazon, the Amazon logo, AmazonSupply, and the AmazonSupply logo are trademarks of Amazon.com, Inc. or its affiliates.

Please support GBodyForum Sponsors

Classic Truck Consoles Dixie Restoration Depot UMI Performance

Contact [email protected] for info on becoming a sponsor