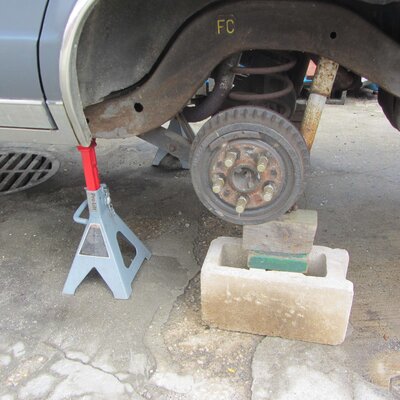
I see this problem asked so many times even from people who should know better. Any factory manual from the rear drive days has this information. The pinion shaft seal in a rear end is there to keep the gear oil inside the carrier and nothing else. But the companion flange, nut, and washer are part of the pinion gear bearing pre-load function. Both the ring and pinion gears are held in suspension by pre-load on their bearings so that under engine torque they don't move out of alignment. If they do then the ring and pinion specification goes out the window, wear occurs, or worse- breakage. We do NOT want to disturb this relationship. We want to be able to change the seal without disturbing the pinion pre-load. It starts by safely getting the vehicle up on jack-stands or blocks with the rear wheels off. Loosen the brakes so they don't affect the torque reading.
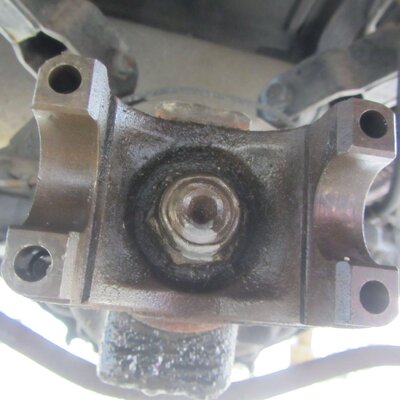
 Remove the driveshaft and hang it out of the way with some baling wire. Here is the most important step of this whole operation. If any pinion shaft threads show- count them and write that down. You MUST mark a spot on the nut and the shaft with either paint or a sharp chisel. Make the marks right next to each other. I start with paint and then later make a mark with a cut-off wheel once the parts are off. This is so that when we put them back together we can have the nut on the shaft EXACTLY as it was when we started.
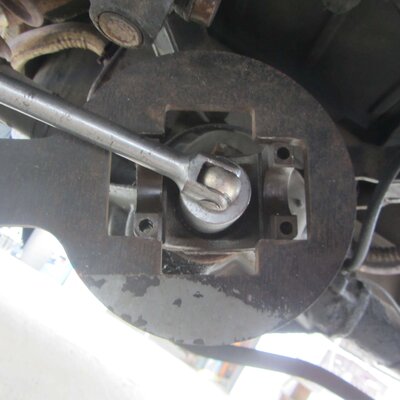
 At this point the FSM wants you to take a torque reading and write down the amount of inch pounds it takes to turn the pinion nut. This is the pre-load. It may or may not be what it should be due to bearing wear over the years. Mine are always looser than they should be. The pinion nut is 1-1/4" on a GM 7.5" rear. Use a socket and an inch pounds torque wrench to measure and write that down. Then get a big breaker bar and the socket to loosen the nut. The companion flange must be held steady to get the nut off. Sometimes if you have a helper apply the brakes that holds it enough to break it loose. The correct way is with a flange holder tool. I have one for a JEEP but I was able to grind it a bit and now it fits my GM rears. A length of pipe clamped in by the U-joint retainers will work too. Oiling ahead of time helps a lot here.
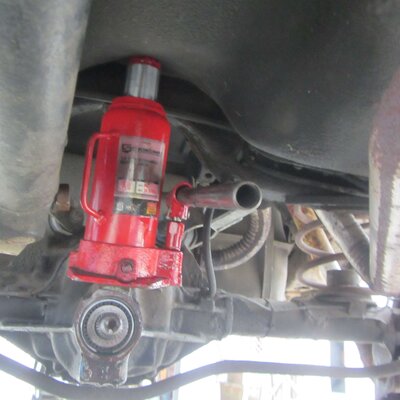
 Once the flange is off take a sharp pointy drift and punch a hole in the seal. Pry the seal out without damaging the shaft. There are two ways to do this job. If you are in a hurry and don't mind some extra work you can remove the carrier cover and drain out the gear oil. I had a lot of time so I chose to position a container under the pinion shaft and let the oil drain out the nose of the carrier. I used a bottle jack between the carrier and the body to depress the snout as much as I could so as much oil came out as possible.
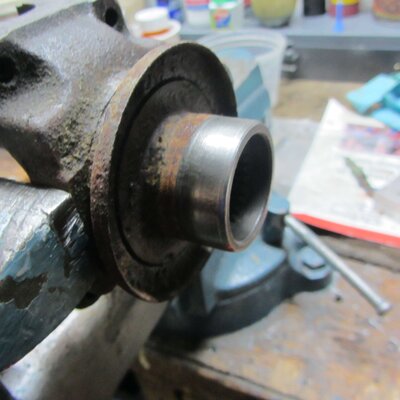
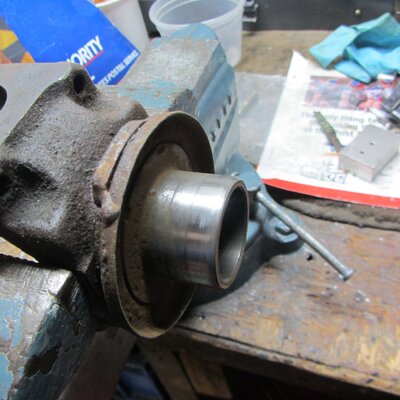
 It took about three hours for the oil drain to subside to an occasional drop. I used that time to clean parts and chase threads. I also cleaned and polished the seal surface of the companion flange looking for gouges. Use a strip of sandpaper like you are buffing the toe of a shoe. Mine had some rust and what looked like a groove. But my test is if it will catch a fingernail it needs attention. Mine was fine because last time I had it apart I filled the groove with grey Marine Tex and sanded it smooth.
 Once the oil stopped I placed the jack under the snout and raised it as much as I could. That way the oil flowed back in to the carrier.
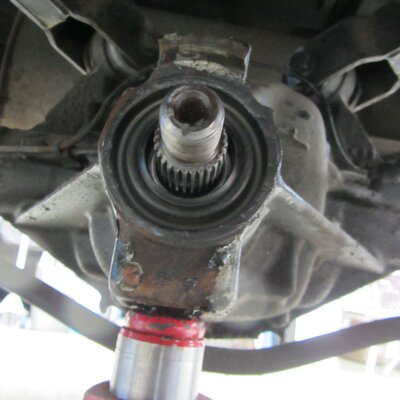 Then I could clean and de-grease the seal cavity and prepare the new seal. The FSM says to install the seal dry but I prefer some sealer. Permatex Aviation is good stuff but now I use the Ultra Black. I find that since these parts are not new, oil will migrate down the splines of the shaft and leak out. I use some Permatex Ultra Black on the seal rim, the pinon shaft splines, and under the washer. This adds a day to cure so allow for that. Try not to get sealer on the seal lips. A seal installer tool is useful but if you are careful you can drive it in slowly around the edges until flush with the carrier. Then grease or oil the flange seal surface so it won't cut the new seal when you install it. Install the flange, washer and nut, and tighten the nut until you feel decent resistance. Now count the threads and look for your marks made at the start. You creep up on the final tightness so that the two marks line up EXACTLY as before.
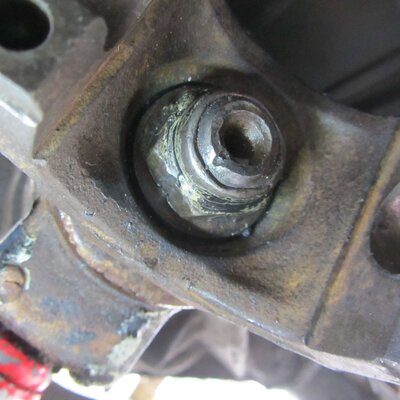 See the cuts lined up? This is key to the job being a success. Take your torque wrench and see if the reading is the same as before. It should be. Mine are always looser than they should be so I give the nut a TINY bit more so that I can get at least minimal torque. If your torque reading was proper for used gears- leave it alone. Replace the cover if removed, fill the rear with oil to the proper level, hook up the driveshaft, replace the wheels, adjust the brakes, drop the vehicle down, and you are done. The RIGHT way.
 Remove the driveshaft and hang it out of the way with some baling wire. Here is the most important step of this whole operation. If any pinion shaft threads show- count them and write that down. You MUST mark a spot on the nut and the shaft with either paint or a sharp chisel. Make the marks right next to each other. I start with paint and then later make a mark with a cut-off wheel once the parts are off. This is so that when we put them back together we can have the nut on the shaft EXACTLY as it was when we started.
 At this point the FSM wants you to take a torque reading and write down the amount of inch pounds it takes to turn the pinion nut. This is the pre-load. It may or may not be what it should be due to bearing wear over the years. Mine are always looser than they should be. The pinion nut is 1-1/4" on a GM 7.5" rear. Use a socket and an inch pounds torque wrench to measure and write that down. Then get a big breaker bar and the socket to loosen the nut. The companion flange must be held steady to get the nut off. Sometimes if you have a helper apply the brakes that holds it enough to break it loose. The correct way is with a flange holder tool. I have one for a JEEP but I was able to grind it a bit and now it fits my GM rears. A length of pipe clamped in by the U-joint retainers will work too. Oiling ahead of time helps a lot here.
 Once the flange is off take a sharp pointy drift and punch a hole in the seal. Pry the seal out without damaging the shaft. There are two ways to do this job. If you are in a hurry and don't mind some extra work you can remove the carrier cover and drain out the gear oil. I had a lot of time so I chose to position a container under the pinion shaft and let the oil drain out the nose of the carrier. I used a bottle jack between the carrier and the body to depress the snout as much as I could so as much oil came out as possible.
 It took about three hours for the oil drain to subside to an occasional drop. I used that time to clean parts and chase threads. I also cleaned and polished the seal surface of the companion flange looking for gouges. Use a strip of sandpaper like you are buffing the toe of a shoe. Mine had some rust and what looked like a groove. But my test is if it will catch a fingernail it needs attention. Mine was fine because last time I had it apart I filled the groove with grey Marine Tex and sanded it smooth.

 Once the oil stopped I placed the jack under the snout and raised it as much as I could. That way the oil flowed back in to the carrier.
 Then I could clean and de-grease the seal cavity and prepare the new seal. The FSM says to install the seal dry but I prefer some sealer. Permatex Aviation is good stuff but now I use the Ultra Black. I find that since these parts are not new, oil will migrate down the splines of the shaft and leak out. I use some Permatex Ultra Black on the seal rim, the pinon shaft splines, and under the washer. This adds a day to cure so allow for that. Try not to get sealer on the seal lips. A seal installer tool is useful but if you are careful you can drive it in slowly around the edges until flush with the carrier. Then grease or oil the flange seal surface so it won't cut the new seal when you install it. Install the flange, washer and nut, and tighten the nut until you feel decent resistance. Now count the threads and look for your marks made at the start. You creep up on the final tightness so that the two marks line up EXACTLY as before.
 See the cuts lined up? This is key to the job being a success. Take your torque wrench and see if the reading is the same as before. It should be. Mine are always looser than they should be so I give the nut a TINY bit more so that I can get at least minimal torque. If your torque reading was proper for used gears- leave it alone. Replace the cover if removed, fill the rear with oil to the proper level, hook up the driveshaft, replace the wheels, adjust the brakes, drop the vehicle down, and you are done. The RIGHT way.
Last edited:


