

DIY and what not to do heater core install procedure
With winter coming its time to start thinking about fixing the leaky heater core you bypassed earlier in the summer. I made about every mistake possible so you don't have to. Your welcome. First things first the heater core is located and accessed under the hood, passenger side inside the big black box bolted to the firewall. You can follow the 5/8" and 3/4" heater hoses from the water pump on the front of the engine to where they attach to the heater core.
Difficulty:
-Fairly straightforward, some annoying parts
Time required:
About 1 - 2 hours for direct heater core replacement
expect an afternoon if you address some optional areas while your in there
Tools / supplies required:
7mm socket
8mm socket
10mm socket
11mm socket
1/4'' socket
flathead screwdriver or similar prying / scraping device
silicone sealant
drain basin
laquer thinner / paint thinner (optional)
well hopped pale ale or wine
Step 1:
Drain about half the cooling system. Its not necessary to drain the entire system just enough it wont overflow when the heater lines are disconnected. This can easily be done by loosing the drain valve on the lower passenger side of the rad. its located inside a 1.5" hole on the bottom of the rad support. This is also a good time to have a look at the rad hoses.
Step 2:
Remove the wiper arms. Lift up on the arm and slide the tab outward with a flathead screwdriver

Step 3:
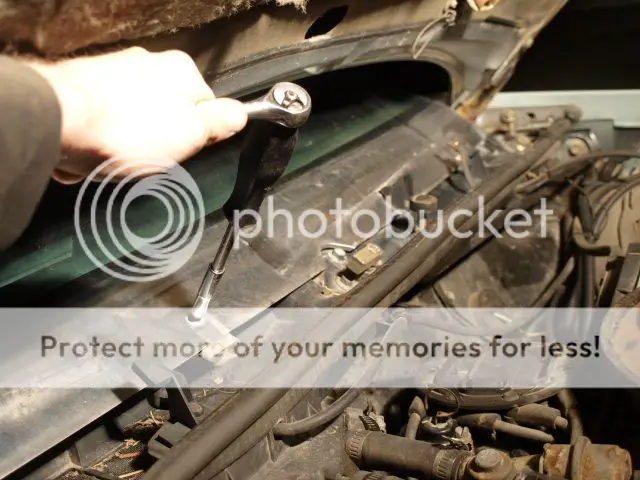
Remove the Stainless Steel cowl trim along the lower edge of the windshield
4 screws 7mm (2 are in the wiper bump stops)
Step 4:
remove the rubber seal along the back side of the engine compartment. You only need to remove the half off the heater box

Step 5:
Remove the plastic screen between the firewall and the rubber seal you just removed. To do this you will need to remove the washer sprayer nozzle on the passenger side of the vehicle. Don't bother with the larger screw to remove the sprayer nozzle from the mount, you need to remove the entire mount.
4x 7mm screws (including sprayer mount)

Step 6:
Remove the passenger side mounts the Stainless Steel trim screws to. You may have to remove the JB weld looking cement stuff to get these nuts off. I used a flathead and gave it a light tap and it chipped and cracked off fairly easy.
4 nuts 11mm

Step 7:
Remove the blower fan, electrical connections and vacuum lines from the blower fan and AC in that area.
5 screws 1/4" for blower fan

Step 8:
Remove the little box thing located beside the AC canister
2 screws 1/4"

Step 9:
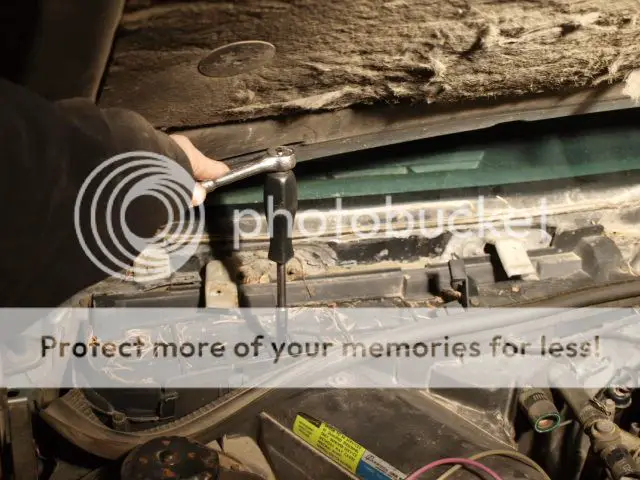
Remove the screws on the heater box cover. This is the entire top you've been removing parts from.
9 screws along the outside edge 8mm
2 screws in the center 1/4"
4 bolts in the firewall 10mm


DON'T MISS THESE TWO. ASK ME HOW I KNOW
With winter coming its time to start thinking about fixing the leaky heater core you bypassed earlier in the summer. I made about every mistake possible so you don't have to. Your welcome. First things first the heater core is located and accessed under the hood, passenger side inside the big black box bolted to the firewall. You can follow the 5/8" and 3/4" heater hoses from the water pump on the front of the engine to where they attach to the heater core.
Difficulty:
-Fairly straightforward, some annoying parts
Time required:
About 1 - 2 hours for direct heater core replacement
expect an afternoon if you address some optional areas while your in there
Tools / supplies required:
7mm socket
8mm socket
10mm socket
11mm socket
1/4'' socket
flathead screwdriver or similar prying / scraping device
silicone sealant
drain basin
laquer thinner / paint thinner (optional)
well hopped pale ale or wine
Step 1:
Drain about half the cooling system. Its not necessary to drain the entire system just enough it wont overflow when the heater lines are disconnected. This can easily be done by loosing the drain valve on the lower passenger side of the rad. its located inside a 1.5" hole on the bottom of the rad support. This is also a good time to have a look at the rad hoses.
Step 2:
Remove the wiper arms. Lift up on the arm and slide the tab outward with a flathead screwdriver

Step 3:
Remove the Stainless Steel cowl trim along the lower edge of the windshield
4 screws 7mm (2 are in the wiper bump stops)

Step 4:
remove the rubber seal along the back side of the engine compartment. You only need to remove the half off the heater box

Step 5:
Remove the plastic screen between the firewall and the rubber seal you just removed. To do this you will need to remove the washer sprayer nozzle on the passenger side of the vehicle. Don't bother with the larger screw to remove the sprayer nozzle from the mount, you need to remove the entire mount.
4x 7mm screws (including sprayer mount)


Step 6:
Remove the passenger side mounts the Stainless Steel trim screws to. You may have to remove the JB weld looking cement stuff to get these nuts off. I used a flathead and gave it a light tap and it chipped and cracked off fairly easy.
4 nuts 11mm

Step 7:
Remove the blower fan, electrical connections and vacuum lines from the blower fan and AC in that area.
5 screws 1/4" for blower fan

Step 8:
Remove the little box thing located beside the AC canister
2 screws 1/4"

Step 9:
Remove the screws on the heater box cover. This is the entire top you've been removing parts from.
9 screws along the outside edge 8mm
2 screws in the center 1/4"
4 bolts in the firewall 10mm


DON'T MISS THESE TWO. ASK ME HOW I KNOW

 Now its time for that Pale ale I told you to get with your supplies.


