BAGGAH2-(Harley-Davidson Project Thread)

Status
Not open for further replies.

Kwik_Cutty88

Royal Smart Person
Nov 22, 2011
1,173
662
113
Coastal North Carolina
A little bit of an update. All the major stuff is here, I'm running tomorrow to grab all the gaskets, seals, and other ancillary items.

I decided on a Jim's "FAT 5" 5 speed overdrive transmission. I originally wanted the Baker OD6, but it was on backorder. I've been waiting 3 months (so far) for my Holley Terminator EFI, and Aeromotive Stealth fuel tank for my Cutlass. So needless to say I'm just sick of back orders right now. Plus my buddy is a Parts Unlimited dealer and was able to get me a pretty good price. This transmission is supposedly a LOT stronger than stock due to the gears being wider.

9A5017E3-AC7C-4506-94EB-48A9205F5199_4_5005_c.jpeg
DF353FE2-2501-48C3-A17A-B481A871DA4A_4_5005_c.jpeg


Here's some comparison on the transmission ratios:

STOCK REVTECH 6 SPEED JIM'S FAT 5 OVERDRIVE
1ST 3.24 2.93 2.91
2nd 2.21 2.08 1.93
3rd 1.57 1.53 1.31
4th 1.23 1.24 1.00
5th 1.00 1.00 .886
6th - .893 -

It showed up in about 3 days, the kit is really nice and mostly complete. It did not come with a clutch cable o-ring, speed sensor block off (the speed sensor is moved from the transmission case, to the trap door), or oil spout spacer (more on that later).

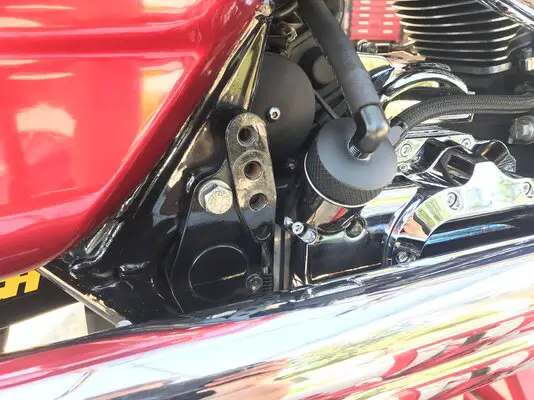
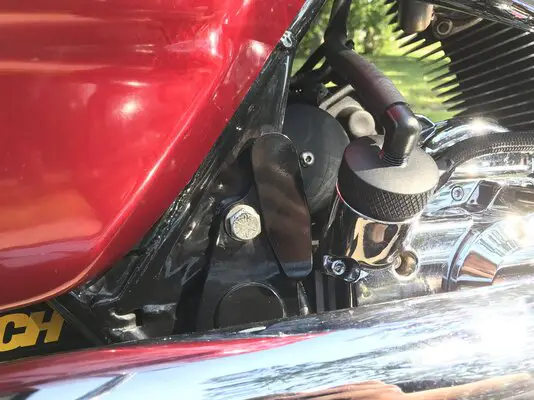
This transmission is advertised as being .560" wider than stock, so although fitment is listed for my motorcycle, its not a direct drop in. I did some test fitting this week, and its going to work, but it's a really tight fit. Some massaging to the exhaust bracket is required. As well as a spacer for the engine oil spout so it will clear the wider transmission trap door. These early twin cam bikes normally have a rubber hose for the top end oil drain back into the crank case, but mine has an aftermarket chrome hardline. To make it easy, I'm going to make up a short AN line (the case fittings are 1/4" NPT) with some trick 45 degree swivel fittings from Vibrant Performance.

I'm hoping to start digging into it this week. The transmission case is clean, and all of the original bearings and seals have been removed.


The chrome is actually pretty nice. You can see in this photo why the oil spout spacer is required. It needs to clear that trap door that is so much wider.
IMG_0310.jpg


I really question the ".560" wider than stock." It damn near almost sticks out as far as the cam chest cover.

IMG_0311.jpg
 
  • Like
Reactions: 1 user

DRIVEN

Geezer
Apr 25, 2009
8,074
14,533
113
*CENSORED*
I'm waiting on a 6 speed delivery myself. I've been seeing a lot of shinys in the oil when I service it. Decided to just upgrade rather than repair. Wish I had Baker money. Another Ultima for me.
 

Kwik_Cutty88

Royal Smart Person
Nov 22, 2011
1,173
662
113
Coastal North Carolina
I got my bike all buttoned up today. It shifts fantastic! Luckily I did not have to modify the exhaust bracket, and there is just enough clearance there.

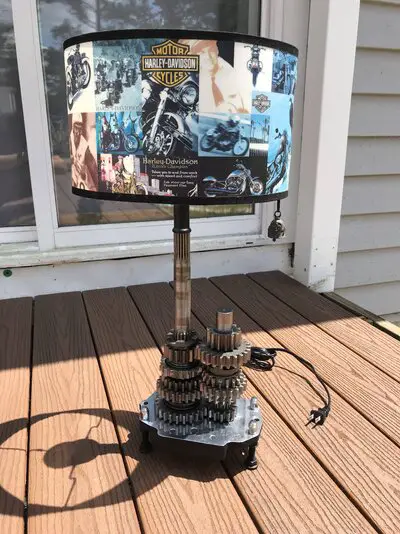
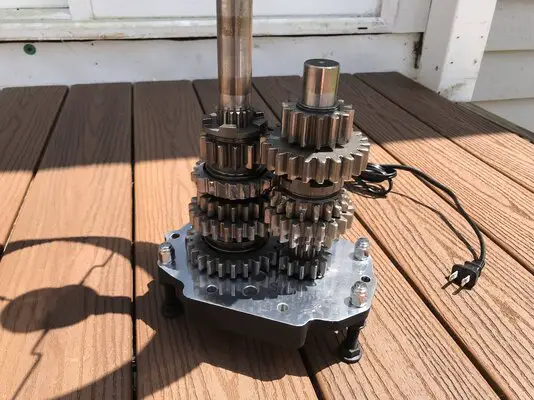
I ended up making a lamp for my buddy, so he can have some parts off his old bike. I was able to run the wiring through the main shaft so its all hidden. I just chopped up a $5 lamp from a thrift store. I found this vintage lampshade on eBay that seemed to fit the theme well, and even hung his original demon bell ofof it.
4711DCD8-FF17-4000-B177-E62C3B3DAF10.jpeg 34FFEB7A-0F41-490F-A50F-E01AEF6D198F.jpeg

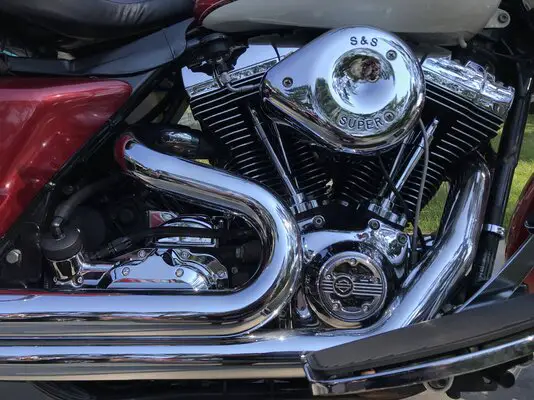
As you can see, the Fat 5 overdrive is a snug fit.

9FD36C82-D898-4710-BFBB-AC3EDB7E4C7A.jpeg 2E1B6783-D3EA-477B-AB88-1489030A53CE.jpeg 331C7D41-6B1E-4441-8C4B-12EE5E1B0F31.jpeg B38607FC-8D12-4BBB-BFDC-032ABF467DF0.jpeg 141568CA-3262-411B-9CB6-0FB8A2A4A122.jpeg
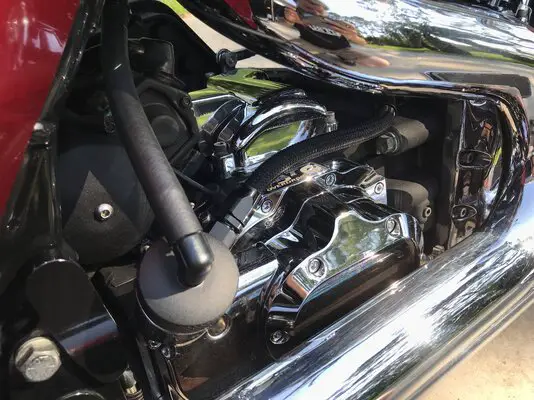
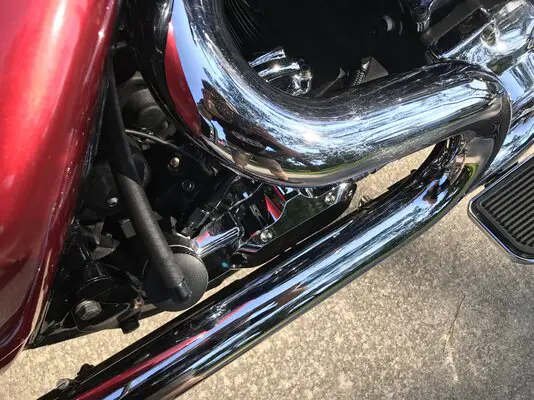
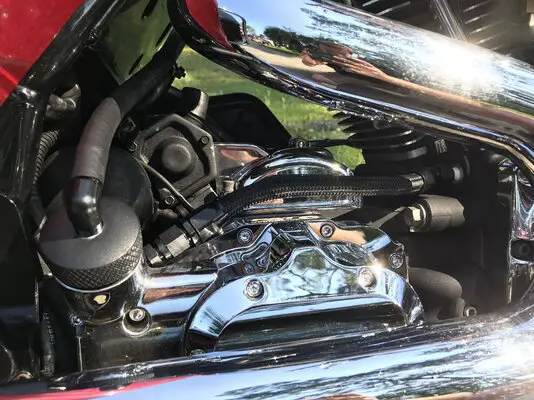
I decided to ditch the chrome oil drain line, and just made this neat -6AN line. I think it turned out well.
CCB70B9D-2B13-4FA1-AC96-2EBB151D2A1C.jpeg
And while I had some downtime, I made these passenger peg blockoff plates. I know Kuryakn makes some, but theirs are secured with a bolt, and I wanted these to be flush. Just made with some sheet aluminum, and secured with double sided tape. You can see in this photo I also painted the starter cover factory texture black. There are a chrome cover here and there that I like, but not that one.

DFC41F68-984A-45C4-8D6F-4B78EF57727C.jpeg
59FDD90A-A1CA-4ABB-963A-777C732EFE9C.jpeg
 

Kwik_Cutty88

Royal Smart Person
Nov 22, 2011
1,173
662
113
Coastal North Carolina
I had been struggling with what seemed like an intermittent fuel delivery issue since early fall. I went out for a ride one day, and the bike died. I pulled the air cleaner off to take a look, and there was no fuel flow through the main jet. I got it towed home, and pulled the carb apart to find everything mostly normal. There was a small bit of trash that came out of the main jet, but nothing that seemed concerning. I threw it back together and it ran fine! A few days later I went about for a ride, after about 50 miles we stopped and got something to eat. I only got about 2-3 miles away from the burger joint when the bike died and did the same thing as before. I had checked the vacuum operated petcock the first time and it was functioning-but it was now clear it had some sort of intermittent issue. I normally don't like to just delete factory features if I can help it, but the goal with this bike is to just jump on and ride it, so I opted to replace with a normal style petcock. I chose a Pingel with -6AN outlet. Adapting the Super E carb from a barb fitting to AN is pretty easy, Pingel offers a conversion fitting. There was really nothing to this swap, but I did have to order a 120 degree AN fitting to get the line to fit exactly how I wanted. I covered the line with heat sleeving just in case. I also modified the horn bracket slightly, by cutting off the ear where the choke for the original carburetor mounted.
IMG_1310.jpeg
IMG_1330.jpeg


IMG_1342.jpeg
IMG_1344.jpeg

IMG_1341.jpeg
IMG_1345.jpeg

IMG_1346.jpeg


I've also been wanting to upgrade the stopping power for quite some time now. I am by no means an incredibly skillful rider, but I felt like I could easily ride quicker than the stock brakes would allow. Although I had nice lines, and upgraded floating rotors, they still sucked. Really mushy and not confidence inspiring. I originally planned to do '08-later Brembo brakes, but ended up selling those. I've seen the "performance bagger" guys rant and rave about radial mounted sport bike calipers, so I really wanted to give that a shot. Finding chromed sport bike calipers proved to be quite a challenge. I originally was going to send a set out to have them chromed, but I was quickly discouraged by the chroming quote. My next plan was to have a set powder coated gloss metallic silver, which I thought might look ok and match the subtle silver pinstriping on the tank. But then (thanks to daily checking of saved searches on eBay) I found an already chromed set of mono block Tokico calipers off of a 2011 Suzuki GSXR 1000. From the quick research I did, it seemed like these were not quite as nice as Brembo M4's (Brembo's entry level aftermarket radial caliper), but they seemed to be a nice budget caliper that would work well. They are 4 piston, and the pistons are actually the same size as the Harley-Davidson Brembo calipers I was thinking of using originally. The supposed benefit with radial mounting is that the caliper is anchored at both ends, and all the force is applied in the same plane as the wheel, rather than off at an angle like an axially mounted caliper (check the last side by side photo if you can't visualize this).
Screen Shot 2021-12-27 at 8.09.25 PM.png

The aftermarket had a few different bracket options available. Ranging from $100/set to $300/set. I opted for the "cheap" brackets-it hasn't seemed to have bitten me so far. Typical China stuff, crappy aluminum polish job, I had to clean the tapped holes, but there was a decent hardware kit (bolts, washers, and shims) provided. The benefit with this bracket setup was that I'd be able to run the larger 11.8" rotors (factory on the older bikes like mine are 11.5") It just requires some shimming of the brackets to get proper caliper spacing and alignment. I ordered nice stainless rotors from EBC that matched my wheel design. I was originally disappointed to see this rotor had round bobbins, but EBC actually has a square drive bobbin, and the round thing is just a cover. The benefit of this is that the hub of the rotor pushes on a flat of the bobbin-more surface area and less change of pulsating and shuddering.
Screen Shot 2021-12-27 at 8.32.45 PM.png
Screen Shot 2021-12-27 at 8.17.40 PM.png

It took me quite a while of removing, shimming and re-installing to get the spacing and alignment to where everything was happy. But in all honesty this was a bolt on affair. The factory lines were juuuuust too short to work. They have a 90 banjo on the caliper end which was just going to bind up the brake line. I ended up finding this factory style T from Russell which has -3AN fittings on each end.
Screen Shot 2021-12-27 at 8.16.56 PM.png

From there I was able to order custom length lines from Galfer. This worked out really well, and the benefit is it is a true 3 piece brake line up front, so if I need/want to change any one I can with ease. The ordering process was really simple. You fill out the order sheet (length, banjo shape, any extras) and then email. I had custom length lines in 3 days! I also chose Galfer for the brake pads, they seem to be working well so far. I filled the system up with Motul Dot 5.1 fluid.
A little extra touch, I removed the badging from the factory calipers and put them on the new ones, it adds a little pop I think. Since the bolts are just black oxide coated, I ordered stainless ARP's to replace them. So far, this seems like a worthy upgrade. The brake lever actually has some feedback now, and the bike seems to be stopping better and better as the pads/rotors bed in. I may end up swapping to the '08-later Brembo master to see if that makes a difference as well. I was worried that the brakes would feel "touchy" and easy to lock. That is definitely not the case, in fact I have not locked the front yet even under hard braking--maybe that is a potential issue that I need to sort out. The brake lever is firm, but progressive. However, this upgrade has really accentuated how loose the front suspension is. The front end dive is really noticeable now, and makes the bike feel uneasy under hard braking. That will definitely need to be addressed soon. As for the rear, it is very easy to overpower the 130 section width tire. I plan on rebuilding the rear master and swapping to the '08-later brembo caliper with nice pads, lines, fluid and rotors. That should improve rear braking enough.
IMG_1465.jpeg
IMG_1467.jpeg

IMG_1466.jpeg
IMG_1468.jpeg

Screen Shot 2021-12-26 at 3.36.36 PM.png
 

Attachments

  • IMG_1343.jpeg
    IMG_1343.jpeg
    1 MB · Views: 95
  • Like
Reactions: 1 user

Kwik_Cutty88

Royal Smart Person
Nov 22, 2011
1,173
662
113
Coastal North Carolina
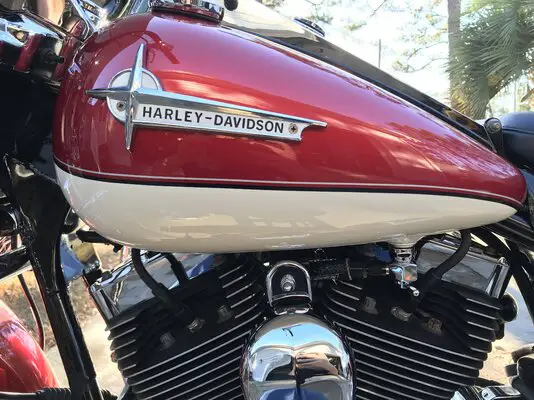
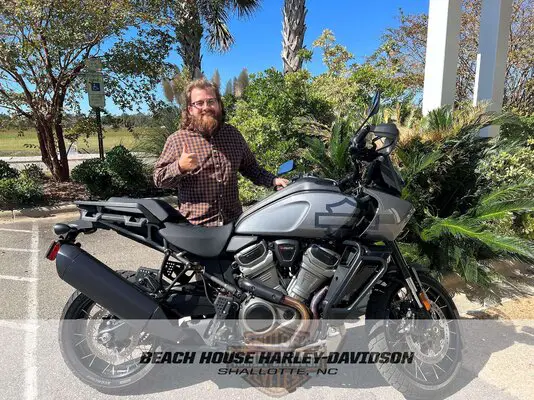
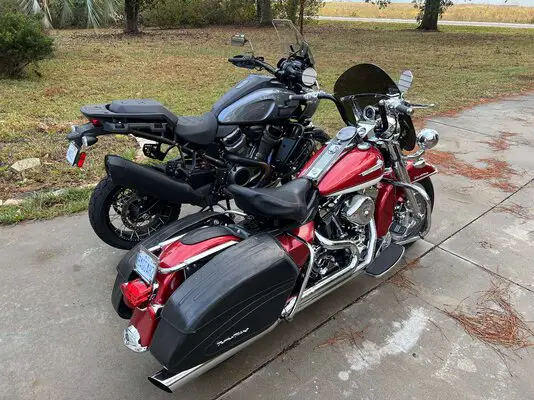
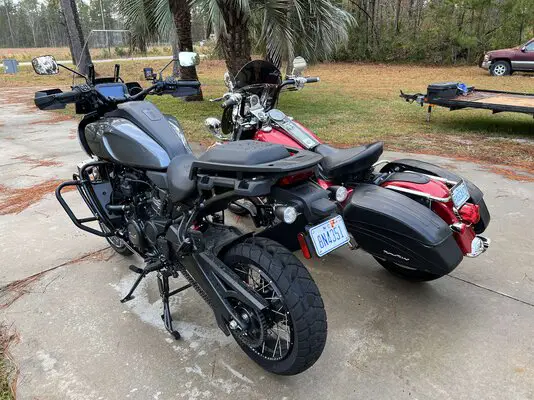
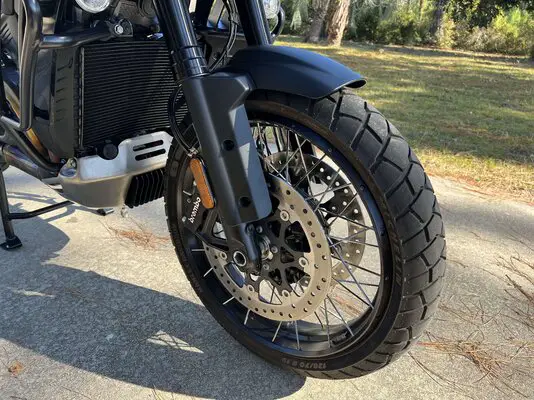
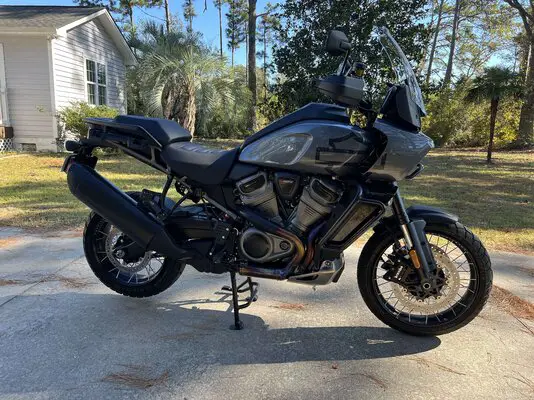
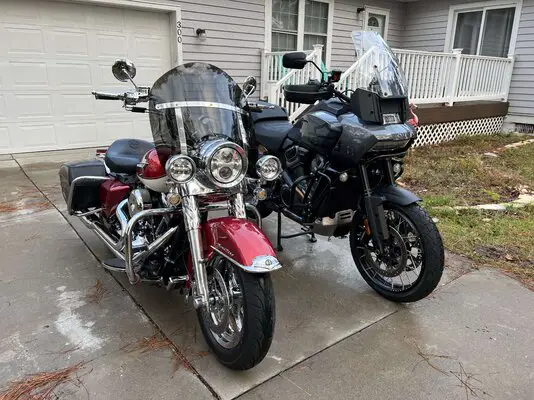
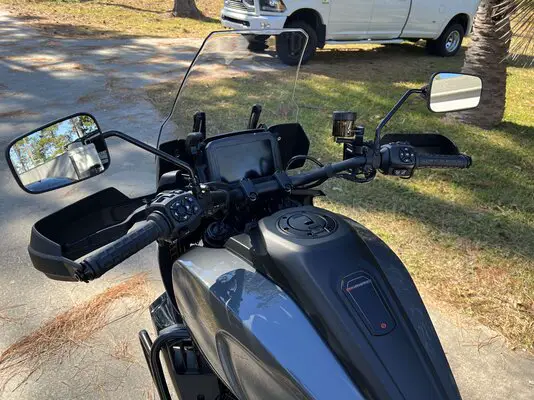
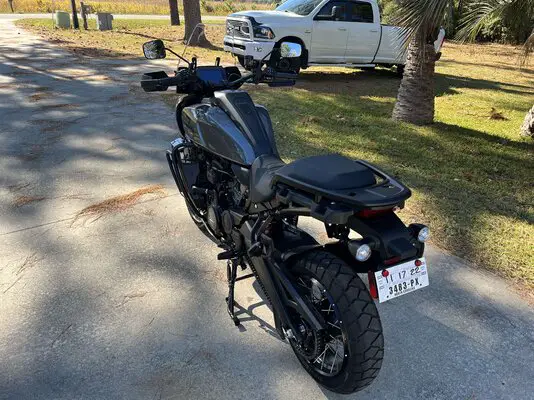
I haven't really done much to my Road King, but I did add a second motorcycle to my fleet. In the summer of '21 I test rode Harley-Davidson's Pan America adventure bike, at the time I had no interest in buying another motorcycle-but was really curious how this motorcycle rode. I immediately fell in love with the way it looked, rode, sounded, so I saved up for about a year to get one. I always had the intention of keeping my Road King. I wanted a new one, but ended up finding a ‘21 used with 1540 miles in perfect conditon. It was Harley Davidson Certified pre-owned which means it carries a powertrain warranty until 2024. This one is a top opinion "special" model. Which includes adaptive ride height (the suspension lowers at a stop and automatically adjusts for cargo weight) and laced wheels. I could probably write a book on all the gadgets and features this thing has. Being that this was my first new anything, and the first thing I've taken a loan out on, I was worried I would have buyers remorse-but I'm happy to report I've had none of those feelings. I really love this motorcycle already.

IMG_2836.jpg
IMG_2898.jpg
IMG_2897.jpg
IMG_2894.jpg
IMG_2855.jpg
IMG_2854.jpg
IMG_2853.jpg
IMG_2852.jpg
 
  • Like
Reactions: 2 users
Status
Not open for further replies.

GBodyForum is a participant in the Amazon Services LLC Associates Program, an affiliate advertising program designed to provide a means for sites to earn advertising fees by advertising and linking to amazon.com. Amazon, the Amazon logo, AmazonSupply, and the AmazonSupply logo are trademarks of Amazon.com, Inc. or its affiliates.

Please support GBodyForum Sponsors

Classic Truck Consoles Dixie Restoration Depot UMI Performance

Contact [email protected] for info on becoming a sponsor