BUILD THREAD Project Olds Cool (Recognition!!)

69hurstolds

Geezer
Supporting Member
Jan 2, 2006
8,184
17,566
113
  • Like
Reactions: 4 users

Rktpwrd

Builder of Cool Shjt
Supporting Member
Feb 2, 2015
4,166
23,915
113
Calgary, Alberta, Canada
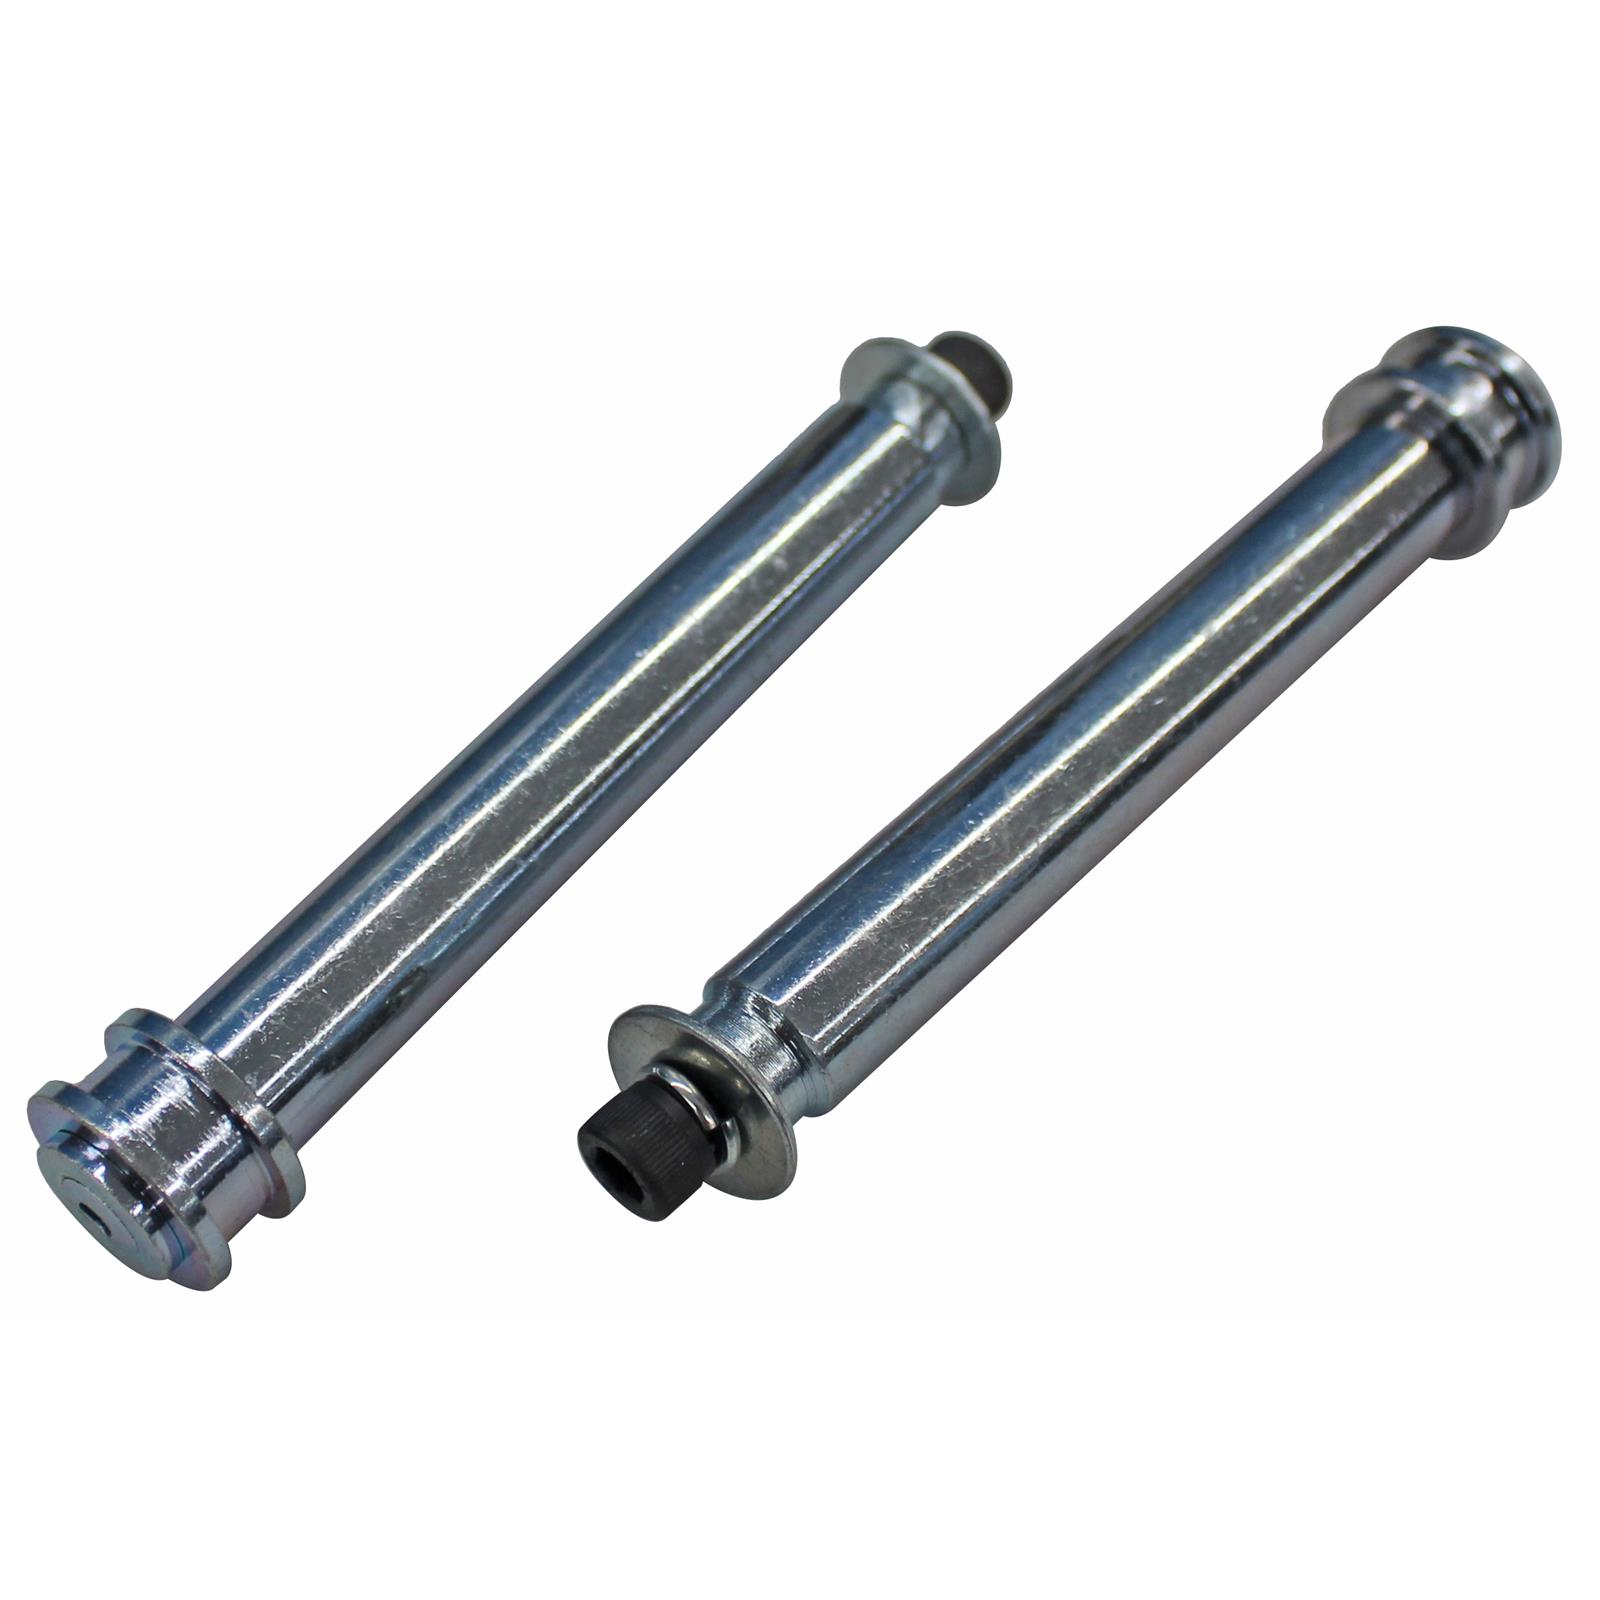
Couldn't find any roller bushings for your car on Dorman website. I did find this at summit racing.


Interesting. Not what I thought a door hinge roller pin kit would look like. Trying to figure out what the 2 bolts are for tho. Strikers in the door jambs???
 

Texas82GP

Just-a-worm
Apr 3, 2015
7,986
18,691
113
Spring, Texas
Very cool of 69hurstolds, our resident part number expert. Donovan, if you are Mr. Riddler, and you are, I think he should be Mr. New Old Stock.
 
  • Like
  • Agree
Reactions: 4 users

awdblazer

Master Mechanic
Dec 12, 2013
314
81
28
i bought those rollers but i couldnt find any for a gbody had to get them for a a body
 
  • Like
Reactions: 1 user

jlcustomz

G-Body Guru
Nov 22, 2011
983
1,096
93
Flush markers looking good. Love to see others that ain't skared to go at it.
I recently got me some vette panel adhesive for adjusting some edges & my roof spline. Qt cost me 50 bucks , but like it a lot better than the all metal or some others I tried. Almost like jb weld.

Those hinge parts pictured look like the hold open rollers , NOT the actual opening part of hinge.
 
  • Like
Reactions: 2 users

Rktpwrd

Builder of Cool Shjt
Supporting Member
Feb 2, 2015
4,166
23,915
113
Calgary, Alberta, Canada
i bought those rollers but i couldnt find any for a gbody had to get them for a a body

Good to know, thanks. Got a P/N or link to the ones you used?


Flush markers looking good. Love to see others that ain't skared to go at it.
I recently got me some vette panel adhesive for adjusting some edges & my roof spline. Qt cost me 50 bucks , but like it a lot better than the all metal or some others I tried. Almost like jb weld.

Those hinge parts pictured look like the hold open rollers , NOT the actual opening part of hinge.

Thanks for the tip on the Vette adhesive. I’ll enquire about it the next time I’m at my supplier. How’s it sand though?

And I’m looking for the roller, bushing and pin for the upper hinge. I can’t believe no one makes a kit for it? Might have to go with a new set that’s fully assembled already.

BA5F6225-FCDE-4423-94F8-69C0FECEF195.jpeg
 
  • Like
Reactions: 2 users

69hurstolds

Geezer
Supporting Member
Jan 2, 2006
8,184
17,566
113
I wouldn't know much about rebuilding door hinges. I've always bought new ones. They were still available from the dealerships last time I had to do door hinges and they weren't $9,000 per set. Plus I have a set on the shelf that's got pre-arranged plans...

Those roller pieces may not work from Summit. Not exactly sure how those are assembled. I had no luck finding separate rollers/bushings.

But- I did find that Goodmark has repros. Complete hinge assemblies that won't break the bank if you cannot find suitable bushings.

At Rockauto, you can get the whole set upper/lower for 107 USD with the 5% discount, plus tax/shipping. That equates to only about $2,000 CAD total after shipping. :) Interesting it wasn't listed under 1980 Calais or Salon. Only Supreme.

Just another option.

G-body Repro Door Hinges Rockauto.jpg
 
  • Like
  • Haha
  • Informative
Reactions: 5 users

Rktpwrd

Builder of Cool Shjt
Supporting Member
Feb 2, 2015
4,166
23,915
113
Calgary, Alberta, Canada
It would seem I’m getting a bit behind on updating this here ‘ol thread. Which is odd, because I rarely get the work done faster than I can post about it.
So here goes:

Once the outer face of the fender was in finished body work, I turned my attention to the inside just like last year. I knew the inside of this fender was in pretty rough shape, but I wasn’t expecting it to be quite this bad, or even worse than the passenger’s side.
Here’s what I had to work with:

98EBE45E-2F3F-4C83-8524-B0F3DB3D0C98.jpeg


EDF55D89-6A02-44C7-B4C5-D533188A05B3.jpeg


321BC65F-6A8A-43A0-B2ED-63C1A3FC08CF.jpeg


44B9355F-E557-4C42-9FD2-85CCD96F8FDC.jpeg

6990233F-F36C-436B-8DEA-CBD456866B55.jpeg


The first order of business was to compare the factory holes in the other fender to the ones in this one, and mark all the rest for elimination. Because symmetry.

DCFBC385-CAE5-4AB1-A26D-90D1B558ECDF.jpeg


These holes were for the factory cruise control transducer, which quickly went away when I did the engine swap. Why? Because this is a street cruiser and cruise will rarely get used, plus it was uglier than a mud fence. Enough reasons for me.

The metal fusing glue gun made short work of the holes:

12DEF5F5-3E94-4AAD-B14B-7CD580CEAFA9.jpeg


Ground ‘em down and metal finished them out:

863A7CB9-F3BC-426F-9B34-7E64436124AC.jpeg


Just to be on the safe side and to ensure the repaired area was nice and flat, next I profiled the area, skimmed it with some putty, and blocked it out.

4724D132-6CCD-43F6-A2FC-993F5BD50581.jpeg


While I was at it, I skimmed the backside of the marker light patch, and smoothed it out as well. No need for perfection here, I just need it to be smooth and invisible once it’s painted.

5D98970B-EAFE-4DEC-B17C-18EB83E7CC45.jpeg


With that little bit of filler work done and outta the way, it was onto getting the rest cleaned up and ready to go. There’s a lot of bare metal here in these next few pics, but it was honestly the easiest way to go about it: Start from (almost) scratch:

E8D753B7-6F89-46F0-81B2-F1FD0227B456.jpeg


54ADC734-B940-401C-9034-CDF3D7EE0182.jpeg


C9EE1DC7-19AB-4EDF-AA75-E6CA7011ED36.jpeg


It doesn’t look like it, but there was an absolutely obscene amount of effort that went into addressing all this stuff. The rusty areas, smoothing edges, feathering out old paint, and scuffing everything in sight.

One particularly concerning thing I found was some very well advanced rust on the backside of the inner fender lip. It was only visible with an inspection mirror, and that’s what I needed to see to remove it too.

Think grinding is easy? Try doing it through a mirror where your depth perception is off, and everything’s backwards!!
Not fun.

7B616E39-B7F3-410D-9E80-7683523B65F9.jpeg


All the grinding in this area was done with a trouble light and the edge of a cutoff wheel, because that’s the only thing that would fit in there. The rust was so advanced that I estimate if I hadn’t caught it at this stage, it would’ve only been a year or two before it rusted through to the outside.

Once I was confident that I had removed 99% of the corrosion, it was time to treat all the inaccessible areas and seams with rust converter:

A7517045-ED90-42AD-BF5D-D4A332F3CEF1.jpeg


No pics, but once the converter had cured, it was back to scuffing and sanding the excess off until everything was ready. And yes, I made especially sure that the areas on the backside of that inner lip got a VERY liberal coating with the converter.

It was at this point that both sides were now ready for paint and primer. On the weekend, I got the shop and the fender set up to spray, the working quarters are as tight as ever.

AE786005-B37D-45E5-843C-7000250813C6.jpeg


Same recipe as always, two medium-wet coats of epoxy (shown in white here)...

43F527E3-B2AA-4F8E-8A50-EC3BAD19E31D.jpeg


...followed by four heavy wet coats of high build primer-surfacer. Looks pretty good, it’s always nice to see things go back to one uniform color again.

CFB6B99A-23E5-49FC-A2D1-4259D222DC82.jpeg


AF8E58D6-1566-49AF-8F5F-A57C795E053F.jpeg


2D25D33E-82EA-40D3-895E-5644926B1244.jpeg


I’m ready to flip the fender over and get some color on the inside now that the outside is primed, but there’s a few fasteners that need to be painted at the same time. So with that being said, I stayed after work a bit tonight and did some sandblasting in the shop’s blast cabinet.

6A779D40-4E3A-416D-AC98-907E65F4116A.jpeg


After separating the stuff that needs to be white from the stuff that needs to be black, I set the black stuff up and painted it tonight.

Undersidesfirst...

70947963-DC91-4120-93F4-4BA6E7A384DC.jpeg


... then the topsides:

83C47FAF-AE96-44DE-BB30-782F6B6C0C4E.jpeg


This is the stuff that needs to be painted white.

B10774D2-6112-44EE-A506-C4CE451948DF.jpeg


But unfortunately I found a couple more bolts that need to go white as well. So no shooting color tonight unfortunately. I’ll blast those last couple after work again tomorrow, then maybe I can get some color on the remaining fasteners and the inside of the fender after dinner.

Thats it for now gents, until the next one!
Thanks for looking in on the progress.

D.
 
  • Like
  • Winner
Reactions: 15 users

GBodyForum is a participant in the Amazon Services LLC Associates Program, an affiliate advertising program designed to provide a means for sites to earn advertising fees by advertising and linking to amazon.com. Amazon, the Amazon logo, AmazonSupply, and the AmazonSupply logo are trademarks of Amazon.com, Inc. or its affiliates.

Please support GBodyForum Sponsors

Classic Truck Consoles Dixie Restoration Depot UMI Performance

Contact [email protected] for info on becoming a sponsor