The "Other" Project

Status
Not open for further replies.

mikester

Comic Book Super Hero
Mar 10, 2010
2,921
3,687
113
Small town NY
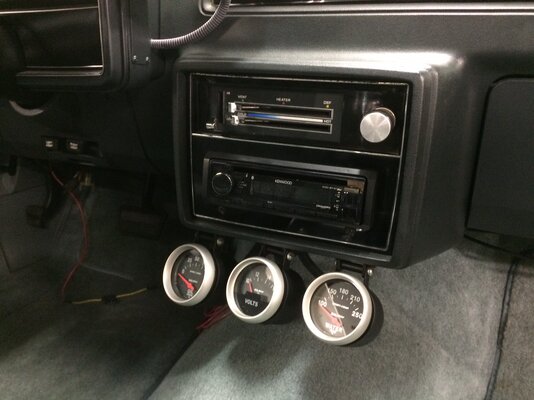
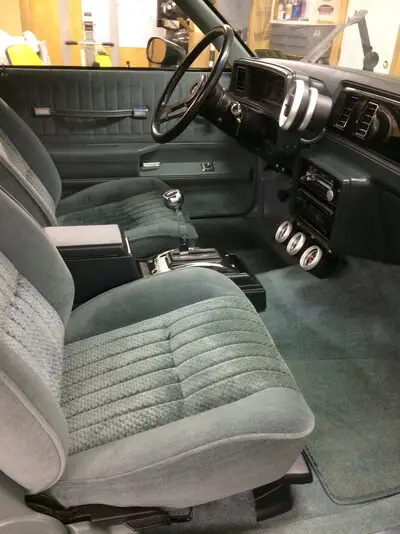
Thought you folks might like to see some progress. The interior is almost done. Bought this Kenwood radio just before Christmas at a store my buddy works in. The manager hooked me up. I used a set of 6x9 Alpine speakers in the back that were previously in my sons '05 Impala that he sold. Always nice to have something sitting on the shelf !
I still have to hook up the shifter and bolt it down to the mount on the floor but at that point the whole interior will be finished. IMG_2241 (004).JPG
IMG_2247 (004).JPG

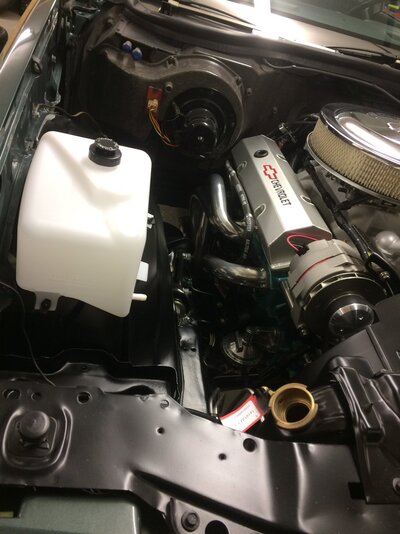
Stuff under the hood has been moving along too. Slow but getting there.
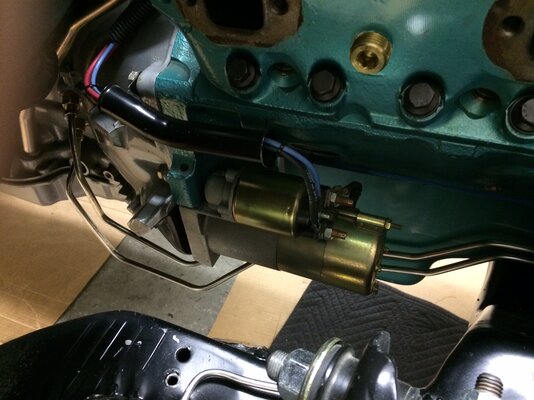
I modified the heck out of the stainless lines for the TH350 but I got them to fit the TH400. Lots of tweaking and rebending but they fit. Theyre about 1 3/4" away from the header tube at the back by the starter but I think thats fine. Time will tell.
Inner fender on the one side is back in and done.
I havent put the drivers side back in because Im still messing with some of the wiring due to a stupid mistake on my part. When I was running the new wire back to the bulkhead connector I bought all new Packard terminals. I was crimping the terminals with a ratcheting crimper that has a die for that type terminal. While I was crimping them I found out the die was too wide and it was distorting the hell out of the small tabs at the end of the terminal. Only on the male terminals. The female terminals dont have the little tabs. So I wound up filing the tabs off. I was also crimping the terminal on the wire. After it was back together I found a video done by American Auto Wire. The Packard terminal should have the first set of tabs on the copper strands. The second set of tabs goes on the insulation. Doing it the way I did it can eventually cause the copper core to break. It was a DUH moment.
I wound up buying the correct crimper and redid the wires that I made a month ago. Just glad I left some slack so I didnt have to redo the whole thing. Live and learn.
IMG_2172 (002).JPG

IMG_2249 (004).JPG
 
  • Like
Reactions: 4 users

mikester

Comic Book Super Hero
Mar 10, 2010
2,921
3,687
113
Small town NY
That is one very fine ride!!!

Thanks for the compliment. Ive been working on it for a long time. Funny thing is I'd rather be working on the wagon. Maybe because the wagon has more of my own choices/decisions in building it.
Ive really trying to get these cars finished before the summer. Ive been dealing with a health issue for the past 10 years and its getting harder to do the stuff that need to be done these days. If I was still 40 all this crap would be done in a couple of weeks. When I was younger I never had the time to work on cars due to life. Kids, house, parents, job. Now that Im older kids are grown, house is done, parents are gone, job is gone. Now its my health. Funny how that crap works.
 
  • Like
Reactions: 1 user

Max Headroom

Master Mechanic
Sep 8, 2011
420
389
63
I can identify with what you are saying in a big way. I just turned 66 and find that while I still have decent (not great) strength, I can't crouch or get back up without difficulty and bending to get into unusual places is, in some cases just no longer something I can do. This makes everything take longer. It also makes it harder to summon the energy to get started. I still love it but find it takes a lot longer to make the same amount of progress.

I have to say though, that your work is very sano and the results are beautiful.
 
  • Like
Reactions: 1 user

mikester

Comic Book Super Hero
Mar 10, 2010
2,921
3,687
113
Small town NY
Trying to button up the last few things on the 81 this week has become a pain in the butt as usual. LOL
Ive put in multiple 4 spd shifters over the years but Ive never installed a floor shifter for an automatic. I mocked up the bracket out of thin cardboard first. Test fit everything at least a dozen times to make sure the shifter would fit into the console right and the plate would fit. Brackets for everything were welded in. It was perfect.
Yesterday a guy that I know that builds cars came over to show me how to install the ratchet shifter. To be honest I assumed the cable would be able to stay within the console. I was totally wrong. I had to drill a hole in the front bracket that the console attaches to. The cable is going to go past the front of the console by at least 1 1/2" and it will be under the carpet. Anything less will have too much of a bend and the cable will bind up. Tried it every way and it binds.
Of course the carpet goes under the front of the console. The mass backing is thick. I think I can just slot the backing a little and the cable will fit right in. If anything it might just raise the carpet a little bit.
Now the fun starts. I have to drill the hole for the cable under the carpet. Cant move it. Not slicing it because the hole is going into the floor past the end of the console. No room to pull the front out. Its too stiff and will never clear the gauges that are hanging under the dash. They were attached to the bottom of the dash with lock nuts before the dash went back in the car.
So most of today will be spent taking the sill plates, seat belts, kick panels and seats back out of the car. Piss poor planning.
The only good thing thats come out of this is I'll know what to do when I start back on the wagon. LMAO
 
  • Like
Reactions: 1 user

mikester

Comic Book Super Hero
Mar 10, 2010
2,921
3,687
113
Small town NY
I know its been quite a while since my last post so its time for an update.
I lost the months of May and June due the the leg injury I had to deal with so Ive been taking it easy out in the garage. After drilling and slotting the floor and front console bracket I figured I was good to go. Well, nothing is easy right ? This whole thing taught me a lesson. ALWAYS read the instructions. LOL
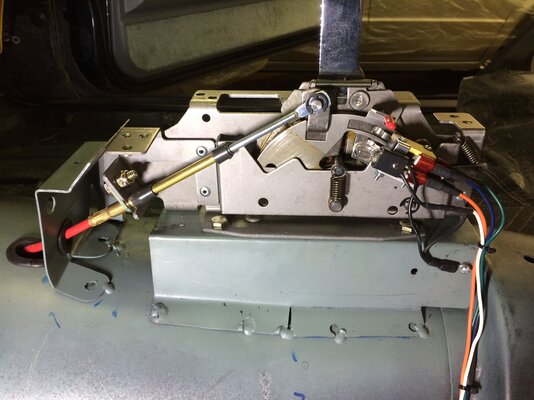
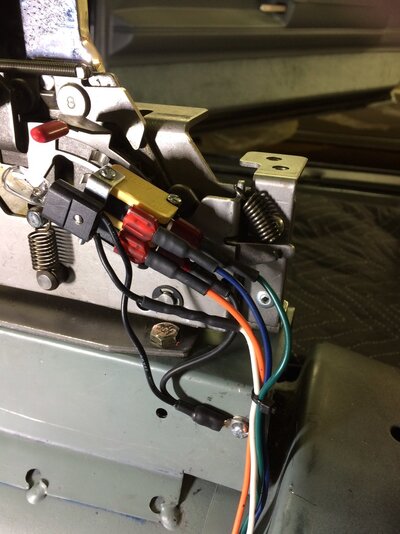
While I was test fitting everything I happened to look in the bag of parts that came with the shifter. It was like a "DUH" moment. Totally forgot about the micro switches and indicator light. I started a thread about the neutral safety switch. In the end I bought a relay from Painless to fix that issue. Had to pull some of the wires back out of the dash and tap into the power wire for the gauge lights to get a wire run to the indicator light. Reverse lights were easy.
This past Saturday I wanted to put some paint on the floor where I drilled the hole for the cable. Just used some self etching primer. I wound up opening the hole a little wider towards the right side since the cables kinda tight. Had to drop the back of the TH400 down again to get the end of the cable through. Just a matter of popping the mount out. When I put it in I had a friend guiding the cable as I was feeding it down. This time as I was feeding back up the brass end of the cable popped out and the cable wound up bending at a 90. I straightened it out but in the end I ran to the local speed shop and bought another one. I was pissed and it might have been okay but since its a pain in the butt to install I didnt want to do it again.
So all the wires to the shifter done. Now I have to put the carpet and seats back in.

IMG_2494.JPG


IMG_2495.JPG
 
  • Like
Reactions: 5 users

mikester

Comic Book Super Hero
Mar 10, 2010
2,921
3,687
113
Small town NY
Getting closer. Two more screws from the local hardware store tomorrow morning and the shifter and console will be complete. By noon I hope the seats, kick panels and radio will all be back together. Only thing that got screwed up is one sill plate. Pushed one of the dollys that the wagons on over it and crushed it. LOL

IMG_2499.JPG
 
Last edited:
  • Like
Reactions: 1 user
Status
Not open for further replies.

GBodyForum is a participant in the Amazon Services LLC Associates Program, an affiliate advertising program designed to provide a means for sites to earn advertising fees by advertising and linking to amazon.com. Amazon, the Amazon logo, AmazonSupply, and the AmazonSupply logo are trademarks of Amazon.com, Inc. or its affiliates.

Please support GBodyForum Sponsors

Classic Truck Consoles Dixie Restoration Depot UMI Performance

Contact [email protected] for info on becoming a sponsor