replace entire floor, or just sections?

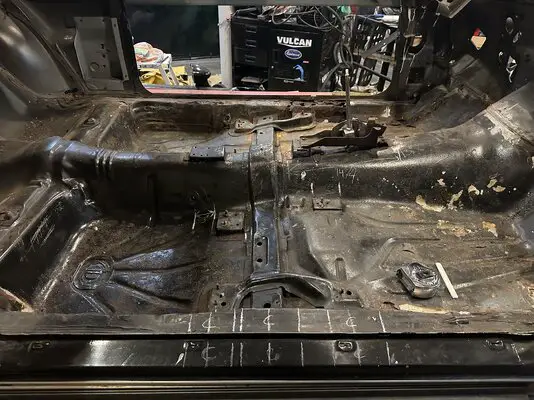
Well I can tell you my experience with my 87 442. The floor wasn’t great but even worse was both sides from front to rear with rust. So I decided I was going to replace everything. Now I’m no welder either but I bought a mig welder and a plasma cutter and watched a bunch of videos and jumped in. So here’s what I can say.
The plasma cutter was nice but not necessary.
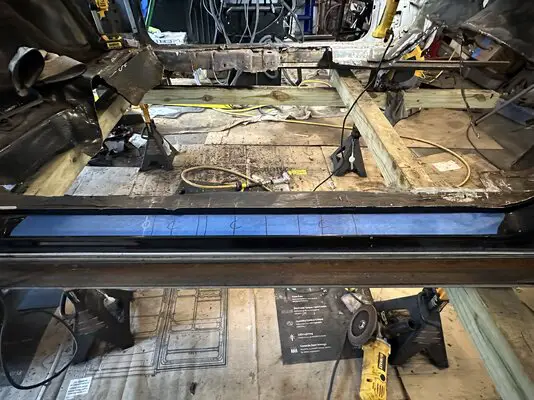
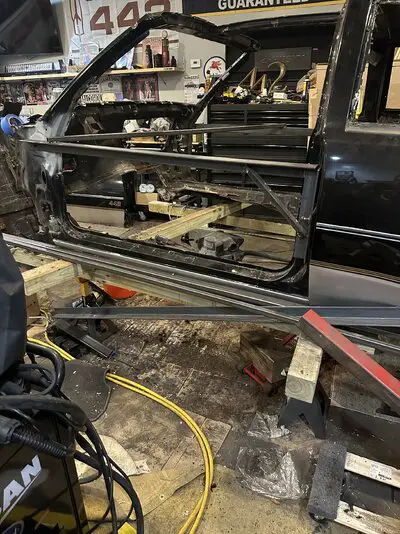
The bracing is definitely needed. I’d give you mine I used if you were closer ( I’m in north east Ohio)
Also the floor won’t come with the bracing and tunnel mounts that had to be added so lots of measurements before the floor is removed. I used blue tape on the sides and marked the measurements for the bracing and seat mounts.
Also when cutting the floor out don’t cut up the sides where the new floor will attach or you will need to patch it in.
I’ll include some of my pictures. Mine came out solid and nice. Just take your time. And definitely want that engine and trans out. Just my opinion.
 

Attachments

  • IMG_3694.jpeg
    IMG_3694.jpeg
    2.6 MB · Views: 3
  • IMG_3692.jpeg
    IMG_3692.jpeg
    2.1 MB · Views: 3
  • IMG_3650.jpeg
    IMG_3650.jpeg
    2.2 MB · Views: 3
  • IMG_3633.jpeg
    IMG_3633.jpeg
    2.9 MB · Views: 3
Been there, done this, the pictures, if I posted them, are under my Project Regress post line. For myself I went with two complete panels that stretch from the toe board flange to the kick up for the rear seat. To use them you need to have a good tunnel and inner rocker panels as they attach to both. it is easier to understand if you can locate some pictures of what they look like. The biggest problem is that when G-Body cabins are assembled, they start with the floor pan and hang stuff off it. As it comes from the factory there is an outer flange to which the inner rocker panel is fuse welded. The patch panels don't normally come with that flange so you have to be ingenious when making your cuts. The other thing is that the pans come minus all the brackets and braces that lie under the seats, as well as the pedestals for the seat riser mounts. All that has to be harvested very carefully from your old pan before the damaged sections are removed. This means you have to locate and expose all the plug welds that the factory used to attach the various elements and drill them out, CAREFULLY!, so that you don't damage them. They all have to go back in once the new pans get burned in and finding replacements is not easy should you damage one or find one that is too badly rusted to reuse. All of what I have mentioned is structural, so just can't be ignored.
There is/are/used to be pan halves that came with a tunnel half included. When installed and welded together you got a new tunnel along with the floors. This is not a simple cut and run exercise as the tunnel is a longditudinal structural element. To work with it you have to gut out the interior completely and put in some kind of multi-bar bracing, both side to side and front to back, to fix and hold the shape of the body while you cut and paste. You also have to be aware that the damage to the toe boards can extend to beyond the seam at which they attach to the fire wall. You might also find damage behind the heater box if the heater core has ever rotted out or leaked. Lastly? in dealing with the rockers you will have to deal with body mounts as there is a mid frame biscuit mount under the door sill and another pair just ahead of the rear frame kick up. You may also find that you will need to dismount the doors to gain better access to work and that those pans will have to come in from under the car, meaning that you will have to dismount both the driveshaft and the transmission crossmember, along with your tunnel mount gear shifter, and then disconnect the parking brake cables. The frame on both sides has complications, like brake and gas lines, that also have to be dealt with; a good time to consider replacing them.

This is not a weekend, or even a long weekend project. Not trying to dissuade you here but the time budget for this is almost a month@ a few hours per day. It can even be longer if life gets in the road or you have a steady day or shift job to work around. Take lots of pictures and make tons of notes; tag stuff with clear descriptions of what it bolted down or where it went. Think Go-Pro and take video to review if you think that will help. You can always post the videos for comment and help wanted here on the forum.

Nick
 

GBodyForum is a participant in the Amazon Services LLC Associates Program, an affiliate advertising program designed to provide a means for sites to earn advertising fees by advertising and linking to amazon.com. Amazon, the Amazon logo, AmazonSupply, and the AmazonSupply logo are trademarks of Amazon.com, Inc. or its affiliates.

Please support GBodyForum Sponsors

Classic Truck Consoles Dixie Restoration Depot UMI Performance

Contact [email protected] for info on becoming a sponsor