Yes, GM Coporate Blue was what most motors were painted from the mid 70's to early 80's in all divisions. It is a nice colour. I am surprised it all cleaned up as well as it did. It looked way rougher in the dirty pics, I guess two decades of dirt will do that. Expect another blown rear end. Something like Yukon spider gears are cheap insurance. The stock ones are soft and explode.
BUILD THREAD 1985 Grand Prix SBC 400 Swap - "Lady Sif"
- Thread starter Highlord_Fox
- Start date
You are using an out of date browser. It may not display this or other websites correctly.
You should upgrade or use an alternative browser.
You should upgrade or use an alternative browser.
- Status
- Not open for further replies.
I see a "speed hole" on the drivers roof. Mine has a rust line with holes on the trim for the landau roof. Damn vinyl roofs.
Yes, GM Coporate Blue was what most motors were painted from the mid 70's to early 80's in all divisions. It is a nice colour. I am surprised it all cleaned up as well as it did. It looked way rougher in the dirty pics, I guess two decades of dirt will do that. Expect another blown rear end. Something like Yukon spider gears are cheap insurance. The stock ones are soft and explode.
The pictures make it look a lot cleaner than it currently is- Since the Driver's side was facing the tree wall, I wasn't able to clean it as well and it still has some gnarly amounts of dirt and that growth stuff on it. An actual scrub with sponges is in line for it sometime soon. And good to know, I'll keep that in mind for Phase 2 of the rebuild.
I see a "speed hole" on the drivers roof. Mine has a rust line with holes on the trim for the landau roof. Damn vinyl roofs.
You mean the storm drain hole? Yeah... I finally got an actual respirator in this week, so hopefully tomorrow's docket is cleaning out the interior and pulling away that headliner, so I can see what the damage is to the roof. I am... Not optimistic about it. But the good news is, we do own a welder!
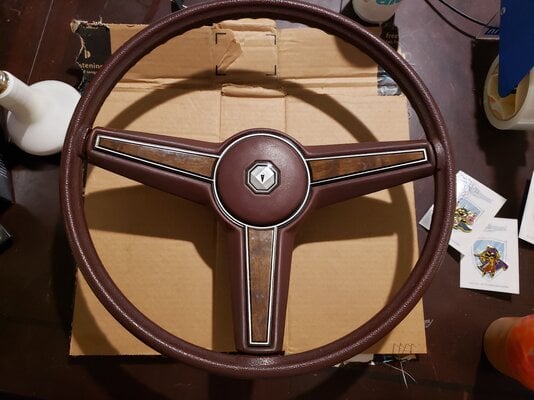
Updates! First, huge thanks to gearheaddrew- I can now replace the dinky racing wheel in the car!
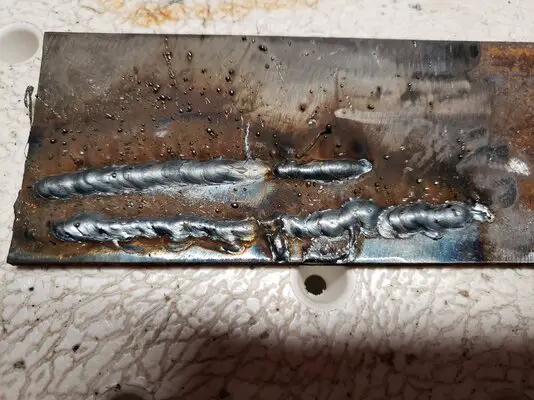
Second, I got to play with our welder for the first time this week. Besides needing to fix several holes in the body, we're planning on welding on extra support mounts for the engine. Right now, the frame side of the engine mount only lines up with three holes, so we're going to weld on a support bracket to the outside, along with filling in all the holes for the other engine mount locations to help stiffen up/strengthen the frame.
Speaking of holes, I cleared away the coating my father put on the leaky freeze plug.
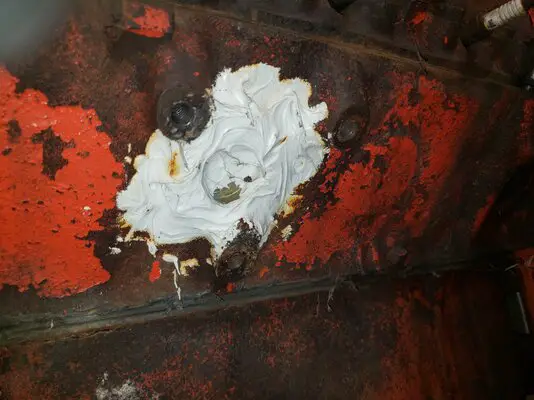
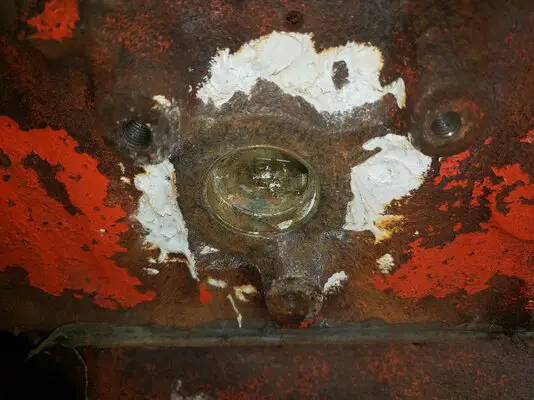
We then tried to pressure test the coolant system. As the radiator isn't part of this, we joined the upper/lower rad hoses from the water pump together and then capped off the heater hose return port. We shoved an air-compressor tool fitting into a hose, and tried to pressurize the system using our tank. Sort of expectantly, this blew out the water pump's outer seal. Sadly, I didn't get any photos or video of this process or setup, but it was a bit comical.
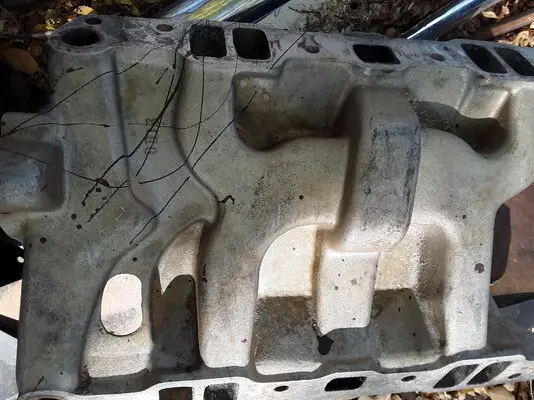
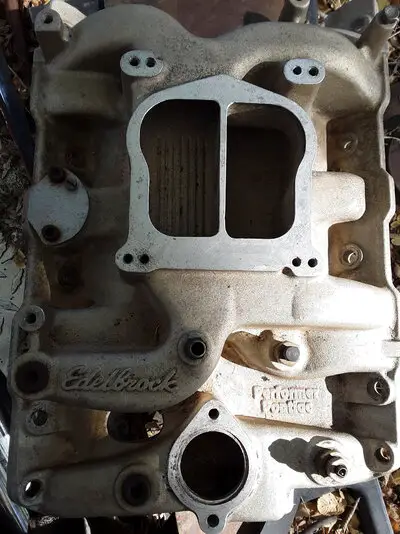
The next day, we pulled off the water pump and crafted some blocking plates for the three large openings. They're like 1/4" plate steel with 1/16" cork gasket material underneath, sprayed with copper gasket maker. We also shaved a casting lip off of the thermostat housing area on the intake manifold, but I don't have pictures of that- I'll snap some once we have the plate removed.
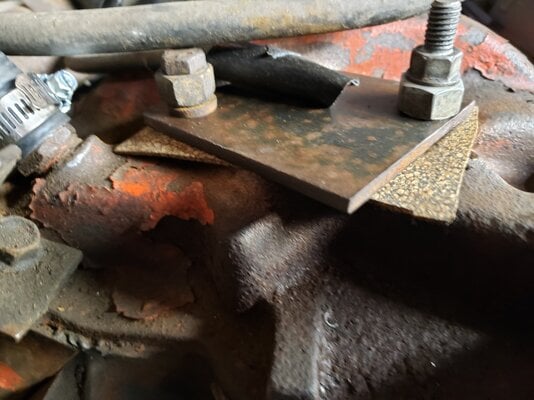
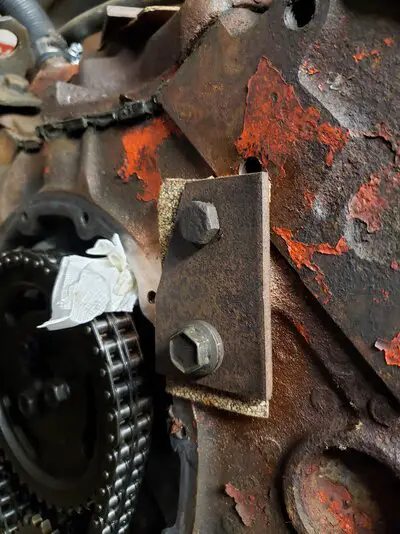
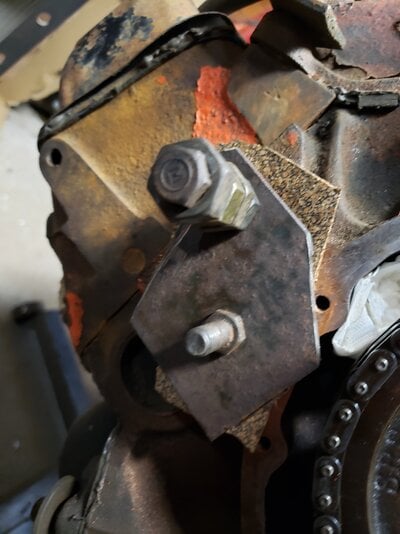
While they held pressure, the freeze plug in question didn't leak at all at 30PSI. I wanted to hold it for an hour to confirm, but my father opted to instead pop the plug right out of it and go to town on it. We've got most of the fluids drained out (and with the plugs out, the thing turns over smoothly), so the next step is to polish down the area around the plug, put in a new one with some sealant, and then pressure test it after filling it up with coolant.
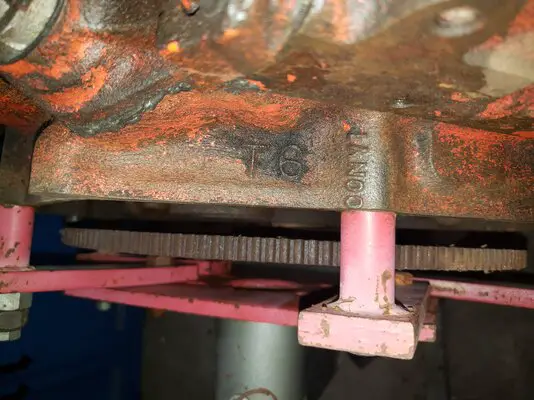
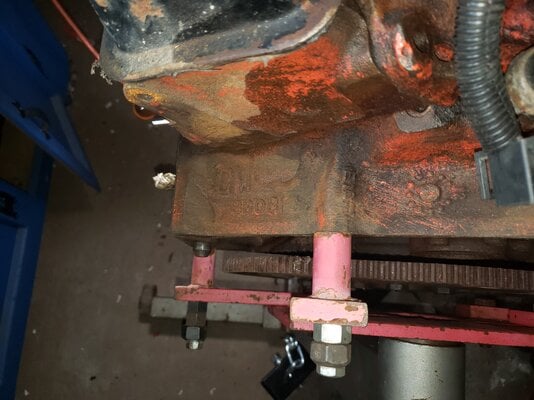
Oh, and some rear cast marks for those curious:
I also have a new video out, which includes the actual removal of the engine and all the fun that was: Youtube.

Second, I got to play with our welder for the first time this week. Besides needing to fix several holes in the body, we're planning on welding on extra support mounts for the engine. Right now, the frame side of the engine mount only lines up with three holes, so we're going to weld on a support bracket to the outside, along with filling in all the holes for the other engine mount locations to help stiffen up/strengthen the frame.

Speaking of holes, I cleared away the coating my father put on the leaky freeze plug.


We then tried to pressure test the coolant system. As the radiator isn't part of this, we joined the upper/lower rad hoses from the water pump together and then capped off the heater hose return port. We shoved an air-compressor tool fitting into a hose, and tried to pressurize the system using our tank. Sort of expectantly, this blew out the water pump's outer seal. Sadly, I didn't get any photos or video of this process or setup, but it was a bit comical.
The next day, we pulled off the water pump and crafted some blocking plates for the three large openings. They're like 1/4" plate steel with 1/16" cork gasket material underneath, sprayed with copper gasket maker. We also shaved a casting lip off of the thermostat housing area on the intake manifold, but I don't have pictures of that- I'll snap some once we have the plate removed.


While they held pressure, the freeze plug in question didn't leak at all at 30PSI. I wanted to hold it for an hour to confirm, but my father opted to instead pop the plug right out of it and go to town on it. We've got most of the fluids drained out (and with the plugs out, the thing turns over smoothly), so the next step is to polish down the area around the plug, put in a new one with some sealant, and then pressure test it after filling it up with coolant.
Oh, and some rear cast marks for those curious:


I also have a new video out, which includes the actual removal of the engine and all the fun that was: Youtube.
So, this leaves me with two questions:
- What's the easiest way to de-scale this thing? We have some rust remover compound that we're planning on dumping in and sort of cycling through the water jacket before we strip the heads off, but if there is a specific product anyone knows of I'm all ears.
- Freeze plugs! We're going to Luster Lace the block's mating surface to a shine, and put in another brass fitting. I want to put sealant in as part of the process, and there are some pretty diverse opinions on the Internet about it.
- We're also considering brazing some material around the outside of the brass where it meets the block as sort of a second layer of sealing.
- If we can't get the plug to seal, we're going to take a section of plate steel and weld the damn thing to the outside of the freeze plug area so it doesn't leak, but that's a last-last resort.
- Status
- Not open for further replies.
Similar threads
- Replies
- 1
- Views
- 140
GBodyForum is a participant in the Amazon Services LLC Associates Program, an affiliate advertising program designed to provide a means for sites to earn advertising fees by advertising and linking to amazon.com. Amazon, the Amazon logo, AmazonSupply, and the AmazonSupply logo are trademarks of Amazon.com, Inc. or its affiliates.


