1986 Monte Carlo SS Restomod LS3/4L80e

Status
Not open for further replies.
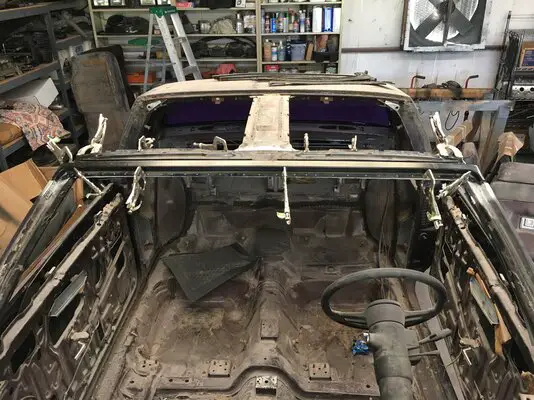
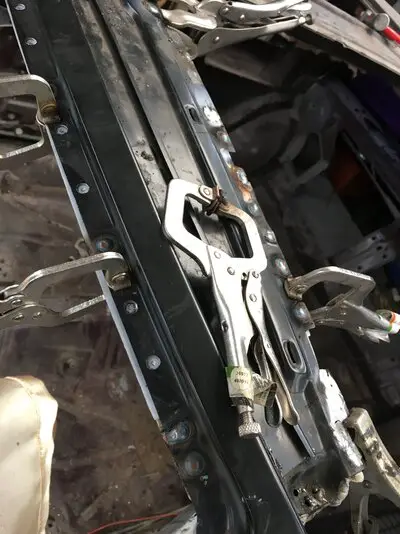
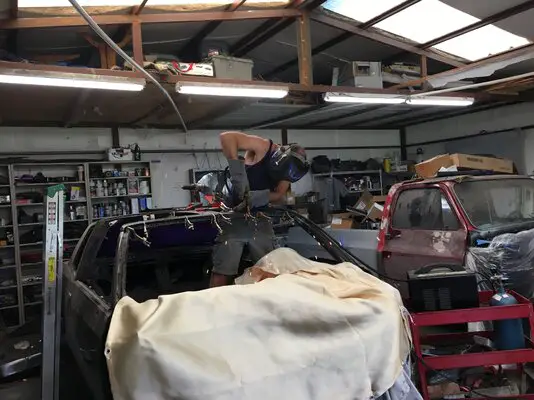
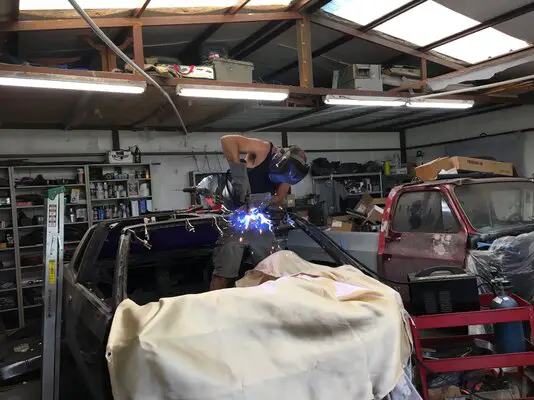
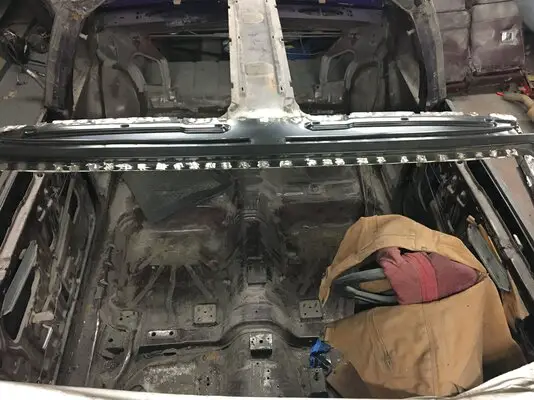
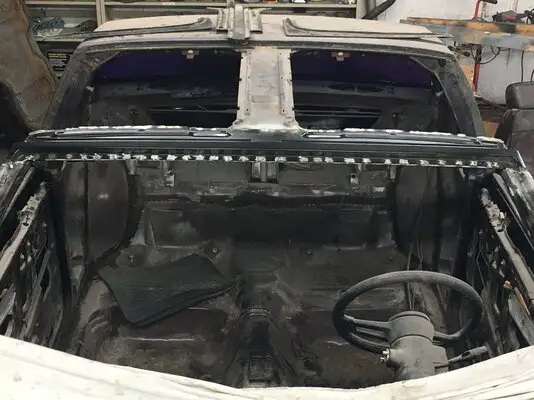
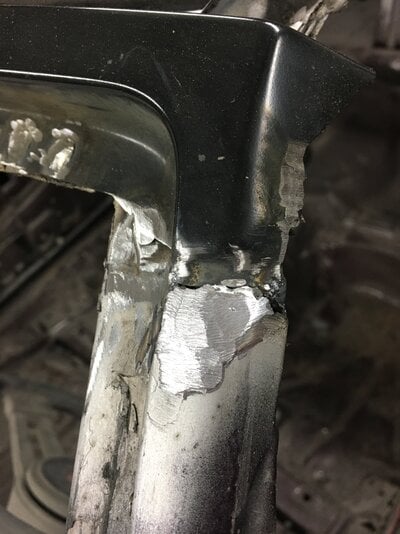
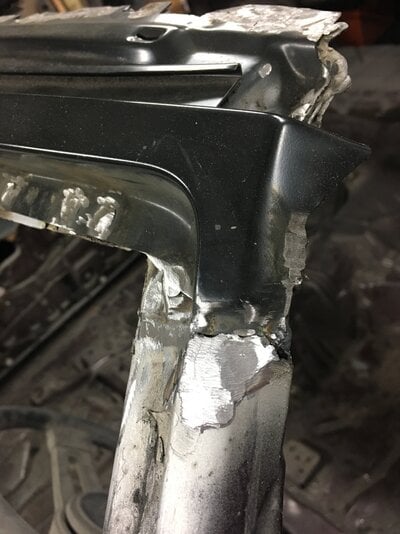
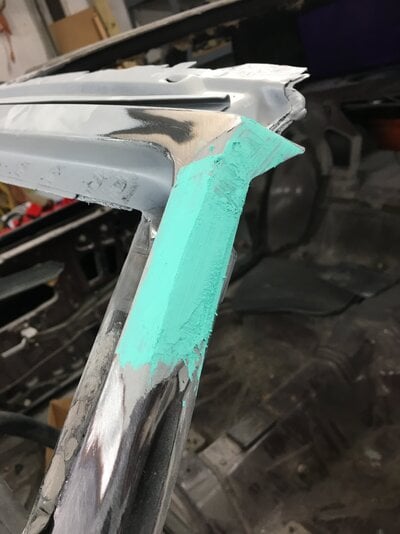
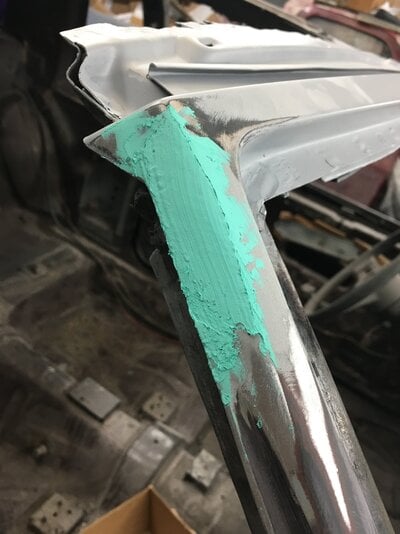
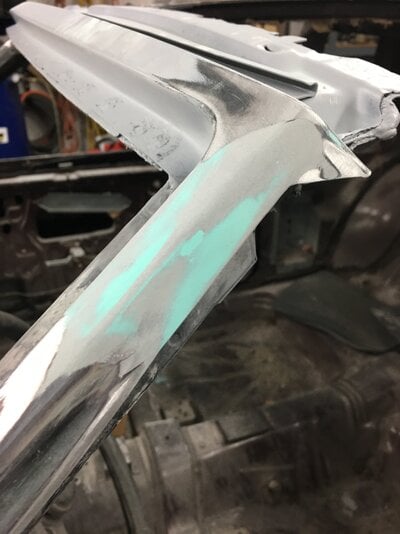
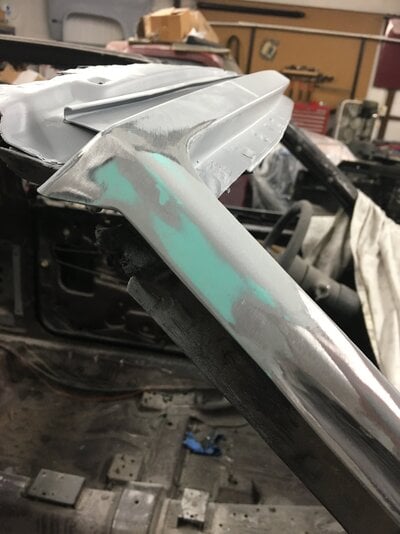
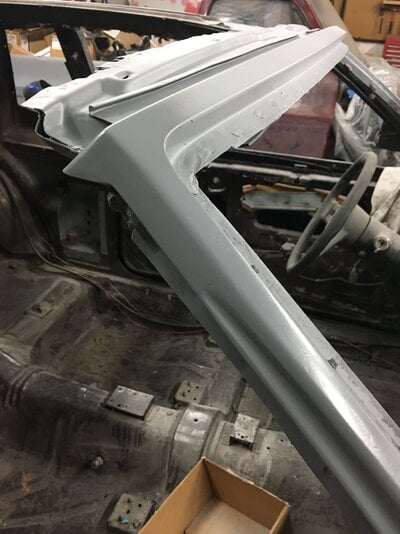
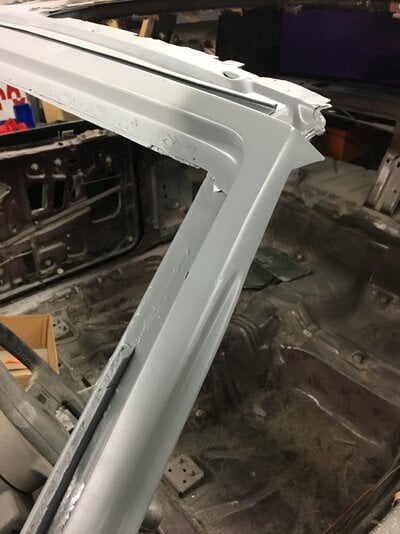
I then moved on to the replacement of the T-Top header panel. This was the only rust on the body. T-tops are notorious for rotting out. The process was to drill out every factory spot weld and size up your cut on the A pillar from the new header panel. The replacement panel I purchased from Mikes Montes website. It fit perfectly. The factory fused the A pillar to the header panel with lead. I chose all metal filler when I went to bond it back. Not sure if that is idea, but I've been using All metal for 15 years and its never let me down. I drilled as many plug weld holes in the header panel as the factory used. Tig weld would be better but a mig welder works just fine. make sure to use a welding blanket over anything you don't want burnt from slag. Use a weld through primer before you weld. It will help prevent future rust. A rust preventative should be used after the welding. I use one from Permatex.
IMG_2169.JPG
IMG_5517.JPG
IMG_5518.JPG
IMG_5795.JPG
IMG_5797.JPG
IMG_5900.JPG
IMG_5902.JPG
IMG_5923.JPG
IMG_5925.JPG
IMG_5928.JPG
 

Attachments

  • IMG_5518.JPG
    IMG_5518.JPG
    2.6 MB · Views: 283
  • IMG_5795.JPG
    IMG_5795.JPG
    1.5 MB · Views: 272
  • IMG_5796.JPG
    IMG_5796.JPG
    2.3 MB · Views: 243
  • IMG_5797.JPG
    IMG_5797.JPG
    2.3 MB · Views: 244
  • IMG_5900.JPG
    IMG_5900.JPG
    2.2 MB · Views: 290
  • IMG_5901.JPG
    IMG_5901.JPG
    1.7 MB · Views: 250
  • IMG_5902.JPG
    IMG_5902.JPG
    1.7 MB · Views: 257
  • IMG_5903.JPG
    IMG_5903.JPG
    1.6 MB · Views: 273
  • IMG_5923.JPG
    IMG_5923.JPG
    1.3 MB · Views: 258
  • IMG_5924.JPG
    IMG_5924.JPG
    1.3 MB · Views: 290
  • IMG_5925.JPG
    IMG_5925.JPG
    1.2 MB · Views: 254
  • IMG_5926.JPG
    IMG_5926.JPG
    1.3 MB · Views: 247
  • IMG_5927.JPG
    IMG_5927.JPG
    1.4 MB · Views: 271
  • IMG_5928.JPG
    IMG_5928.JPG
    1.4 MB · Views: 272
I totally suck at this forum stuff. LOL. Sorry for not keeping things up to date.

Time to get things cleaned up. I started with the under body. Luckily I had zero rust issues in the floor. It took me a whole weekend of sand and using a heavy wire wheel to clean up 30 years of grease and road grime. Good luck cleaning. I looked like a coal miner after doing mine. Once it was all clean I coated it with truck bed liner from O'Reilly. I'm pretty happy with it. If it ever chips I'll recoat no problems.

Back to the frame. Yes I boxed in the frame, did the frame notch and made rear support bracing out of 1.5 1/8" and 3/16" tubing. I made my own template out of cardboard for the notch and the boxing of the frame. It wasn't easy but it saved me a ton of money. I went to the local metal yard and bought a 4x8 sheet of 1/8" and a 3x3 piece of 3/16". The 3/16" was used to make my version of the UMI shock tower brace. I have a total of $123 invested in this. If you frame notch, DO NOT CUT THE FRAME FIRST. Set your frame as level as possible. I started boxing in first. I cut my templates and transferred it over to the 1/8" sheet. Busted out the sawzaw and the cut off wheel and went to town. Once cut I welded in place. I then moved to the shock tower brace. Again made a template from cardboard and transferred over to the 3/16" sheet. It's important, from what I've researched, to have this piece if you are to run coilovers. Once I cut my 2 pieces out, I then drilled holes to match the shock mount holes. I bolted it in place then measured out the bar to connect the two 3/16" pieces. Measured 50x's to cut once. Haha. Welder up! That being finished I welded up 2 pieces of tubing. One up top and the other just below the shock towers. The pictures will show. Took a piece of tubing and welded it to the top and bottom pieces. Looking back I would hade triangulated two pieces. Now to the notch. I cut my frame at the top and bottom right on the seam. I measured the cut wide enough for large tire options. You never know. Made templates from cardboard and transfered over to the 1/8" sheet. Cut then set it up to be burned in. You may have to do this in pieces. I also cut out three gussets per side and welded them in the center of the frame notch. It would be easier unless you are a tradesman in metal fab. I am not. But I managed. Once it was all welded in the frame was cleaned up and coated with POR15 chassis black.

3349f1323af900760f12a58d115754df.jpg
cf0ddc9fea22c41b31dd97b8598bdef9.jpg
9b91181984e9266468fa132847865a95.jpg
b6e846edc4d2f4fa0917efe558c01857.jpg
fff291010f07ec668a7f8c6f1c4257c8.jpg
0acd86aa51b975dc2472971a9c2c959a.jpg
5a1f145d3478f374281e02684729c767.jpg
cbf92da3a9b8dc1c0c787ca43b625081.jpg
9f11184fb2a97dbe413078b418735a92.jpg


Sent from my iPhone using Tapatalk
 
Status
Not open for further replies.

GBodyForum is a participant in the Amazon Services LLC Associates Program, an affiliate advertising program designed to provide a means for sites to earn advertising fees by advertising and linking to amazon.com. Amazon, the Amazon logo, AmazonSupply, and the AmazonSupply logo are trademarks of Amazon.com, Inc. or its affiliates.

Please support GBodyForum Sponsors

Classic Truck Consoles Dixie Restoration Depot UMI Performance

Contact [email protected] for info on becoming a sponsor