Search for J-23028 or J-23028-01. This will require the bolts to be removed without bothering with the balljoint. If someone finds one of theres I stongly suggest to have a CSM on hand to follow the proper procedure on using it.They used to make a special floorjack saddle adapter for securely holding lower control arms for spring compressing. Sadly I don't think its made anymore.
Front Spring Install Methods / Moog 5658
- Thread starter brrian
- Start date
You are using an out of date browser. It may not display this or other websites correctly.
You should upgrade or use an alternative browser.
You should upgrade or use an alternative browser.
- Status
- Not open for further replies.
I'll second or third, "rent" the one from Oreilly's, run the spring compressor through the upper shock hole on the frame, tighten the fingers to the spring, drop out both A-arm mounting bolts and the A-arm will come down, and the spring is still attached to the frame. The stabilizer bolts need to come out first. I've even done them with the front tires left on.
I've used the pictured spring compressor kit from Autozone a few times in recent years and it's always worked. Not a fun job, it's a pain to get the spring to catch to the tool and finally compress using it instead of spinning, giving it a few ugga ugga's to tighten down while wearing some protective stuff and just hoping nothing goes haywire. My first experiences in spring swapping were a breeze years ago, I didn't find removing them bad and I put in Eibachs in both cars, so they were short enough that I didn't even need to compress them much, just used the floor jack and had the shock partially bolted in place so the spring can't fly around. The last springs I used and used the tool for were Moog's, I think 5658's.


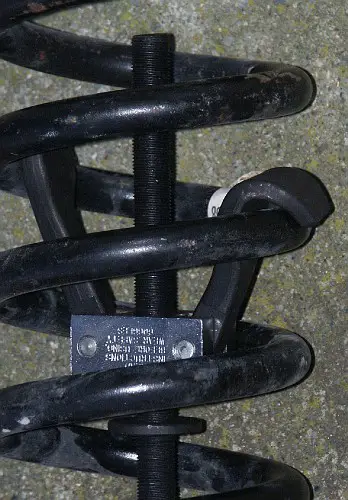
The reason its tricky to get the rental tools to catch the spring is because the hooks on those tools are sized for thinner wire diameter, light duty springs. Its a cheap tool for cheap springs for cheap 4 banger cars. Here is a picture of a Autozone / OEM Tools style compressor on a non police Crown Vic spring which is too big for the compressor hooks. Cop springs and many performance springs are even thicker than this one.

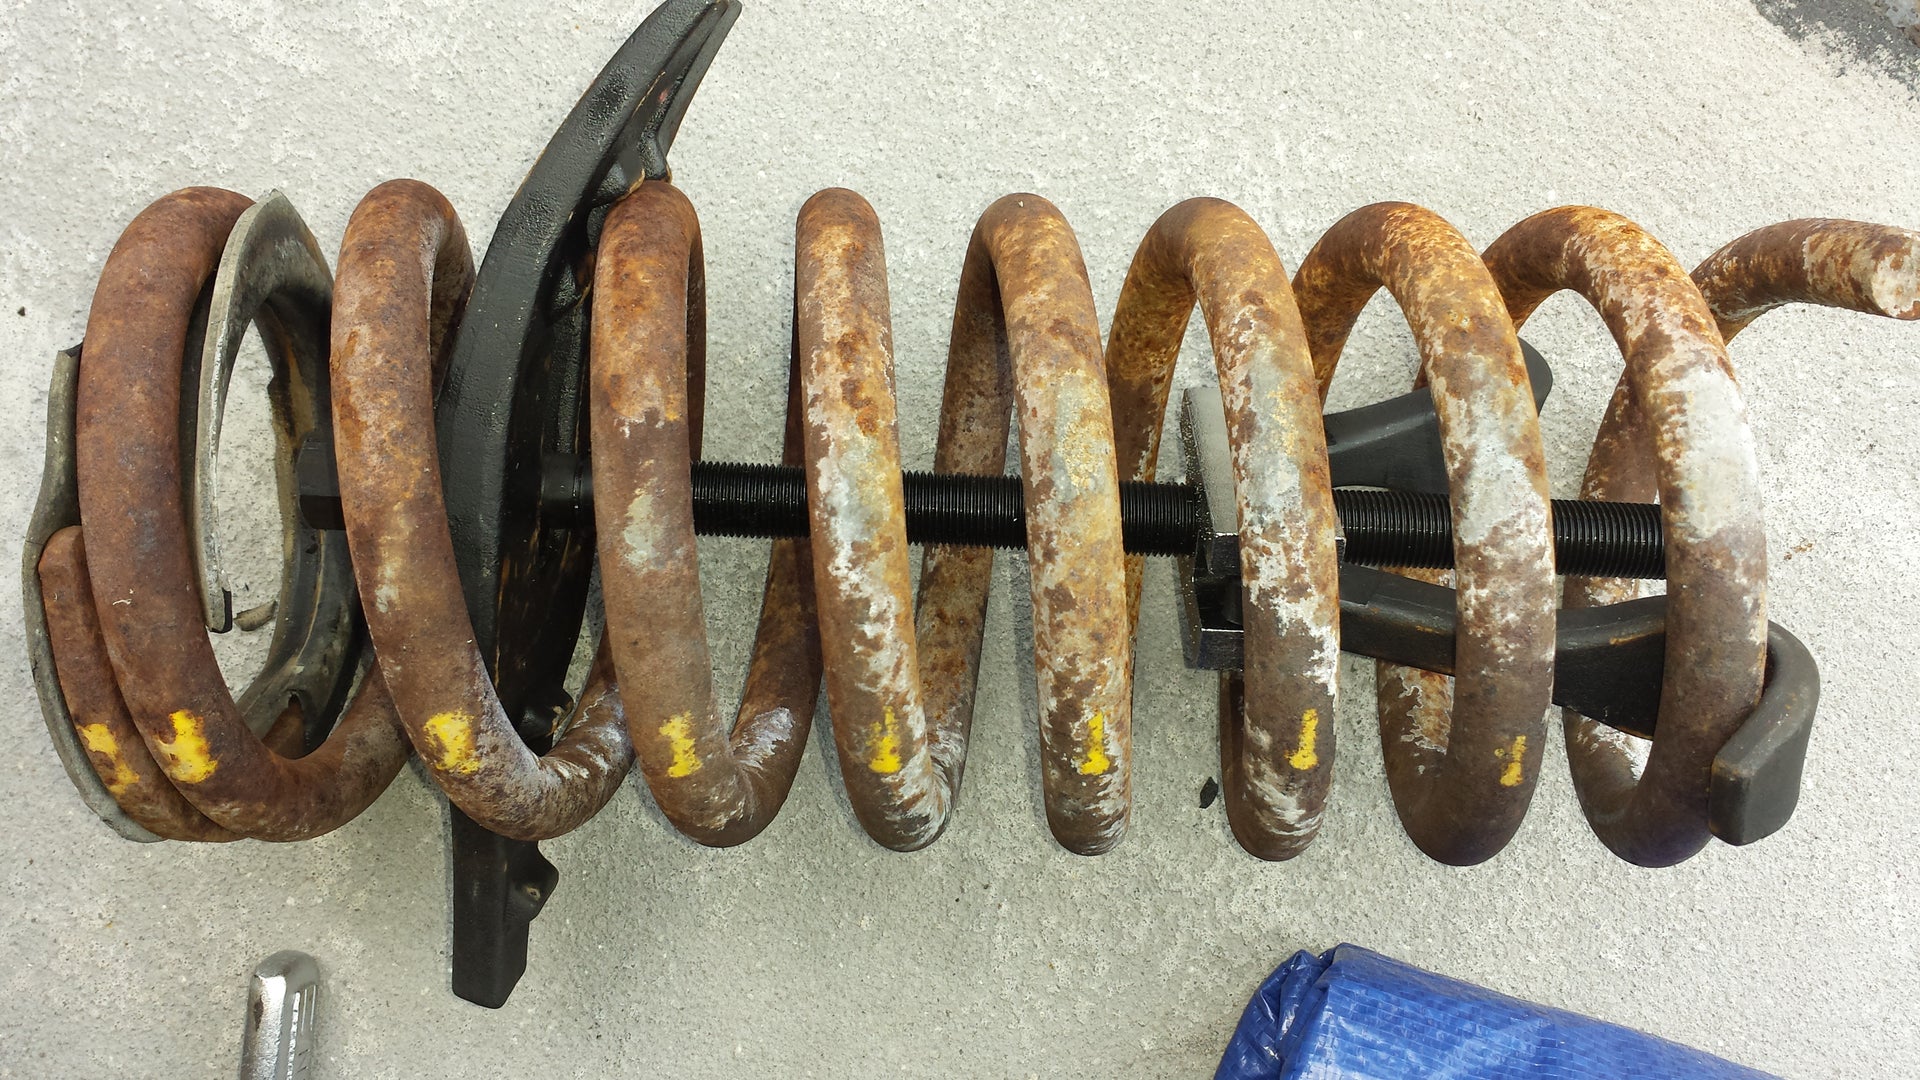
Next image is the same style compressor on a vintage Mustang spring with a thinner wire diameter. The compressor hook just fit on this spring. Note there is no gap between the hook and coil here 6nlike the Crown Vic example above.

You can try testing fitting the hooks of a rental compressor on your coil springs first and if they are too small like in the Crown Vic example then you will need a better compressor. Performance springs for V8 cars require performance compressors like the OTC one. A OTC compressor is still cheaper than a hospital visit.

Next image is the same style compressor on a vintage Mustang spring with a thinner wire diameter. The compressor hook just fit on this spring. Note there is no gap between the hook and coil here 6nlike the Crown Vic example above.

You can try testing fitting the hooks of a rental compressor on your coil springs first and if they are too small like in the Crown Vic example then you will need a better compressor. Performance springs for V8 cars require performance compressors like the OTC one. A OTC compressor is still cheaper than a hospital visit.
Through the shock hole works the best in my opinion. Other things help, like having the vehicle high enough on big jack stands. No headers, they keep the lower a-arm from swinging down enough. Having some friends on scene to help or call 911 when or if it gets out of hand.
Another thing to work with, is if you run a good quality chain with a grab hook or double hook, from the bottom of your floor jack frame over the frame rail of the car and back to the frame rail of the floor jack. This limits the travel of the vehicle and secures the jack to it, what it does, keeps the vehicle from raising up away from the jack and the ground so your floor jack's force can compress the spring.
There are some other versions of spring compressors.

https://www.santhuffshocks.com/springs.html (tool at the bottom)
The tool form Ecklers is designed (like OE or GM) to bolt onto the lower a-arm at the shock mount and allow the lower a-arm to pivot and swivel back into place.
As for the tool you have, and where you were at, I did the same, only persuaded the spring into place with a long pinch-bar/rock-bar/pry-bar and copious amounts of WD-40 followed by a few adult beverages after the adventure was over.
Another thing to work with, is if you run a good quality chain with a grab hook or double hook, from the bottom of your floor jack frame over the frame rail of the car and back to the frame rail of the floor jack. This limits the travel of the vehicle and secures the jack to it, what it does, keeps the vehicle from raising up away from the jack and the ground so your floor jack's force can compress the spring.
There are some other versions of spring compressors.

https://www.santhuffshocks.com/springs.html (tool at the bottom)
The tool form Ecklers is designed (like OE or GM) to bolt onto the lower a-arm at the shock mount and allow the lower a-arm to pivot and swivel back into place.
As for the tool you have, and where you were at, I did the same, only persuaded the spring into place with a long pinch-bar/rock-bar/pry-bar and copious amounts of WD-40 followed by a few adult beverages after the adventure was over.
Springs went in last night! How I did it:
Unbolted the lower control arms in the back, then 'hung' them from the spindle
Placed the jack on the back flange between the bushings & lifted up the LCA slightly (see note below)
Set the spring onto the LCA & rotated to align with the drain holes
Slid a rod through the shock hole & down through the spring, for safety
Jacked up the LCA & properly seated the spring into the frame
Carefully jacked up the LCA & guided the bushings into the frame, close to the mating holes
Carefully pried the rearward LCA bushing to align to the bolt holes, then placed a short & smaller diameter bolt into the back frame hole to 'pin' the back bushing in place
Carefully jacked & pried until the frontward LCA bushing aligned with the hole, then installed the correct bolt & nut
With two bolts in place and the bushings and holes aligned, I fed the correct bolt into the rearward LCA bushing (which pushed the temporary one out) then installed the nut
'Hand tightened' the bolts & nuts (will torque with the wheels on the ground), then removed the jack and 'safety' rod
The process was fairly easy, but for safety's sake, I took my time. It would have been safer and easier with the J-23028 tool, but even without it, it was FAR safer and easier than what I originally tried. And, I did not need a spring compressor.
& when placing the jack on the LCA flange, draw an imaginary line through the lower ball joint and center of the spring, and place the jack about where that line intersects the flange. Reason is that it helps lift the LCA evenly. Otherwise it tends to twist as it lifts, making everything harder / less safe.
Thank you all for your advice & I hope this helps somebody else!
Last edited:
Did you torque those LCA bushings with the car on the ground? If they're rubber you'll need to do it that way. Make sure the suspension is settled the best it can be.
I torqued them... glad you mentioned. I knew the UCA end bolts get torqued with the wheels on the ground & didn't consider that so should the LCA bolts. I loosened them. Also edited my post above for anybody that might follow that. Thanks...
- Status
- Not open for further replies.
Similar threads
- Replies
- 8
- Views
- 526
- Replies
- 4
- Views
- 312
GBodyForum is a participant in the Amazon Services LLC Associates Program, an affiliate advertising program designed to provide a means for sites to earn advertising fees by advertising and linking to amazon.com. Amazon, the Amazon logo, AmazonSupply, and the AmazonSupply logo are trademarks of Amazon.com, Inc. or its affiliates.

