My 83 Olds Cutlass / Turbo6 build thread

Status
Not open for further replies.
waay ahead of you Toby. Ive got a GT45 in the trunk of my 72 Skylark 350 now. Currently working the bugs out of the Blow thru Quadrajet. Ive got a thread going on Buick Performance Group in the small block section. But thats a whole other story....this is about the turbo 6 in the Olds
 

Attachments

  • muffler2.JPG
    muffler2.JPG
    64.7 KB · Views: 829
  • Ttypebadge.JPG
    Ttypebadge.JPG
    44.2 KB · Views: 820
Oh man the trans install is killing me.

I put it up on the back of the motor on the dowel pins, and had a little trouble getting all the bolts in. Massaged it a little and got 5 of 6 in there. But then I noticed that the converter wouldnt come forward to the flexplate. I had to put two washers on each converter bolt.

I just didnt like that so I took it all down again. Pulled the converter and test fitted it in the back of the crank - fits great, goes all the way forward to the flexplate.

So I put the converter back in the TH350 and line the trans up with the engine again. This time being sure to keep the converter engaged in the crank...... Now I can only get two bellhousing bolts in.

driving me nuts. So I think I am going to pull the dowel pins as they seem to be misaligning things.

I purchased four automotive hardened studs and will install them in the back of the engine.....then slap the trans up on them and line up the last two bolts. That should do the trick.

I'll have to take a break though....I am worn out from muscling the trans around under the car. I have the process down pretty good with jackstands and a low profile jack , but sometimes little things get ya.
 
OK I got some automotive studs and installed them in the back of the engine. that lined up the trans just right.
The torque converter cam all the way forward to the flexplate like it should. So the extra effort was worth it I am glad to say.

The engine and trans are in, driveshaft etc all back on.
I ran new trans cooler lines while I was at it...what a pain.

I removed a bunch of A/C stuff - going to scrap the aluminum. Looks like it will be a tight fit with the AC box back there.

I am working on removing the CCC harness - I am considering just cutting it and yanking it out.

And at long last I installed the T-Type steering wheel I ebayed. Looks great, but I need to recondition the horn mechanicals.

Glad to be out from under the car for awhile....
I cant wait to get it on the road!
 

Attachments

  • turbo6installed.JPG
    turbo6installed.JPG
    71.5 KB · Views: 763
  • steering after.JPG
    steering after.JPG
    67.3 KB · Views: 747

Good find with that steering wheel. Sometimes I wish my horn had the triple shield instead of the T logo. It's kinda like false advertisement to people who think my car came with a turbo 6.. :lol:
 
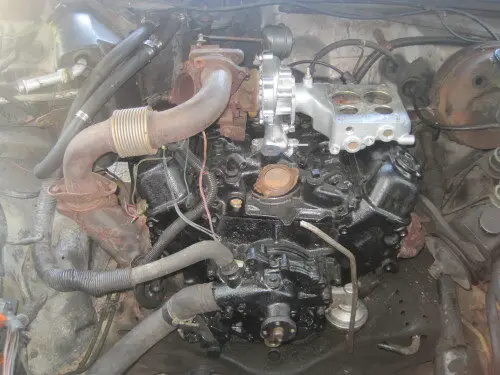
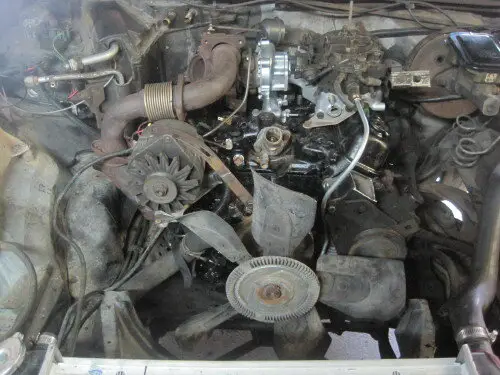
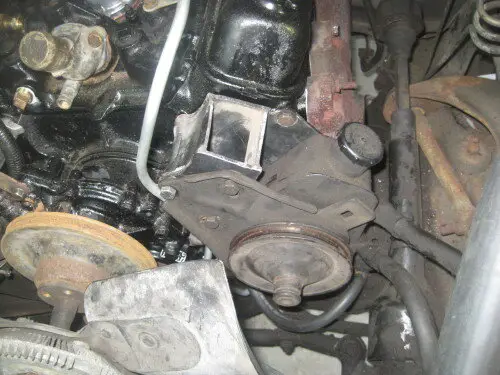
I cut the AIR pump part of the power steering bracket off and am keeping the rest of the bracket and P.steer assembly. Got it fitted up today.

I am keeping the Olds 70A alternator, but have eliminated the AC/Alt aluminum combo bracket in favor of an oldschool aluminum Buick Non-AC lower bracket. I cut two inches out of a Buick 350 upper Alternator bracket arm and welded it back together, hammered it flat, and it fits great so the Alternator is good to go.

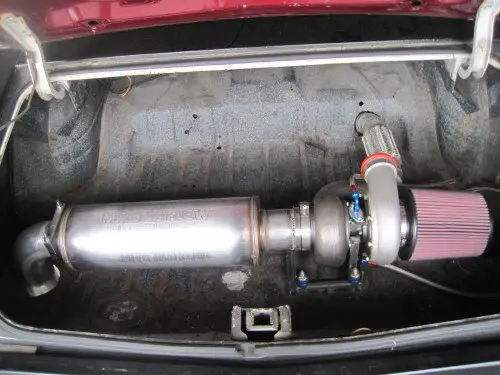
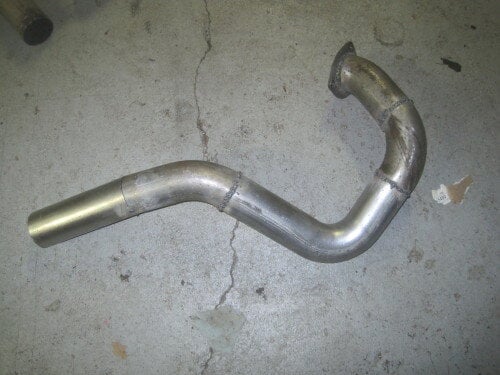
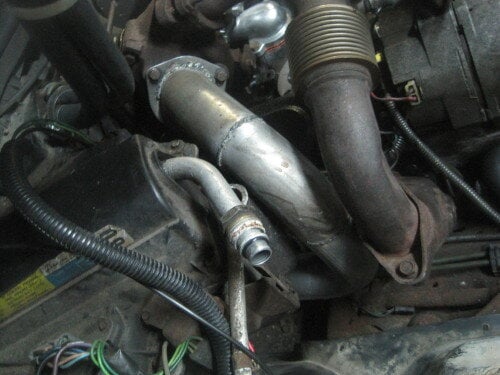
Installed and torqued the turbo and plenum to the intake. Plugged the EGR manifold and reinstalled it.

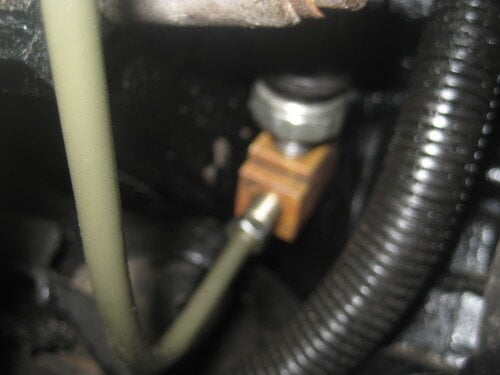
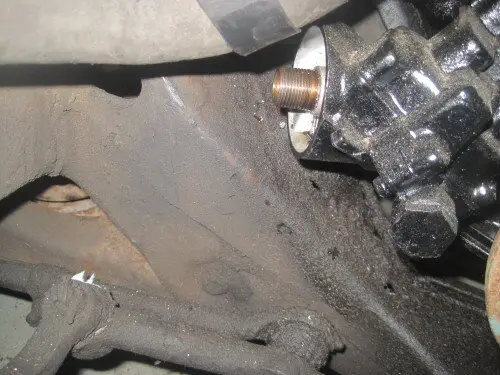
I need to go to the auto parts store for an oil line for the turbo, some fuel line for the carb, misc pipethread adapters for the temp sending unit, heater hose etc. But I have the routing planned out.

Once I get the wire harness, oil line and fuel line situated correctly, I will put the alternator back on and start adding pulleys etc to the front of the engine.

I have to figure something out for the distributor - I have the CCC HET dist from the olds, I have a non computer V8 pertronics HEI or I have a simple points V6 dist. I think I want to combine the Olds HEI and the Pertronics HEI pieces to make a non computer 6cyl HEI but I dunno. The engine harness is set up for HEI though.

Another Question - I used the flexplate from the Olds V6. should I use the balancer from the Olds V6 or should I stick with the original from the 225?

getting much closer now. Eager to get it DONE. Maybe on fathers day I will get some "freetime" at long last hehheh

pics soon

edit: I shouls probable replace that lower radiator hose as well while everything is out of the way.
 
Decided on going with points dist because I didnt want to mess with taking apart the known-good Pertronix HEI. So I ordered cap and rotor, plugs and wires at the Carquest today. Also a lower Radiator hose.

Waiting for those to come in, I ran a new fuel line from pump to carb. Teed the oil pressure feed, one for the pressure sender, the other an oil line to feed the turbo. Really pleased with the bends on both of the solid lines I bent today.

Decided to eliminate the water to the plenum, figuring I want to keep it cool and dont mind warming the car up. I also got a new 160deg thermostat figuring I would try to keep a little cooler to help avoid detonation. Installed that and the housing.

wired up the starter, oil sender, alternator, water temp sender. Engine harness will have to run outside the pass valvecover to avoid the hot turbo.

One problem I have encountered: The oil filter interferes with the engine cradle. should I rig a remote oil filter or work the engine mounts to lift it "just enough"?

pics
 

Attachments

  • Engine.JPG
    Engine.JPG
    76.2 KB · Views: 673
  • Powersteering.JPG
    Powersteering.JPG
    76.7 KB · Views: 681
  • oilTee.JPG
    oilTee.JPG
    39.1 KB · Views: 684
  • OilFilter.JPG
    OilFilter.JPG
    71 KB · Views: 676
Lookin good! Keep it up, i really like your skylark too 8)
 
put together a downpipe...man is it a tight fit! I think a little heatshield wrap will be in order for the engine harness and the plug wires.

If Ida thought of it I could have run the engine harness under the plenum then forward - instead of outside the valve cover. But Im not going to pull the turbo off just to move the harness.

pics
 

Attachments

  • downpipe1.JPG
    downpipe1.JPG
    55 KB · Views: 591
  • downpipe2.JPG
    downpipe2.JPG
    61.5 KB · Views: 589
I took some garage time during this heat wave to get the engine hooked up. Its ready to start.

Obviously needs some "tidying up" but I believe its all ready to go.
 

Attachments

  • enginereadytostart.JPG
    enginereadytostart.JPG
    79.9 KB · Views: 565
Status
Not open for further replies.

GBodyForum is a participant in the Amazon Services LLC Associates Program, an affiliate advertising program designed to provide a means for sites to earn advertising fees by advertising and linking to amazon.com. Amazon, the Amazon logo, AmazonSupply, and the AmazonSupply logo are trademarks of Amazon.com, Inc. or its affiliates.

Please support GBodyForum Sponsors

Classic Truck Consoles Dixie Restoration Depot UMI Performance

Contact [email protected] for info on becoming a sponsor