

CUTLASS Reverse light lens
- Thread starter nycutlass
- Start date
You are using an out of date browser. It may not display this or other websites correctly.
You should upgrade or use an alternative browser.
You should upgrade or use an alternative browser.
I have but for different application. Late 80s & early 90s I used to make light boxes for rear deck EMS/VFD personal vehicles.
Green scrub pad and scuff the plastic. If greasy or dirty, use a little dish soap. Primer first, then use the "plastic" spray paint. I, for the most part used flat black, but any color should lay down just as good. Grey, silver, chrome should work just fine.
Set in sunlight to help cure.
Green scrub pad and scuff the plastic. If greasy or dirty, use a little dish soap. Primer first, then use the "plastic" spray paint. I, for the most part used flat black, but any color should lay down just as good. Grey, silver, chrome should work just fine.
Set in sunlight to help cure.
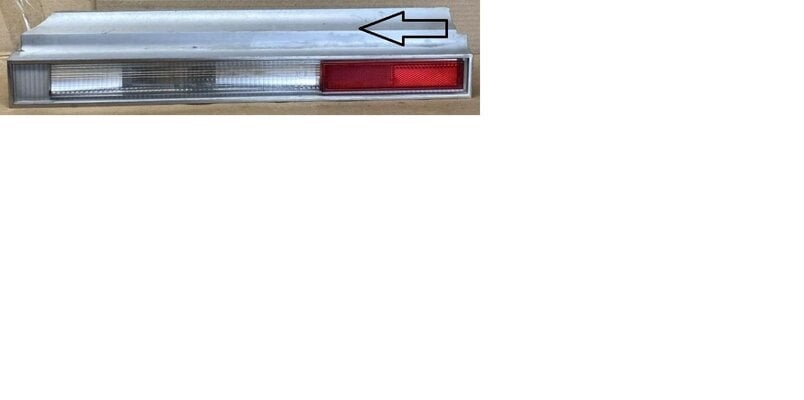
I did mine. The "chrome" on top was flaking and looked horrid few years ago and couldn't find anything that looked good.i was wondering if anyone has painted the reverse light lens on the top where its gray ? mine is extremely faded , if so what color did you use ? the picture is just a representation of what I'm talking about.
I used green ScotchBrite pads and removed all the "chrome". Then scuffed the entire unit, even the clear areas to remove any old damaged plastic layers. I then used red ScotchBrite under a light flow of water to keep washing away contaminants and keep pad clean on the whole unit. They went to my buddy who paints next.
He cleaned them thoroughly and degreased them. Then shot a layer of adhesions promoter. From here he shot the body color where the "chrome" was. Once this flashed and was ready, he cleared the entire lens, clear part and all. This was with actual automotive Sherwin paints. Came out amazing. This is a quick pic I just took it the garage for ya. Not best lighting as its night. But you can see how they came out. I would recommend doing them. P.S. don't mind the dust on my car lol. Needs washed.

Added this pic from few days ago with daylight so you can see both sides.

Last edited:
Looks fantastic ! but for this 83 cutlass I'm working on i would like it to be its original color, if i can find what color that is. your lens looks very clean painted i like it.I did mine. The "chrome" on top was flaking and looked horrid few years ago and couldn't find anything that looked good.
I used green ScotchBrite pads and removed all the "chrome". Then scuffed the entire unit, even the clear areas to remove any old damaged plastic layers. I then used red ScotchBrite under a light flow of water to keep washing away contaminants and keep pad clean on the whole unit. They went to my buddy who paints next.
He cleaned them thoroughly and degreased them. Then shot a layer of adhesions promoter. From here he shot the body color where the "chrome" was. Once this flashed and was ready, he cleared the entire lens, clear part and all. This was with actual automotive Sherwin paints. Came out amazing. This is a quick pic I just took it the garage for ya. Not best lighting as its night. But you can see how they came out. I would recommend doing them. P.S. don't mind the dust on my car lol. Needs washed.
Added this pic from few days ago with daylight so you can see both sides.
For some reason krylon dull aluminum color comes to mind (heard it was discontinued but not verified). Same color as the sides of the taillight housings too.
Problem is we have no electricity and more info is on my desktop so not looking up anything atm.
Problem is we have no electricity and more info is on my desktop so not looking up anything atm.
i appreciate the reply don't worry about it hope you get power back .


An argent silver might even be an option as GM used it on many trim parts.
Similar threads
- Replies
- 0
- Views
- 130
- Replies
- 5
- Views
- 160
- Replies
- 0
- Views
- 88
GBodyForum is a participant in the Amazon Services LLC Associates Program, an affiliate advertising program designed to provide a means for sites to earn advertising fees by advertising and linking to amazon.com. Amazon, the Amazon logo, AmazonSupply, and the AmazonSupply logo are trademarks of Amazon.com, Inc. or its affiliates.