IROC Wagon Project

Status
Not open for further replies.

ssbrewskyaz

Master Mechanic
Dec 29, 2010
472
103
43
New River, Arizona
I've been working on this Malibu wagon on and off for several years now. It started out inocently enough as a dailey driver with some extra beans to scare the neighbor kids in their little tuner mobiles. Wasn't too long before the thing started to take on a life of its own. Seems after several years of casually building "numbers matching" Camaros, Chevelles, El Caminos and Impalas, I was not able to do a car in which the body was not removed from the frame, also know as "frame off" restoration. And although I have way more time and money in the car than it will ever be worth, it will not be a trailer queen as all the cars before it have been.

So, here I am building an IROC wagon. Started with a 1981 Malibu wagon, bought a 1990 IROC and gutted it to use the parts in the wagon. You might ask, who needs an IROC wagon? Apparently I do.

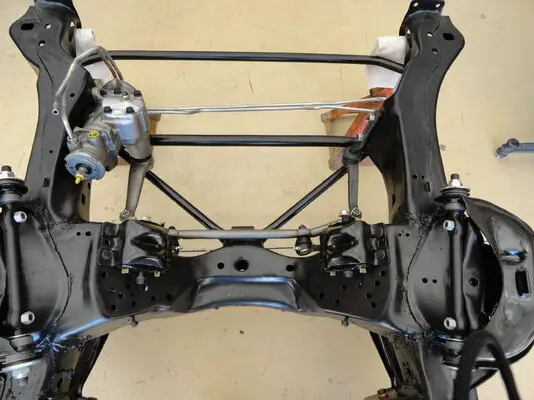
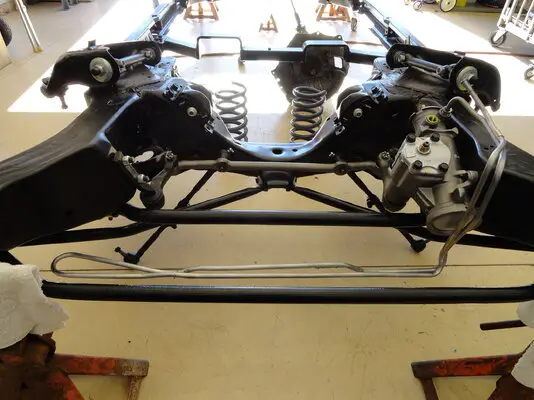
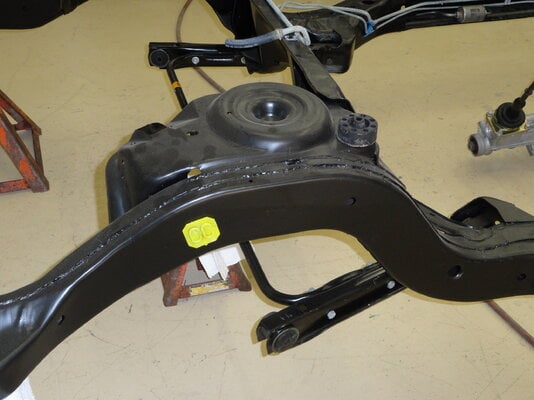
It's still a work in progress but coming together now that I'm nearly complete on my second complete chassis. The first one was original to the car and had spent time somewhere frames don't like to be. Body didn't and doesen't have a spec of rust anywhere but the first chassis was scaley. I thought I could live with it, I was wrong.

13:5 to1 high compression balanced and blue printed 302 DZ Clone motor with a ported and polished Tuned Port Injection running on E85.

Borg Warner T-5 five speed transmission

Grand National 8.5 10 bolt Rear Axle with 4:11 gears and Truetrac posi.

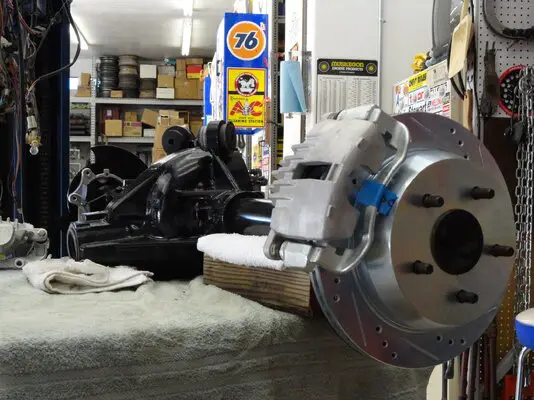
98-02 LS1dual piston front brakes. 05 Blazer Extreme Rear disc brakes.

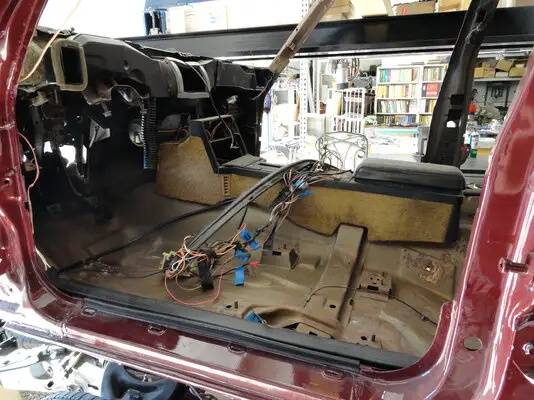
A complete IROC interior including bucket seats, center console and overhead console. If the wife wouldn't have threatened to stab me in my sleep, it probably would have been turned into a two door with T-Tops. Thank God for idle threats.

Any way, this is a peak at the money pit.
 

Attachments

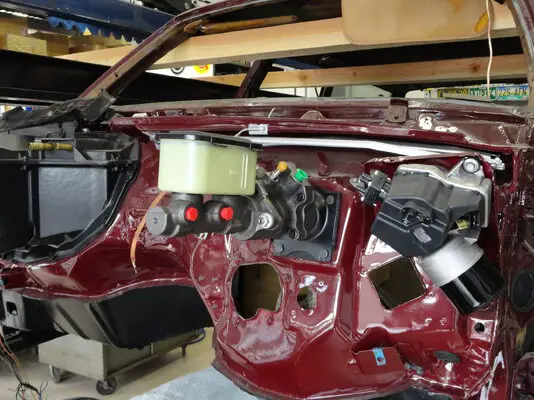
  • Firewall .JPG
    Firewall .JPG
    2.8 MB · Views: 5,953
  • Suspension Detail.JPG
    Suspension Detail.JPG
    2.8 MB · Views: 5,924
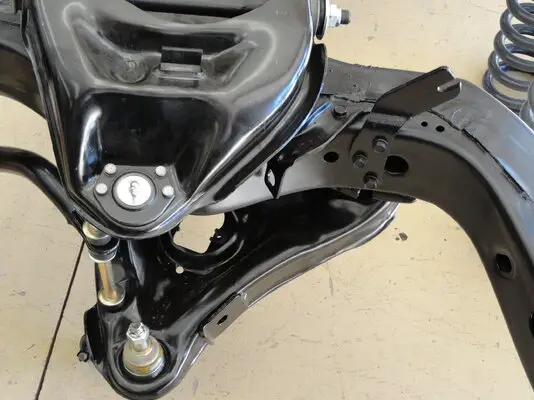
  • Suspension Detail III.JPG
    Suspension Detail III.JPG
    2.6 MB · Views: 5,855
wow that sounds like a bad *ss wagon. what are you plans for the rest of the interior and the paint?
 
that looks really sweet. I run the T5 WC transmission, what have you done to it to hold up to the power your going to have...
 
Welcome aboard! It looks like it's going to be one hell of a wagon....keep us updated.
I assume the body is burgundy. Nice work and attention to detail.
 
Man that things is going to b beautiful when complete....let's get more piks
 
COOL wagon! Welcome aboard. Ya, let's have some more pics. I'm doing thrashin on my '82 right now. The paint was done when I got it and I'm stuffin a Rat into it now. Waiting on headers, buit in the meantime, I wil probably start fabbin up my crossmember and such....Matt
 
Thank you for the kind words gents.

I only get to work on the car about one day a week, for the most part, that's Saturday. Plan to put in a couple solid weeks over Christmas and at least get the chassis rolling. Had I not ended up building two different chassis's, I probably would have been burning gas in the stupid thing by now.

I've started modifying the IROC interior pieces to fit the wagon but surprisingly most of the stuff fits in the car like it was made for it. Need to cut the console down to clear the dash but the rest of the stuff is easy peasy, at least so far. The idea is to make the car look like the General made it even though we all know that was never in the plans, not for one iota.

Things you can't see from the crappy photos I take are the cowl induction hood. No, not one out of the box, they weren't even available when I started this project. This cowl induction hood is one I had a guy make for me from an actual Chevelle cowl induction hood. Originally was going to put an LS6 in the car (a real LS6 not an LS motor), but I got over that.

The license plate pocket on the tail gate is filled and the license plate now resides in the rear bumper. The luggage rack is gone and all the holes welded shut. Like I'm gonna put luggage up there. Come to think of it, the only time I ever saw luggage on the roof was in one of those Chevy Chase movies.

The header panel is modified to get rid of the spring loaded pop goes the weasel. Has an aluminum core support, and aluminm bumper mounts that replace the shocks front and rear and allow me to set the bumpers back to rid the car of the ridiculous five MPH bumper gap.

Here's a few more pictures of my junk but in the mean time, can someone tell me how to load more than three photos at a time? Send me a PM if it's a trade secret.
 

Attachments

  • DSC0182.JPG
    DSC0182.JPG
    2.9 MB · Views: 5,614
  • Rear Disc II.JPG
    Rear Disc II.JPG
    2.9 MB · Views: 5,676
  • DSC00366.JPG
    DSC00366.JPG
    2.7 MB · Views: 5,558
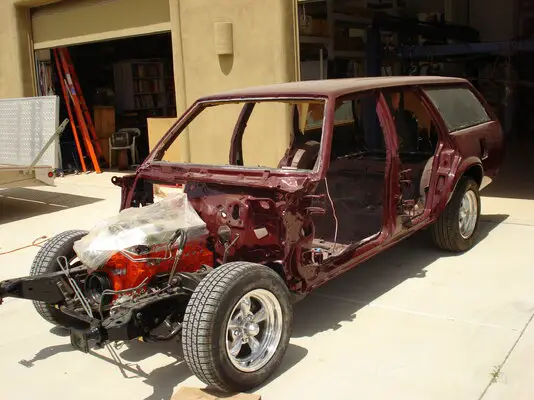
And a couple more, one of the interior with the center console test fit and the other of the temporary body drop on the original chassis. This is where I discovered a person could build a room addition in the space between the top of the test tire and the body. That ain't gonna fly, so I got way more agressive the second time around. The car only needs to go really quick and fast in a straight line up to the speed limit. Don't plan to auto cross and it's never going to be off road, at least I hope not. ...
 

Attachments

  • Console Left.JPG
    Console Left.JPG
    2.9 MB · Views: 5,665
  • Temp Body Drop 2.JPG
    Temp Body Drop 2.JPG
    1.2 MB · Views: 5,752
Status
Not open for further replies.

GBodyForum is a participant in the Amazon Services LLC Associates Program, an affiliate advertising program designed to provide a means for sites to earn advertising fees by advertising and linking to amazon.com. Amazon, the Amazon logo, AmazonSupply, and the AmazonSupply logo are trademarks of Amazon.com, Inc. or its affiliates.

Please support GBodyForum Sponsors

Classic Truck Consoles Dixie Restoration Depot UMI Performance

Contact [email protected] for info on becoming a sponsor