

Ha! Go figure, they make a padded dash filler? Thanks for the link on that. I am gonna get that and I'll get back to everyone on how good it works. Thanks for the tips everyone!
Upholstered dash?
- Thread starter bigjoenvegas
- Start date
You are using an out of date browser. It may not display this or other websites correctly.
You should upgrade or use an alternative browser.
You should upgrade or use an alternative browser.
- Status
- Not open for further replies.
"There are a total of 5 screws holding the dash to the car. There's one at each lower corner near the kick panels, one under the stereo in the back and 4 along the top near the windshield (one in each of the defrost outlets and one under each speaker grille)."
That seems like more than 5 screws.")
That seems like more than 5 screws.
carmangary said:"There are a total of 5 screws holding the dash to the car. There's one at each lower corner near the kick panels, one under the stereo in the back and 4 along the top near the windshield (one in each of the defrost outlets and one under each speaker grille)."
That seems like more than 5 screws.
You know what, I do that EVERY time! I posted this on Oldspower.com a month or so ago and did the same thing. I keep forgetting to count the ones under the speaker grilles. DOH!
Edit, its a total of 7 screws.
I did a vynl wrap and I think it came out good. I plan on doing it again now that I'm practiced on my 80 C20. I never filled my cracks in and they aren't noticeable. I think it looks like it should have been a stock option (for color anyways).
==========================================================================================================madmaxstyle said:I did a vynl wrap and I think it came out good. I plan on doing it again now that I'm practiced on my 80 C20. I never filled my cracks in and they aren't noticeable. I think it looks like it should have been a stock option (for color anyways).
Could you post a picture of your vinyl wrapped dash? I was thinking about vinyl, and how difficult it would be to cover a dash with it. Also, did you end up using a heat gun to stretch the vinyl and make it more flexible?
Jack
I'm not sure how to post pics but I'll try this,
was a total learning experience as I'd never done anything like that before I used a paintbrush and contact cement by 3M. I didn't use heat but thinking back it may have been easier if I had one.
this is still Work in progress pics I was so happy to get it in I took these and never took any more after it was done.
I found this article and figured I would share it.
Step 1
Remove Dash Pad.
Step 2
Clean the Dash Pad with soap & water and let dry. Then clean with a wax & grease remover. Be sure to do the underside because this is where the adhesive really needs to hold for the vinyl to stay tight.
Step 3
All the cracks & imperfections need to be prepped for the new vinyl. Start off by running your hand over the cracks. You will feel the vinyl raised or cupped at both sides of the crack. You will need to remove the cupped vinyl. What I did was just press on it with finger or thumb & break the hard vinyl back to a flat area. Remove any loose pieces from the padding below. Then take a single edge razor blade and at about 30 degree angle scrape both edges of the crack to create a bevel. Next blow off all dust and debri and if the cracks are large be sure foam is in good condition. If any loose foam is present, remove it at this time.
Step 4
We now need to repair the cracks. What I used is sealant foam (Pic 1). You can get this at any hardware store or home center. I got mine at Eastwood Company (Item #52038 Z). Spray the foam into the cracks. You will need to work the foam into the cracks (But not more than needed) with small puddy knife or something similar. The foam now need to dry for about 8 hours.
Step 5
With the foam now cured we need to trim the foam flush with the dash pad.You can use a sharp knife or razor blade. You will see as you cut the foam air pockets in the foam. Don't worry these will be filled in the step 7.
Step 6
Using 180 grit sand paper (Use a block not your fingers to sand) Sand the foam flat with the dash Pad surface. At this time you can also sand the rest of the pad. This will give better adhesion for the adhesive. (Don't foget about the bottom of the pad) Now clean all sanding dust off the pad.
Step 7
Now we will fill and smooth the cracks with Padded Dash Filler (Pic 2). I bought this also from Eastwood (Item # 50118). This is a flexable polyester filler used for repairing padded dashes. Follow directions on the can. Spread a thin layer on the repair area and let dry about 30 minutes. Then sand till smooth and flat with the pad surface. If the pad still has imperfections repeat step 7. Remember it needs to be fairly flat. Any major dips or lumps will show up in the new vinyl. Now if your satisfied with your work clean the Pad again with wax & grease remover or a pre paint prep.
Step 8
You are now ready to cover the Pad with the new vinyl. Cut a piece of vinyl 10 inches X 6 foot. Its a good idea to have the vinyl warm so it is more plyable. You can use a heat gun or hair dryer. Carefull not to overheat or burn the vinyl. I also used the heat gun to help with the wrinkles you will read about later in this article. Lay the vinyl good side down on a good work surface. (You might want to lay something disposable down, the glue can be messy). We will start the adhesive process over the instrument panel section of the Pad first and work to the ends one at a time. Start by spraying adhesive on the vinyl (where the hump is in the Pad)
and on the Pad itself and let the glue setup for 5 minutes to get tacky. (Do Not Use Contact Cement. This will not allow you a chance to spread or reposition the vinyl) Place the Pad upside down onto the vinyl making sure your centered on the vinyl. Start to gently strech the vinyl to the back of the pad paying attention the vinyl is smooth and tight. continue working it till you get the look you want. Then pull back the vinyl to where the adhesive ended. Apply adhesive to both the Pad and vinyl as much as you feel comfortable working with until you reach the ends. (Work from area of gauge cluster out to the ends one at a time). At this time you have covered the old Dash Pad with new vinyl and it needs to be trimed. Simply use a single edge razor blade and carefully trim the excess vinyl (Be sure to leave at least a 1/4 inch wrap around on the bottom).
NOTE: When reaching the ends of the Pad the vinyl wants to bunch up and create wrinkles on the front edge. To minimize this when you get to the end of the Pad pull towards the front (Windshield side of Pad) and the end to minimize these wrinkles. I had a couple wrinkles but when the dash is mounted you can't even see them and it was a 1000 time better than what I had.
This is what worked for me. Hope this helps someone to make there ride a little better!!!!
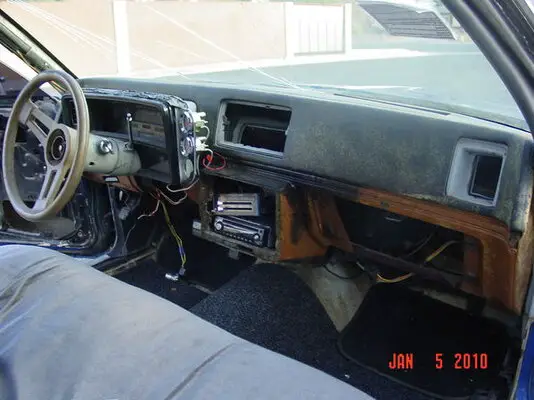
Well, my old lady bought me some padded dash filler and a big roll of vinyl to cover my dash and to do the whole interior. So I am about to pull my dash and start working on it but I do have one problem. I don't want it to look bad and it looks like I should do some sewing around the stereo and a/c panel. So, I dusted of my lady's sewing machine and now I am practicing sewing. I am gonna make this a build thread for dash boards and I hope this helps everyone else like me (broke and not much time). Here is the dash with a cap on it. The previous owner had grey vinyl over the cap and the rest of the dash and I ripped it all out. It was done poorly and due to the Las Vegas heat it was coming apart. I hate when people half-*ss things and this car definatly was half-assed!
Attachments
Definitely post up some progress pics. A dash repair and recover thread would be cool. Good luck.
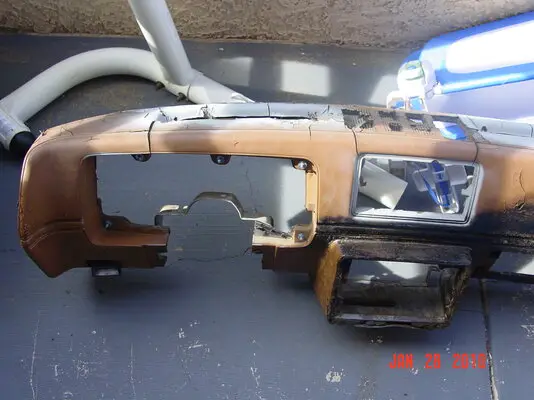
Well removing the dash was easy but I don't think I will be reusing it. As you can see this is definitely a Nevada car. Lol! So I wanted to show everyone what it looks like. Pretty tore up but it was very simple to remove. I had to take off the instrument cluster and box, then remove the washer and light switch bracket. Next I removed 2-10 mm bolts on each bottom corner of the dash and 1 under the stereo. Next was 2 screws in each of the defrost vents and 1 more 10 mm behind the center air vent on the dash. I then dropped the column and slowly pulled the dash off. I reached behind and popped off the wire holds and removed the under dash light. There was also a fuse block bolted on at the e-brake pull. Easy as that! Now I just need a used dash to put back in. No sense on polishing a turd!
Attachments
- Status
- Not open for further replies.
Similar threads
- Replies
- 12
- Views
- 2K
- Replies
- 15
- Views
- 2K
- Replies
- 5
- Views
- 561
GBodyForum is a participant in the Amazon Services LLC Associates Program, an affiliate advertising program designed to provide a means for sites to earn advertising fees by advertising and linking to amazon.com. Amazon, the Amazon logo, AmazonSupply, and the AmazonSupply logo are trademarks of Amazon.com, Inc. or its affiliates.
