BUILD THREAD 84 Regal back half/caged/mini tubbed lq4/4l80e build

Roblq84

Apprentice
Oct 29, 2023
73
141
33
Finally finished most of the wiring and got everything mounted up behind the dash, and really wanted to see how this interior paint was going to come out

I scuffed it, some parts sanded, wiped down, used 2 coats of adhesion promotor, 3-4 coats of duplicolor flat black vinyl and fabric, and like 2 coats of clear. I’m just happy it’s not brown anymore, and this is the first interior I’ve ever painted. That steering wheel has to go next,
When I wired the tach Back in, the last previous setting was at 8k🤣 pretty sure it had a bbc

and that oil cap is driving me crazy being written upside down lol
 

Attachments

  • IMG_2099.jpeg
    IMG_2099.jpeg
    2.7 MB · Views: 42
  • IMG_2085.jpeg
    IMG_2085.jpeg
    1.8 MB · Views: 42
  • IMG_2083.jpeg
    IMG_2083.jpeg
    1.4 MB · Views: 38
  • IMG_2096.jpeg
    IMG_2096.jpeg
    3 MB · Views: 40
  • IMG_2119.jpeg
    IMG_2119.jpeg
    3.2 MB · Views: 42
  • Like
Reactions: 2 users

bracketchev1221

Royal Smart Person
Jan 18, 2018
1,415
1,654
113
I deal with vehicle wiring almost daily, and I had the biggest smile and shocked look on my face when every wire actually matched up and worked as should 🤣. The only thing i regret is wasting the time trying to go through the original harness since a lot of things loop back into eachother and go to dated components which are now obsolete.
You couldn’t have said it better as a satisfying job, and atleast knowing now from the get go wiring it firsthand where and what every single circuit, wire, and color is, but the best part of it all was the price, which was a 5th of most major brands 🍻

In all honesty, I have no idea, the car is more sentimental to me, and I’m going for the overall performance and look of what I’ve always wanted to build. The engine should be putting out right around 500, through a 4l80e, with a 3800-4000 stall, with 4.10s, with 31” tires, and a weight of about 28-2900 lbs. 60ft times should be significantly low considering the setup. as a ladder bar/backhalf Car, it should really hook well, but I would be surprised if it’s not in the ballpark of 11s, your guess is as good as mine haha
I would agree, 500 hp and probably in the area of 3200 lbs with driver I think you could be low 1.50 in 60' and probably low 11's. My car way back when I first ran it was 3675 with driver and 540 hp on the dyno and I ran 11.20's at 118.
 
  • Like
Reactions: 3 users

Roblq84

Apprentice
Oct 29, 2023
73
141
33
interior is 99.9% finished, I almost forgot what it looked like, the best feeling is getting into the drivers seat for the first time, taking a deep breathe, and appreciating all the work that went into it.
 

Attachments

  • IMG_2150.jpeg
    IMG_2150.jpeg
    4 MB · Views: 36
  • IMG_2153.jpeg
    IMG_2153.jpeg
    2.8 MB · Views: 42
  • IMG_2160.jpeg
    IMG_2160.jpeg
    677.9 KB · Views: 41
  • IMG_2162.jpeg
    IMG_2162.jpeg
    706.6 KB · Views: 40
  • IMG_2159.jpeg
    IMG_2159.jpeg
    933.4 KB · Views: 36
  • Like
Reactions: 4 users

Roblq84

Apprentice
Oct 29, 2023
73
141
33
Interesting build. I'm in for the ride. Looking good 👍
Thanks!!
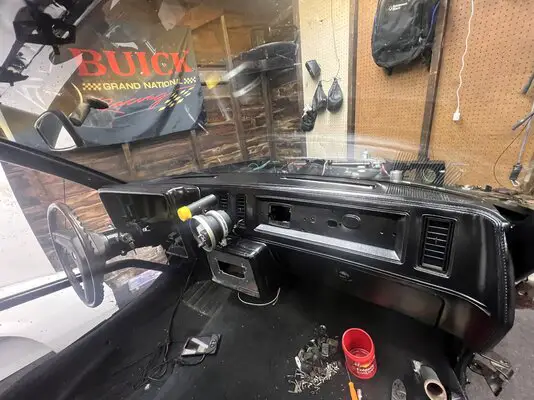
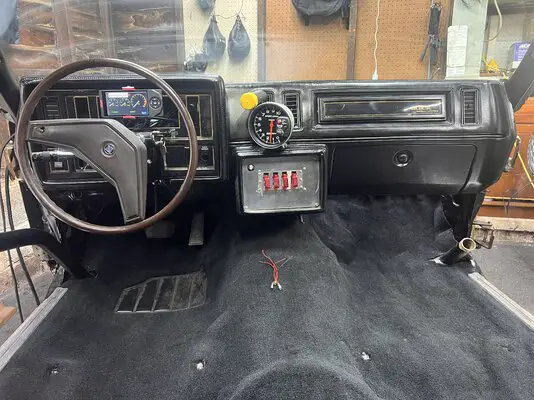
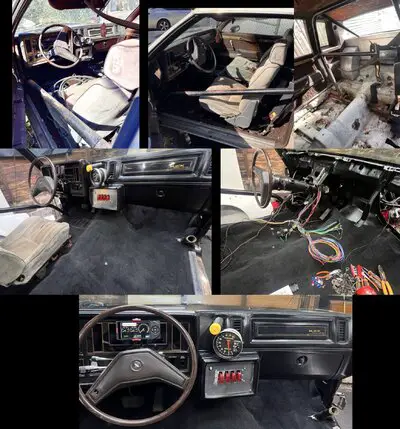
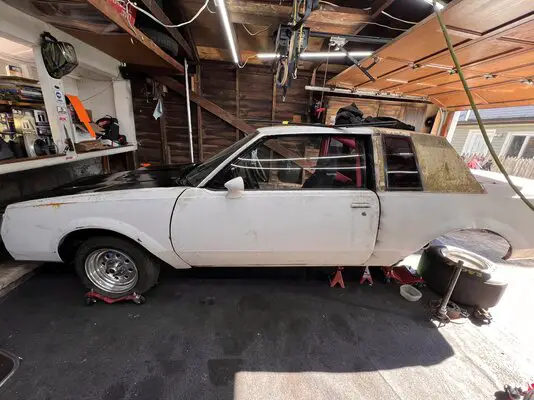
This isnt going to be a show car, I wanted to keep
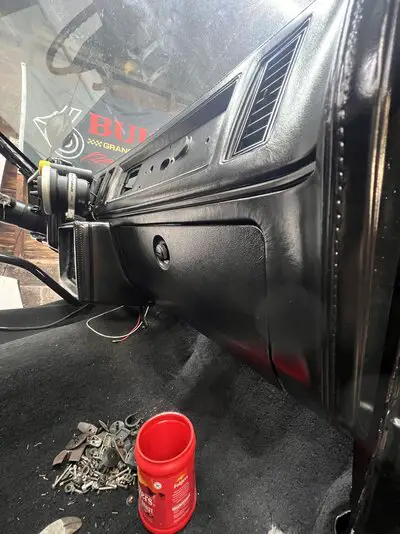
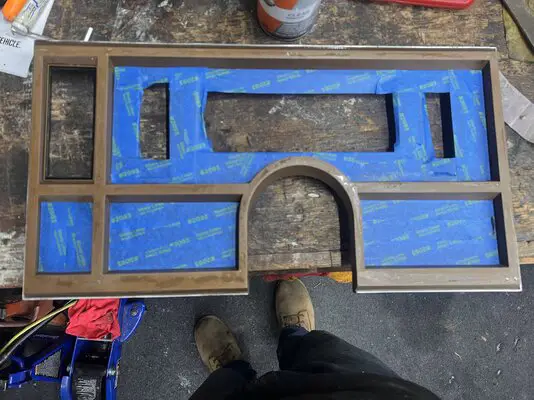
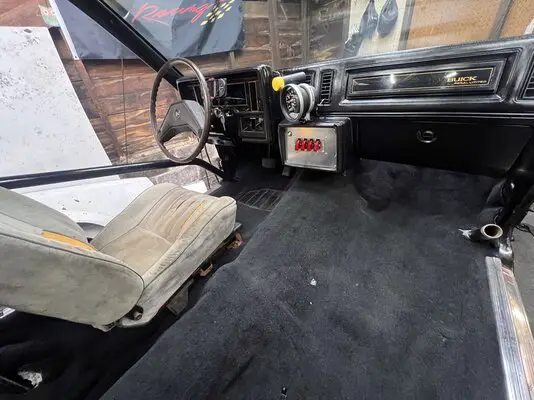
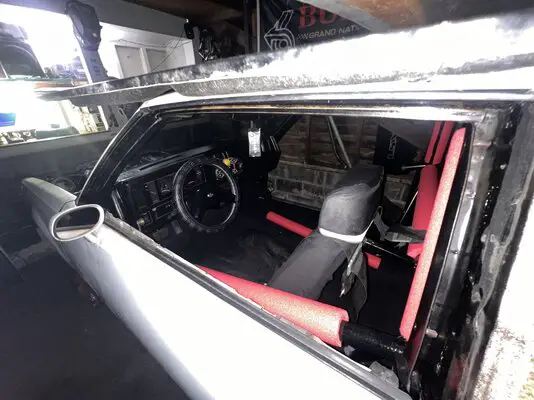
The originality and character of the cars past, using the original autometer monster tach, same switch panal, yes it’s scratched and gouged, but some one took The time to make it before me, I kept the original gold outlines on the cluster bezel, and glove box plate etc. it’s paying homage to what hot rodding originally was, realistic, functional, garage built with sweat blood and tears, turning the vision and ideas in my head of
My dream car into a reality, to some it won’t be pretty, or “by the book” but more of a test of lifelong mechanic experience. I’m grateful everyday to be able to have the time and means to do what others dream of doing no matter what kind of car it is.

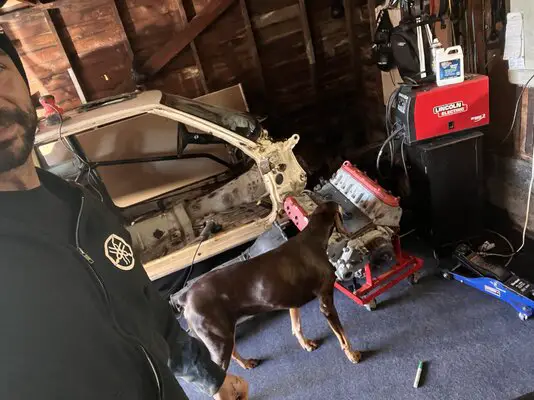
This car is my therapy, no better feeling than getting to build your own, after working on customers, and everyone else’s using your expertise, when it’s your own, you can really let your ideas shine, where there’s no rules or limits of what you can do.

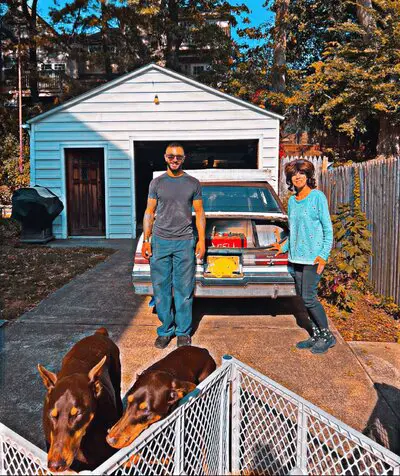
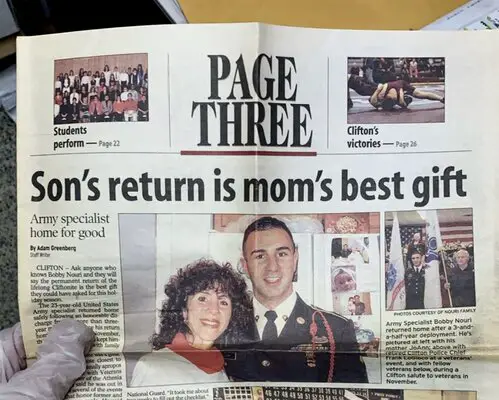
Long story short, my mother was diagnosed with late stage brain cancer after an unexpected seizure, a week later I was packing my bags and 2 pups in Texas from where I was previously stationed, (12B, first AD, OIF 2009-2010) to move back home To nj to take care of her. During that time and roller coaster of emotions, never ending dr appointments, i couldn’t really be away from home much, so i purchased this car, it was my get away, (which was 5 ft off the back of the house lol) and a place to clear my head and keep it together and stay strong as a caretaker, the one car that just always took My breath away whenever I saw it, as well as a previous not so great history, I used to have a 87 we4, internet resources were pretty scarce at the time, I was young and thought I knew everything, but this time, I need to right my past wrongs with it

She passed away 19 months from her diagnoses, and a month later, I lost my one therapy dog whom I’ve had since she was 5 weeks.

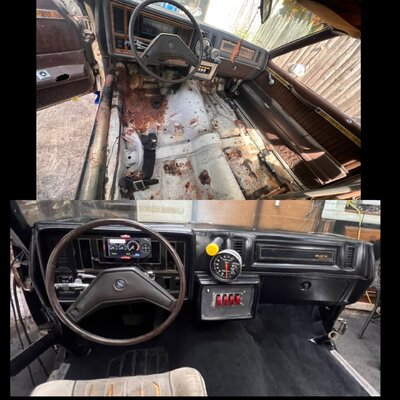
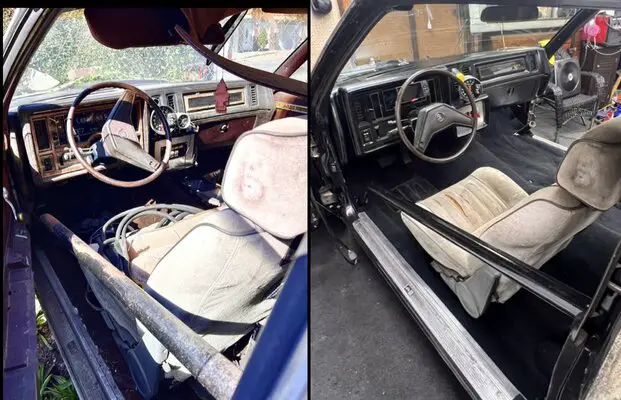
So many people just see metal and rusty old crap, but it’s the story behind the car, and what it means to you, and the memories that were built and shared with others together.

Thanks for reading
 

Attachments

  • IMG_2166.jpeg
    IMG_2166.jpeg
    805.1 KB · Views: 45
  • IMG_3650.jpeg
    IMG_3650.jpeg
    2.2 MB · Views: 44
  • IMG_6420.jpeg
    IMG_6420.jpeg
    347.8 KB · Views: 39
Last edited:
  • Like
  • Friendly
Reactions: 11 users

Tony1968

Royal Smart Person
Supporting Member
Jul 1, 2018
2,324
5,132
113
NW Indiana
As someone who is a caregiver to my mother who has late stage dementia believe me... I understand
And I totally get what you are going after. Don't stop. Keep up the good work brother. And myself as I'm sure many here have lost beloved dogs as well. Life can be so damn hard...
 
  • Like
Reactions: 5 users

Roblq84

Apprentice
Oct 29, 2023
73
141
33
As someone who is a caregiver to my mother who has late stage dementia believe me... I understand
And I totally get what you are going after. Don't stop. Keep up the good work brother. And myself as I'm sure many here have lost beloved dogs as well. Life can be so damn hard...
Sorry to hear about your mother as well, I’m sure it’s not easy, but you have my respect for what you are doing. And thank you!
It was like a 1-2 punch, but they’re always here with us.
I Took a break from the car for a bit and recently started making progress on it, and want to get it wrapped up hopefully this year lol the joy of a project car. I’m sure a single turbo will
Be installed shortly after it’s done 🤣
 
  • Like
Reactions: 2 users

SoFloG

Royal Smart Person
Mar 9, 2016
1,107
1,258
113
South Florida
Thank you for your service and my condolences. Your story makes this build that much cooler. Keep up the progress, it gets more rewarding the more you accomplish.
 
  • Like
  • Agree
Reactions: 2 users

Roblq84

Apprentice
Oct 29, 2023
73
141
33
Thank you for your service and my condolences. Your story makes this build that much cooler. Keep up the progress, it gets more rewarding the more you accomplish.
thank you! Much appreciated, and for sure, as soon as I slapped the header panel on it, it’s starting to take shape, just have to keep the big picture in mind and see what others don’t, especially past the cosmetics lol.


Had to retouch on the braking system after doing some research and seeing what setup was in the rear. Should have done it prior, but it just felt like another boxed check without looking into it.

I’m ditching the 24mm master cylinder since
1. The acdelco from Rock auto leaks at the front line seam, warranty is out from October, and only good for the same part number replacement so I’m screwed on that 😑may just warranty it and try to sell the new one I guess

2. I purchased a 79-80 riviera master cylinder with the 1 inch bore, and larger reservoir for rear disc brakes, hopefully that monstrosity clears the hood lol

2. Replaced the original proportioning valve with a Pv4 for disc/disc brakes

3. Ran a new line from prop valve to rear, to the rubber hose, and split left and right with the hard lines, purchased rebuilt calipers and just going to use what was on it from The Volvo 240 since they are known to fit, I’m able to split them to install, and they are also dual piston, one on each side inner and outer so should be better braking as well, with some new low metallic pads.
(Lines and front end are already brand new and were replaced when it was a roller and before I dropped the engine in)

4. Using DOT 5.1 fluid
 

Attachments

  • IMG_2281.jpeg
    IMG_2281.jpeg
    1.7 MB · Views: 22
  • IMG_2270.jpeg
    IMG_2270.jpeg
    173.4 KB · Views: 25
  • IMG_2267.jpeg
    IMG_2267.jpeg
    1.2 MB · Views: 23
  • IMG_2278.jpeg
    IMG_2278.jpeg
    1.1 MB · Views: 24
  • IMG_2279.jpeg
    IMG_2279.jpeg
    983.1 KB · Views: 23
  • IMG_2261.jpeg
    IMG_2261.jpeg
    3 MB · Views: 23
Last edited:
  • Like
Reactions: 2 users

Roblq84

Apprentice
Oct 29, 2023
73
141
33
It was a different post regarding the rear but ill touch on it again for anyone following this build.

The rear is a 12 bolt out of a 69 chevelle or Malibu since it has the upper trailing arm mounts

Has a strange spool, Richmond gears, shortened axle tubes, and ford 9” ends from a Torino with the sealed bearings, and 33 spline axles, for right now, I’m going to be just reusing what’s in it, cleaning it up and resealing it, when its road worthy I will drive it to the diff shop and have them install some fresh gears and most likely a Detroit trutrac, for the moment it’s an expense I don’t need to worry about, and I’m really not all that familiar with rebuilding rear ends anymore than pulling axles or changing gear oil, I would feel More comfortable having some one who does this everyday do it.
The calipers are off of a 1988 Volvo 740, I tried the 1990 Volvo 240, but the line outlets are in the middle and not the side, had to swap them. They use a bubble flare, with metric threads, had to do them twice since mid year on the Volvo calipers they switched from British to metric threads, they are split block dual piston calipers which need to Be split in order to remove the rotor as shown
(Ps.i know a stud is missing, I’m matching it up for a new one)

The original diff cover has rusted pin holes in it so I also ordered a perfect launch cover with bearing cap tensioners

I picked up a set of hardtop quarter windows, header panal, bumper fillers, door sweeps,
Going to paint the headlight and tail light bezels black, modified the radiator hold down and painted it black as well
 

Attachments

  • IMG_2218.jpeg
    IMG_2218.jpeg
    2.5 MB · Views: 29
  • IMG_2219.jpeg
    IMG_2219.jpeg
    1.4 MB · Views: 28
  • IMG_2216.jpeg
    IMG_2216.jpeg
    2.1 MB · Views: 33
  • IMG_2237.jpeg
    IMG_2237.jpeg
    2.2 MB · Views: 35
  • IMG_2240.jpeg
    IMG_2240.jpeg
    3.3 MB · Views: 30
  • IMG_2246.jpeg
    IMG_2246.jpeg
    1.7 MB · Views: 27
  • IMG_2250.jpeg
    IMG_2250.jpeg
    1.3 MB · Views: 28
  • IMG_2305.jpeg
    IMG_2305.jpeg
    1.8 MB · Views: 28
  • IMG_2329.jpeg
    IMG_2329.jpeg
    1.8 MB · Views: 27
  • IMG_2332.jpeg
    IMG_2332.jpeg
    1.6 MB · Views: 28
  • IMG_2846.jpeg
    IMG_2846.jpeg
    71.2 KB · Views: 9
  • IMG_2843.jpeg
    IMG_2843.jpeg
    2.3 MB · Views: 9
Last edited:
  • Like
Reactions: 1 users

GBodyForum is a participant in the Amazon Services LLC Associates Program, an affiliate advertising program designed to provide a means for sites to earn advertising fees by advertising and linking to amazon.com. Amazon, the Amazon logo, AmazonSupply, and the AmazonSupply logo are trademarks of Amazon.com, Inc. or its affiliates.

Please support GBodyForum Sponsors

Classic Truck Consoles Dixie Restoration Depot UMI Performance

Contact [email protected] for info on becoming a sponsor