BUILD THREAD 78 Malibu "#DtoxBu/Caged Beast"

Status
Not open for further replies.

Bumpin1ohmSS

Royal Smart Person
Jun 17, 2008
1,643
113
63
Cali to Az
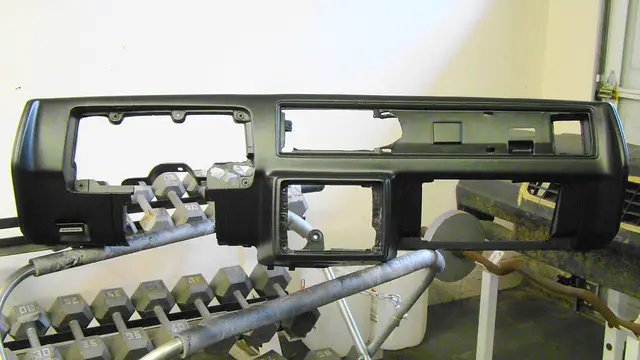
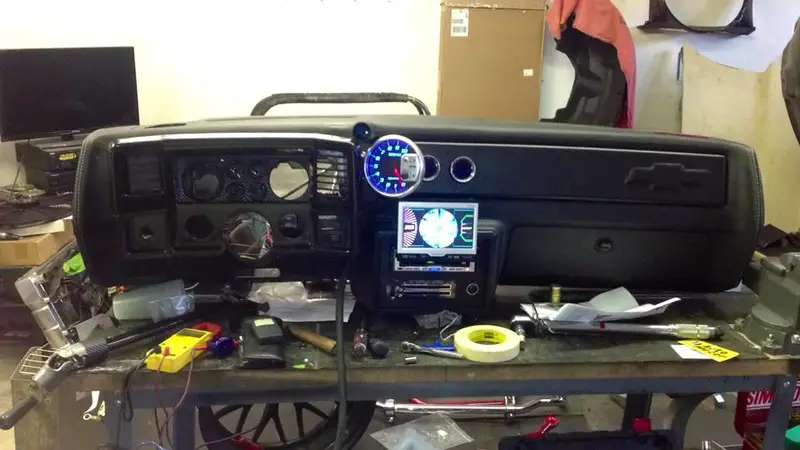
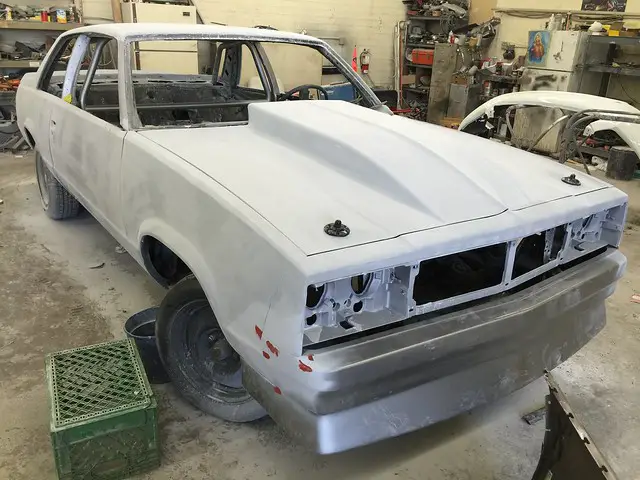
Wassup yall! 80z back at it again with a 78 Mali. Picked it up last year from a club member and quickly began cleaning up parts and stocking up goodies for the build. Few pics of her as she sits. In need of some serious tlc and 80z is ready to handle the job...

8099273445_231159b349_o.jpg


8099273569_b7f34ab979_o.jpg


8099273009_1a4be119ff_o.jpg


8099273665_077f065236_o.jpg


8631410610_7933efbc60_c.jpg


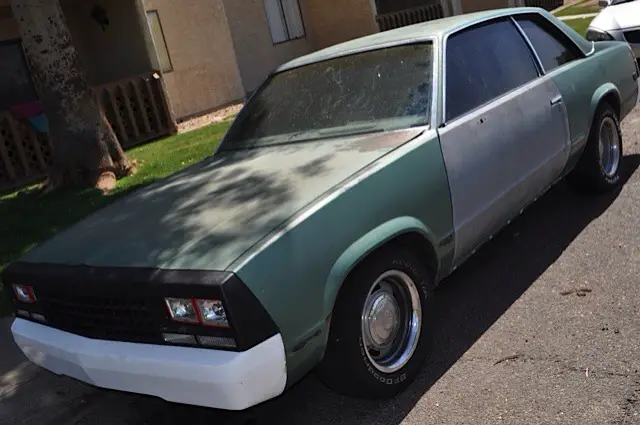
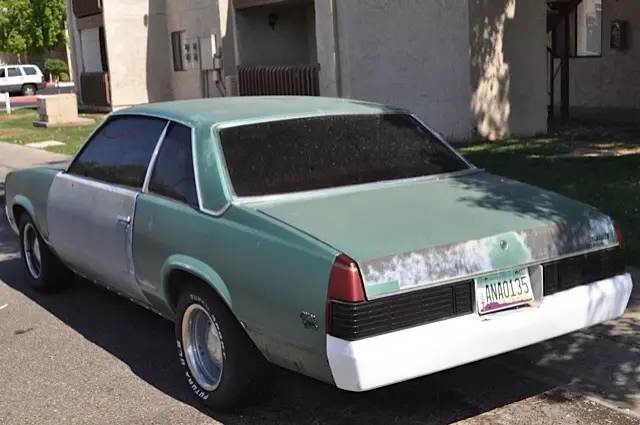
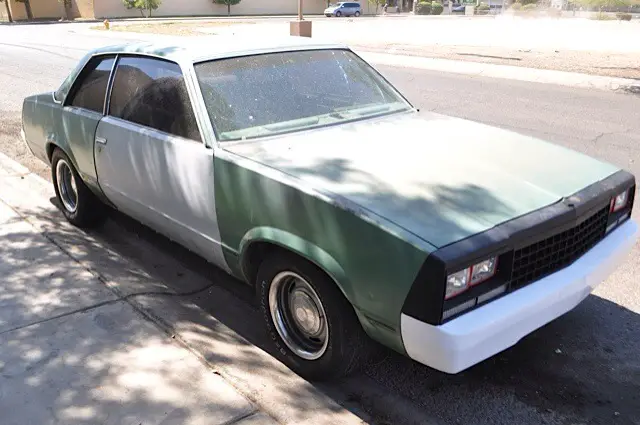
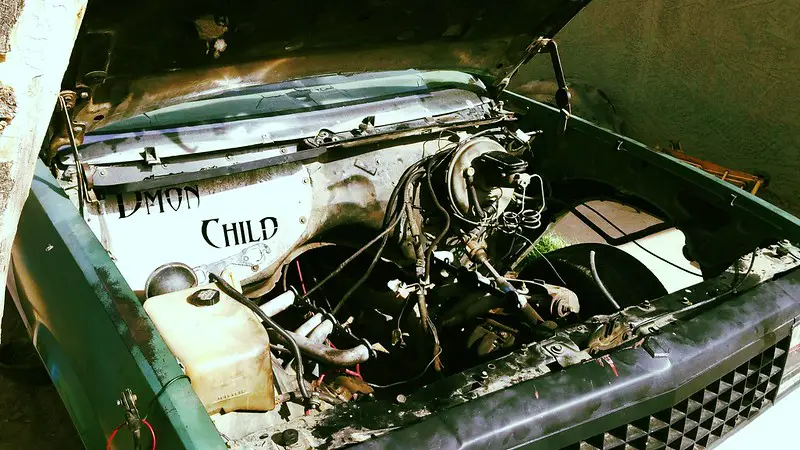
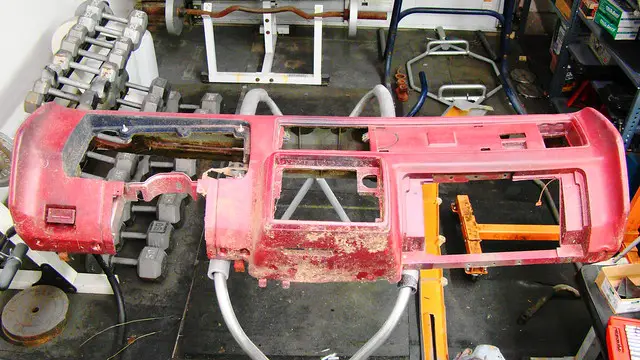
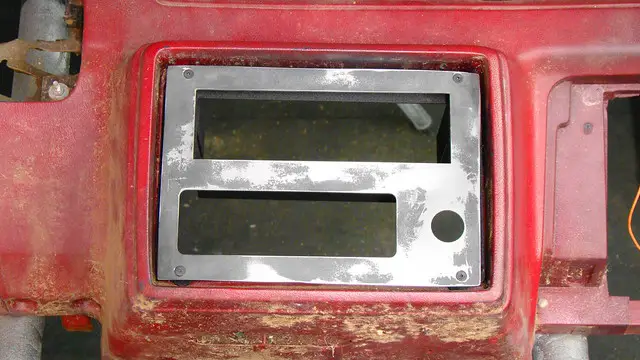
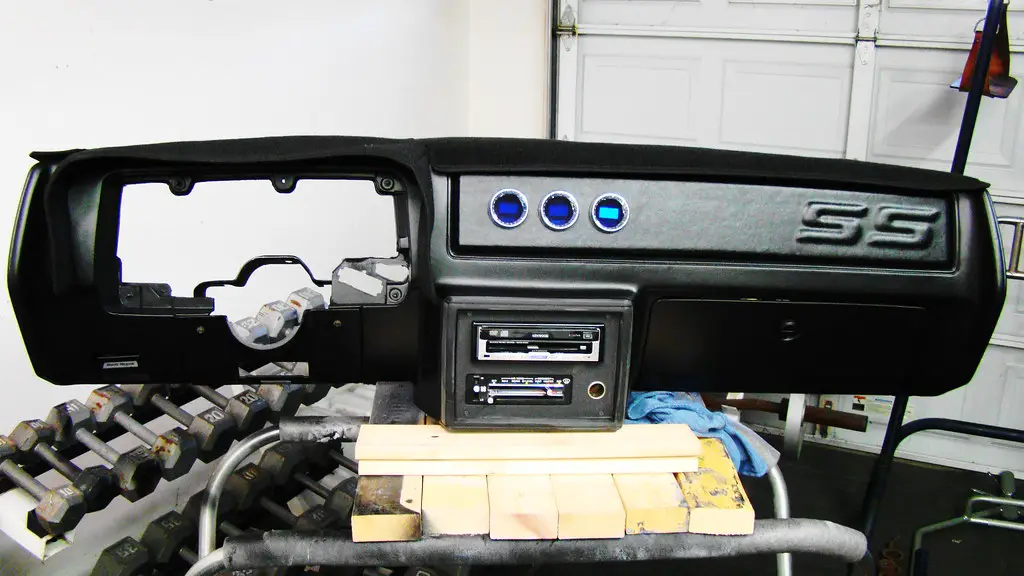
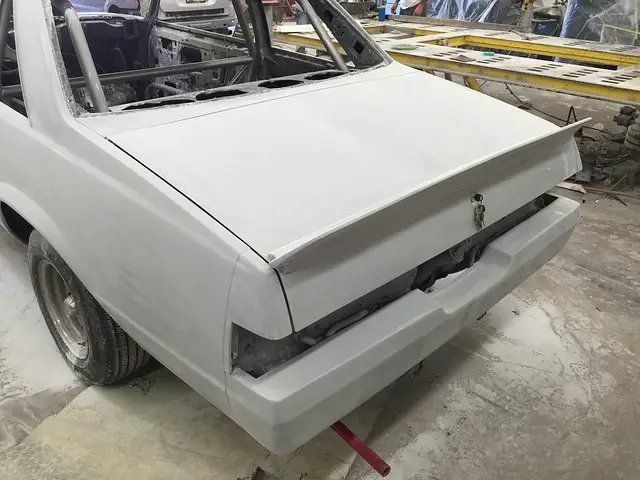
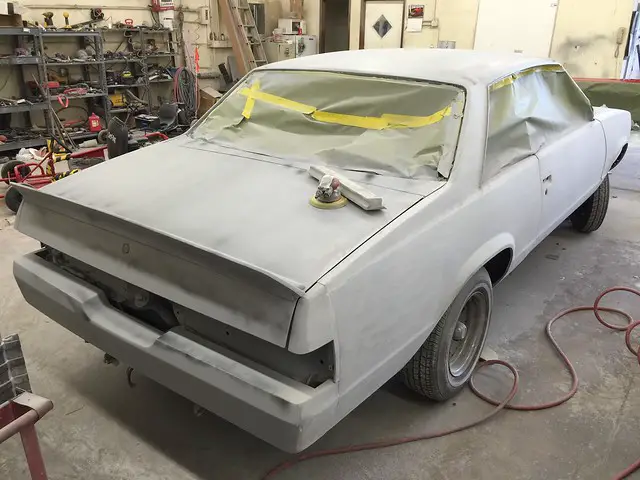
She already has a few cosmetic mods done-tucked bumpers, updated front clip and I believe the rear tails are the newer style. Ive already started stacking parts up, cleaning and painting up stuff as I get em. A few parts I have so far are:
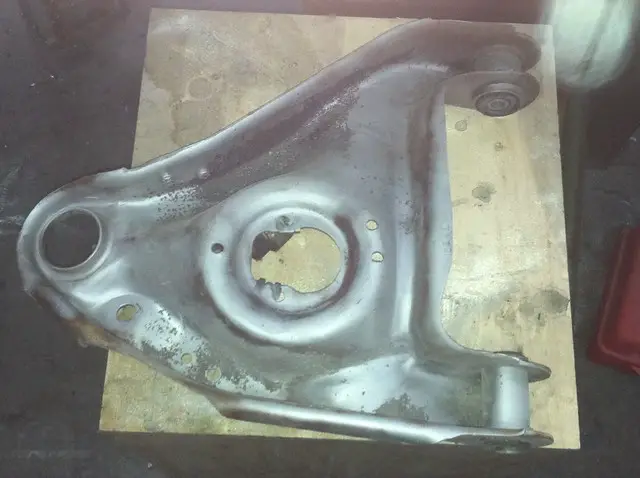
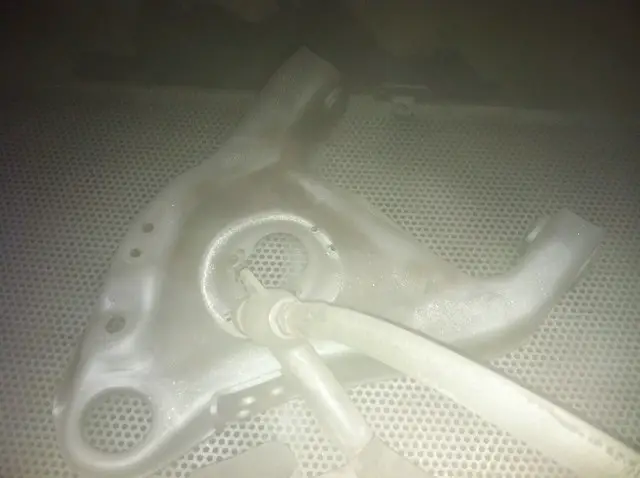
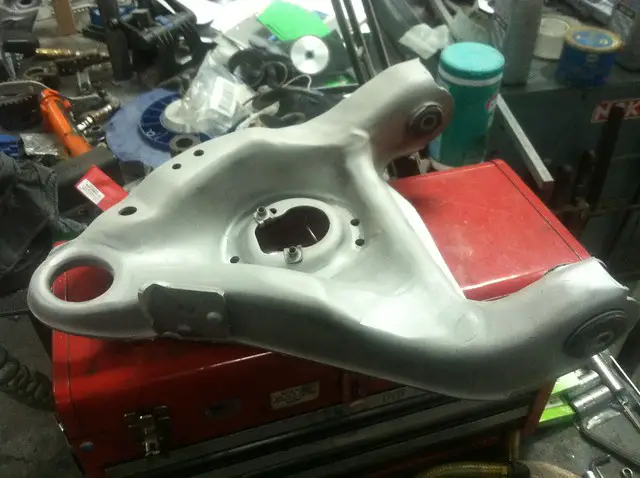
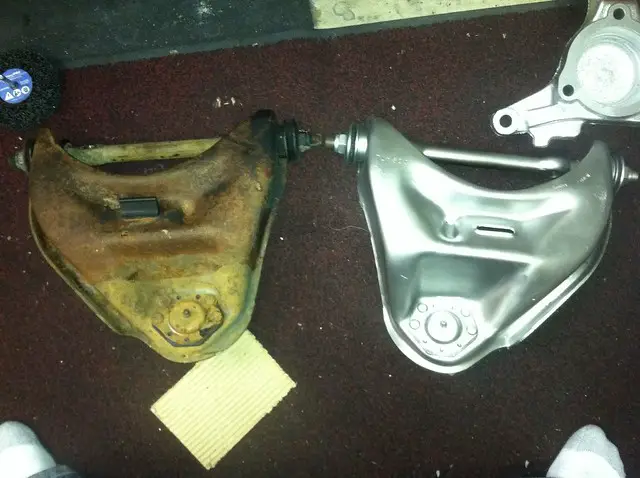
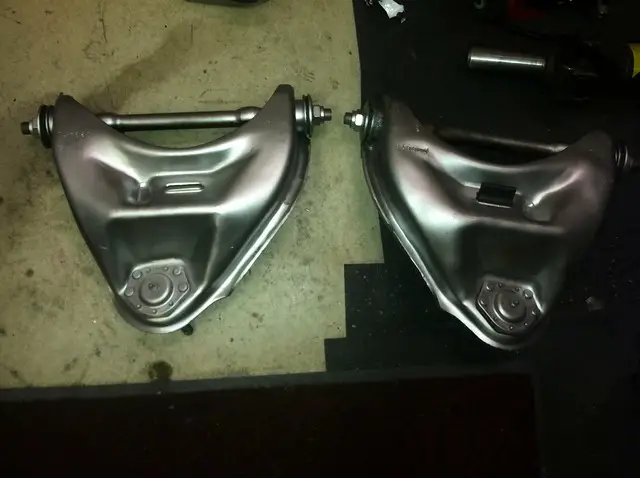
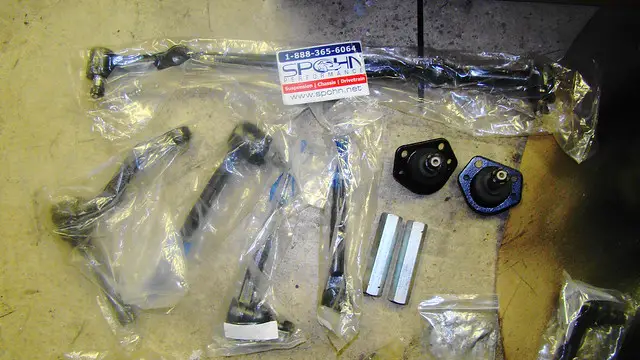
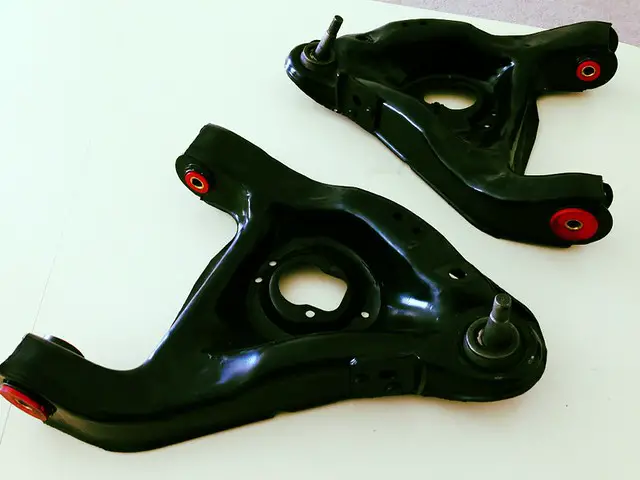
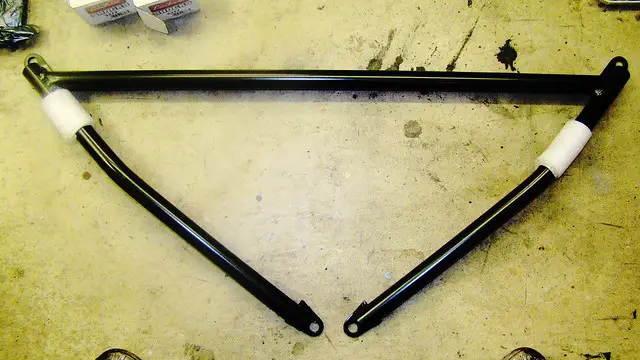
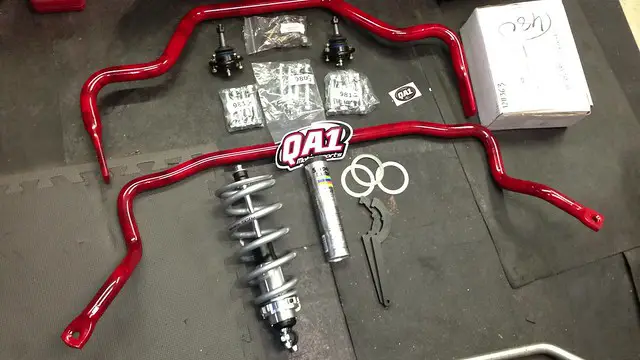
Front suspension setup:

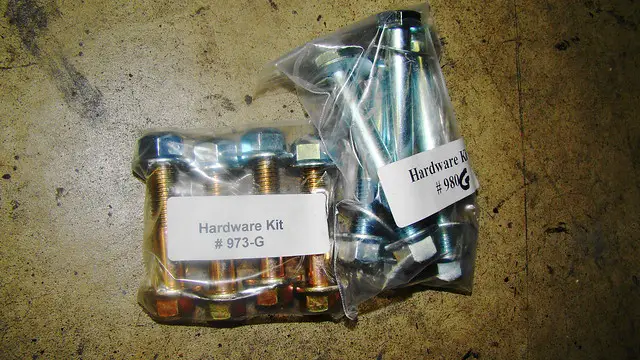
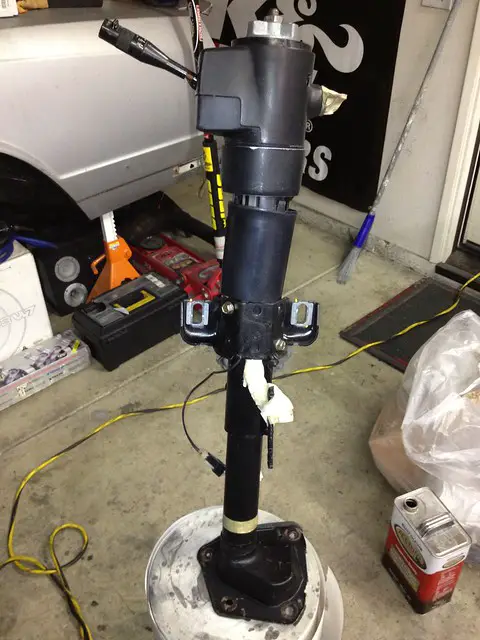
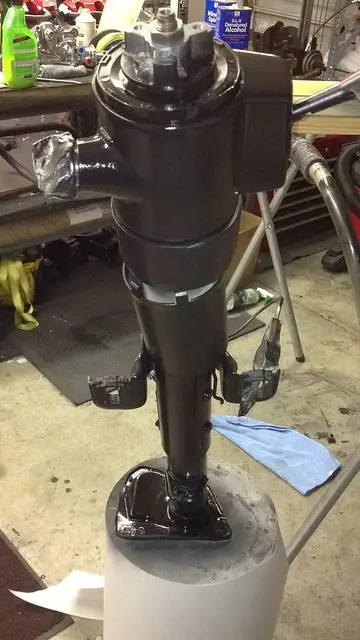
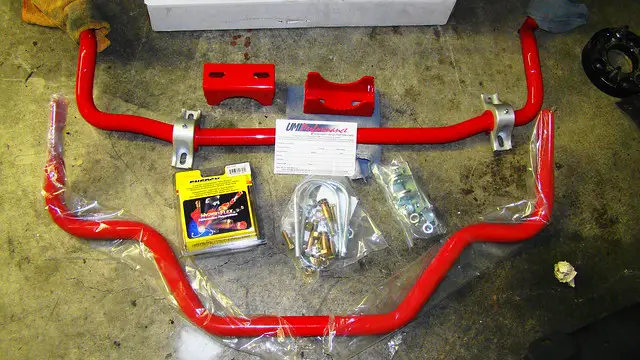
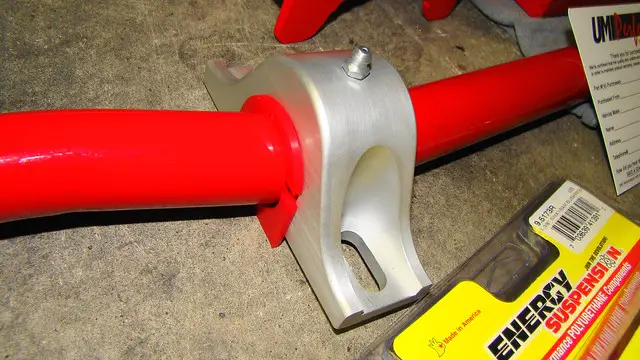
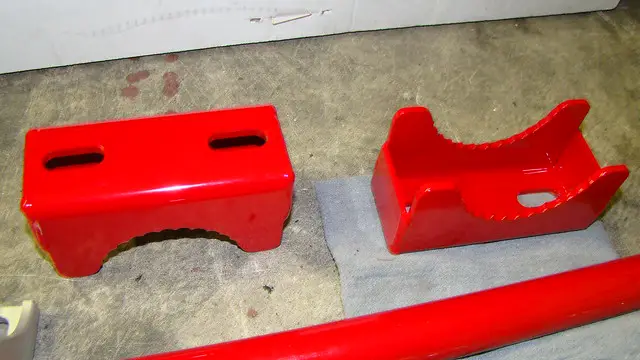
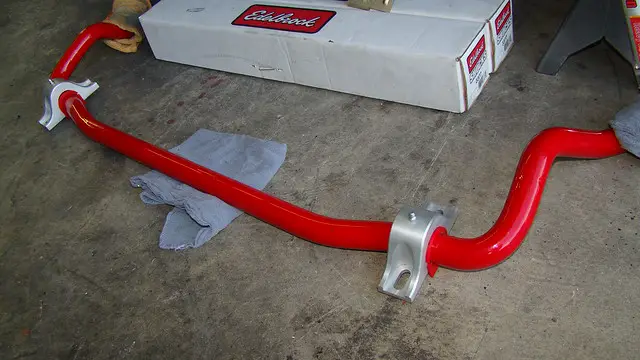
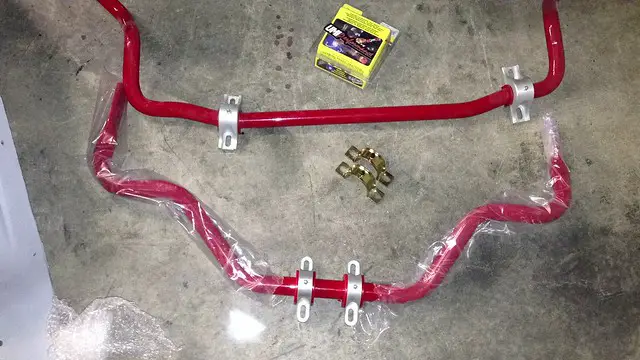
Front upper and lower arms have been cleaned up, powder coated and new Spohn bushings, super travel ball joints and lower heavy duty ball joints.All new mounting hardware-nuts and bolts all from Spohn, SC&C front triangular jounce bar setup, Spohn front steering and UMI front swaybar and aluminum swaybar mounts. OPG 1" drop springs and Belltech nitro drop shocks, rebuilt steering box and jeep sfaft setup.

Rear Suspension:

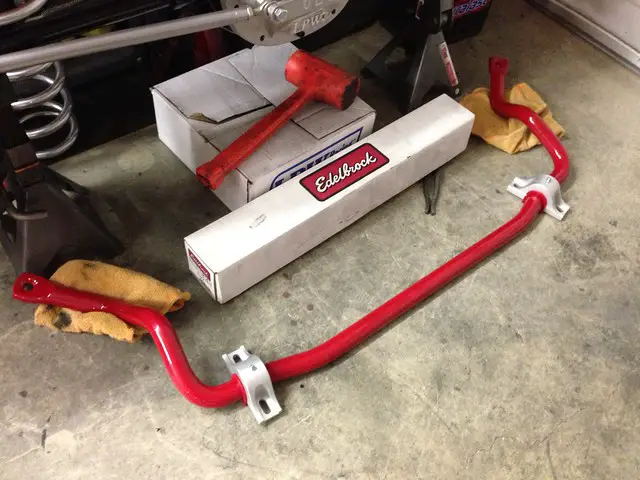
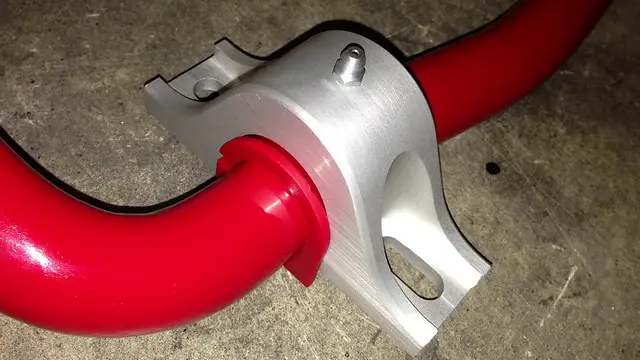
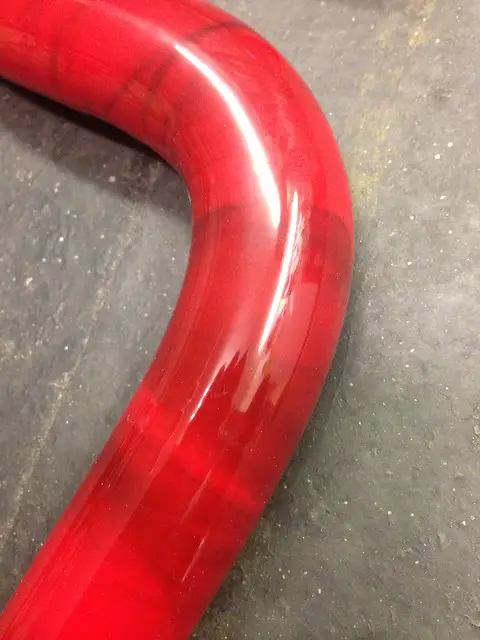
OPG 1" drop springs and Airlift coil spring bags. Belltech nitro drop shocks, Speedway rear upper/lower trailing arm kit, Edelbrock antihop bars and a UMI rear drag bar(Pre order-waiting on shipment)
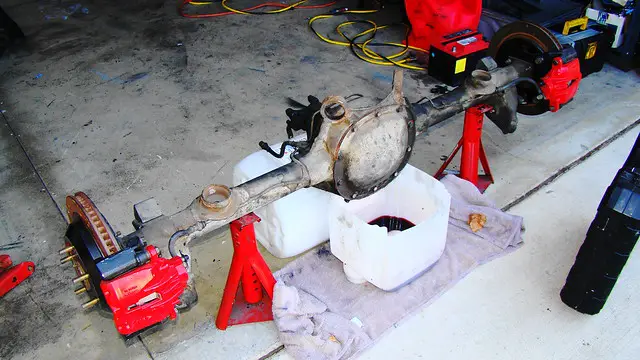
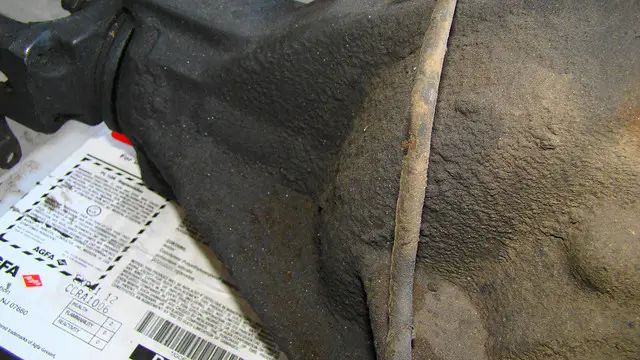
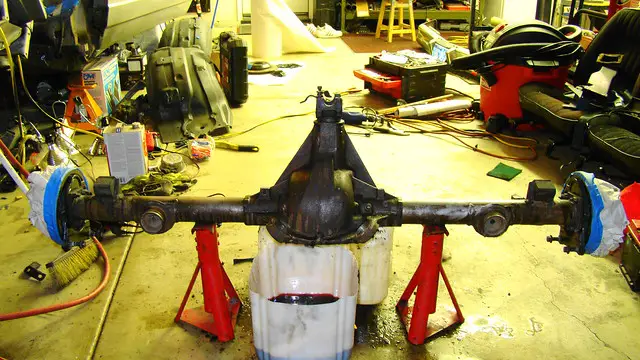
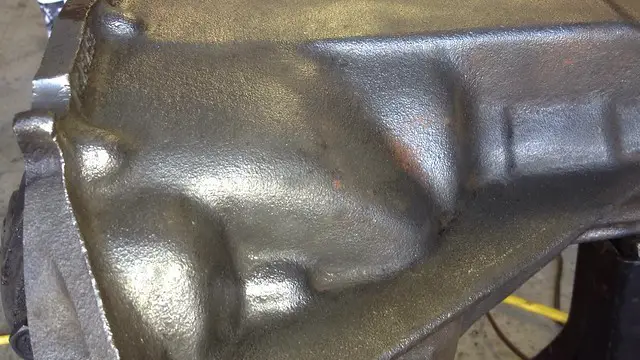
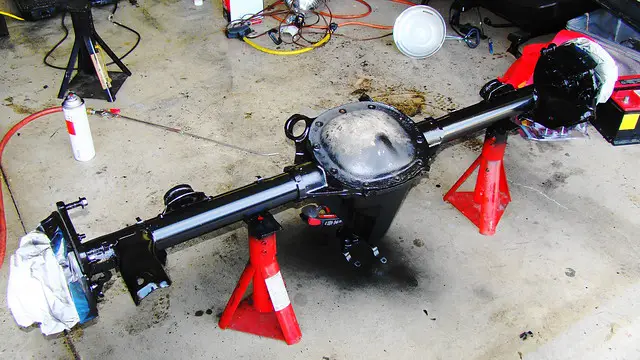
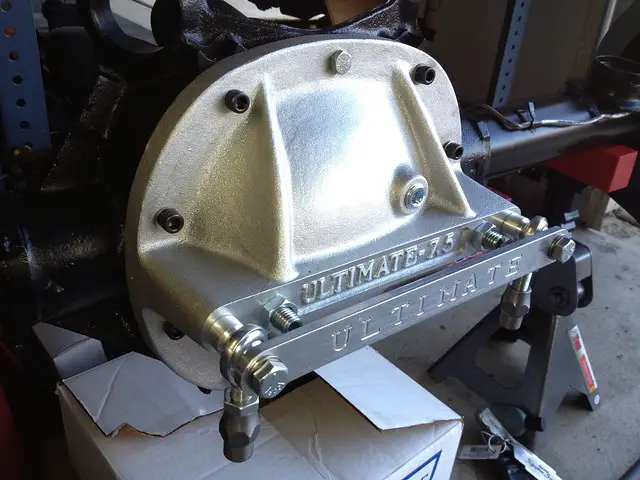
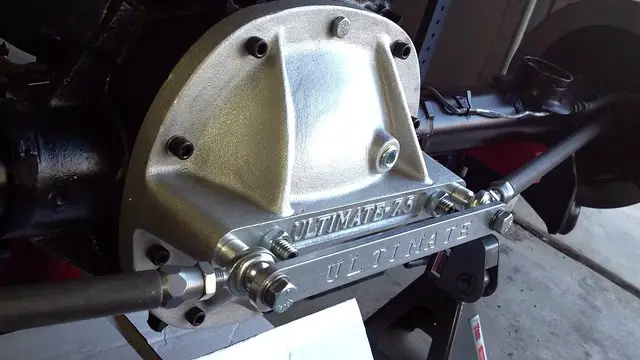
Rear end setup

Built Posi/373 7.5 rear with Maro SS rear disc swap, LPW rear cover and brace kit, Moser 26 spline axles

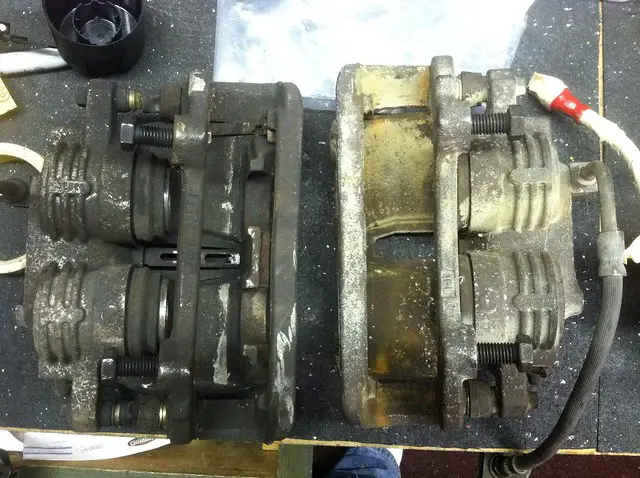
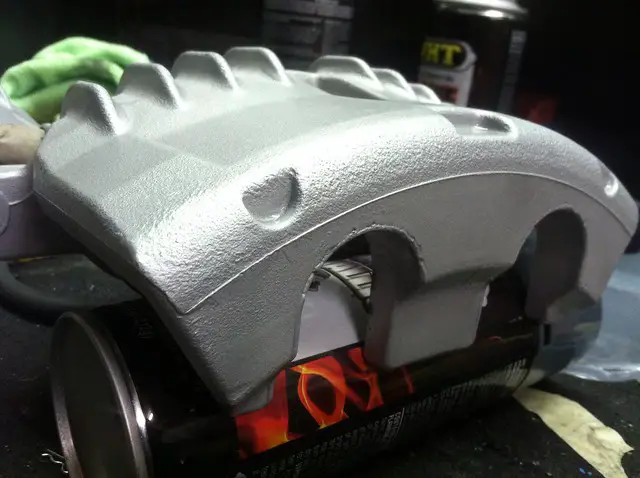
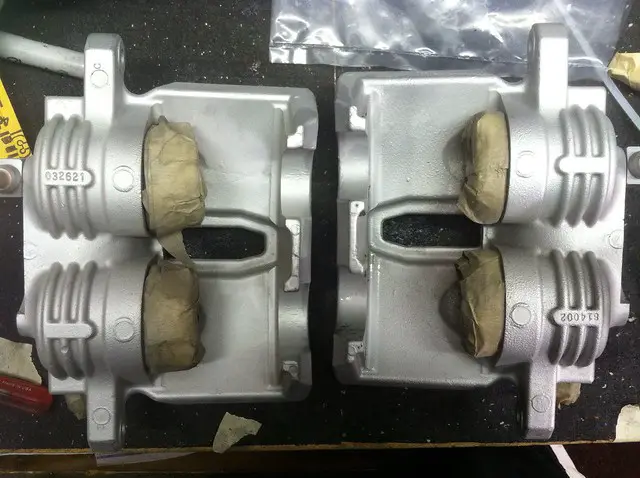
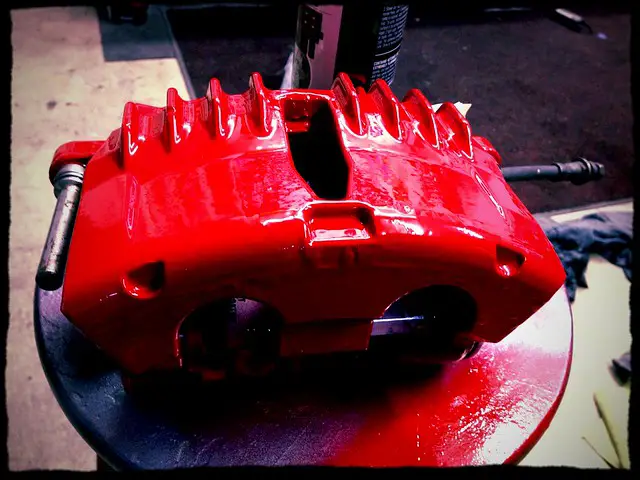
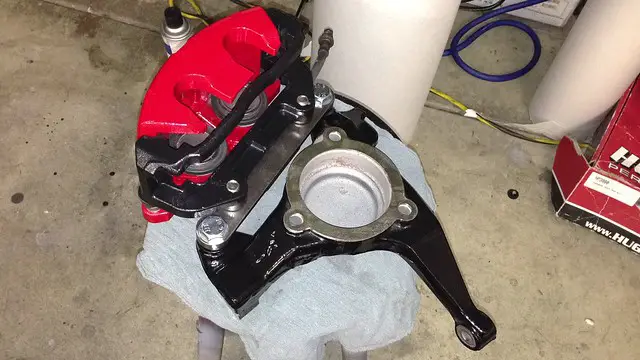
Brake setup for the front and rear:

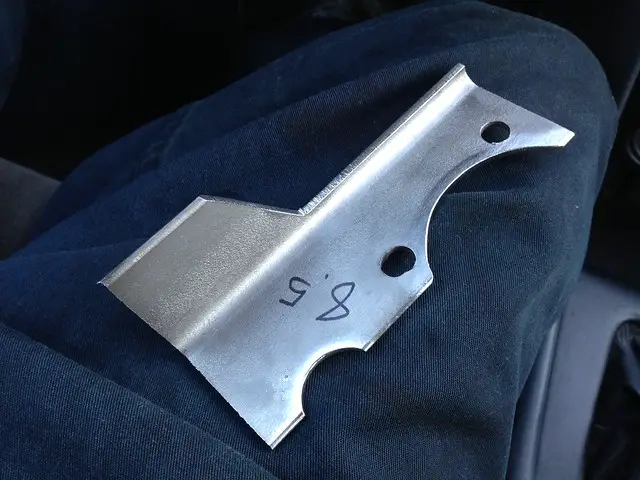
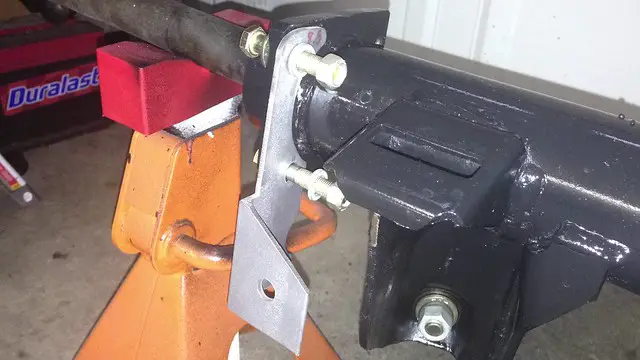
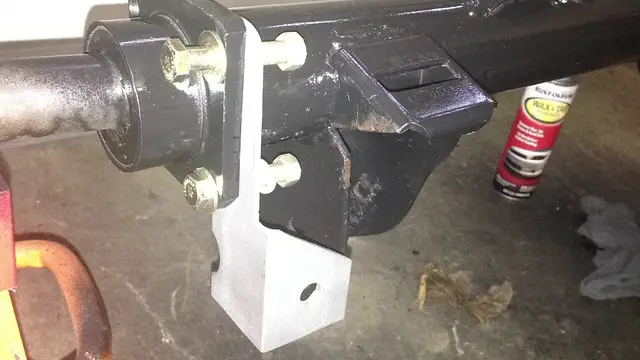
Camaro SS caliper swap with blazer spindles, new hubs, Kore3 big brake kit and z51 PAB setup for 13.39" front rotors(black cross drilled) Rear setup is from a 2002 Camaro (LS1 rear brake swap mod) 12" black rotors, shock relocater brackets fabbed up and Im in the process of making some brackets for the e brake.

Motor will be a "357" rebuild. I have a new hydraulic flat tappet cam/lifter set, 670 CFM Street avenger carb, airgap style intake, new dizzy, fuel pump, Crane 1.5 roller rockers, GM serpentine(fresh powder coat done), new alt, new water pump(GMPP), new 4 core radiator and fan assy and all the needed stuff to get the motor goin.. Trans is a 200r4 that was built by the previous owner but will be torn apart and rebuilt-new 200 deep pan from hughs.

Whew! Nuff talk..Pic time!!!!


UPDATED 3-25-15

Looks like all my pics were lost somehow on flickr.

16308243244_ffd29204d5_z.jpg


16742962068_7b66ef5401_z.jpg


16904704766_1862ec1af6_z.jpg

 
Last edited:

Bumpin1ohmSS

Royal Smart Person
Jun 17, 2008
1,643
113
63
Cali to Az
7.5 posi rear end clean up... Picked it up for dirt cheap and it already had the swap done. Just needed that "EKCO" Warren treatment

8114508407_34a896423f_z.jpg


8114524576_e529340c0d_z.jpg


Started knocking off a lot of the grime and stuff with a small chisel. Drained the fluid and broke out the wire wheel

8114522941_e045cb234e_z.jpg


8099284440_04ae43ee7a_z.jpg


Got it pretty clean

8099284196_f61d00feb4_z.jpg
 
Last edited:

Bumpin1ohmSS

Royal Smart Person
Jun 17, 2008
1,643
113
63
Cali to Az
Used some Eastwood "Xtreme Chassis Black" primer here..

8114538456_512ef8d1a7_z.jpg


I welded up the LPW brace kit and picked up some black drilled 12" rotors-Shout out to big Josh!!! Lowproelco

8143000074_8d991b3b0e_z.jpg


8142973931_fc2fa13deb_z.jpg


Fabbed up some shock relocation brackets

8385501736_38598c837f_z.jpg


8384418855_25165a7f04_z.jpg


Decided to add a lil flare to the brackets...

8384417671_75ddd43354_z.jpg


8397014481_4eb47eeae0_z.jpg


8398101586_a51d54d3f6_z.jpg


Lil red to add some detail

8408257904_b93bf5152a_z.jpg


8408258942_8ed9992fa4_z.jpg


Continued...
 
Last edited:

Bumpin1ohmSS

Royal Smart Person
Jun 17, 2008
1,643
113
63
Cali to Az
With the rear clean up pretty much done,(just waiting on moeser axles) I turned my attention to my front suspesion cleanup(parts). I degreased and took the parts to work and sandblasted before taking to have the bushings pressed out. Its my thought that clean parts make the guys working on your shiz want to do a better job at installing and handling your parts...

6451010991_8c9c5bbe00_z.jpg


6450992167_0a6c9a278d_z.jpg


6451012257_7669e2bc12_z.jpg


6908106415_770812dbc2_z.jpg

6908103707_2478d5a214_z.jpg

Spohn bushings, steering, super travel upper ball joints and heavy duty lowers

6840226782_14e87f3fa6_z.jpg


9152167932_b5b037ca32_z.jpg


powder Coated and bushings pressed in

8373470328_b57bc5a681_z.jpg

8398135120_0d04b6f68e_z.jpg


SC&c bar. Prob will powder coat it red

6882985888_f3e4bdc2fe_z.jpg


new hardware

7029086811_f3b79b0c43_z.jpg


UMI front sway, aluminum mounts and QA1's

8397078659_d4e9bdcc70_z.jpg

8397076971_eee50ed4d8_z.jpg


I had all the parts re powder coated and added a "Smoke" effect. They basically took some burning rubber and let the smoke from it set in while the powder coat dried. then Cleared over it. Cool effect.
9152179602_750563c4b2_z.jpg

9152163542_4deaccec2f_z.jpg


With the front suspension pretty much done, i started in on the LS1 front brake swap: cleaned up the calipers, powder coated the blazer spindles, Kore 3 z51 pabs, new rotors ect

Continued
 
Last edited:

Bumpin1ohmSS

Royal Smart Person
Jun 17, 2008
1,643
113
63
Cali to Az
cleaned up the front calipers and had the blazer spindles powder coated

6646267853_b044179d72_z.jpg


After i blasted em.

6647246843_ccd4a80d96_z.jpg

6647234249_e22e70d1c4_z.jpg


VHT Primer and caliper paint

8501382441_896b38606e_z.jpg


rear

8502475970_0cd202eee2_z.jpg


kore3 pab's and powder coating the blazer spindles

8373437376_3c913263e6_z.jpg


Waiting on hubs and black x drilled rotors 13.39", turned my attention to the wheel wells (which i passed over to Saint for project Tummy Tuck) Since I wont be using the factory bottles and mounting locations on the wells, i filed down and filled in any holes not needed for a cleaner look (wellz by Warren stylez)

6072998730_c32194c8d3_z.jpg


6073001254_eac9f8e4fc_z.jpg


6072461023_2087518338_z.jpg


6072462049_4e9533ea54_z.jpg


6073005680_a7dda96ebc_z.jpg


6072467415_571a2ccfba_z.jpg


6072469957_93c4f24c99_z.jpg


6072473741_a8b64c1aa0_z.jpg


dry sanded to 800 grit. sprayed some sandable primer and wet sanded to 1500 grit

8155870395_dc9a4d4105_z.jpg


painted em with rusto engine block paint

16948105961_e974bd9d85_z.jpg


Sprayed underneath with 3m rubber undercoat

5596558454_7ac408f69d_z.jpg


With that done I did some cleanup on my dash out my Monte SS that been moved over to this project...
 
Last edited:
  • Like
Reactions: 1 user

Bumpin1ohmSS

Royal Smart Person
Jun 17, 2008
1,643
113
63
Cali to Az
Mel snatched me a floor shift steering column from a monte ss. I cleaned it and SEM painted it up. (landau black) Steadfast column cover to be installed soon..

Paint was still wet in these pics. It dried up to a nice oem sheen. Pretty happy with the outcome..

8329815890_a6a6337fe9_z.jpg

8328759977_c09379c3c5_z.jpg


ss dash clean up

5537989863_93355506a4_z.jpg


radio flip

5537994209_59ed14b502_z.jpg


5537996873_2723f360b6_b.jpg


reinforcing the rear radio section with epoxy to srengthen it up and drill out the mounts for the "flip" cage

5538000683_e0d3c28caa_z.jpg


5538583530_fbe157490a_z.jpg


adhesion promoter and then paint

5559370536_bc8de95588_z.jpg


5559468040_532f411d37_z.jpg


this has my SS triple gauge setup from GSI interiors. i have a dual setup with digi gauges (trans temp motor oil temp) for this dash now..The radio flip is a good look

5562154899_c4a3bb6220_b.jpg


Massaged it for a nice fit. A lot of time went into this. cut chop and rebuilding the bezel/trim piece

5562157193_4597bc94d7_z.jpg


5562732216_72c510806e_z.jpg


Dakota digi panel also:cool2:

16967066576_3cef1084c5_z.jpg


16805369598_634183a19f_z.jpg


16805638400_245711e38e_z.jpg


16992199871_59b9584ecc_z.jpg


I had the dash re wrapped. Its just a $300 wrap but gets the job done. Black with silver double stitch

9080651601_eb6e1017d2_z.jpg

9080652513_f073322c65_c.jpg


With some of the goodies installed/mocked up..

16785715807_1e0eaa8efe_c.jpg


continued....
 
Last edited:

Bumpin1ohmSS

Royal Smart Person
Jun 17, 2008
1,643
113
63
Cali to Az
Big Saint just swung thru and picked up the wells and i got his og set. Imma start on these later on today and will post up pics along the way.Did a lil more work on my e-brake brackets Im trying to setup. Simple piece of angle iron. I made a template, mocked it up on the rear and then transferred it over to the angle iron. I cut it to size and drilled the holes for the stock g body e brake cables to go thru. The clip has these lil prongs that hold the clip in place once pushed thru the hole. i basically re created what the old factory backing plate for the drum setup did. The angle iron was a lil thick and i had to mill down a few thousands of metal so the prongs would push thru. Im new to doin all this and using tools like this so bare with me. I must say it is VERY fun work tho. Im really enjoying learning how to fabricate and use the old noodle to problem solve. Also had a cool lil vist from josh "lowproelco". He dropped off some radiator core to firewall bars for my project! Thanks fam!!! "Tha Alibu" is moving right along!

Few pics

Here's what I started with. i had a chance to see a stock bracket from a donor 98-2002 Camaro, and did a quick google search to see if anyone else had come up with an idea for the e-brake lever. Found a nice pic and tried my hand at making it...

Making the template..

8440865226_24205ef925_z.jpg


I used a spray can top to make the pie cutout. Then placed the cutout up against the back of the rear end backing plate flange and pressed the cardboard to make the the holes for the backing plate bolt holes

8440866248_da7b32fa9f_z.jpg


Template looks decent..I just flipped it backwards to make up the op side bracket(mirror image)

8439777049_18aaa50da5_z.jpg


Mock up to get and idea of how it works and looks...

8439777591_d9a7ec1f24_z.jpg


I also measured where I'd want the stock e brake cable to "clip in" just before the e brake "lever" on the Camaro backing plate. I have it slotted on this template, but didnt do it this way on the final setup. I basically did what the stock G body backing plate did-cut a hole for the cable to clip into and allow the prongs to snap up against the back of the bracket..

8440867366_c831a903cc_z.jpg


Cut the pieces to length..

[youtube]-zO8fk9iwtE[/youtube]


Drilled the holes out and mocked it up on the backing plate. Ive figured out a cleaner way to do it. bare with me as this is my first attempt at doing this kind of stuff..

8437035397_214846096c_z.jpg

8438118440_b1079d37c7_z.jpg


After I cut the "half moon" out I sand blasted the bracket and then started trimming awaysections not needed to "clean it up" some..You can see that I trimmed away some material so the bracket clears the rubber boot on the backing plate's ebrake lever area..

8438117578_de66d0931c_z.jpg


I measured the stock G body clip and (9/16") and eye balled the center of the bottom section where the clip will run thru. I marked it and used a 9/16" drill bit to make the hole. Well I stepped the bit sizes up and stopped at 9/16".Took the homegrown "brackets" to the garage shop and mocked em up..

8438115020_49a4c4e2e6_z.jpg

8438116698_97682b7690_z.jpg


At this point Im pretty happy with the setup and how its coming along. I'm thinking to myself that even if this doesn't workout, I'm learning how to figure out stuff(problem solving) and learning how to use different tools. As my boy at work says "Now you hot rod'n son!!!" LOL

The thickness of the angle iron was a lil too thick for the stock ebrake cable clip to push all the way thru the 9/16" hole on my new bracket. I couldnt get the prong clip to seat into place. This is where things got really fun. I figured out how to use a caliper to measure the thickness of the angle iron. I then came up with an amount I wanted to "shave/mill" off around the front of the 9/16" hole in the bracket. I figured I could let the ring around the clip (just before the prongs) sit down inside the milled out area. This would allow the prongs to get the needed clearance to sit inside the bracket correctly as it did on the stock GM drum backing plate. I also measured the small amount in between the prongs and clip ring.. Then I milled it out. Measure twice and mill once!!!

8438112882_1fd744fc75_z.jpg


[youtube]P8MjhKjWh9E[/youtube]

Not the best, but for my first time doin stuff like this it will work. Ive already figured out a much better way to get it going the next time I get a chance to work in the machine shop..

8438112568_ac65bf931f_z.jpg


I sprayed em up black (I'll powder coat em later) just to get a "feel" for how they will look. You can see in the pics above that I rounded the sharp edges off trying to "clean" it up a bit.. I just used a grinding wheel, belt sander and then wire wheel..

8446718172_2cebe326eb_z.jpg


Top view. I also used longer 3/8" grade 8 bolts (fine thread), washer, lock washer and a nut with nyloc. The finer thread will give it more bite and the nyloc nut will prevent the nut from backing out due to vibration. A lil loc-tite will be added on the final setup...

8445633015_b4d7624274_z.jpg


You can see the hole I cut/milled out is in line with the e brake lever on the backing plate.

8445631303_6e7dc65a8a_z.jpg

8445634337_40449f97c1_z.jpg


The next step is to either trim a little of the stock e brake cable's spring away and loop the covered wire back onto itself and use and u bolt clamp setup. (this will create an eyelet for the "Maro" backing plate ebrake lever). Or I can cut a section of the stock g body e brake cable out, cut a nice section of ebrake cable with the correct eyelet from the donor Camaro, and use the u bolt clamp to ment those two wires together. The ubolt setup is strong as fawk! We use em at work on elevatores and it will get the job done. The other thing is to completely remove the donor cars e brake cable and swap em. I'll see what I want to do later on. Im on a "Fab/mock up" hight right now. HAHA

Thanks for looking! I'll be working on my new to me wheel wells today when i wake up. Sorry for the loooooong post fellas..
 
Last edited:

Lowproelco

Greasemonkey
Jul 19, 2011
230
1
16
So Cal
ahh man ELCO WARREN doing it a third time around.. love that rear end bro.. makes me all tingley inside lol... if yall dont subscribe to this thread your missin out...
 

Peter

Royal Smart Person
Jun 27, 2007
1,175
74
48
MA
man, awesome work
 

Bumpin1ohmSS

Royal Smart Person
Jun 17, 2008
1,643
113
63
Cali to Az
Lowproelco said:
ahh man ELCO WARREN doing it a third time around.. love that rear end bro.. makes me all tingley inside lol... if yall dont subscribe to this thread your missin out...

Thanks FAM!!! Preciate you rolling thru and checkin out the projects and stuff. Also, thanks for the painting and mock up tips also bruh! I passed the just finished wells over to Saints "Tummy Tuck" project and have a "new to me" set. Let the fun begin!!!

My new UMI rear drag bar came in. I ordered it back on Nov 24,2012. It was a pre order deal and I knew it would be a lil wait. . Few pics...

rear drag bar, hardware and front bar-UMI

8445652807_35c4684786_z.jpg

8445654609_48be5628a2_z.jpg

8445648075_5949ba04de_z.jpg

8446715232_a889535959_z.jpg

8486185315_320ed02518_z.jpg


The project is coming together. Pushing to get her on the road by summer. Thanks for checkin her out. I'll update as I get stuff done on her. The car is in Arizona, and I go out there once a month..

Elco Warren
80! :twisted:
 
Last edited:
Status
Not open for further replies.

GBodyForum is a participant in the Amazon Services LLC Associates Program, an affiliate advertising program designed to provide a means for sites to earn advertising fees by advertising and linking to amazon.com. Amazon, the Amazon logo, AmazonSupply, and the AmazonSupply logo are trademarks of Amazon.com, Inc. or its affiliates.

Please support GBodyForum Sponsors

Classic Truck Consoles Dixie Restoration Depot UMI Performance

Contact [email protected] for info on becoming a sponsor