GRAND PRIX 83 Grand Prix freshening

Status
Not open for further replies.

DSM

Apprentice
Feb 1, 2008
92
106
33
Michigan
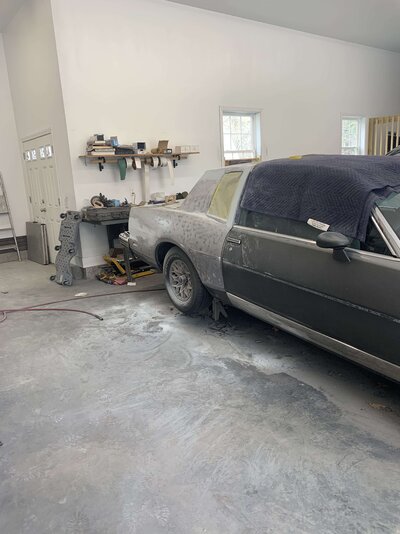
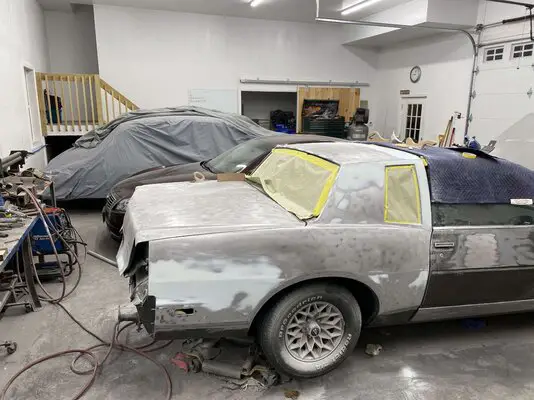
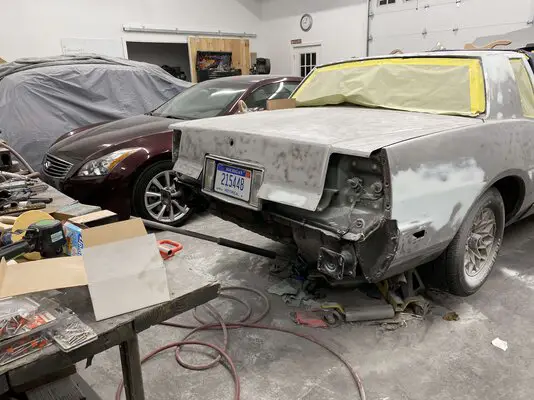
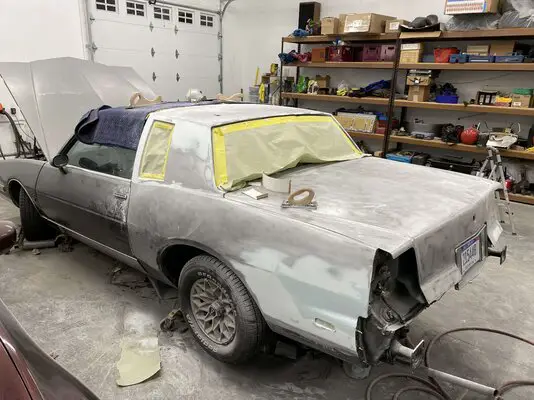
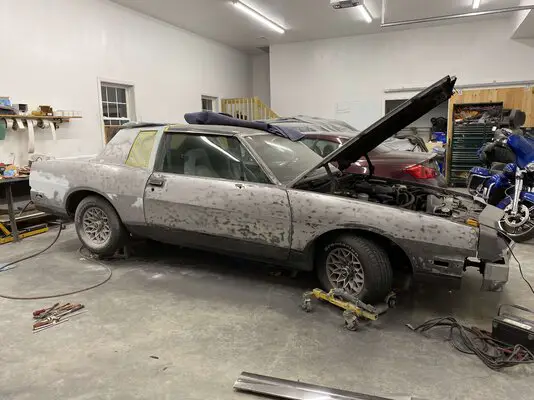
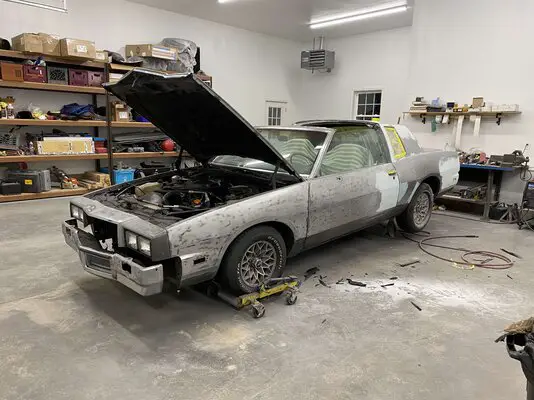
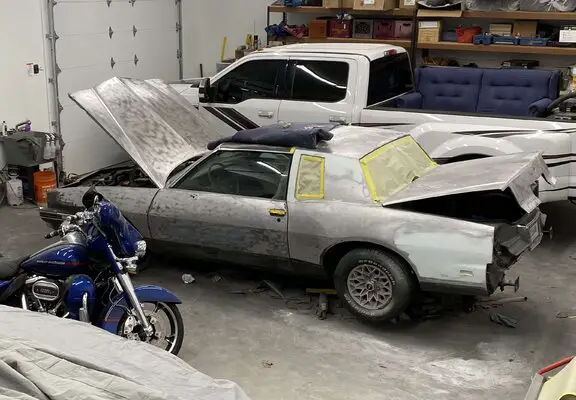
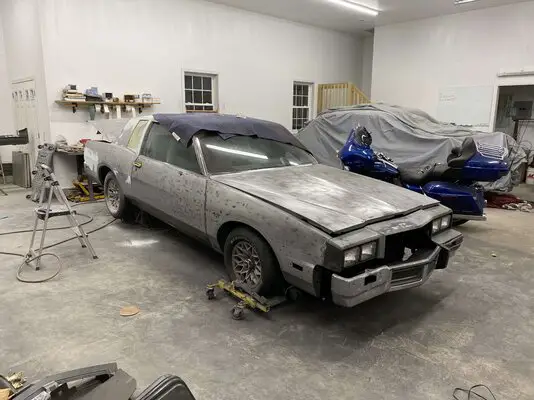
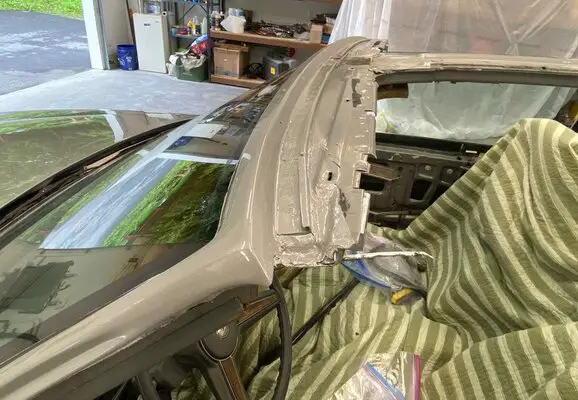
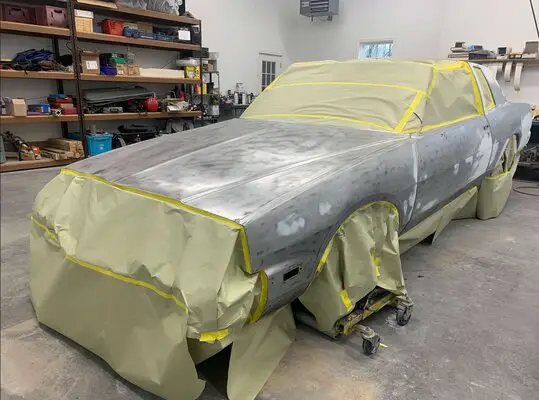
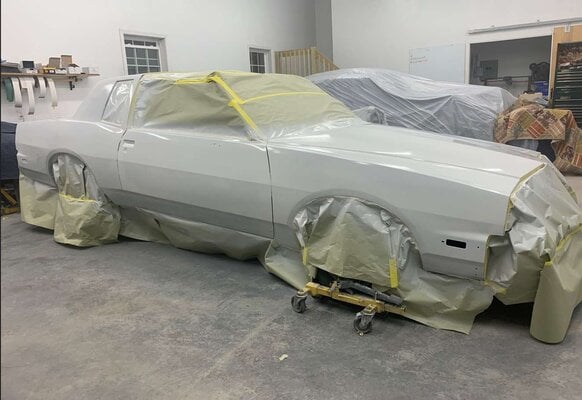
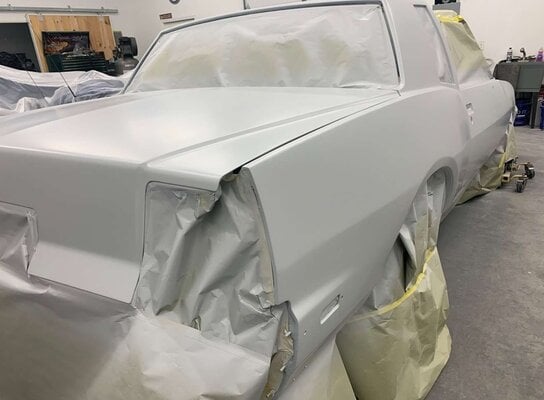
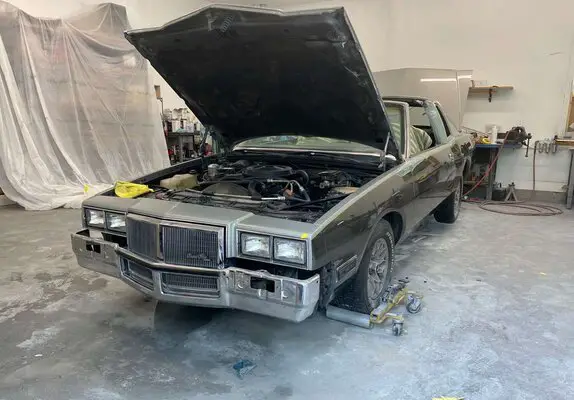
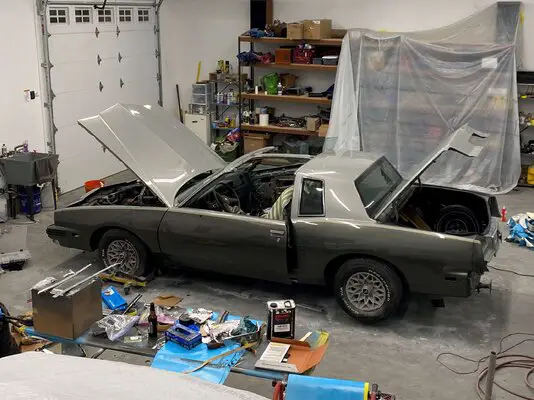
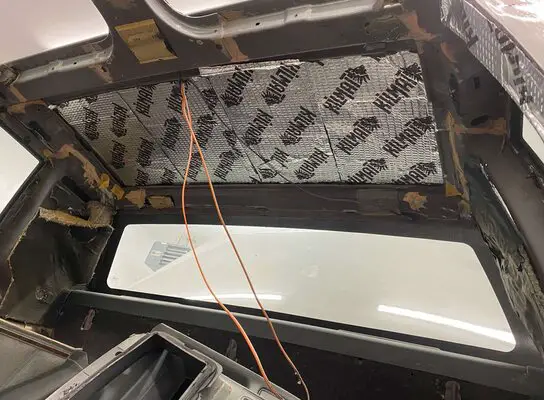
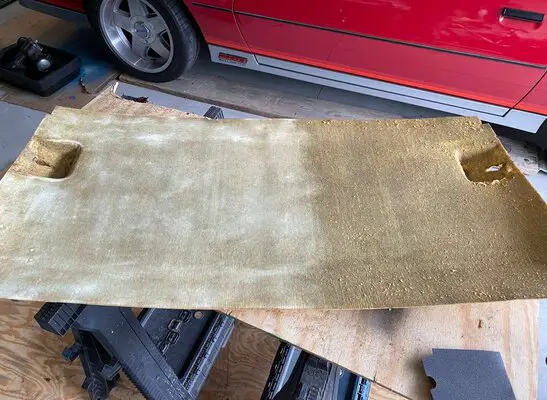
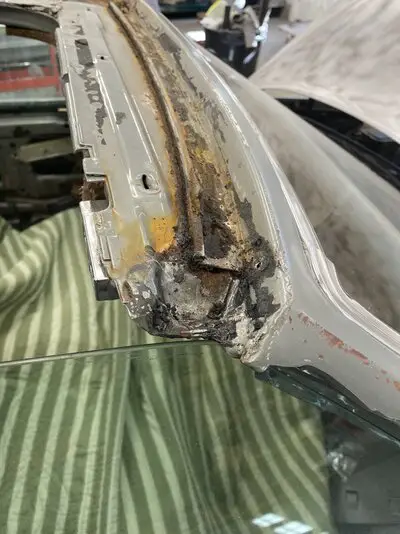
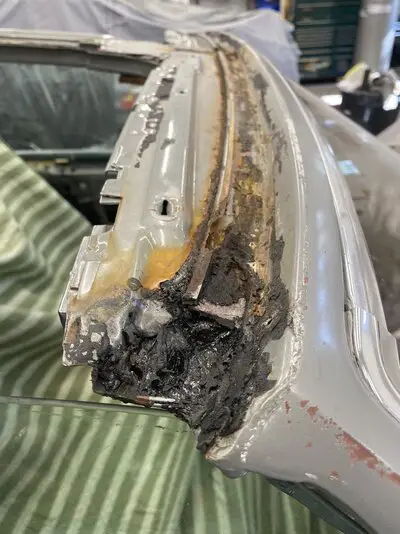
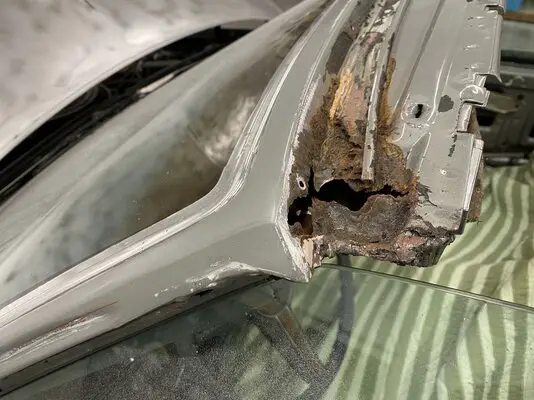
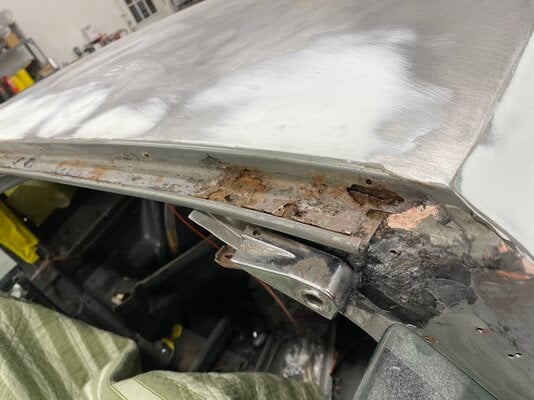
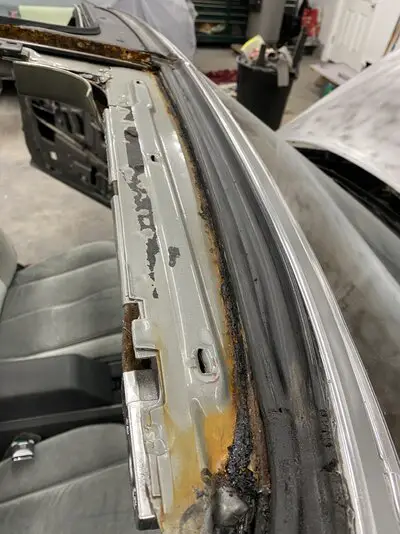
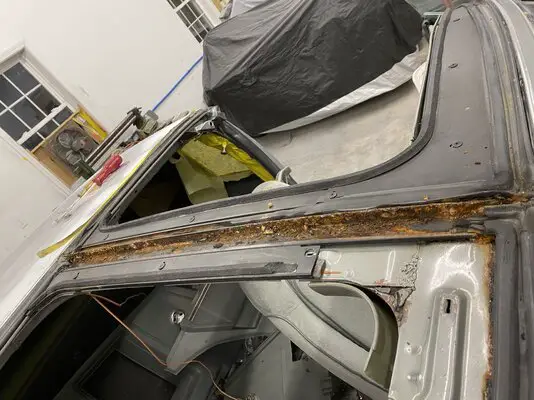
Once the top was out of the way, the rest of the car was disassembled in stages, stripping off the old paint and starting body work as we moved from back to front.
 

Attachments

  • 04-2022-23-133903-IMG_0290.jpeg
    04-2022-23-133903-IMG_0290.jpeg
    657.4 KB · Views: 74
  • 04-2022-26-210048-IMG_0301.jpeg
    04-2022-26-210048-IMG_0301.jpeg
    886.7 KB · Views: 68
  • 04-2022-26-210054-IMG_0302.jpeg
    04-2022-26-210054-IMG_0302.jpeg
    954 KB · Views: 70
  • 04-2022-26-210102-IMG_0303.jpeg
    04-2022-26-210102-IMG_0303.jpeg
    956.2 KB · Views: 69
  • 04-2022-27-004812-IMG_0322.jpeg
    04-2022-27-004812-IMG_0322.jpeg
    874.7 KB · Views: 70
  • Like
Reactions: 2 users

DSM

Apprentice
Feb 1, 2008
92
106
33
Michigan
We were also making plans for dealing with the two tone paint scheme which I wanted to retain. From the factory, the top and bottom colors were separated by a tape stripe which just alternated the paint colors. So our first plan was to duplicate this pattern with paint and then clear over it. But after some more thought and a quick photoshop trial , we decided a gold stripe would look really good and add a little something to the paint while still looking factory. Here you can see just how bad the original paint was. The clear panel with the stripes on it is from the '83 Pontiac dealer catalog and came in handy for making the decision to change up the stripe.
 

Attachments

  • 04-2022-27-090644-IMG_0327.jpeg
    04-2022-27-090644-IMG_0327.jpeg
    1.6 MB · Views: 73
Last edited:
  • Like
Reactions: 1 users

DSM

Apprentice
Feb 1, 2008
92
106
33
Michigan
At this point all of the paint was stripped off, and body work was underway
 

Attachments

  • 04-2022-28-215157-IMG_0354.jpeg
    04-2022-28-215157-IMG_0354.jpeg
    1 MB · Views: 72
  • 04-2022-27-234217-IMG_0341.jpeg
    04-2022-27-234217-IMG_0341.jpeg
    480.7 KB · Views: 85
  • 04-2022-27-222644-IMG_0339.jpeg
    04-2022-27-222644-IMG_0339.jpeg
    895 KB · Views: 86
  • Like
Reactions: 2 users

DSM

Apprentice
Feb 1, 2008
92
106
33
Michigan
Things were moving along way too smoothly at that point, so I should have known something would go wrong.

The original t-top seals weren't terrible, but we wanted to remove all the chrome window and top moldings for the best quality paint job possible, and it is almost impossible to do that w/out damaging the seals. On top of that, the center bar which holds the t-tops was installed wrong from the factory and severely misaligned. So we started tearing into the top, and I was totally not prepared for what I would find. Keep in mind - this is a 44,000 mile, garage kept, Southern car without a spec of rust on it. But it was hiding a dirty secret.
 

Attachments

  • 04-2022-29-094529-IMG_0359.jpeg
    04-2022-29-094529-IMG_0359.jpeg
    1.9 MB · Views: 84
  • 04-2022-29-094114-IMG_0357.jpeg
    04-2022-29-094114-IMG_0357.jpeg
    2 MB · Views: 88
  • 04-2022-28-215146-IMG_0352.jpeg
    04-2022-28-215146-IMG_0352.jpeg
    2.7 MB · Views: 86
  • 04-2022-28-215144-IMG_0351.jpeg
    04-2022-28-215144-IMG_0351.jpeg
    2.7 MB · Views: 77
  • 04-2022-28-200836-IMG_0349.jpeg
    04-2022-28-200836-IMG_0349.jpeg
    1.9 MB · Views: 75
  • 04-2022-28-200655-IMG_0348.jpeg
    04-2022-28-200655-IMG_0348.jpeg
    2.4 MB · Views: 85
  • Like
Reactions: 1 user

DSM

Apprentice
Feb 1, 2008
92
106
33
Michigan
Given what I was dealing with, I wound up ordering a complete set of reproduction t-top channels and trim pieces from Mike's Montes, although in the end we didn't use the new channels. Instead my uncle formed replacement sections for the damaged areas and made repair patches for the body sheetmetal. I unfortunately don't have pics of everything in process because I was back in Michigan when he did the repairs, but it turned out great.
 

Attachments

  • Screenshot 2022-10-27 233843.jpg
    Screenshot 2022-10-27 233843.jpg
    144 KB · Views: 80
  • Like
Reactions: 1 users

DSM

Apprentice
Feb 1, 2008
92
106
33
Michigan
Work progressed while I was back home in Michigan and by early May he had the car sealed, primed and blocked out.
 

Attachments

  • Screenshot 2022-10-27 234141.jpg
    Screenshot 2022-10-27 234141.jpg
    116.8 KB · Views: 71
  • Screenshot 2022-10-27 234202.jpg
    Screenshot 2022-10-27 234202.jpg
    94.2 KB · Views: 70
  • Screenshot 2022-10-27 234239.jpg
    Screenshot 2022-10-27 234239.jpg
    72.5 KB · Views: 75
  • Like
Reactions: 1 users

DSM

Apprentice
Feb 1, 2008
92
106
33
Michigan
All the sealer, primer and paint we used is Tamco https://tamcopaint.com/ Definitely a "budget friendly" paint compared to the big name brands, but my uncle had good luck with it on previous jobs, including the 1960 Rolls Royce which is sitting under plastic behind my car in some of the pictures. I figured if it was good enough for a Rolls, it's probably good enough for my Grand Prix.
 

Attachments

  • Screenshot 2022-10-27 235518.jpg
    Screenshot 2022-10-27 235518.jpg
    86.4 KB · Views: 68

DSM

Apprentice
Feb 1, 2008
92
106
33
Michigan
By June, we were in color, and then came the process of wet sanding, buffing and reassembly. I don't have many pictures from that period....again, I was in Michigan and my uncle isn't much for stopping to take pics along the way!
 

Attachments

  • Screenshot 2022-10-28 000057.jpg
    Screenshot 2022-10-28 000057.jpg
    128 KB · Views: 79
  • Screenshot 2022-10-28 000505.jpg
    Screenshot 2022-10-28 000505.jpg
    114 KB · Views: 79
  • IMG_0580.jpg
    IMG_0580.jpg
    441.4 KB · Views: 82
  • Like
Reactions: 1 users

DSM

Apprentice
Feb 1, 2008
92
106
33
Michigan
Most of the interior had been removed during paint, so I took advantage of that to add Killmat to the interior, including the roof, around the rear sail panels, and inside the front doors.
 

Attachments

  • Screenshot 2022-10-28 000756.jpg
    Screenshot 2022-10-28 000756.jpg
    154.9 KB · Views: 79
  • Screenshot 2022-10-28 000817.jpg
    Screenshot 2022-10-28 000817.jpg
    75.5 KB · Views: 69
  • Like
Reactions: 1 user

DSM

Apprentice
Feb 1, 2008
92
106
33
Michigan
The headliner and visors were a total disaster - structurally fine, but faded and dry rotted. The interior in this car is unique color only used in '83 and '84 - its a greyish green, and nothing like the sage green all the catalogs list. So I couldn't take the easy route and just order a replacement pre-covered headliner board and visors. Instead, I matched the material to a hidden piece of the original with no damage, and then stripped the original headliner board down and recovered it. I had a local trim shop in Michigan use the same material to recover the original visors.
 

Attachments

  • 04-2022-29-094625-IMG_0360.jpeg
    04-2022-29-094625-IMG_0360.jpeg
    990.9 KB · Views: 76
  • Screenshot 2022-10-28 001633.jpg
    Screenshot 2022-10-28 001633.jpg
    21.7 KB · Views: 73
  • Screenshot 2022-10-28 001345.jpg
    Screenshot 2022-10-28 001345.jpg
    194.5 KB · Views: 64
  • Screenshot 2022-10-28 001552.jpg
    Screenshot 2022-10-28 001552.jpg
    51.4 KB · Views: 82
Status
Not open for further replies.

GBodyForum is a participant in the Amazon Services LLC Associates Program, an affiliate advertising program designed to provide a means for sites to earn advertising fees by advertising and linking to amazon.com. Amazon, the Amazon logo, AmazonSupply, and the AmazonSupply logo are trademarks of Amazon.com, Inc. or its affiliates.

Please support GBodyForum Sponsors

Classic Truck Consoles Dixie Restoration Depot UMI Performance

Contact [email protected] for info on becoming a sponsor