BUILD THREAD 87 Regal Build

Should I go Olds 350 or Ls

  • Ls engine

    Votes: 9 52.9%
  • Oldsmobile 350

    Votes: 8 47.1%

  • Total voters
    17
  • Poll closed .

RegalRegal

Greasemonkey
Nov 30, 2020
133
362
63
St. Paul, Mn
So today I only got a few hours in garage.
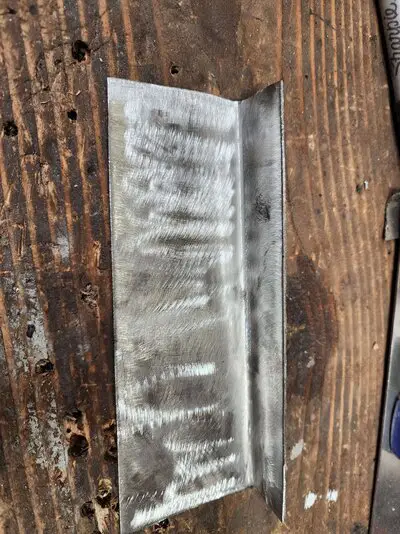
I finished all the cardboard templates.
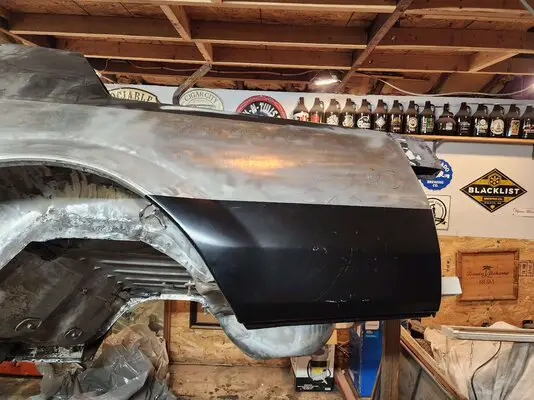
I picked up some 16 ga sheet metal to use in my venture. I kept finding more bad spots on the top sheet on P.S. where it overlaps . 20230216_183332.jpg 20230216_185955.jpg

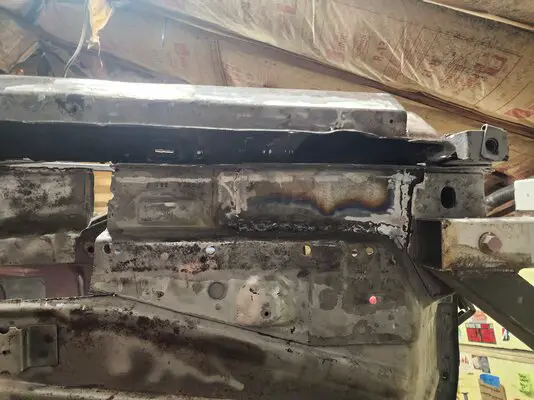
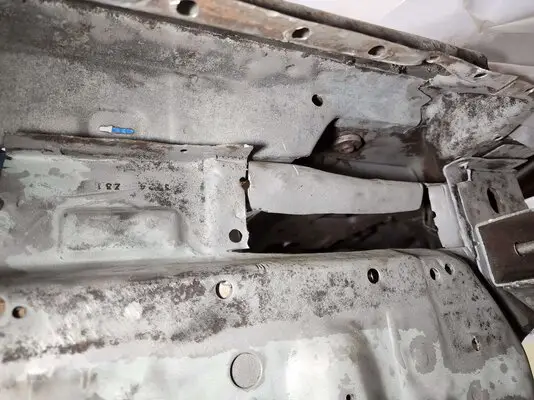
So after I finished the templates it was time to clean things up. The bottom side is a mess, hard to tell what is what but I think I have it figured out and have a plan. 20230216_105758.jpg

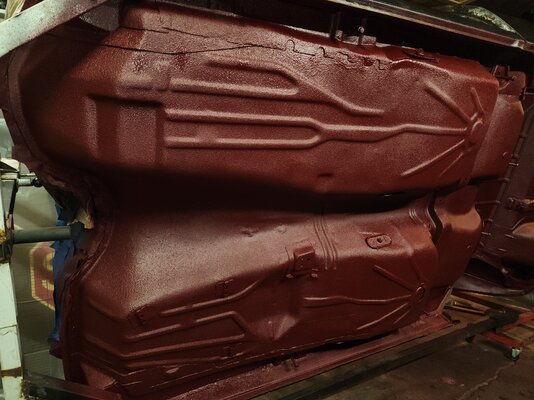
So I used a grinder and blaster to get area prepped, Looks a little better. 20230216_214409.jpg

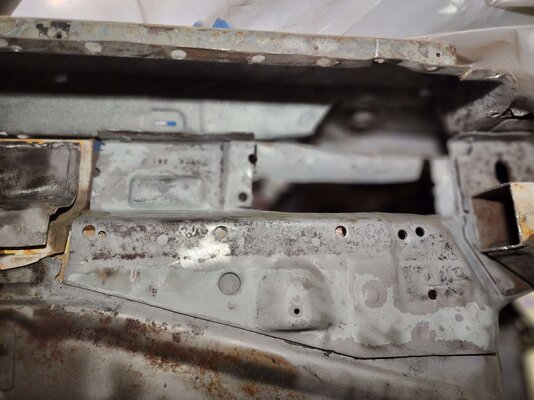
Up inside the pocket.
20230216_214446.jpg

I decided to paint inside the pocket and the inside of the outer rocker with 2 coates of Por15, so no welding today.
20230216_225936.jpg 20230216_225911.jpg


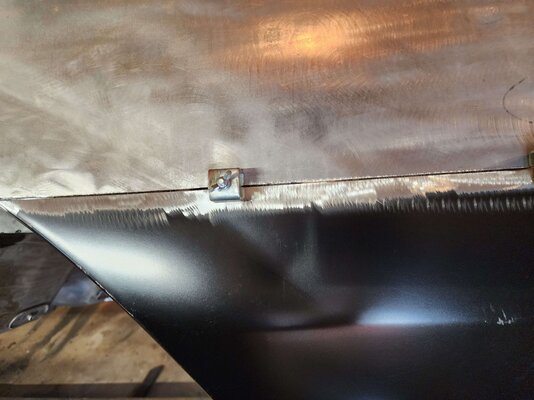
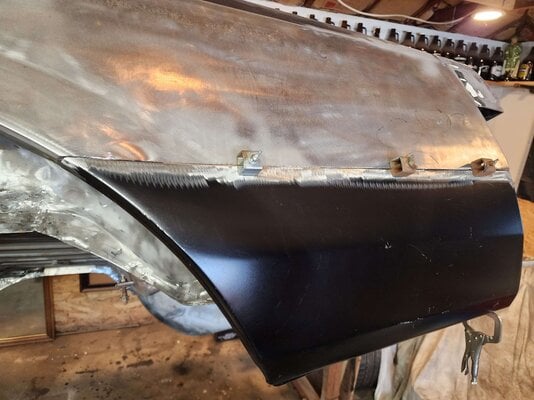
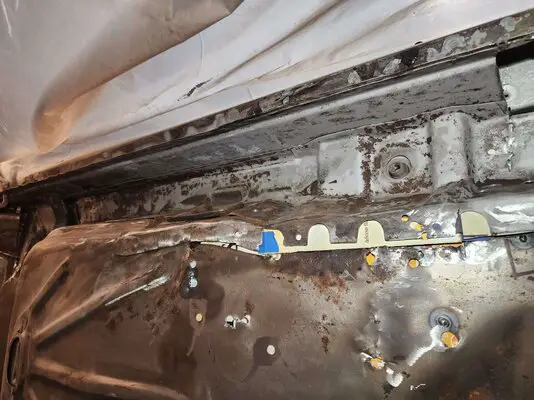
Here is what my plan is.
Yellow is existing topside, the red piece goes under the yellow, the blue is a 16ga with a 90° lip. Then 20ga to tie it all together. A little different than factory but will be stronger and deletes a couple overlaps.


Screenshot_20230217_011446_Gallery.jpg
 

Attachments

  • 20230216_225726.jpg
    20230216_225726.jpg
    1.5 MB · Views: 53
  • 20230216_214505.jpg
    20230216_214505.jpg
    1.2 MB · Views: 63
  • 20230216_214419.jpg
    20230216_214419.jpg
    1.3 MB · Views: 57
  • 20230216_214400.jpg
    20230216_214400.jpg
    961.4 KB · Views: 55
Last edited:
  • Like
Reactions: 5 users

RegalRegal

Greasemonkey
Nov 30, 2020
133
362
63
St. Paul, Mn
Another busy weekend, but was able to make it out to the garage. I started making the sheet metal pieces from the templates I made. 20230217_095126.jpg

I laid out all of the pieces and everything looked great. 20230218_002339.jpg 20230218_002355.jpg

I also cut and bent a 16ga. piece for the bottom side and got that welded in place.

20230219_230335.jpg


I started cutting and removing the old sheet metal, using the metal made from templates I scribed lines and used the cut off wheel to remove. A few spot welds and a few more cuts to finish removals.

20230219_021549.jpg
 

Attachments

  • 20230219_021603.jpg
    20230219_021603.jpg
    7.8 MB · Views: 61
  • 20230217_095059.jpg
    20230217_095059.jpg
    2.2 MB · Views: 65
Last edited:
  • Like
Reactions: 3 users

RegalRegal

Greasemonkey
Nov 30, 2020
133
362
63
St. Paul, Mn
Well I am officially done with the floor portion of my body. It's been a pain in the arse dealing with thin metal and the like, I know many are familiar with this headache. I am super excited to have that behind me. Now to to paint and put on chassis. I have put some thought into this and have decided to pull the engine and trans after body is on and clearances have been checked. This will allow me to bodywork, prep and paint firewall with everything else, I want to color match the firewall to body.

Need to attach seat bracket.

20230304_221520.jpg

A little more grinding needed.
20230304_221539.jpg

I had a delivery show up, the last 3 body panels.
20230304_232719.jpg

Now off to AZ for a little R&R. I can fully relax with this chapter just about finished.
When I get back I will be ready to go at it again!

Ps I talked to a few shops about paint and am definitely overwhelmed. I have a hard time justifying a 10-15k paint on a 5-7k body. I know that nothing is cheap but just hard to swallow when I plan on driving this car and fully expect to have a door ding or rock chips. Maybe Ill do it myself, not sure exactly, I do have some time but like to have a plan. I will need to sorce some clean doors but that should be it. Then lots and lots of body work, Yay!
✌️
 
  • Like
Reactions: 6 users

doood

Amateur Mechanic
Sep 24, 2020
576
786
93
Jeeezus. lots of work.
 
  • Like
Reactions: 1 users

RegalRegal

Greasemonkey
Nov 30, 2020
133
362
63
St. Paul, Mn
Ok time for a update, With the bottom side basically done I started on the rear lower qtr panel (driver side). I removed the old qtr and found the inner well was rusted as well, not a suprise. I decided to purchase a metal strecher/shrinker to help with this task. 20230319_162732.jpg 20230319_171649.jpg 20230323_140404.jpg
The new tool worked great, definitely should have bought sooner. I also replace the bottom piece if the inner qtr.

20230325_193208.jpg 20230328_154529.jpg 20230328_154619.jpg
Everything line up quite well, heat control was good, but I still ended up with a few problem areas. Just a couple low spots and an area that I need to shrink. It seems like as I welded it pinched and created a slight bulge near the wheel well flare. I've seen the shrinking process done, but have never done myself so hopefully all goes well with that. I ran out of gas for that so I went to the passenger side, I need to replace the same front and rear lower qtrs along with the inner wells too.
I do gave a question if anyone can help. When I'm doing panel replacement on these 2 panels where is the best place to cut, as far as best for metal working?
My first cut was on the lower body line, will that be problematic? I can always go above but was just curious.
 

Attachments

  • 20230323_143105.jpg
    20230323_143105.jpg
    927.3 KB · Views: 47
  • 20230323_143056.jpg
    20230323_143056.jpg
    822.8 KB · Views: 64
  • 20230320_193344.jpg
    20230320_193344.jpg
    1.2 MB · Views: 52
  • Like
  • In Love
Reactions: 6 users

RegalRegal

Greasemonkey
Nov 30, 2020
133
362
63
St. Paul, Mn
Is sure feels good finding the product I ordered Monday night is sitting at my door step on Wednesday when I get home. Big shot out to Speedway Motors, quite impressive for the times.
The shifter itself is also very nice, I went with the Lokar sport shifter for a few reasons. Being able to shift electronicly in sport mode was the biggest reason along with the lifetime warranty and made in America. I'll post more on the shifter soon. If only I could use it now! ;-)
20230405_163525.jpg 20230405_161333.jpg
20230405_161711.jpg
 

Attachments

  • 20230405_161207.jpg
    20230405_161207.jpg
    662.5 KB · Views: 42
  • Like
Reactions: 1 users

RegalRegal

Greasemonkey
Nov 30, 2020
133
362
63
St. Paul, Mn
Well it's been a a while since I've had time to post anything, so lets catch up. With the metal replacement completed, I started the process of painting the fire wall and the bottom side of the body.
I was unable to massage the 2 areas that need to be shrunk on the qtrs. The goal is to get it driving and I will be able to bring it to someone better than I. I don't usually don't give up but feel its a futile battle that could easily be completed by someone with more experience and correct tools. 😒

Onward, I smoothed out the fire wall and was prepping for paint. I need to get the firewall painted but am not ready to paint entire car. Here's the plan, rattle can the firewall so the body can go back on chassis engine and trans inplace. The idea is to get as close as I can to Kandybrandy wine over black with rattle cans. Can this be done?

Well I found this line from Lil Daddy Roth, son of Big Daddy (Ed) Roth. They have all sorts of flake and paint. I bought a rattle bomb kit.
The kit includes cherry pie base, cherry pie flake, wino kandy and 2k clear. I decided to go with a black base to give a darker look.
I tested the kit on a test panel and everything looked good. When I was going to paint the firewall I switched the tip to a h.o. tip on the flake can. After I layed the primer and base down a sprayed the flake. With the new tip I had a little to much material and had a small run in the middle of the fire wall. Not ideal but it's not horrible. The results looks good, its not perfect but works for a fire wall and the color is good crazy good. Pics do not do it justice. More to come
20230901_095535.jpg
20230831_171057.jpg
20230831_163905.jpg
 
  • Like
Reactions: 3 users

RegalRegal

Greasemonkey
Nov 30, 2020
133
362
63
St. Paul, Mn
With the body still on the rotisserie I blasted what was left of the paint and undercoating off the bottom side.

With work I was unable to complete the blast and primer work timely. So with a little flash I went with Por 15, I have had hood luck using this with proper prep.

After that I went with a tintable Upol Raptor bedliner kit. I bought a blood red color kit and was trying to get a maroon by mixing in various colors from paint store. I realized how difficult maroon is to mix, all my test samples turning to brown. I added black for the darkest red I could get. The bedliner laid down perfectly, I sprayed 3 coates and let it cure, it looks great the color is definitely not dark enough (my camera pics are brighter). I should have bought maroon paint instead of trying to change the blood, lesson learned. Oh well no looking back now.
20230909_200103.jpg
20230917_185119.jpg
20230917_222551.jpg
20230917_185059.jpg
20230918_044019.jpg


I've been flip flopping the body and chassis back and forth between driveway and garage. With winter coming I need to put body on chassis and get them into garage.
 

Attachments

  • 20230918_044019.jpg
    20230918_044019.jpg
    5 MB · Views: 15
  • Like
  • Wow
Reactions: 4 users

SS_Malibu

Royal Smart Person
Supporting Member
Sep 27, 2021
1,164
2,034
113
Mesa, AZ
We can all pick our own cars apart to no end. That looks great. There is only two occasions where someone will see the bottom of the car:
1) Of it’s on a lift, in which case you’ll get comments on how nice it looks and
2) We’d rather not discuss (insert wisdom here)
 
  • Haha
  • Like
Reactions: 1 users

GBodyForum is a participant in the Amazon Services LLC Associates Program, an affiliate advertising program designed to provide a means for sites to earn advertising fees by advertising and linking to amazon.com. Amazon, the Amazon logo, AmazonSupply, and the AmazonSupply logo are trademarks of Amazon.com, Inc. or its affiliates.

Please support GBodyForum Sponsors

Classic Truck Consoles Dixie Restoration Depot UMI Performance

Contact [email protected] for info on becoming a sponsor