When I started the build on my 500 Cadillac swap I knew I would need a bit more rear end than the stock 7.5”. I was looking at the available options (8.5, 12 bolt, and 9”).
As far as the 9” go there were only 3 real candidates available that were the right width, the 57-9 Ford station wagon the early Bronco units and the 77-81 Granada and Versailles. These units approximatly measured 58” flange to flange like the G Body rear ends.
These stock rear ends have certain things you will want to be aware of. The 57-9 Wagon rear was only available with a 28 spline axel but from personal experience they will hold up to most HP street use however if you plan on a lot of racing and a set of slicks you would really want to step up to at least a 31 spline axel Additionally the rear brake drums for the wagon rears are almost impossible to find. The bolt pattern on this rear end is 5 on 4 1/2" (the G bodies use a 5 on 4 3/4”). The majority of early Broncos came with the 31 spline axels and are a bit easier to find the common bolt pattern on most of these is 5 on 5”. They are also more likely to have a Posi in them than the earlier wagon rear ends. The Granada/Versailles rear is available with rear disc brakes (a big plus for some people), but normally the rear end ratio in the 2.50-2.75 area, which depending on what you're using your car for may require a gear change. If you decide to use the original Granada/Versailles carrier you will need to do a yolk change to accept a conventional U Joint.
There are a lot of other 9”s out there but most are so wide they would need to be shortened and custom axels made, and by the time that is done chances are you would be just as well off and probably cheaper buying a ready built housing from Currie, Moser or Quick Performance.
The decision for my project was pretty much made when I came across a 59 Ford Wagon rear end at a local wrecking yard for $100 drum to drum. I got very lucky as the axels and brake drums were perfect. It had a 3.50 gear set (which would have been great for a lot of builds.....EXCEPT for what I was planning LOL).
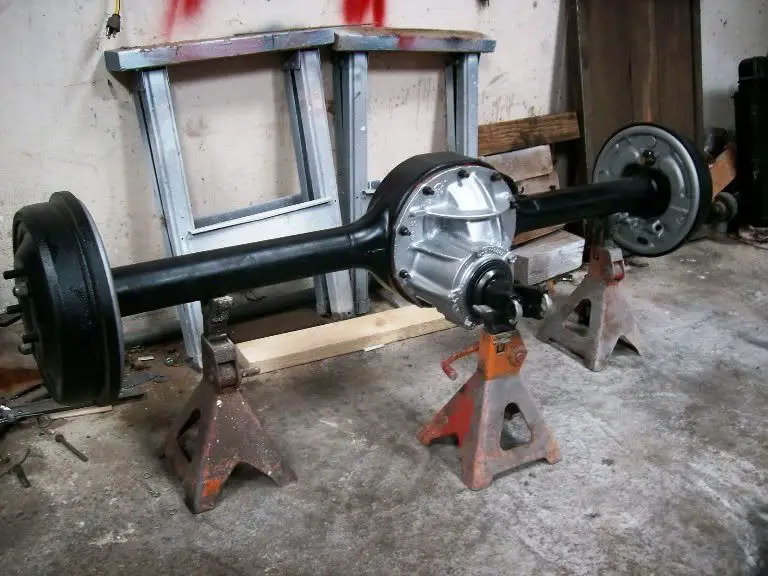
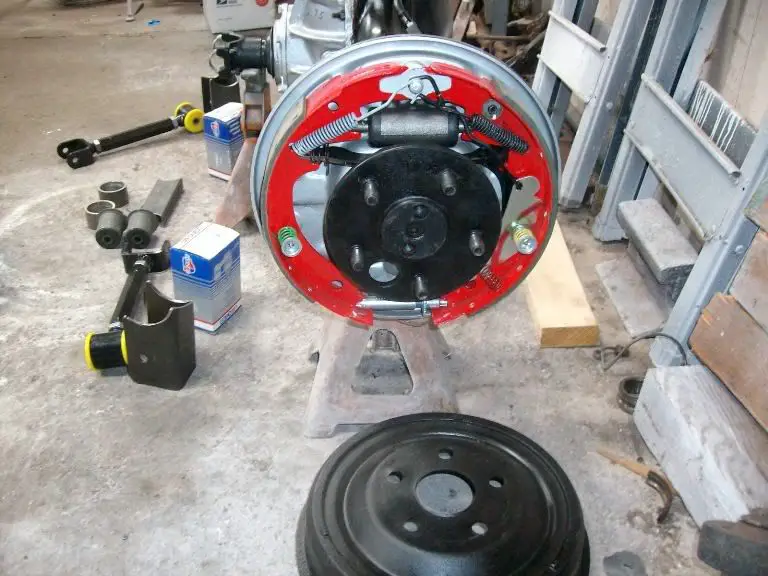
Anyway a long story short, I tore the rear end apart, cut off the leaf spring perches, sand blasted it and added a posi carrier (which I scored from friend and had rebuilt with new bearing, seals and a 2.75 gear set). The drums were turned and I installed new axel bearings and seals. I also added new brakes and wheel cylinders (the 57-9 Fords did not have self adjusters, but were easily retro fitted from a later model).
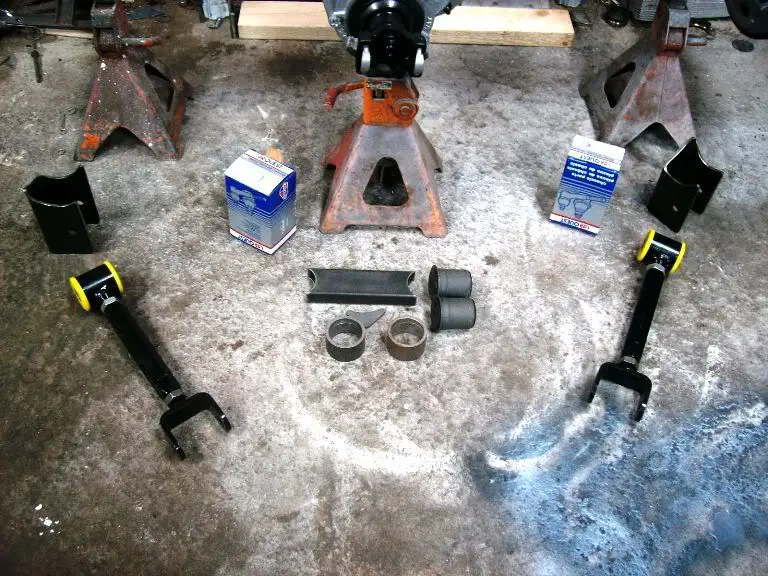
With the rear end rebuilt I bought a set of brackets off of E Bay for the G body conversion, new set of lower control arm bushings and a set of Lakewood adjustable upper control arms (so I could more easily set the drive line angle).
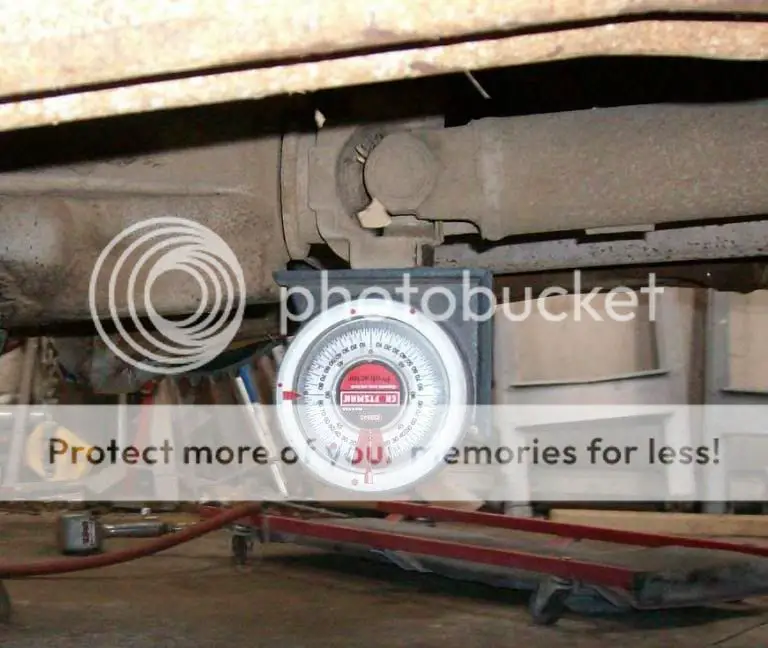
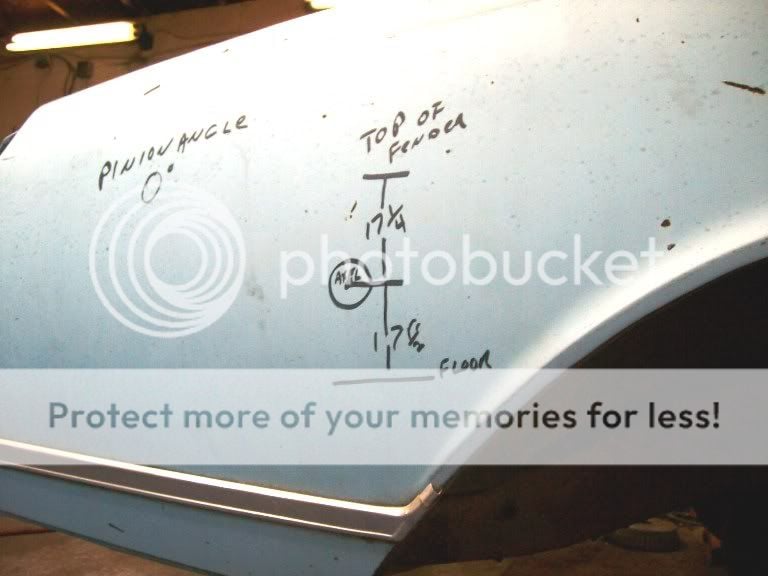
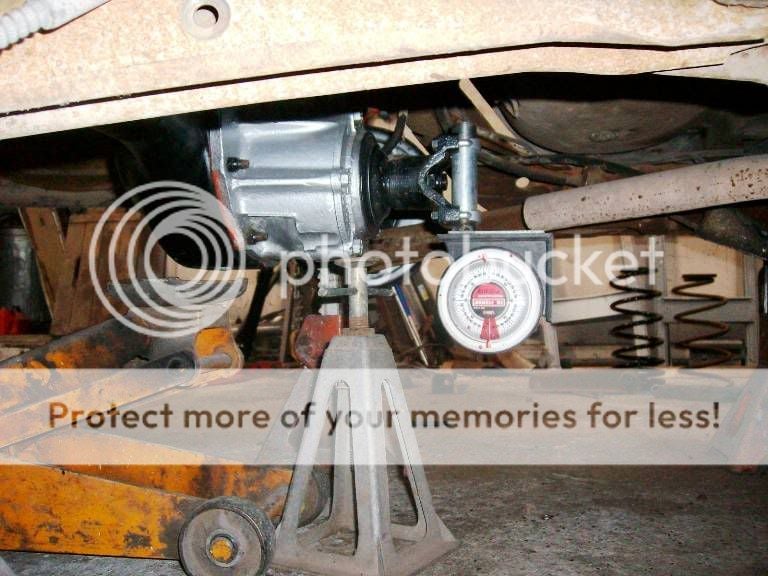
The adjustable upper control arms are not absolutely necessary provided that the upper control arm brackets are placed and welded on the rear end where the original pinion angle is duplicated......and the original pinion angle was correct in the first place.
I elected to go ahead and buy the set for a couple of reasons. This rear end was going under a project that also included a custom transmission crossmember which could have changed the driveshaft angle resulting in a requirement to change the pinion angle. They are more rigid than the stock control arms allowing for a hard launch. Their smaller size makes it easier to route the tailpipes over the rear end.
The cost break down to this point is:
Rear End $100
Brakes, bearings, seals $200
Third Member and gears $400
Brackets $100
Adjustable control arms $100
L control arm bushings $50
__________
Grand total $950
As far as the 9” go there were only 3 real candidates available that were the right width, the 57-9 Ford station wagon the early Bronco units and the 77-81 Granada and Versailles. These units approximatly measured 58” flange to flange like the G Body rear ends.
These stock rear ends have certain things you will want to be aware of. The 57-9 Wagon rear was only available with a 28 spline axel but from personal experience they will hold up to most HP street use however if you plan on a lot of racing and a set of slicks you would really want to step up to at least a 31 spline axel Additionally the rear brake drums for the wagon rears are almost impossible to find. The bolt pattern on this rear end is 5 on 4 1/2" (the G bodies use a 5 on 4 3/4”). The majority of early Broncos came with the 31 spline axels and are a bit easier to find the common bolt pattern on most of these is 5 on 5”. They are also more likely to have a Posi in them than the earlier wagon rear ends. The Granada/Versailles rear is available with rear disc brakes (a big plus for some people), but normally the rear end ratio in the 2.50-2.75 area, which depending on what you're using your car for may require a gear change. If you decide to use the original Granada/Versailles carrier you will need to do a yolk change to accept a conventional U Joint.
There are a lot of other 9”s out there but most are so wide they would need to be shortened and custom axels made, and by the time that is done chances are you would be just as well off and probably cheaper buying a ready built housing from Currie, Moser or Quick Performance.
The decision for my project was pretty much made when I came across a 59 Ford Wagon rear end at a local wrecking yard for $100 drum to drum. I got very lucky as the axels and brake drums were perfect. It had a 3.50 gear set (which would have been great for a lot of builds.....EXCEPT for what I was planning LOL).
Anyway a long story short, I tore the rear end apart, cut off the leaf spring perches, sand blasted it and added a posi carrier (which I scored from friend and had rebuilt with new bearing, seals and a 2.75 gear set). The drums were turned and I installed new axel bearings and seals. I also added new brakes and wheel cylinders (the 57-9 Fords did not have self adjusters, but were easily retro fitted from a later model).
With the rear end rebuilt I bought a set of brackets off of E Bay for the G body conversion, new set of lower control arm bushings and a set of Lakewood adjustable upper control arms (so I could more easily set the drive line angle).
The adjustable upper control arms are not absolutely necessary provided that the upper control arm brackets are placed and welded on the rear end where the original pinion angle is duplicated......and the original pinion angle was correct in the first place.
I elected to go ahead and buy the set for a couple of reasons. This rear end was going under a project that also included a custom transmission crossmember which could have changed the driveshaft angle resulting in a requirement to change the pinion angle. They are more rigid than the stock control arms allowing for a hard launch. Their smaller size makes it easier to route the tailpipes over the rear end.
The cost break down to this point is:
Rear End $100
Brakes, bearings, seals $200
Third Member and gears $400
Brackets $100
Adjustable control arms $100
L control arm bushings $50
__________
Grand total $950