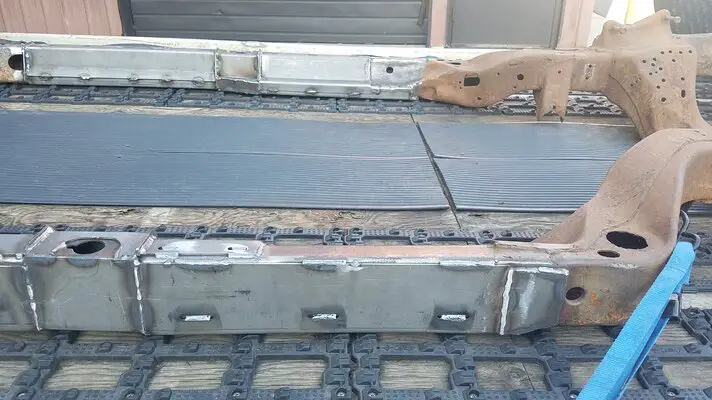
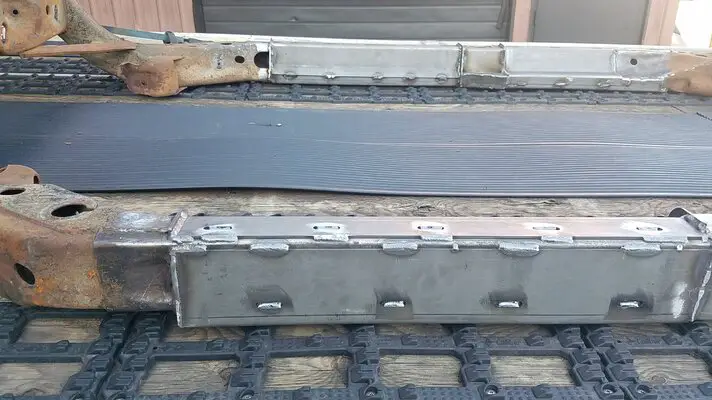
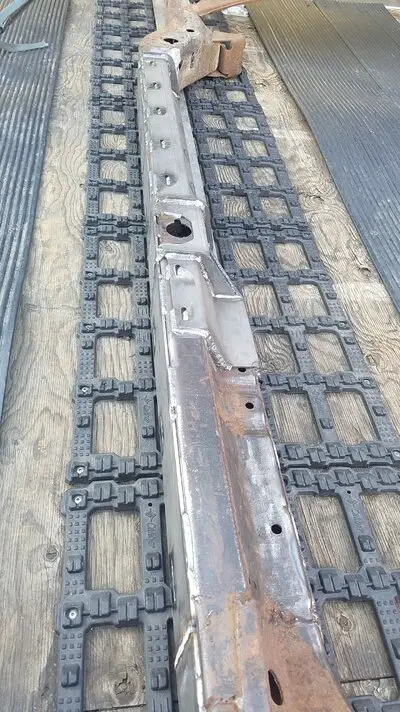
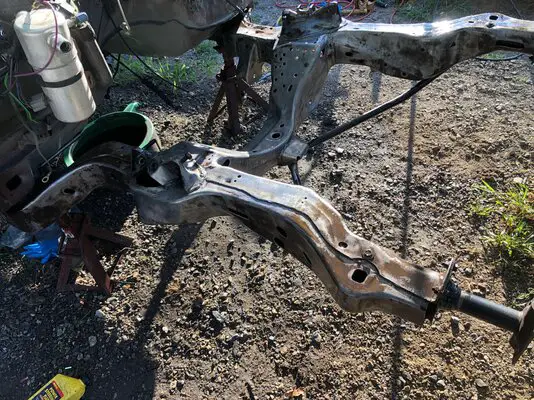
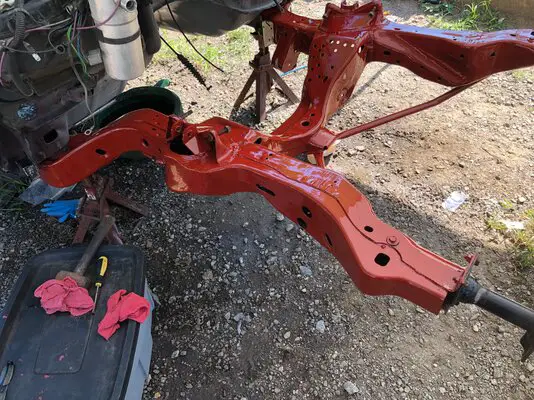
Dropped the frame off at school couple of weeks ago. Picked it up last night. Looks great. He followed the instructions and the only problem he had was the frame didn't warp. Per the instructions, he pulled the middle of the frame in with a rachet strap the stated amount. And when he was done, and released the strap, the frame stayed pinched. So they took a port-a-power and pushed the frame rails back to spec.
frame wrap and paint questions
- Thread starter oldsmobile joe
- Start date
You are using an out of date browser. It may not display this or other websites correctly.
You should upgrade or use an alternative browser.
You should upgrade or use an alternative browser.
- Status
- Not open for further replies.
Yeah, I plan on getting some X-121 when I redo the 85's frame. Been meaning to get some, but never got a round tuit.
It carries the GM specifications for frame coatings, but I'm not fond of the idea of using it. I'd rather paint the frame, but if I'm going to try and do it correctly....sigh.
It carries the GM specifications for frame coatings, but I'm not fond of the idea of using it. I'd rather paint the frame, but if I'm going to try and do it correctly....sigh.
The welds look pretty good. With those panels only being stich welded on, I would be concerned about rust forming between them. If you have the frame stripped of the old coating and blasted clean it doesn't really matter if you paint it or rubber coat it, just be sure to seal those seams. Through you may want to keep the bottom seams unsealed so they can allow any moisture to drain out, maybe even try to form some drain tubes like in the rocker pinchweld. Passenger side #2 mount is going to need a repair washer welded in, just about every G body needs repair there.
great insight on the seams. thank you. yes good eye on the #2 bushing mount hole. the left side #2 is weak also and both will be repaired in the future.The welds look pretty good. With those panels only being stich welded on, I would be concerned about rust forming between them. If you have the frame stripped of the old coating and blasted clean it doesn't really matter if you paint it or rubber coat it, just be sure to seal those seams. Through you may want to keep the bottom seams unsealed so they can allow any moisture to drain out, maybe even try to form some drain tubes like in the rocker pinchweld. Passenger side #2 mount is going to need a repair washer welded in, just about every G body needs repair there.
i had no plans for a frame wrap till the opportunity to help my sons welding class presented it self. my son did the welding on the passenger side and another student did the drivers side. the class was astonished at what passed for weld quality back then. so i may clean up and weld the remaining factory seams. as well as add some gussets for the rear suspension attaching points.
I've used and really like the KBS coatings https://www.kbs-coatings.com/. I coated the front of my frame with it when I cut and welded in the Ride Tech Chicane brackets 3 years ago. No that I have the entire frame out for notching and boxing I've been able to get a good look at the KBS coating that I painted on and it held up amazing. I followed the instructions and didn't paint on any top coat since I knew I would be redoing the frame at some point. I can tell you that 80-grit flap disks on my DeWalt grinder barely scratch the surface without significant pressure on the disk. It has held up great. I'm going to use the same kit now that I"ve nearly done with the notch and boxing but I'm going to also add their top-coat as well. I wanted to have it sand blasted but I had it cleaned very well with just a wire wheel and grinding disks.
Attachments
I used the kbs on my frame. It came out fairly smooth even with a brush. Once its on, it isn't coming off the frame or your skin. I topcoated with rustoleum. If I were to do it again I'd spray it. Heres the satin kbs dry.I've used and really like the KBS coatings https://www.kbs-coatings.com/. I coated the front of my frame with it when I cut and welded in the Ride Tech Chicane brackets 3 years ago. No that I have the entire frame out for notching and boxing I've been able to get a good look at the KBS coating that I painted on and it held up amazing. I followed the instructions and didn't paint on any top coat since I knew I would be redoing the frame at some point. I can tell you that 80-grit flap disks on my DeWalt grinder barely scratch the surface without significant pressure on the disk. It has held up great. I'm going to use the same kit now that I"ve nearly done with the notch and boxing but I'm going to also add their top-coat as well. I wanted to have it sand blasted but I had it cleaned very well with just a wire wheel and grinding disks.


The bubbles were my fault. Its caused by letting the paint pool up.
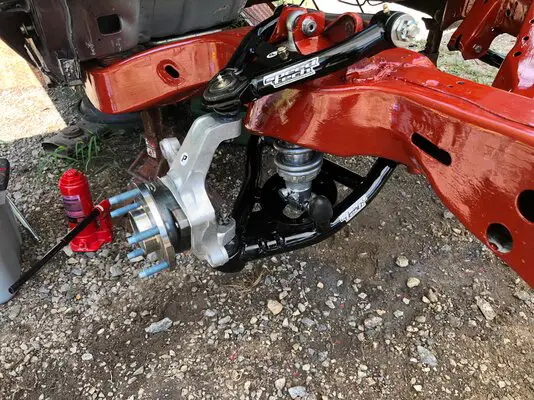
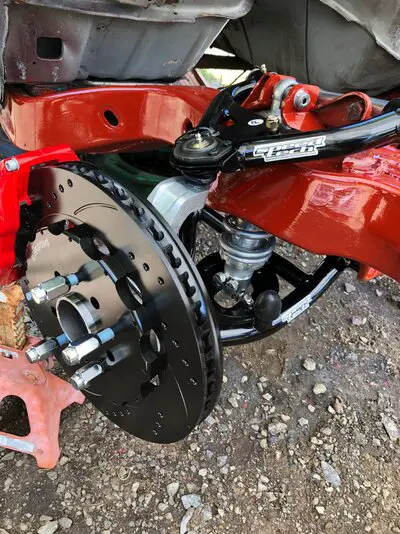
i noticed you have new knuckles and hubs and they are not from an s10 blazer. please tell me more about them.I've used and really like the KBS coatings https://www.kbs-coatings.com/. I coated the front of my frame with it when I cut and welded in the Ride Tech Chicane brackets 3 years ago. No that I have the entire frame out for notching and boxing I've been able to get a good look at the KBS coating that I painted on and it held up amazing. I followed the instructions and didn't paint on any top coat since I knew I would be redoing the frame at some point. I can tell you that 80-grit flap disks on my DeWalt grinder barely scratch the surface without significant pressure on the disk. It has held up great. I'm going to use the same kit now that I"ve nearly done with the notch and boxing but I'm going to also add their top-coat as well. I wanted to have it sand blasted but I had it cleaned very well with just a wire wheel and grinding disks.
CPP? Where are the tie rod arms, or am I just blind?i noticed you have new knuckles and hubs and they are not from an s10 blazer. please tell me more about them.
Everything is from Speed Tech Performance. https://speedtechperformance.com/i noticed you have new knuckles and hubs and they are not from an s10 blazer. please tell me more about them.
Their parts are "pricey" but worth every penny since they were designed to be installed on G-body's.
I ordered all of the parts several years ago and at that time they had what they called the road or track assault package with both the front and rear suspension with coil-over upgrades and the Chicane mounts for the front coil overs. They don't seem to offer the exact kit any longer but some similar.

Boost Your Drive with 78-88 G-Body Road Assault Package
Experience ultimate ride quality and performance with our 78-88 G-Body Road Assault Package. Order now for unbelievable results!
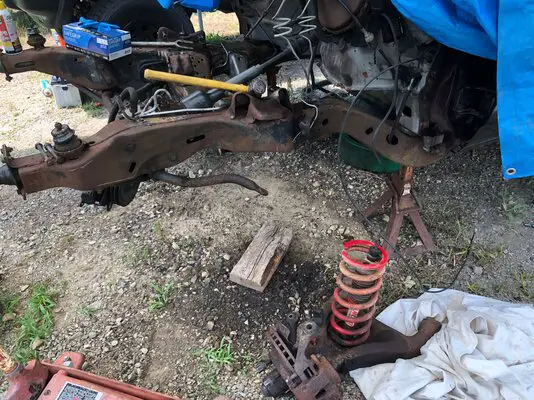
Here is an image that shows the brackets:
Attachments
Your eye site is ok, I was just test fitting everything at that point. I did latter install the steering gear box and linkage to make the car easier to move around.CPP? Where are the tie rod arms, or am I just blind?
The car is currently stripped to the frame for notching and boxing.
- Status
- Not open for further replies.
Similar threads
- Replies
- 8
- Views
- 513
- Replies
- 8
- Views
- 440
GBodyForum is a participant in the Amazon Services LLC Associates Program, an affiliate advertising program designed to provide a means for sites to earn advertising fees by advertising and linking to amazon.com. Amazon, the Amazon logo, AmazonSupply, and the AmazonSupply logo are trademarks of Amazon.com, Inc. or its affiliates.


