Hey guys,
I'm new to the threads but have been learning from these sites for some time now. I've done an LS1 Swap on my 84 Regal.
I am currently working on the fuel sender and getting it to work with the PCM. I've seen a lot of options but here is what I am currently working on.
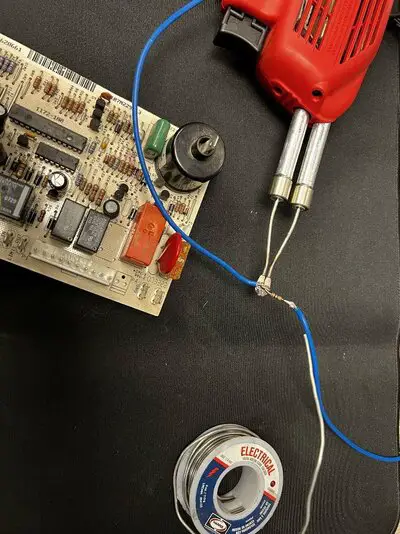
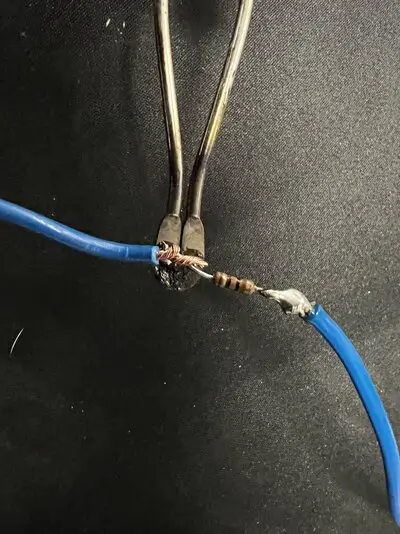
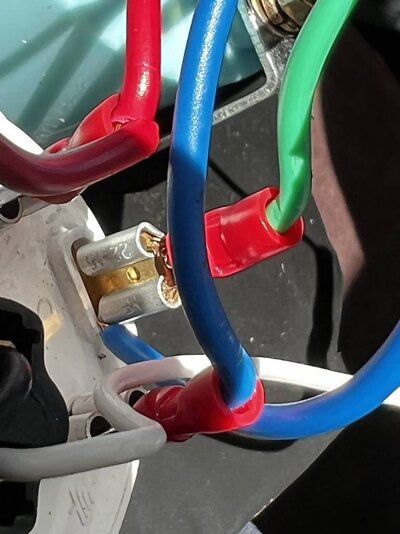
(Pic 1 and 2 )I pulled a resistor off of a bad board here at work and (its the bosses old mini-fridge for his RV) I found a 100 ohm resistor (color code is brown, black, black, gold) and desoldered it (you can snip it if its long enough) then soldered it to wire on both ends.
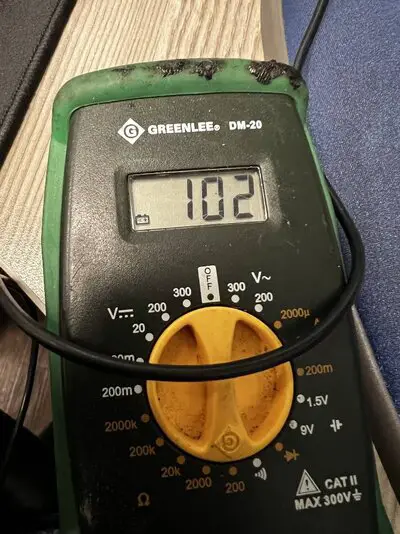
You can find them on anything just gotta know what you are looking for. Test it to be sure it is working with a multimeter. (Pic 3)
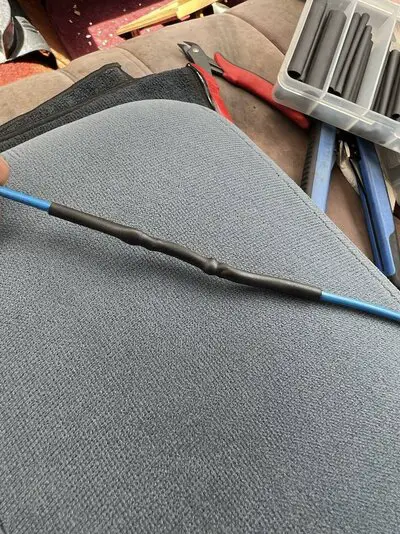
Pic 4once its soldered you put some heat shrink to help keep it safe, I double-sleeved cause I'm paranoid, you don't have to do that.
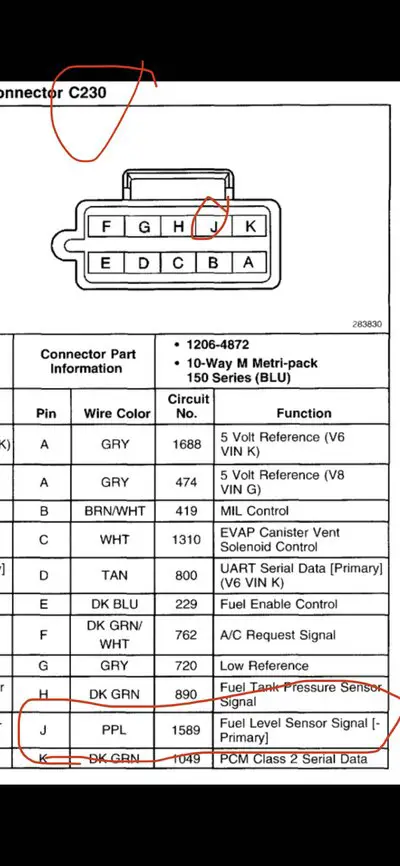
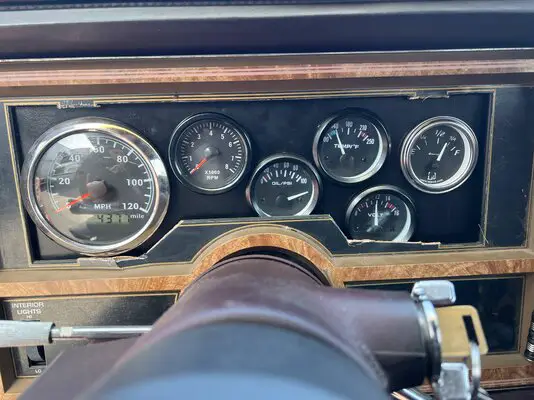
Pic 5 I have an aftermarket fuel gauge that is 0-90, instead of going to pcm I left it alone so that I can read it correctly for now and wired it into the slot in pic 5,
I know its not the best right now but its for calibrating first, once I have it dialed in I will splice the ends together (I may leave it, its not a huge concern for me)
that is where I am at right now, I will start to test my volume and level tables and calibrate it based on the fuel sender that does work properly.
I'm going to search for tables to see if this has already been done,
I hope this helps anyone trying to get their systems working with older tanks and gauges,
this allows me to retain my stock sender and matching gauge without the headache of trying to get it to work from the getgo with the pcm as well as calibrate it because it will be already reading correctly and all you are doing is dialing it in for data purposes
I'm new to the threads but have been learning from these sites for some time now. I've done an LS1 Swap on my 84 Regal.
I am currently working on the fuel sender and getting it to work with the PCM. I've seen a lot of options but here is what I am currently working on.
(Pic 1 and 2 )I pulled a resistor off of a bad board here at work and (its the bosses old mini-fridge for his RV) I found a 100 ohm resistor (color code is brown, black, black, gold) and desoldered it (you can snip it if its long enough) then soldered it to wire on both ends.
You can find them on anything just gotta know what you are looking for. Test it to be sure it is working with a multimeter. (Pic 3)
Pic 4once its soldered you put some heat shrink to help keep it safe, I double-sleeved cause I'm paranoid, you don't have to do that.
Pic 5 I have an aftermarket fuel gauge that is 0-90, instead of going to pcm I left it alone so that I can read it correctly for now and wired it into the slot in pic 5,
I know its not the best right now but its for calibrating first, once I have it dialed in I will splice the ends together (I may leave it, its not a huge concern for me)
that is where I am at right now, I will start to test my volume and level tables and calibrate it based on the fuel sender that does work properly.
I'm going to search for tables to see if this has already been done,
I hope this helps anyone trying to get their systems working with older tanks and gauges,
this allows me to retain my stock sender and matching gauge without the headache of trying to get it to work from the getgo with the pcm as well as calibrate it because it will be already reading correctly and all you are doing is dialing it in for data purposes