IROC Wagon Project
- Thread starter ssbrewskyaz
- Start date
You are using an out of date browser. It may not display this or other websites correctly.
You should upgrade or use an alternative browser.
You should upgrade or use an alternative browser.
- Status
- Not open for further replies.
So I thought I'd throw some more photos on since this is what I use instead of a bad memory. Maybe someone else needs some reference, I've sure used a bunch from this and other sites. Hard to believe there's no assembly manual for these cars yet. Had a friend of mine in engineering try to see if the PAD documents were still available in archive. Don't think he spent a lot of time on it but I'm basically using the parts catalog as an assembly manual. PAD documents are what the plant uses to assemble a vehicle at pilot and start of production. All the engineering changes are eventually worked into the PAD documents. Oddly enough PAD is the acronym for Plant Assembly Documents.
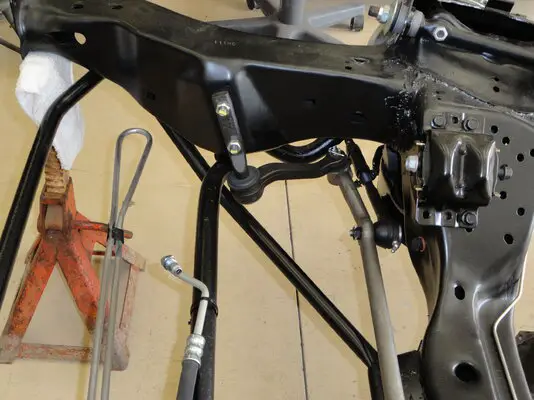
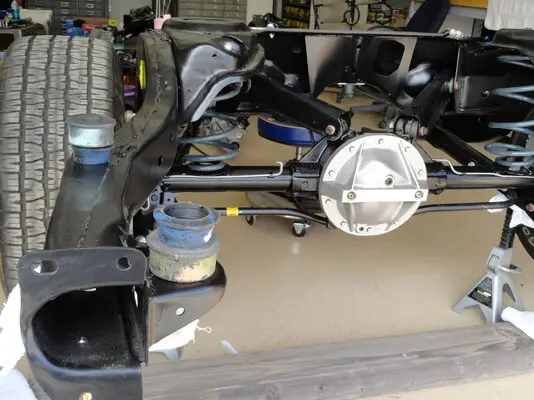
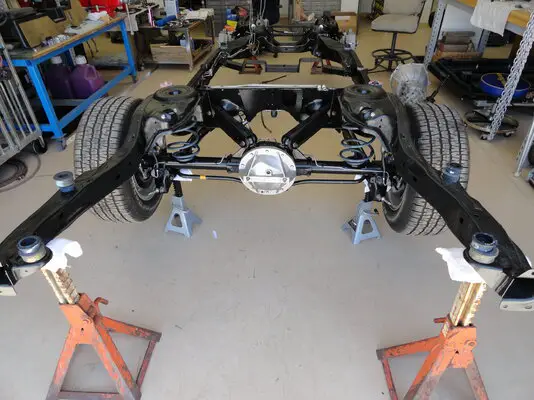
With only a few minor exceptions, every new piece on this car is a GM part, even the hardware is new GM. One of the exceptions is the front stabilizer bar cushions. Those are urethane and the brackets are Energy greasable. The body cushions are original GM, calipers, pads, etc. I would have used the original part number springs but nobody around here knows how to effeciently cut the coils to drop the car and I'm really not into the stock stance.
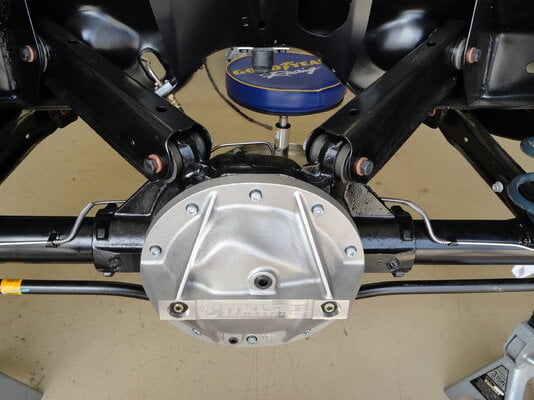
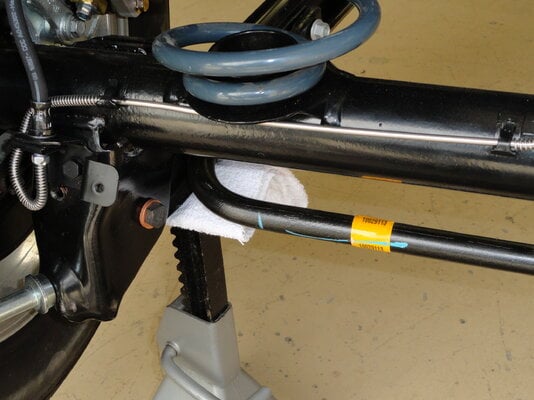
Everything I torque, I put a paint line on like the plant does to indicate a torqued fastener. Every critical fastener is torqued. The springs, both front and rear are indexed per the service manual and they're all riding on the GM cushions. A lot of the parts are disapearing from GM parts as they fit ten years worth of cars from multiple GM brands.
Attachments
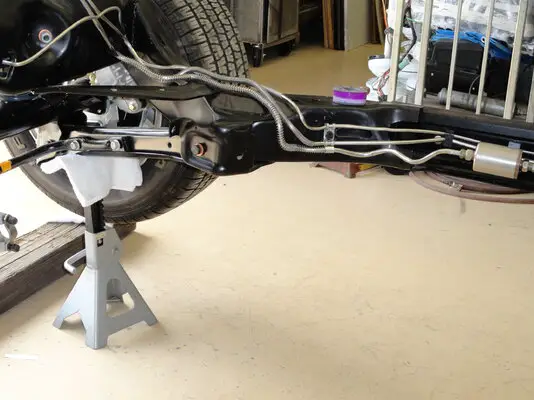
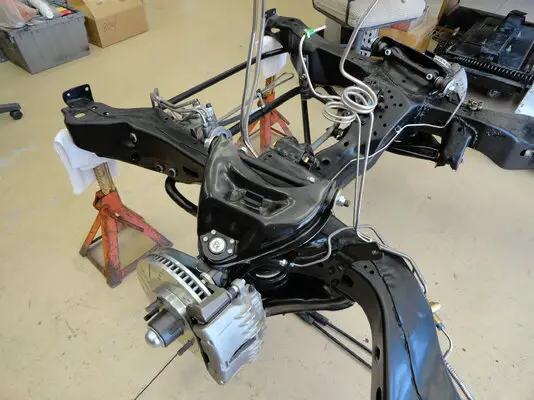
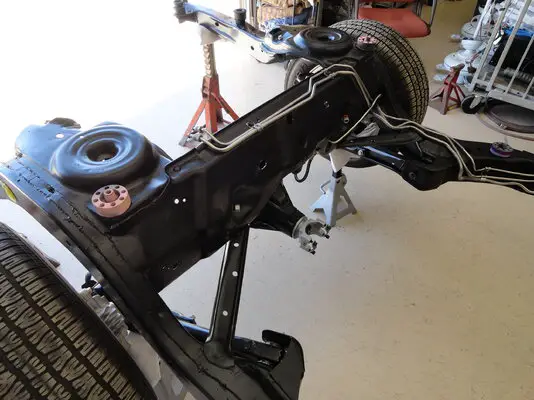
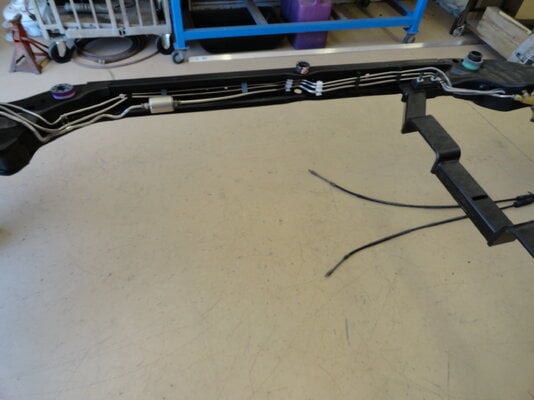
Fuel lines on this thing have been a lot of work. I did buy brake lines from a company that will remain unnamed and I'm not sure I'll ever do that again. I ended up bending and rebending the stuff to get what I wanted. In the end, it's not as pretty as I'd like but then again, nobody's ever going to see it. The point is I should have just bent the stuff myself like I've done on every car I've built previously.
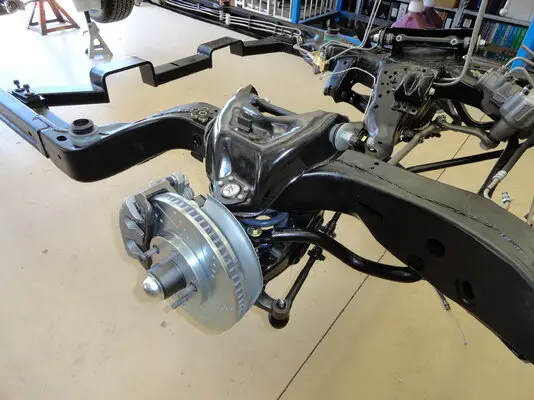
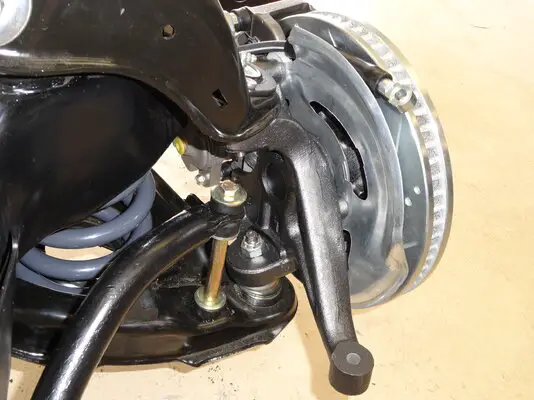
All the brake hoses are connected to the calipers and all the ball joints are torqued so I can put the rollers on and this thing can see some daylight next weekend. It's not a good idea to torque the control arm bolts until the car is sitting on the tires with weight on it. You'll notice the trailing arms and the control arm bolts have special washers. I've taken three of these cars apart and not one of them had these washers but they're called out in the parts catalog so this car has them.
All the brake hoses are connected to the calipers and all the ball joints are torqued so I can put the rollers on and this thing can see some daylight next weekend. It's not a good idea to torque the control arm bolts until the car is sitting on the tires with weight on it. You'll notice the trailing arms and the control arm bolts have special washers. I've taken three of these cars apart and not one of them had these washers but they're called out in the parts catalog so this car has them.
Attachments
Its looking really good. I like that you're maintaining the factory appearance as much as possible. Please keep up the good work, updates and photos.
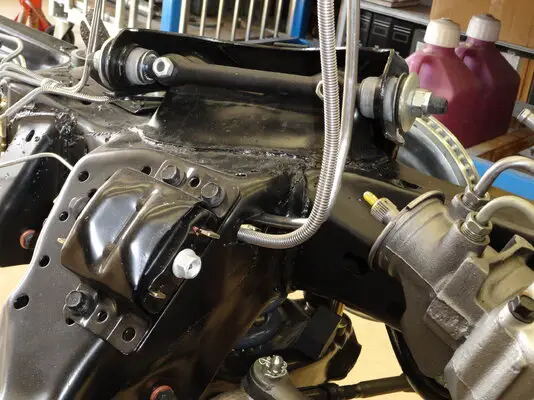
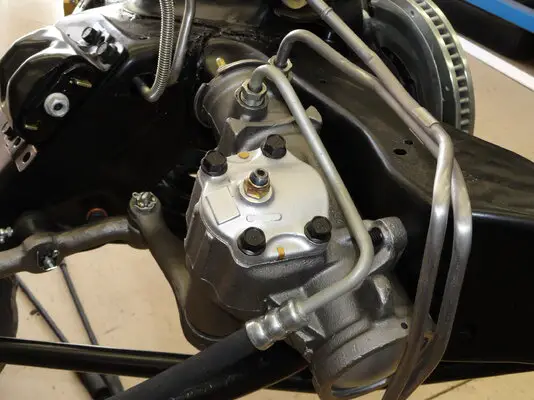
It's probably not even noticeable in the photo but all of the steering gear cover bolts have the Saginaw "S" logo. Took three gears to get seven bolts. The rebuilders just use what ever bolt they pick out of the box or whatever bolt is easy to get their mitts on. The devils in the details.
All the OE body cushions were color coordinated so plant personal only had to remember the color and the position the color went in.
And that's a wrap for Saturday, 05 May. Happy Cinco de Mayo.
All the OE body cushions were color coordinated so plant personal only had to remember the color and the position the color went in.
And that's a wrap for Saturday, 05 May. Happy Cinco de Mayo.
Attachments
Hello Everyone,
Well Saturday was supposed to be the day I moved the wagon chassis off the jack stands and on to the ground rolling. Unfortunately for me I neglected to take in to account that my roller wheels would not clear the larger LS1 front calipers. So, needless to say, the chassis is still getting jack stand rash and I’m in search of some 16 or 17 inch rollers. Really don’t even care if the wheels have tires.
Scoured the local Craigslist and found a few candidates but as usual, when you’re looking for something specific, it’s elusive. If I wasn’t looking for wheels, the pages would be full of wheels. Hey, what the heck, just means I can’t blow the shop out or take real light photos of the chassis, certainly not the end of the world.
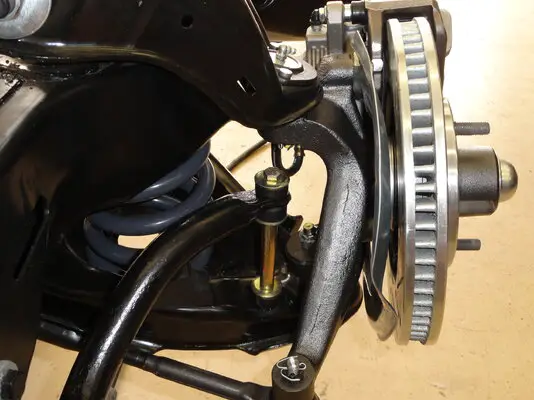
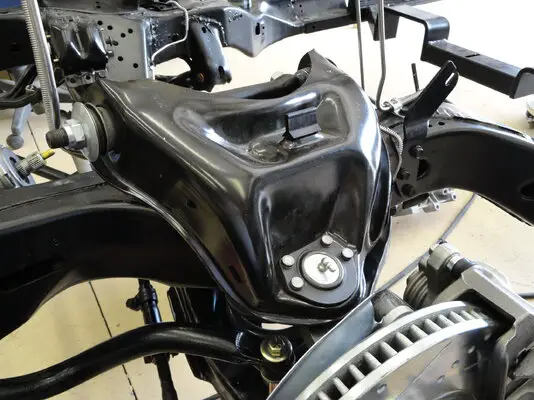
Noticed something else about the upper control arms and the spindle; In full droop the control arms contact the spindle. I believe that when the chassis has weight on it, this will no longer be an issue, or at least I hope it won’t. It’s a little late in the process to find this out after everything is powder coated so we’ll see.
So the weekend wasn't a total wash, I worked on some other stuff.
Attachments
Here’s a photo of the rub I was talking about between the spindle and the upper control arm. Had to take the arrow out because it made the photo size larger than three meg.I guess I should start looking at my own photos. If I had I would have noticed this long before this weekend as this photo is clearly before I assembled the tie rods and torque all the bolts.
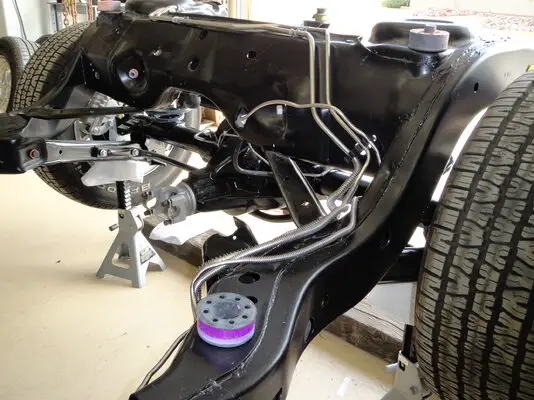
The rear brake and fuel lines are not as nice as I’d hoped for. There’s only so much rebending a person can do to a set of lines that are supposed to already be bent to fit the car. I just don’t have it in me to scrap the lines and start again. I should say my expense account doesn’t have it in it. The areas I dislike will for the most part, be hidden from view. That’s not an excuse to do it half *ss, that’s just the excuse I’m using to keep what I have and move on.
In case you’re wondering, the two obvious whoops just ahead of the fuel filter are actually intentional. Something I learned from Prudhoe Bay Alaska and the Trans-Alaskan pipeline. It’s not straight every couple hundred feet the pipe does a forty-five to a forty-five etc to etc and then goes on for a couple hundred more feet. This changes the resonance frequency and reduces fractures and droning. My purpose is to minimize fuel pump drone and vibration. Will it work, don’t know.I do know it could have been done nicer and would have been had I bent all the pipes.
Attachments
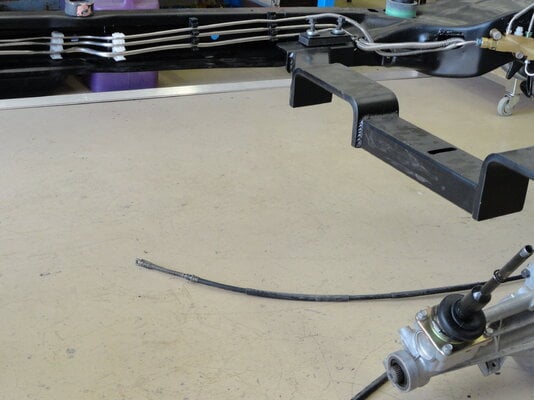
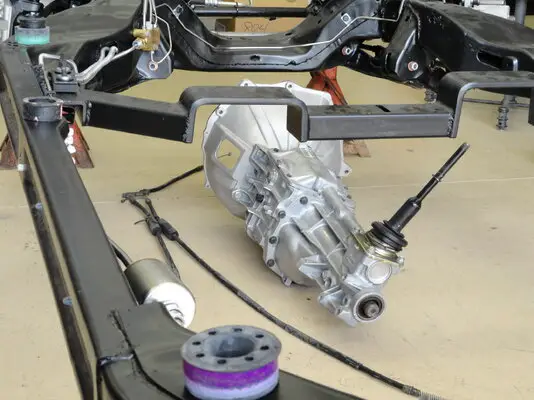
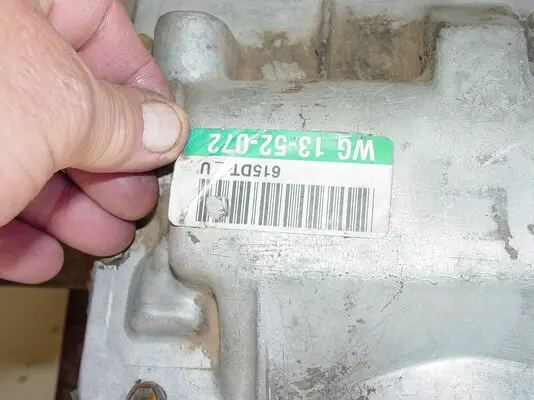
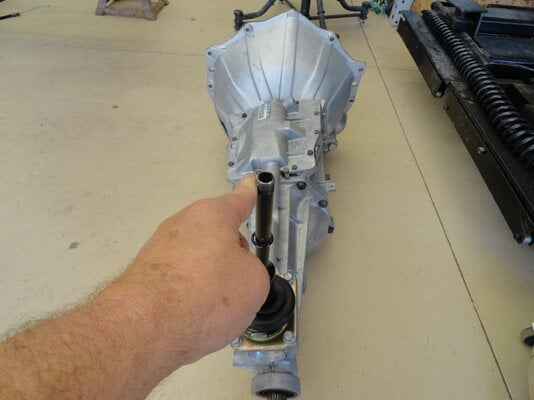
I went with the T5 due to the expense of the other options. Yes, I’ll probably break it but I’ll blow that bridge up when I get to it. The T5 I’m using is out of an 85 Trans Am with a 5.0 V8. This can be confirmed by the paper tag on top of the box. What’s up with paper tags, obviously stamping the trans with the codes like back in the 60’s and 70’s costs too much money. Any way, if you have a transmission with a tag intact, you can look up the original application at this site. http://www.5speeds.com/t5/,
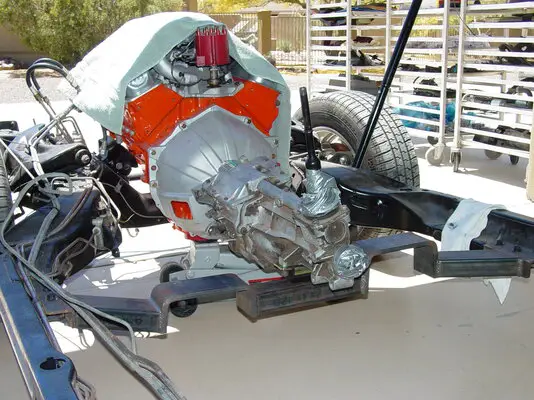
I didn’t want a hydraulic clutch so I needed a bell housing from a mechanical linkage application. Far as I can tell, 1983 was the last year for a T5 with a mechanical linkage and that’s what I have. I’d say the bell housings have to be rare indeed; I considered a 621 before I stumbled upon this one. The unique thing about this bell housing is that it cants the transmission at a 27 degree angle toward the driver. Never knew that until I started looking into the application.
Yes, I know that everyone thinks you have to use a 462606 cover but I really don't know why. I know that the cluth fork for the 606 cover is about twice as much as any other fork.
I’m going to try to use this to my advantage. If you have seen photos of factory three or four speed Malibu’s, the shifter comes through the tunnel off to the side as opposed to in the middle as previous years did. Chris has one or did have one of these Malibu’s.
One of the photos is of the mock up I did using the first chassis I built for the car and before the trans was cleaned up.
Attachments
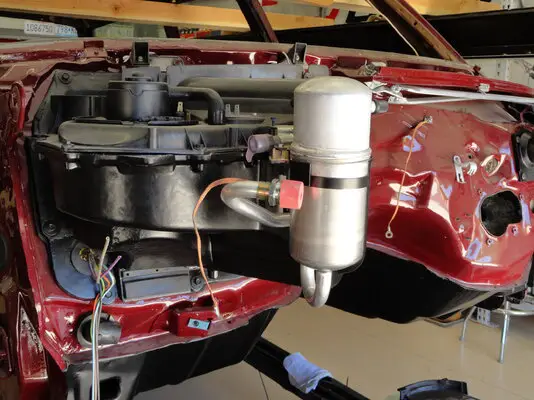
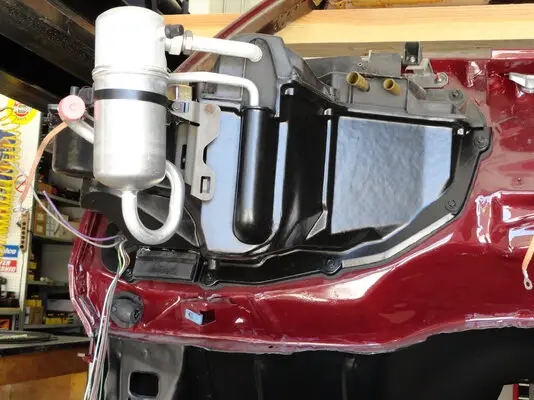
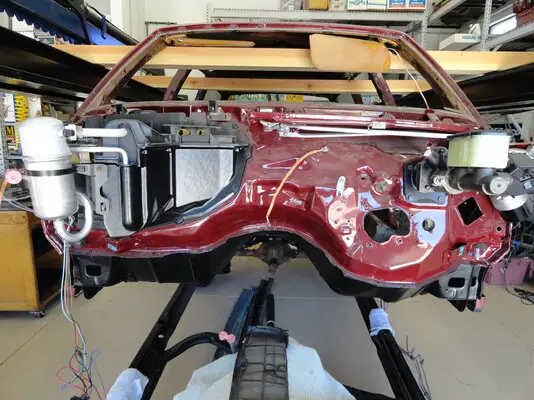
Here’s a couple photos of the blower box. Yeah, it’s just a blower box but I made some changes I hope will help out the air flow. Basically, I used body seam sealer to seal the joints inside the blower box. In my little pea, this should equate to more air coming out the vents. We’ll see, in Arizona, it won’t be heat, it’ll be AC.
On the front of the blower box where the heater core and evaporator pipe exit the box, I used the rubber pipe wrap you can buy at Home Depot. It’s not the plastic stuff, it’s a dense rubber covering that people put around pipes in cold states, been there, done that.
Anyway, I bought a length for the largest pipe, either inch or inch and a half. Put the piece spread out face down on the work bench with weights on it and left it for the week. When I cut it up when I was working on the piece, it was just starting to curl when I was done. Once it’s in the case, it’s not going anywhere.
Attachments
- Status
- Not open for further replies.
Similar threads
- Replies
- 9
- Views
- 526
- Replies
- 0
- Views
- 336
- Replies
- 2
- Views
- 161
GBodyForum is a participant in the Amazon Services LLC Associates Program, an affiliate advertising program designed to provide a means for sites to earn advertising fees by advertising and linking to amazon.com. Amazon, the Amazon logo, AmazonSupply, and the AmazonSupply logo are trademarks of Amazon.com, Inc. or its affiliates.


