My other shop
- Thread starter Mike P
- Start date
You are using an out of date browser. It may not display this or other websites correctly.
You should upgrade or use an alternative browser.
You should upgrade or use an alternative browser.
- Status
- Not open for further replies.
Driven, nothing really to update on the line shaft, it got cold down here and I moved on to some projects inside the house over the last couple of months. It finally turned warm last week and I’m getting ready to get back out shop and start getting the shaft up.
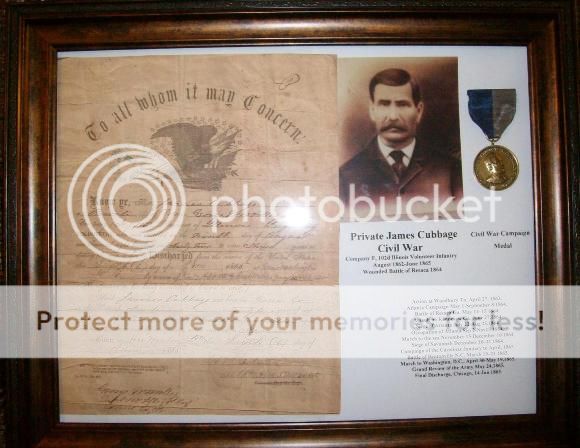
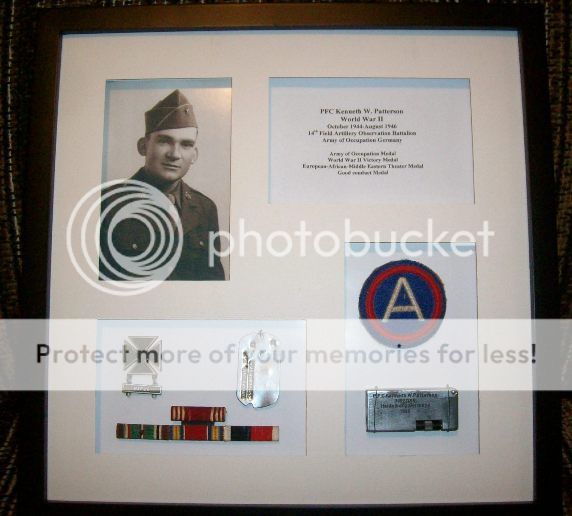
The project I’ve been working is kind of related. I’m the only one of my generation that went into the military so I’m also the caretaker of those items in addition to the mechanical things I inherited. I’ve been sorting, organizing and framing some of my Granddads and Dads WWI and WWII stuff (the ones who passed the tools on to me). I also got my Great Great Granddad original Civil War Discharge papers so I did some research on him too.

TC I’d love to come up there but I’ve already committed to a get together down here next weekend with a bunch of guys who are going to do a route 66 run.
The project I’ve been working is kind of related. I’m the only one of my generation that went into the military so I’m also the caretaker of those items in addition to the mechanical things I inherited. I’ve been sorting, organizing and framing some of my Granddads and Dads WWI and WWII stuff (the ones who passed the tools on to me). I also got my Great Great Granddad original Civil War Discharge papers so I did some research on him too.


TC I’d love to come up there but I’ve already committed to a get together down here next weekend with a bunch of guys who are going to do a route 66 run.
Well the line shaft is kind of on hold for the time being as I’m waiting for a friend to give me a hand getting it up in air.
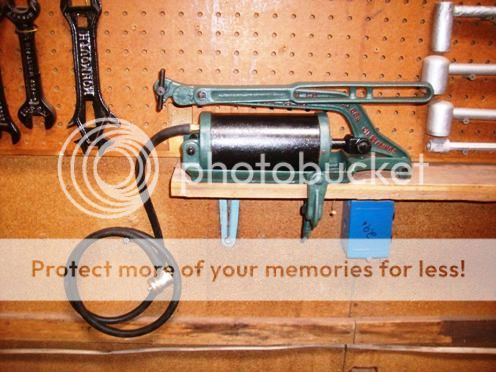
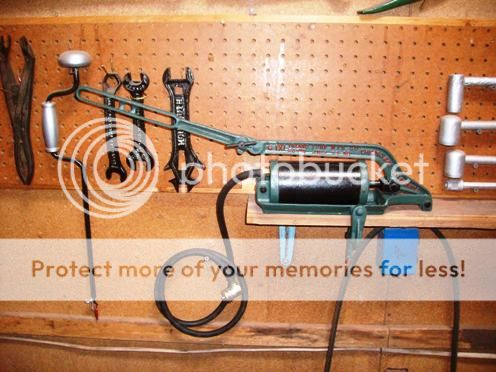
I did make a trip back to Illinois a while back and brought a few more things back I found in the old shed. One rusted mass of metal turned out to be a running board mounted tire pump (which I restored). The handle folds up for storage and folds out when it’s mounted.
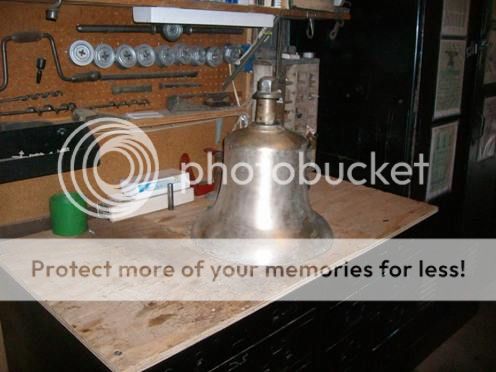
Another item was this bell. From what I was able to find out it is from a steam locomotive built in 1880. The Railroad gave Grandpa a good deal on when they scrapped the engine and he hung it on the farm and it was used as a dinner/alarm bell when they farmed with horses (up until 1936).
I’m currently building a carriage for it so it can be rung.

I did make a trip back to Illinois a while back and brought a few more things back I found in the old shed. One rusted mass of metal turned out to be a running board mounted tire pump (which I restored). The handle folds up for storage and folds out when it’s mounted.


Another item was this bell. From what I was able to find out it is from a steam locomotive built in 1880. The Railroad gave Grandpa a good deal on when they scrapped the engine and he hung it on the farm and it was used as a dinner/alarm bell when they farmed with horses (up until 1936).
I’m currently building a carriage for it so it can be rung.


Very Cool stuff indeed! Been looking for an anvil for a while now. Seems like all I ever come across is what I'll call "toys", five or six pounders. I either want something I can't lift or something that gives me a hernia trying to lift. ...
:arrow: :arrow: :arrow: :wink:
:arrow: :arrow: :arrow: :wink:
ssbrewskyaz said:Very Cool stuff indeed! Been looking for an anvil for a while now. Seems like all I ever come across is what I'll call "toys", five or six pounders. I either want something I can't lift or something that gives me a hernia trying to lift. ...
:arrow: :arrow: :arrow: :wink:
Go to an antique tractor or farm engine show. They always have them for sale but they are not cheap.
I finally got things caught up enough to get back getting the lineshaft up. I had a couple of offers for help on getting the thing up in the air, but in the end schedules didn’t work out and I put it in myself. In spite of having to rearrange the shop and all the trips up and down the ladder, it was worth the effort.

The old adage we use when building cars that “it will take twice as long and cost twice as much as you expect” applied equally well to this little project. I thought I had majority of the stuff collected when I had the shaft, pulleys, bearings and belt gathered. By the time it was in the air and turning I had gone thru 60 feet of angle iron, 35 feet of flat stock and 40 feet of lumber, not counting copper tubing, fittings, wire etc.
The jackshaft and belt tensioner was pretty straight forward, but I had to build the exhaust twice. The first attempt I used 1 ¾” exhaust pipe and it caused the engine to load up badly. For the second attempt I used 2 1/2” pipe I had laying around, which worked out great. You might have noticed the 1” nipple and pipe cap at the 90 degree bend. I put that in so I could see and hear the exhaust when I fine tune the mixture on the carburator.
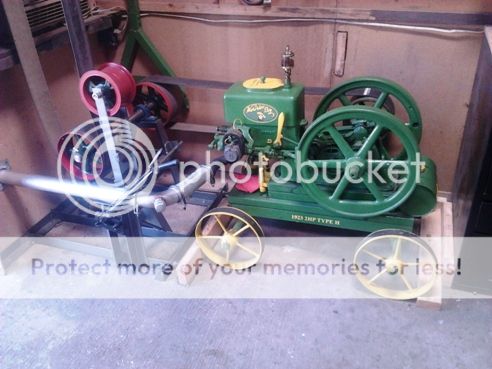
The Motsinger Autosparker (DC generator) draws a surprising amount of power. By turning the governor spring almost all the way in I can get a bit more than 12 volts out of it. I dialed it back to around 6 volts though so it not working all that hard. I also built a handle with a wedge on the end so I can disengage it completely from the pulley if I don’t want to run it at all. I put a 6V light in the old railroad lantern and also wired up a goose neck work light that can be used with either the grinder or drill.
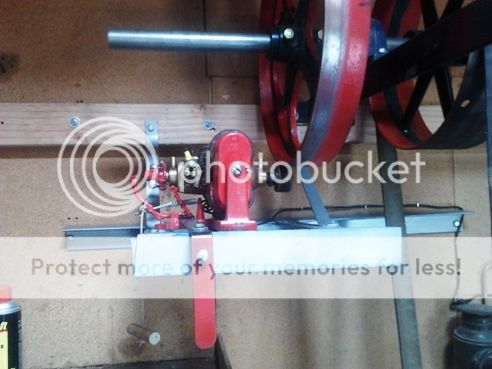
The grinder was pretty straight forward. I did built a movable belt guide to slide the belt from the loose to tight pulley rather than just use a stick as was common when these were in general use.
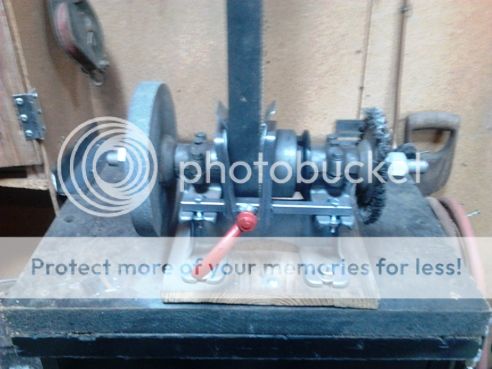
The compressor is the newest piece of equipment, it’s only about 50 years old. Rather than belt it directly to the line shaft, the power goes thru a smaller belt and pulley setup and is activated by applying a belt tensioner. The adjustable pop off valve is set to 50 PSI and once the pressure is achieved it can be shut down by manually by releasing the belt tensioner. An old 30 pound Freon tank is used as pressure tank.
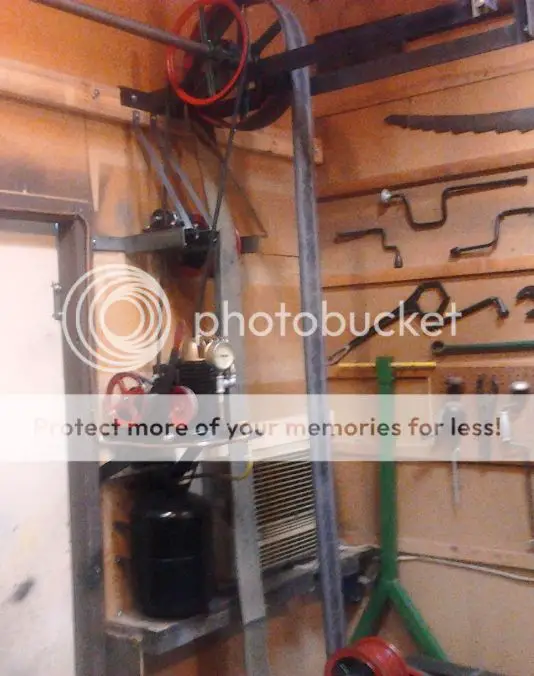
The post drill had also been set up for a V Belt and is activated by a spring loaded belt tensioner. I used a countershaft similar to the one on the compressor and it’s also activated by a spring loaded tensioner pulley. On the drill it allows the pulleys to be changed easily to change the speed. Spindle speed is currently about 140 RPM which is slow enough to engage the auto feed (which I really don’t use when I’m actually drilling anything but it is neat to watch work occasionally). I’ve drilled a few ½” holes on some 3/8 flat stock and the drill barely loads the engine.
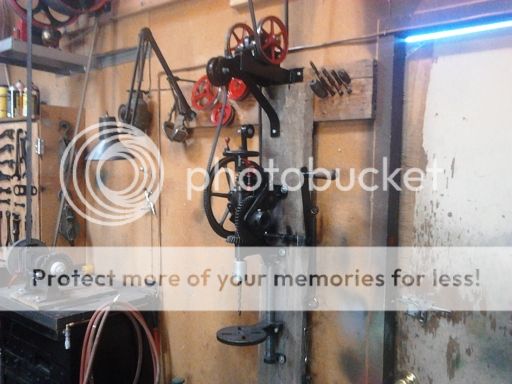
I didn’t want to have to loosen the lineshaft (and realign it) every time I needed change a V belt, so I bit the bullet and ordered some Flexco V Belt splices. They work well but are very expensive.

Here is a link to the shaft working, you might want to turn the volume down a bit. The actual noise level when the line shaft is running is really quite reasonable by the way.
http://www.youtube.com/watch?v=wwk4niUu ... e=youtu.be
Enjoy.

The old adage we use when building cars that “it will take twice as long and cost twice as much as you expect” applied equally well to this little project. I thought I had majority of the stuff collected when I had the shaft, pulleys, bearings and belt gathered. By the time it was in the air and turning I had gone thru 60 feet of angle iron, 35 feet of flat stock and 40 feet of lumber, not counting copper tubing, fittings, wire etc.
The jackshaft and belt tensioner was pretty straight forward, but I had to build the exhaust twice. The first attempt I used 1 ¾” exhaust pipe and it caused the engine to load up badly. For the second attempt I used 2 1/2” pipe I had laying around, which worked out great. You might have noticed the 1” nipple and pipe cap at the 90 degree bend. I put that in so I could see and hear the exhaust when I fine tune the mixture on the carburator.

The Motsinger Autosparker (DC generator) draws a surprising amount of power. By turning the governor spring almost all the way in I can get a bit more than 12 volts out of it. I dialed it back to around 6 volts though so it not working all that hard. I also built a handle with a wedge on the end so I can disengage it completely from the pulley if I don’t want to run it at all. I put a 6V light in the old railroad lantern and also wired up a goose neck work light that can be used with either the grinder or drill.

The grinder was pretty straight forward. I did built a movable belt guide to slide the belt from the loose to tight pulley rather than just use a stick as was common when these were in general use.

The compressor is the newest piece of equipment, it’s only about 50 years old. Rather than belt it directly to the line shaft, the power goes thru a smaller belt and pulley setup and is activated by applying a belt tensioner. The adjustable pop off valve is set to 50 PSI and once the pressure is achieved it can be shut down by manually by releasing the belt tensioner. An old 30 pound Freon tank is used as pressure tank.

The post drill had also been set up for a V Belt and is activated by a spring loaded belt tensioner. I used a countershaft similar to the one on the compressor and it’s also activated by a spring loaded tensioner pulley. On the drill it allows the pulleys to be changed easily to change the speed. Spindle speed is currently about 140 RPM which is slow enough to engage the auto feed (which I really don’t use when I’m actually drilling anything but it is neat to watch work occasionally). I’ve drilled a few ½” holes on some 3/8 flat stock and the drill barely loads the engine.

I didn’t want to have to loosen the lineshaft (and realign it) every time I needed change a V belt, so I bit the bullet and ordered some Flexco V Belt splices. They work well but are very expensive.

Here is a link to the shaft working, you might want to turn the volume down a bit. The actual noise level when the line shaft is running is really quite reasonable by the way.
http://www.youtube.com/watch?v=wwk4niUu ... e=youtu.be
Enjoy.
- Status
- Not open for further replies.
Similar threads
- Replies
- 10
- Views
- 392
- Replies
- 2
- Views
- 594
GBodyForum is a participant in the Amazon Services LLC Associates Program, an affiliate advertising program designed to provide a means for sites to earn advertising fees by advertising and linking to amazon.com. Amazon, the Amazon logo, AmazonSupply, and the AmazonSupply logo are trademarks of Amazon.com, Inc. or its affiliates.


