Tools for front end work

Status
Not open for further replies.

GP403

Administrator
Site Admin
Moderator
Feb 25, 2005
4,613
1
5,204
113
Rolla, MO
gbodyforum.com
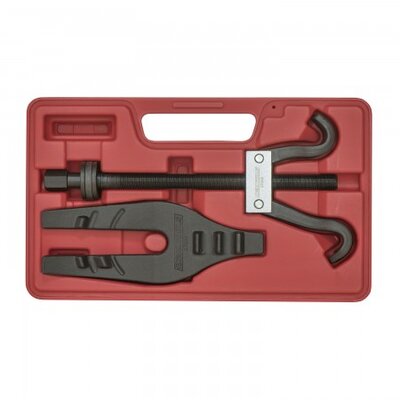
So once it cools off and its time to hibernate Project Blue Book, it'll be time to rip this front end apart and put in all the new steering linkage, control arm bushings, ball joints, UMI springs, etc.... So what tools do I need to do this myself? Here's what I've come up with so far.... I'd like to get some specific recommendations on stuff like the socket/adapter sizes needed to press in or out the various bushings and stuff.... $$ means I still need to actually get it

air rachet/driver/hammer
$$ Pickle forks (sizes?)
BFH™
tape measure
floor jack
$$ grease pencil/paint pen to mark locations
$? ball joint separator (necessary since I'm ripping it all apart anyway?)
$$ internal spring compressor (not screwing around here)
$$ safety chain/latch/lock (really not screwing around here)
$$ bench or free standing press
$? adapters or sockets for press or hammering in bushings (sizes?)
The usual sockets/wrenches
$$ beer
bandaids

What am I $$ missing?

For parts I've got so far:
center link
tie rods (inner/outer/sleeves)
idler arm
ball joints (upper/lower both sides)
sway bar end links
springs & shocks (thx UMI!)
Energy control arm bushings

still need to get:
UCA shafts
maybe wheel bearings, haven't decided yet
new bump stops
front stabilizer bushings, once I know which ones I need

I'm contemplating picking up a spare set of control arms and getting those cleaned up and assembled first. might save some hassle and down time.

chime in! If nothing else we get a reference thread going on.....
 
If the car is from the rust belt, then i would recommend replacement bolts for the upper and lower control arms.
See https://gbodyforum.com/threads/bolt-size-question.56237/page-2#post-475396

You really don't need a pickle fork to remove ball joints or tie rods, just a BFH and hit it on the knuckle to separate.

I did my upper control arm bushing a few weeks ago, and a balljoint press/clamp works well as you can use the various tubing sizes to press them in.

I would also recommend using anti seize paste for the bolts.

Hope this helps!
 
Good idea on the bolts. I will have to check if the Energy kit has them in there or not. They're probably "alright" but it wouldn't hurt.
 
Sounds like you got it well covered, Chris.
The thought of picking spare control arms is not a bad idea. Having the replacement arms painted, rebuilt, and ready to swap over, would certainly save you down time.
Replacing the control arm bolts, as 442_87 suggested is also an excellent idea. I had to replace mine, which I had to cut off. They don't come in a kit, unfortunately.
At the time, I was able to find decent 8.8 metric replacements at Pepboys.
 
Good idea on the bolts. I will have to check if the Energy kit has them in there or not. They're probably "alright" but it wouldn't hurt.

for the energy control arm bushings they use 1/2" bolts and not the smaller OEM metric bolts. My kit did not have the bolts included.
 
for the energy control arm bushings they use 1/2" bolts and not the smaller OEM metric bolts. My kit did not have the bolts included.

Well that figures. :/ I found a reference to the ID of the sleeve being 1/2" but only in a separate document from a larger kit. Doh! Thanks for the heads up, I would not have known that unless there's something actually in the box to that effect (haven't opened it yet.)
 
I used the ball joint press from O'Reilly to press in and out the balljoints in the lower control arms. On the uppers, I clamped the control arm in the vice and cut an "X" in the head of each rivet and then knocked the head off with a hammer and cold chisel. Then I used a punch to drive the rivet out of the control arm. I found the pickle fork to be useful on separating the balljoint and tie rod end tapers.

You might want to add a heavy duty ratcheting strap to your list. When taking the front end apart, I put the ratcheting strap under the jack and looped it over the frame. I then put the jack under the lower control arm and picked up on it until I had a little weight on it. Then I loosened the lower balljoint nut. Then I used the pickle fork to break the taper of the balljoint loose. Then I picked up on the jack until the car started to come off of that side's jack stand. Then I removed the lower nut. Then I started letting down on the jack slowly until it was all the way down. At that point, all I had to do was prize the spring out of the pocket of the lower control arm and it didn't have much energy stored in it. It was the first time I did it this way and it went smooth. I didn't use the compressor at all to take it apart. I did use the compressor to put it together though. I compressed the spring just enough to get it in the pocket and then I started to jack up the lower control arm. I used the spring compressor from O'Reilly like pictured below with good success.

I have a press but found I couldn't press out the control arm bushings as I couldn't get the control arm in the press far enough. I did use my press to press out the upper shafts (buy pushing out the rubber out of the bushing's sleeve). On the rest of the bushings, I resorted to heating up the sleeve with a propane torch until the rubber was sizzling, then knocked the rubber out, then knocked the sleeve out with a hammer and cold chisel. I learned the propane trick from a youtube video. I would call this the hard way. If you do it this way, watch out. The molten rubber makes a hell of a mess. I had a shop drive the new bushings in. He didn't use a press either. He used "cones" made by Snap On for driving in bushings.

On tools, make sure you are in good shape on 18mm wrenches and sockets. Several of the fasteners on that front end are 18mm like idler arm bolts, upper control arm bolts, and maybe even lower control arm bolts. If it's past 82, all of that chassis stuff is metric.

On parts, be sure to get yourself a pair of the rubber isolators that go up above the spring in the pocket in the frame. I got mine from Rock Auto. They were Metro molded rubber and I really liked them. They fit so well I didn't have to tape them to the spring. I could just put them into place up in the frame and they stayed. You might also want to get yourself some new tie rod adjusting sleeves. Not necessary but will save you the chore of cleaning up the old ones. I ended up with the fancy billet ones from QA1 because I was stupid and couldn't get the Moog ones I bought to thread on because I forgot one side was reverse thread. That's about all I can think of for now. Check out my build thread for what parts I used and why and make sure I'm not forgetting something useful. Just search "Space City 1982 GP" and it should come up.

Hope this helps.

27035nopkg.jpg
 
  • Like
Reactions: 442_87 and Rktpwrd
I use a 12 ton press as well as this tool to do the control arm bushings and lower ball joints. The ears on the control arms tend to collapse when you try to press in the new ones so I made some spacer sleeves out of PVC pipe. The first time it worked well, but the next time I did it, they broke so I then made spacers from steel pipe. Better. This tool is expensive but makes the job much easier. The Harbor Freight model is almost as good as the OTC version and much cheaper. If you can catch a sale or 20% off coupon it's definitely worth it. The adapter set is great too-more uses, but for now just the "C" clamp is good.http://www.harborfreight.com/automo...rvice-kit-for-2wd-and-4wd-vehicles-60827.html
image_23089.jpg
image_23473.jpg
 
Last edited:
  • Like
Reactions: Texas82GP
Status
Not open for further replies.

GBodyForum is a participant in the Amazon Services LLC Associates Program, an affiliate advertising program designed to provide a means for sites to earn advertising fees by advertising and linking to amazon.com. Amazon, the Amazon logo, AmazonSupply, and the AmazonSupply logo are trademarks of Amazon.com, Inc. or its affiliates.

Please support GBodyForum Sponsors

Classic Truck Consoles Dixie Restoration Depot UMI Performance

Contact [email protected] for info on becoming a sponsor