Marriage: 1980 Grand Am and 2005 GTO Build Thread.

smed7880

Greasemonkey
Jul 27, 2010
132
171
43
She is now a hard no on the dash swap.

We pulled the 301 clamshells last night and both of us were soaked before finishing. Installing the Blackheart stuff will have to wait.

Shes going to assemble the fuel tank kit between now and then in the ac. Next garage time is saturday morning.

I looked at the gto last night and the alternator is buried deep sitting at what will be the Grand Am steering box area. It looks way too tight. I dont think its going to fit.
 
  • Like
Reactions: 1 user

Texas82GP

Just-a-worm
Apr 3, 2015
7,989
18,702
113
Spring, Texas
Cool project. Tuned in. My suggestion on the A/C:

Open up the factory HVAC box under the hood. The top comes off. It's not hard, you just have to find all the bolts. There are threads on here. oldsofb has a great deep dive YouTube video. Check the condition of the evaporator and heater core. If there are no signs of leakage flush both and reuse. While you're in there clean out the bottom of the case and the flap drain down there. Flush the evap core with denatured alcohol with one of these...

Goplus A/C AC Flush Kit, Heavy-duty & Safety Air Conditioner System Flush Gun Kit, Car Cleaning Tool Kit for R134 R12 R22 R410 R404, AC Flushing Kit https://www.amazon.com/dp/B06X9QSHM9/?tag=gbody-20

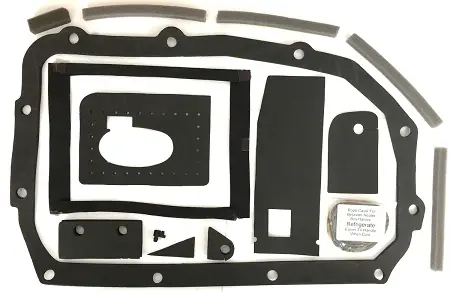
Get a rubber kit for putting the box back together.....


I replaced the evaporator core and heater core in mine. They are fine but don't fit as well as the original units.

My guess is the low mount compressor will require a frame notch for clearance. You won't know until you set the engine in the car the first time. When you do, watch the rear coil pack and valve cover on the passenger side. It is easy to crash that into the HVAC box and bust it.

If you have trouble with clearance on both the power steering pump and the A/C compressor, check out ICT Billet for brackets that will repackage those accessories that you already have.

On the condenser, you just want a modern replacement that has the inlet/outlet on the passenger side. R12 Condensers are a serpentine configuration. R134 performs best with parallel flow. Modern replacement units are normally parallel flow. The 3rd gen Camaro condenser fits our cars and is popular to use. It has passenger side connections. The Cutlass 307 condenser has inlet/outlet on the passenger side as well. That's the way I went. If the Grand AM connections are on the passenger side, just get a replacement condenser for that application and then you can use the stock liquid line between the Evaporator and Condenser. I just sourced a used Cutlass 307 liquid line to pair with my Cutlass condenser.

You'll need a new oriface tube for R134A. Easy to find. It's just calibrated slightly differently than the stock R12 tube. Stay away from the Hot Climate oriface tubes. Several of us have had trouble with the evaporator core icing up with these.

On hoses, if you stay with the LS2 compressor, you'll have to make up custom ones. Vintage Air has a nice selection of hose, fittings, etc. Once you have them mocked up, you can take them somewhere to have them crimped.

To my knowledge, R12 hoses can be used but they need to be flushed of the mineral oil that is used in R12 systems and you need to swap the O-Rings to one's that are R134A compatible. If you're using a modern compressor, you won't be able to use the old hose assembly anyway.

We put the full Vintage Air kit in my brother's LS swapped 78 Camaro. It's nice but there are a few drawbacks, which are also present in the Vintage Air G-body kit. First, you lose the fresh air capability. It is recirc only. Second, they want you to run heater hoses inside the car to the point of connection. I for one don't want to have to take a heater hose loose under the dash of the car. We modified my brother's install to move the point of connection under the hood. Third, it's a fairly compact unit so the heater and evaporator cores are small and don't have a ton of capacity. Last, with everything under the dash, you lose a lot of the glove box and it's pretty tight under the dash.

The upside on the Vintage Air is the modern control and the room you gain under the hood.

Another option on the compressor would be a high mount Sanden or R4. We used an R4 on my brother's car. The R4 is much maligned but I think the secret is to not Rev it past 4k RPM when it is engaged. We have a window switch wired in on my brother's car thar cuts it out automatically above that RPM. I think it is seven or so years old and has around 6 or 7 thousand miles on it, so not a ton yet.

Anyway, some ideas to think about.
 
  • Like
Reactions: 2 users

smed7880

Greasemonkey
Jul 27, 2010
132
171
43
Thanks Texas82GP.

Saturday we plan to get the mounting system and tank in the Grand Am. Then Ill pull the nose off the GTO so i can get better mockup measurements. But first will put some 134a in its system so i can test it. With only 41800 miles that compressor should be good.

The gto alt placement looks really bad. The steering box and it arent going to be happy with each other. Hoping the blackheart mounting system saves me
 

Texas82GP

Just-a-worm
Apr 3, 2015
7,989
18,702
113
Spring, Texas
Thanks Texas82GP.

Saturday we plan to get the mounting system and tank in the Grand Am. Then Ill pull the nose off the GTO so i can get better mockup measurements. But first will put some 134a in its system so i can test it. With only 41800 miles that compressor should be good.

The gto alt placement looks really bad. The steering box and it arent going to be happy with each other. Hoping the blackheart mounting system saves me
Here to help. I know folks have made the F Body LS FEAD work and it's similar with the low mount alternator so see how it goes. My bet is the compressor is good. I just replaced the compressor on my brother's 02 Sierra but it is 20 years old, has 200k miles on it and had been low many times the last few years due to a recently identified leak I'm the condenser. The compressor on the LS2 is worth using if possible. Good luck with all of it. There is a wealth of knowledge here. We're here to help.
 
  • Like
Reactions: 1 user

smed7880

Greasemonkey
Jul 27, 2010
132
171
43
Welcome to the land of project creep.

Holley clamshells are installed. I had to drill out the frame for them. Started with elongation of the 4th mount hole on the top to slide the mounts back the 1/3d of and inch that these require. Then drilling the 2 lower holes. I made the two lower holes a bit bigger than needed so I have slop to adjust with once fitting the LS2 in place. I left the 2d hole on the top alone which will be the pivot point. 4 contact/bolt points should anchor them well once adjusted. A template would have been very helpful, but I made it work.

Discovered I needed the frame extension for the holley crossmember. Ordered 12647HKR for $71. Wont be here for 10ish days.

Somewhere in there I lost track of the transmission code from the GTO. It's an M32 with is a 4l65 not a 4l80. Thankfully I did order the right transmission mount extension for the crossmember in the beginning.

Pulled the old gas tank.

Project just changed. Now doing a garage based no lift frame off resto. The left rear rail is soft from rust. Cant leave it that way. Project creep... Ordering parts from a catalog is great, except you see what is out there and want it... Since the body will be off for the replacement of the left rear rail i'll add strength the frame via boxing, added crossbars, and added gussets.

Im now talking to Sherry about notching the rear for wider tires. She doesnt even want 15's even after I showed her the 15" Rally IIs....she wants to stick with her 14" Rally IIs. So the notching may not happen, but I would like the opportunity to run wider rubber in the future.

After all the welding POR 15.

The body itself is pretty clean except for the drivers door area body mount. It is heavily scaled. I havent done the screwdriver test looking for soft spots yet. Ill need to once the frame is off.

What was going to be a 'simple' LS swap has just turned into much more. This Grand Am like my Torino is a family long term ownership car. It will be just as right when Im done.

Screenshot_20230709-154833_Gallery.jpg
 
Last edited:
  • Like
Reactions: 3 users

565bbchevy

Geezer
Aug 8, 2011
9,619
12,711
113
Michigan
Project just changed. Now doing a garage based no lift frame off resto. The left rear rail is soft from rust. Cant leave it that way. Project creep...
If you are going to be doing body mounts I feel you could do a rear frame rail at that time without actually pulling the body off the frame, I also did my frame notch with the body attached a few years after doing my body mounts.
 
  • Agree
Reactions: 1 user

CopperNick

Comic Book Super Hero
Supporting Member
Feb 20, 2018
3,387
3,047
113
Canada
And after the POR15, you will need to apply a top or cover coat over it because, while POR15 works on the rust, it is susceptible to UV damage and, even when cured, it can still be abraided by contact with road debris or sand/grave. If you plan to shoot the whole frame, then epoxy primer over the POR and on top of that, your choice of finish color.

Just finished some update work on the inner rocker panel that i had made for my Monte and stored away some 15+ years ago and at the time it got a coat of POR15 gloss, not what it ought to have been given but what I had at the time. I can honestly say that 15 year old POE15 is about as hard to color sand as the instructions say it will be. Even with 220 W/D and DA discs, what it does is clog the paper. The sand down did expose the bumps and lumps that I knew I'd find and allowed me to dolly them down. giving me a better piece to recoat.


Nick
 
  • Like
Reactions: 1 user

smed7880

Greasemonkey
Jul 27, 2010
132
171
43
Appreciate the input guys. A bunch.
 
  • Like
Reactions: 1 user

Happy camper

Master Mechanic
Nov 21, 2016
264
380
63
San Dimas Ca.
It sounds like we are doing the same thing, just different cars different motors. I was just going to swap the motor, and now my frame is in the driveway getting boxed, and the body is sitting in the garage next to the engine. Good luck .
 

smed7880

Greasemonkey
Jul 27, 2010
132
171
43
Yep. Sounds the same Happy Camper.

I havent taken the body off yet. Heat and work have been in the way so not much progress. But I have been able to noodle this body off project and that has been time well spent.

Im going to build front and rear gantrys out of 4x4 posts that are 2 feet wider than the body and put them on casters. Then use 2x6s at the bottom and top of the gantrys to frame the front and rear together. All attachments will have lags and hangers. Ill use 2x4s as 45s at all joints. Across the top Ill run a 4x6 lagged and hangered to the top of each gantry, then attach 2 HF comealong hoists front and rear so I can lift the body with plenty of clearance using chains and straps. Ill over-engineer the hell out of it but if there was ever a good place to over-engineer, it is a body lift with a complete interior. Ive watched youtube vids where guys have used all sorts of hoists and jacks...but the thing I havent seen is reattaching the frame and body. Lining all that up with the LS2 in the frame....I want adjustability, hence the casters...ill use skates for the frame with tires but would rather have the fine adjustability in the gantry system if needed to avoid wrecking something. Ill build a body cart from the extra pieces of wood with another set of casters and more 2x6s. I dont have much to do on the underside of the body itself but while its all apart I will POR 15 it and the frame once welding is done, then epoxy/paint as suggested. The body cart will help with that, plus it may be on the cart for many months, I dont want it just hanging. All in about $400 in lumber and another $200 in hoist/chain/casters/hangers. Even if it's more $ im ok with that.

The underbody will be painted matte black. The frame will be silver. All bolt ons will be red or gloss black...not sure yet.

Eliminated the weld in Trick Chassis inner bracing kit...cant use the Holley Crossmember and too much ex sys headache. For 425ish HP...eliminated.

Boxing the frame will happen via 11104 Hellwig frame box kit. Ill incorporate some sort of reinforcement around the holley crossmember attachment points from flat steel if i have to. I like some of the reinforcements Ive seen at the rear over axle area and at the suspension mount points. Since the over the rear wheel frame section is so thin I will add round steel being careful to not interfere with gas tank fit etc. I was going to notch it at the rear tires but after looking at that frame Im going to leave it alone...it is already pretty thin in that area. Ill also join the front/rear frame ends. For the 425ish HP that should be way over engineered, but while the body is off this work is mandatory.

Sherry wants the SS trim ring and Rally IIs like her first and she does not want a 17" inch rim. I convinced her to go 15s at least to allow for rear disc brakes. I found a used set of HW 15x7s that are complete with caps and good SS rings. Ordered. She is happy with them.

I keep telling her im the ideas/muscle, shes the brains/project approval. She gets full veto power on anything not related to safety. Disc brakes are a safety thing in my mind. That LS is x3 what the 301 was...it needs better braking and tire contact patch.

A Trick Chassis G Body 9 inch housing and axle unit is on the list. That is going to have to wait on $s though....all in about $2700 after buying the adjustable U/L control arms axles gear and shipping. I have several 9" rear gears from my Torino(s) laying around....2.73, 3.00, and 3.25 but all of them are 28 spline pigs and small bearing axles due to the 72 being an odd year for 9 inch rears in a Torino. To save $ I guess Ill have to settle on 28 spline and use the TrakLocks i have. Plus I really want to drive it with different gears to feel out the car. The GTO has a 3.46 ratio but it is heavier than her Grand Am by 1100 pounds before the swap/adding metal/9inch. Im targeting the 3.00 range knowing the 15s will get blown off at the line and mpg is important. Im guessing the LS2/4l60/9inch will add about 500. Net puts her Grand Am around 3850ish which is about 500 lbs lighter than the GTO. Im not sure on rpms with the OD transmission, 3.00 may be too low of rpm at cruising speed. My Torino weight is about 4500 +/- 200 ish and with the torque of the 460 im launching pretty hard with 3.00s on a decent hook...the 28s are working so I hope they work in the Grand Am. Plus I save the cost of the gear while experimenting.
 
Last edited:

GBodyForum is a participant in the Amazon Services LLC Associates Program, an affiliate advertising program designed to provide a means for sites to earn advertising fees by advertising and linking to amazon.com. Amazon, the Amazon logo, AmazonSupply, and the AmazonSupply logo are trademarks of Amazon.com, Inc. or its affiliates.

Please support GBodyForum Sponsors

Classic Truck Consoles Dixie Restoration Depot UMI Performance

Contact [email protected] for info on becoming a sponsor