BUILD THREAD Sweet Johnny & Gina: A Love "Two Large" To Fail

And is it true that the Astro roof drain hoses terminate inside the quarter?

Can confirm, this is indeed the case. The thinking at the time was that the water would simply drain out the drain holes in the bottom of the quarter, not realizing how easily and quickly they would get clogged. Or maybe they did, as there are several mentions about maintaining and keeping these drain holes clean and clear of dirt and debris throughout the life of the vehicle in the FSM. And not just on AstroRoof optioned vehicles either, but ALL G bodies.

Still, not The General’s wisest decision.
 
  • Like
Reactions: Sweet_Johnny
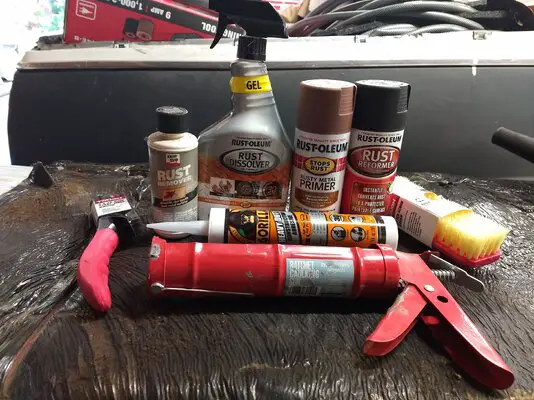
Probably going to add a few things to this group but it's what's available ATM.

IMG_20241015_173609735.jpg
 
  • Like
Reactions: doood
I believe it's about time for another update considering I've managed to accomplish a thing or two since last we spoke. Some of it has been posted to "What Did You Do" so it might be a quick read for you.

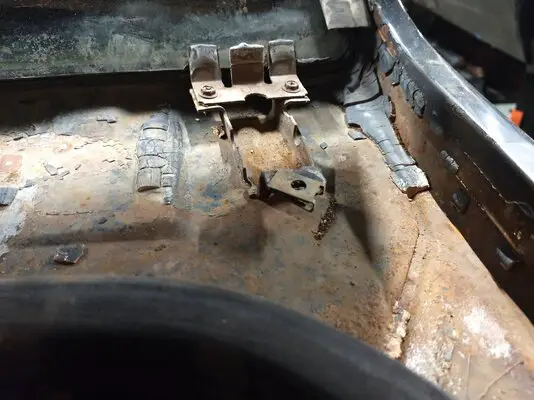
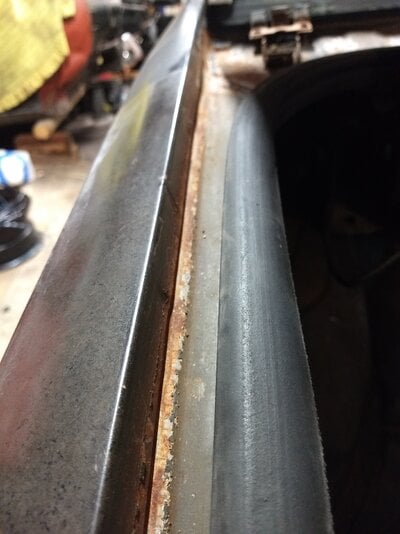
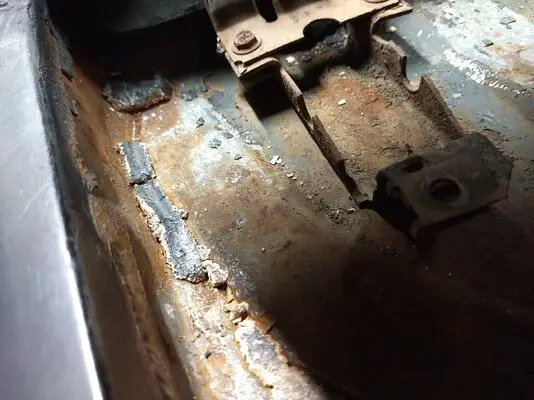
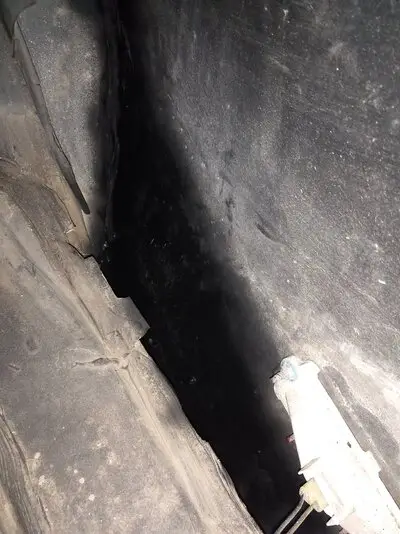
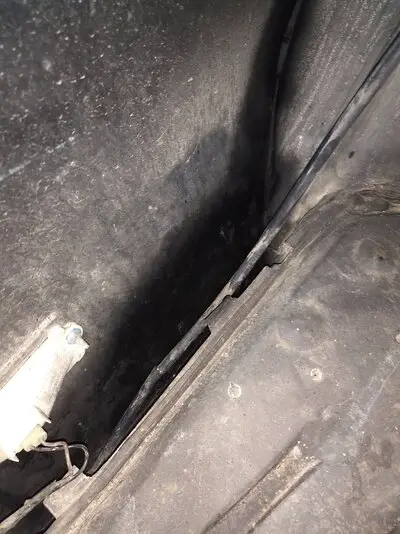
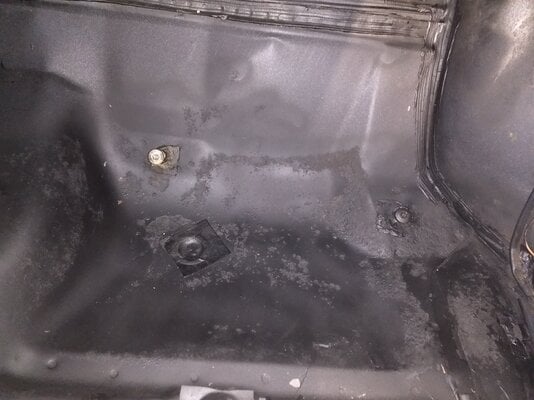
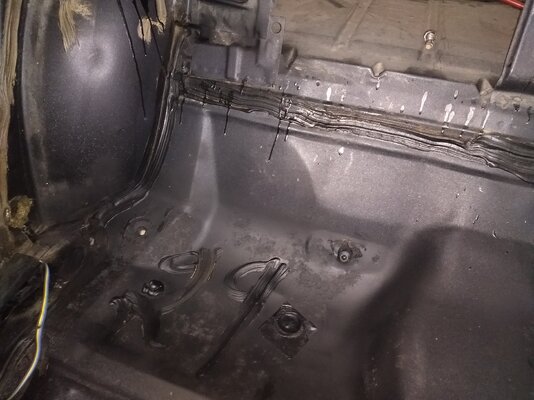
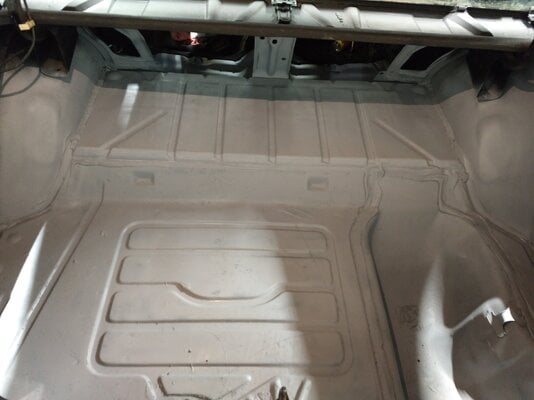
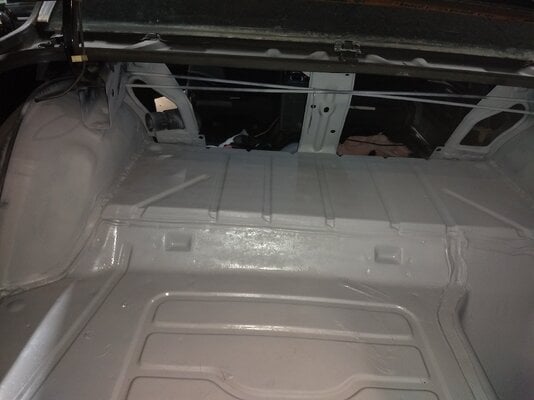
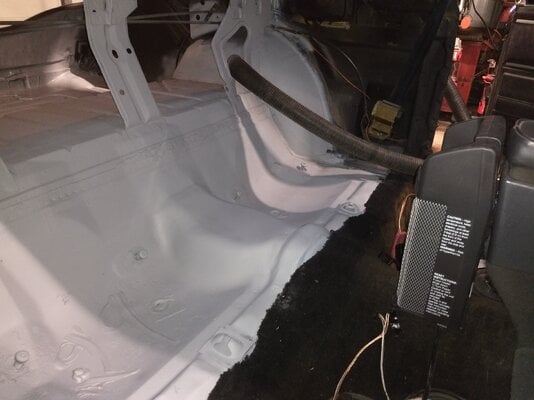
Right off the bat I'll say that I haven't finished painting the interior trim- I haven't touched it. I don't need trim until it has a home... What I have done is a bit of work removing factory seam sealer and possibly a bit of Bondo from the trunk and rear cabin area. Some areas were so thick that I assumed it was all Bondo considering how much is on the roof and passenger rear quarter, and the underside of the trunk lid had fingerprints where someone had pressed "whatever" into the little holes at the rear seams. I was informed by Big D (Rktpwrd) that the factory used copious amounts of seam sealer, and he's not wrong! I'm sure more was added when the last person was in the neighborhood, and Gina had yellow and cream (creme?) sealer in the trunk area and by the wheel tubs. Pink sealer was used around the trunk lid, quarter tops, and in the rear window filler area. Brown goo and black butyl rubber was all over the rear seating area, and yellow sealer patches were placed over the floor drains. I went about removing much of that with a putty knife, drywall multi tool, and a pneumatic needle scaler from Harbor Freight. Rust was attacked with the the bottle of Rust-Oleum Rust Dissolver seen above.

IMG_20241113_214919171.jpgIMG_20241113_214901192.jpgIMG_20241113_214843526.jpg

Of course, those pics were taken during the process and all of the sealer seen was completely removed. The driver's side was exceptionally thick and required picks to wiggle it from between the panels. Rust-Oleum Rust Converter was utilized on the inside of the rear quarter panels as a slight Band-aid for the rust that will need to be removed at a later date. Someone has also riveted a piece of sheet metal in and covered it with mud, though it's unseen in the picture. 😤

IMG_20241113_214501122.jpgIMG_20241113_214417057.jpg

The pans under the rear seat received the same treatment after seeing the Rust Dissolver and a steel wire brush.

IMG_20241113_214559714.jpgIMG_20241113_214608756.jpg

Following that, the trunk was cleaned and received its first coat of Rust-Oleum Sealer Primer, and it'll get another when the weather warms up. It's not ideal but I can't go without more and the weather says "Not now".

Screenshot_20241125-220349~3.png

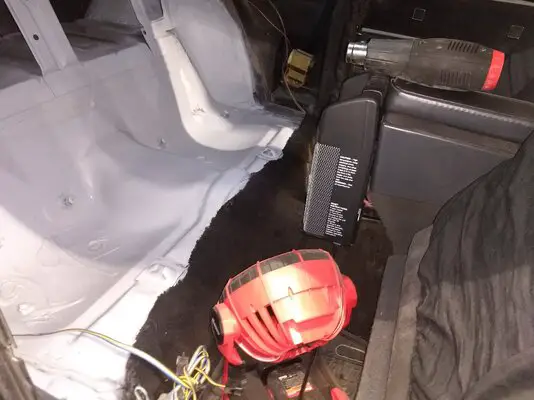
So to get the paint to dry I bought a $40 1500 watt space heater from Wal Mart and combined it with a Drill Master 1500 watt heat gun and a Bauer fan from Harbor Freight to circulate the air. Fun fact: this heat gun was used as a shop space heater for 12 hours straight yesterday. I just chucked in a vice and continuously checked the body, cord, and receptacle for heat. None of that ever got warm to the touch at all, but my space heater lowers its output after a while as a safety precaution. If the damn heater would just stay on High I wouldn't have needed the heat gun for this.

IMG_20241121_172149831.jpgIMG_20241121_013647529.jpg

The interior is still pretty much how you see it with one exception. What appears to be a fat rectangular strip of sealer/butyl in the photo above is actually just its ghost. I removed the stuff extremely easily before scraping out the seams at the tubs and it has all been replaced with Dynatron seam sealer from Auto Zone. It took a whole tube and I needed even more so my rewards points paid for another. Converter was used on any remaining rust (and only there) before I again used Rust-Oleum Sealer Primer and laid on their Flat Black Primer around the trunk and rear window filler. I'd much prefer to get seam sealer on directly after the sealer primer, but this way the sealer primer is covered and I can sand away the black after washing if necessary. There's no bare metal, and that's what counts.

IMG_20241121_013547040.jpgIMG_20241121_172352933.jpg

See that HUGE gap up there? I still need to seal all of the seams in this entire area but see no feasible way in a breezy uninsulated shed, even if I used the kerosene jet heater which is currently empty. It's just not going to cure when the nights are in the 20s. BTW, the Gorilla HD Adhesive was being considered for the rear seat brace I'm making. It was NEVER intended to be used as seam sealer, and if you had assumed otherwise, well, that's on you. I haven't chosen a winner between the Dynatron and JB Weld Seam Weld. I'm open to input or suggestions from anyone reading.

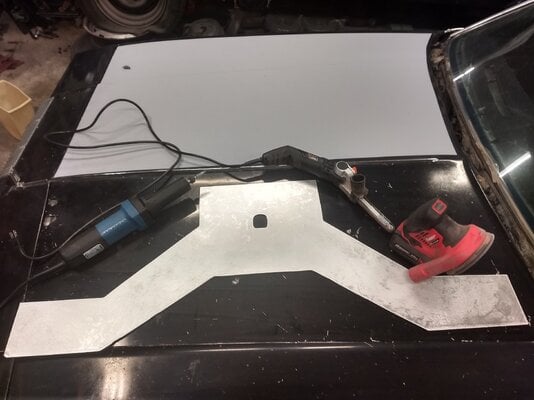
The brace still needs a bend at the top and I'll provide measurements and such when I can install the finished product.

IMG_20241202_210355117_HDR.jpg
 
Keep reading, that's not the only stuff I got done.

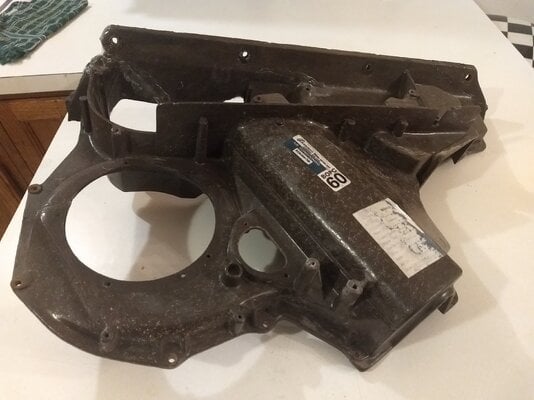
Tired of freezing my chestnuts off I decided it was time to tackle the heater core replacement. I knew this would suck because I could see numerous cracks on the heater box top, and some no doubt came me leaning on it in the last year. However, it's painfully clear that the last "mechanic" absolutely butchered this thing- it was cracked everywhere and missing pieces when it was reinstalled. These two things combined for a tricky removal that actually resulted in moderate success: I added one small crack, broke off a 1" X 1" piece that nobody will miss, and got it into the house for cleaning after about an hour. I didn't miss any screws but prying this away from the firewall without making things worse was difficult thanks to the old butyl rubber rope caulk and some kind of sealer that has dried to be rock hard. I used Murphy's wood soap and Dawn dish soap to get things sparkling clean, and when the time came to hang it up to dry Mr. Butterfingers here dropped it. With catlike reflexes I lowered my shoulders and clamped my hands together, saving the box top from hitting the floor. And succeeded in smashing it into the freakin tub... I broke off a substantial portion of the top right corner, including a mounting bolt hole. Ugh. Super Glue!!!

Many of the screw holes were also stripped out, and those as well as all visible cracks were repaired with Super Glue 5 minute epoxy until I ran out. It dries nice and hard and is exceptionally clear considering what it is. To knock the shine off I sprinkled a bit of baking soda on top before it fully cured, and this avoids having eye catching glossy spots that would need sanded or painted to match. It ain't gonna match. Adding the soda too soon results in an ugly, goopy mess that takes forever to dry and is weaker. It only takes a little, and I added it after the glue was half set up with darn good results. On the inside I added a layer of Super Glue Fix All for reinforcement, and this was also used for some cracks although they didn't turn out as good. The case below was completely split open from the blower motor hole to the outside perimeter, can you find the seam? That was epoxy and soda. The ones that get covered by the the cowl screen are the cracks with only Fix All.
IMG_20241203_000246985.jpg

The lower half needed a bit of glue too so I returned to the store for more 5 min epoxy. I then strung duct tape around my air cleaner to hold things in place.
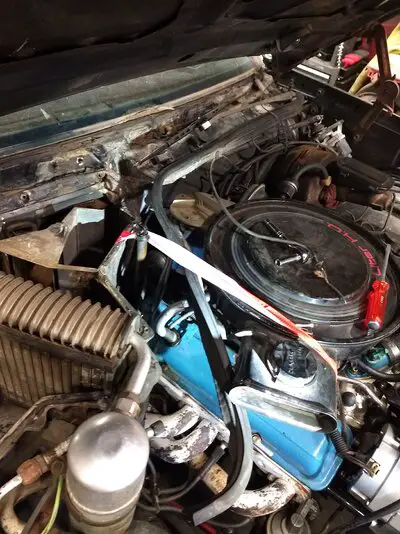
IMG_20241203_194807337.jpg

Behind the rubber firewall gasket was a ton of loose rust and debris.
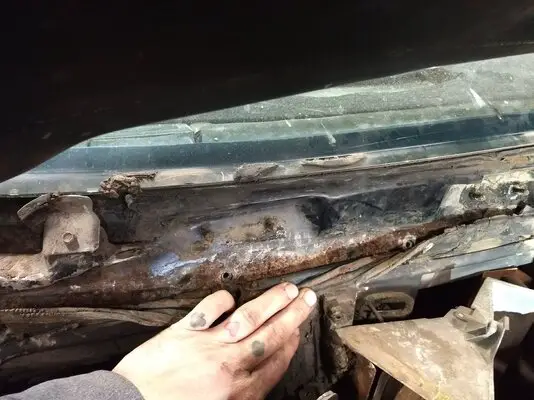
IMG_20241203_194823569.jpg

So it was dealt with and covered with Rust-Oleum Rusty Metal Primer and Flat Black Primer just so everything was black. I was out of black rust converter as well as sealer primer so I used what I had. The car was on stands now and I couldn't leave.
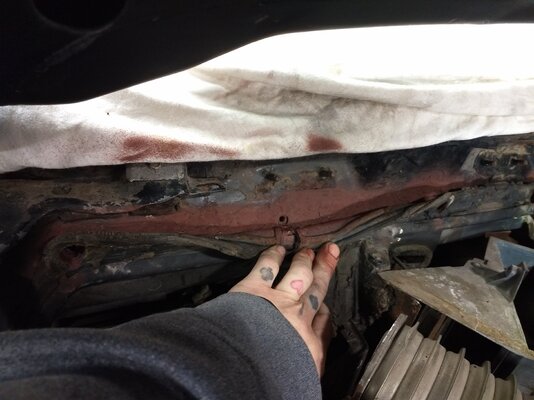
IMG_20241203_200204125.jpg

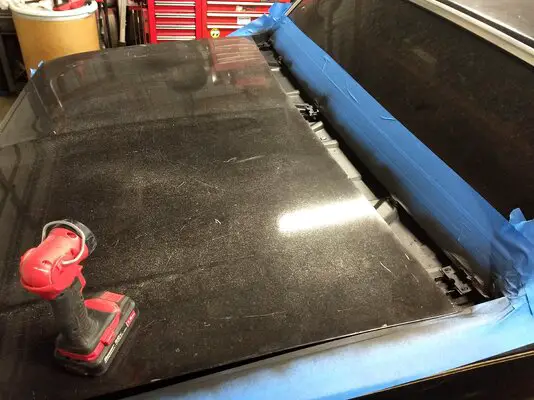
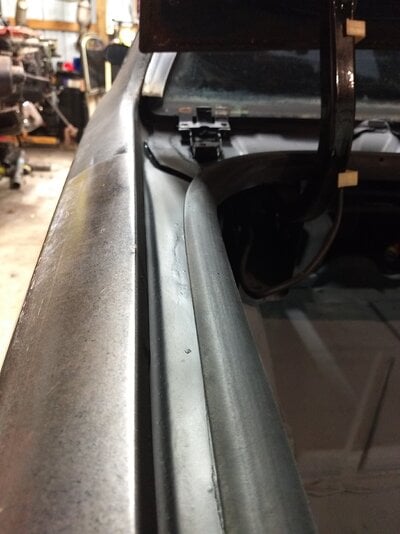
While that dried I took to removing and replacing some seam sealer near the radio antenna and both ends of the windshield channel. The windshield will be replaced at some point and the sealer directly below the antenna was solid so it stayed in place. No masking was performed but an old t-shirt was slung onto and inched along the windshield for protection.
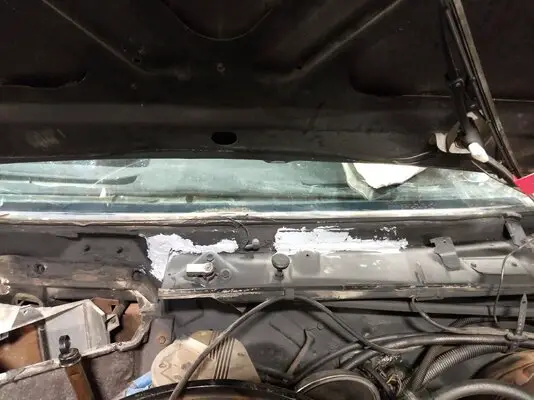
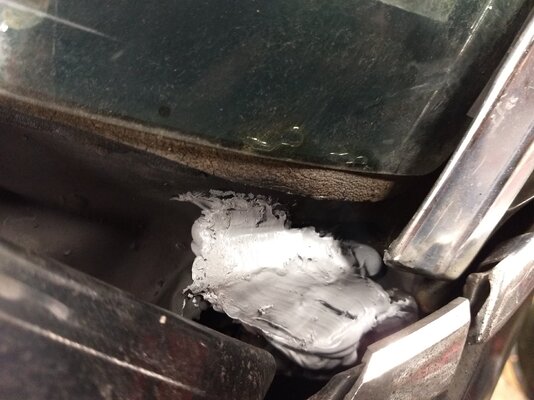
IMG_20241203_212549284.jpgIMG_20241203_212529573.jpg

The same sealer was squeezed into the depths of the heater box to form a dam that prevents future toe-wetting.
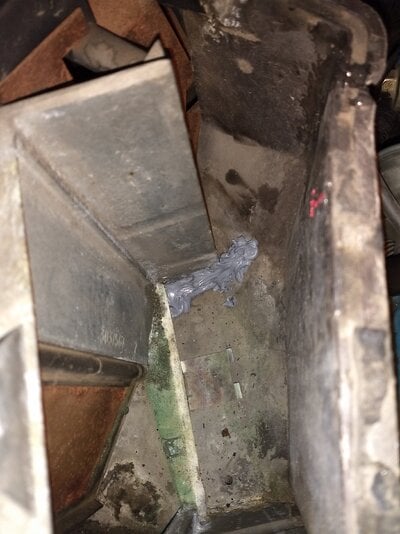
IMG_20241203_212415889.jpg

After a short time the grey sealer formed a skin and started to dry, at which point it was covered with black primer.
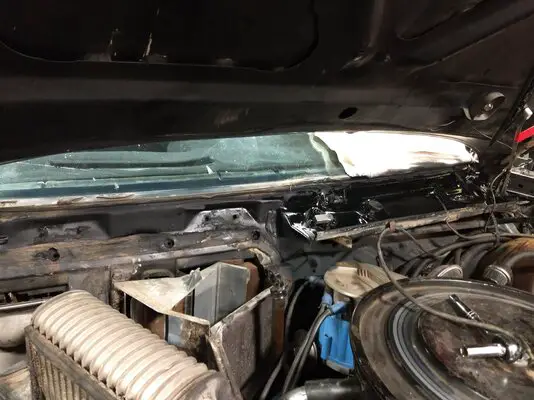
IMG_20241203_202732282.jpg

The Spectra heater core arrived with bits of foam on the sides, but it was far from enough to seal things properly. I procured some single sided foam insulation tape and added a couple strips that covered the sides and bottom, with the 2nd piece being longer to trap the first. It required 2 layers to achieve a very solid fit that wouldn't leak all the airflow.
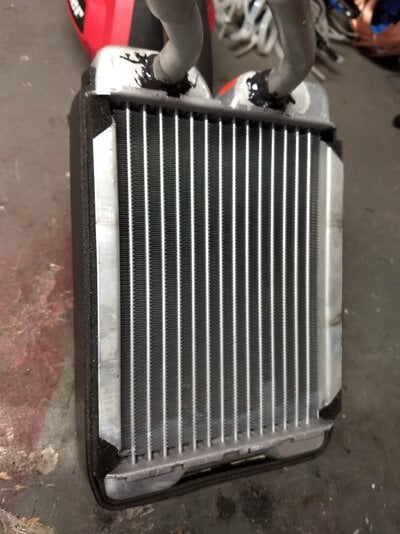
IMG_20241204_005556932.jpg

You may notice what appears to be JB Weld where the inlet/outlet attach to the tank, and that's exactly what it is. I saw no visible damage or pinholes but figured a little schmear couldn't hurt but could potentially help. It's a bit messy due to the Kwik Weld setting up as I used a toothpick to spread things around. You don't see it when things are put together.

I had a helluva time tracking down rope caulk locally. Living outside of town is cool but local to me is often still within 30 minutes of nowhere. Wal Mart doesn't carry it and whoever runs the Lowe's near me needs fired, but I found it at Ace Hardware: 90 feet of 1/8" cords for under $10. The box said "Grey" but I'm seeing "White"... You? I also added more foam tape to the top of the heater core and installed a new, larger ground strap. I still need to replace the other ground strap on the AC lines.
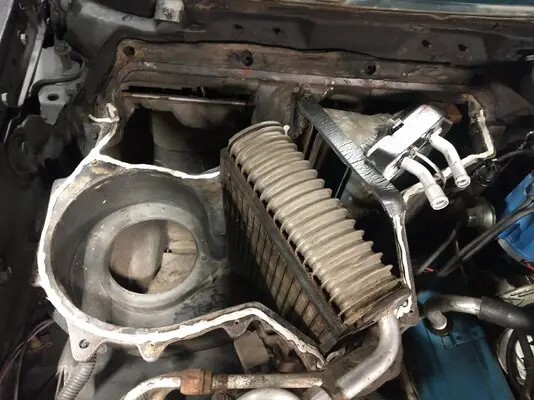
IMG_20241204_185216485.jpg

I said that JB Weld wouldn't show and I meant it. I snagged some foam from the trash can, glued it together, and drove a piece of 3/4" pipe through it after tracing the square shape I needed.
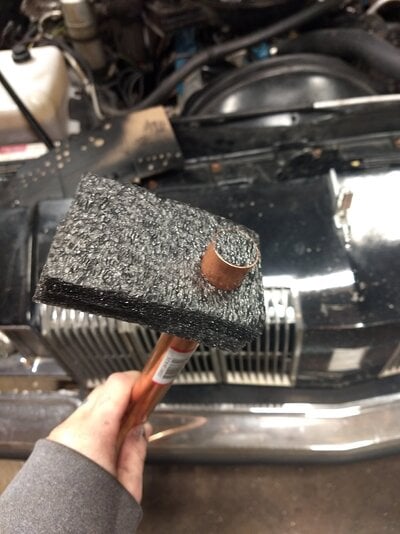
IMG_20241204_200318939.jpg

Fits good and tight. Snug as a rug full of smuggled drugs.
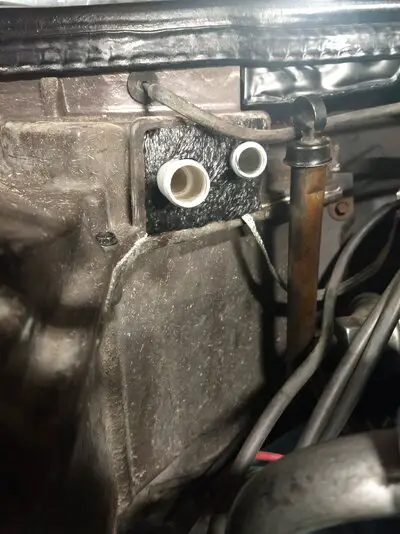
IMG_20241204_211101343.jpg

But this shot shows that the 3/4" heater line goes through that area at an angle. Thankfully the interior piece seems to be blocking what the outer would release. Go ahead, zoom in and check out my hole.
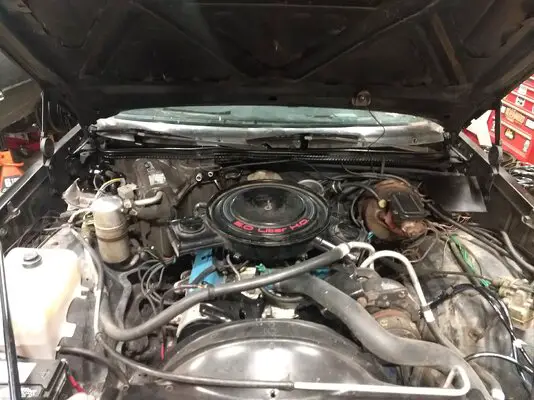
IMG_20241204_211039731.jpg

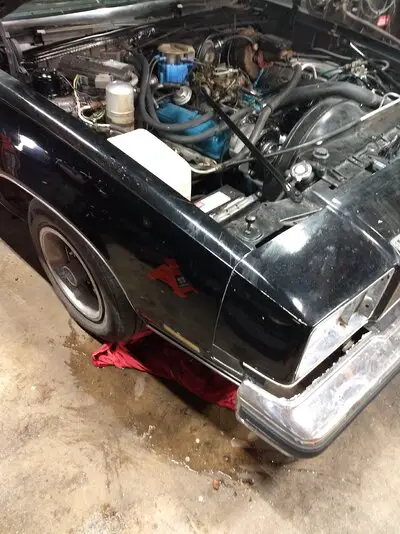
Not wanting to plug up a new heater core, I drained the coolant and cleaned my overflow tank. I didn't do a flush although it's recommended. I can never drain a radiator or engine without spilling at least some of it, and a big cup of fresh water poured all over helped to clean up.
IMG_20241205_155031812.jpg

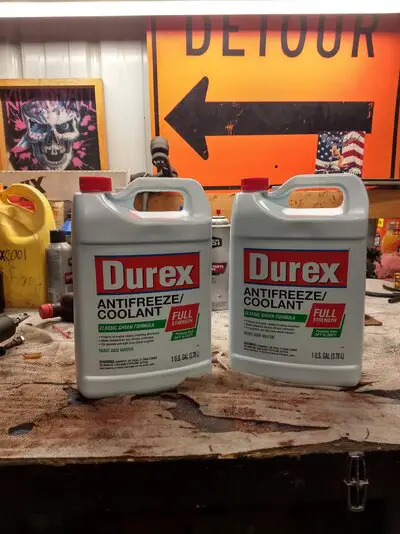
I normally reach for Prestone or Peak coolant but couldn't find the green concentrate ANYWHERE for over a month. A month. I'm not buying 50/50, that's for suckers, and that other coolant has no place in my old engines regardless of how compatible it claims to be. I don't care. I eventually located the pure, unadulterated juice I craved at Atwoods (farm/ implement store). I've never used this coolant before but their condoms are top notch.
IMG_20241205_155248854_HDR.jpg

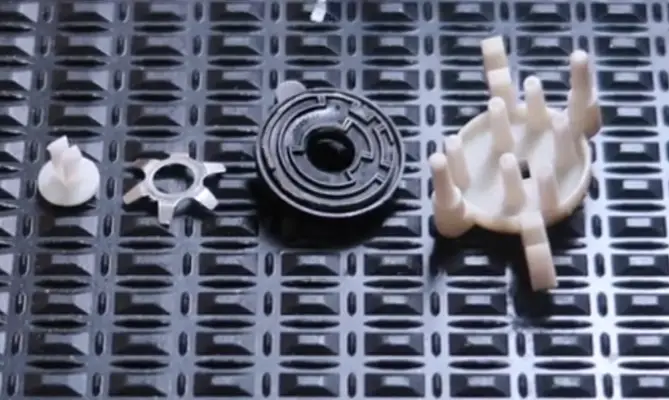
All systems are fully functional with no new leaks that I can find, but I do have an issue that I could use some help with. I've got the default setting of air only coming from the defrost and floor vents, surely caused by a vacuum leak at the selector behind the climate controls- it gets worse if I pinch or move the main piece. I seem to recall there being a disc or something in there that can dry out and leak- am I imagining things?

Edit: It's going to be this lil guy, isn't it?
Screenshot_20241206-021834~2.png
 
Last edited:
I forgot to add that I employed 3M Weatherstrip Adhesive behind the firewall rubber at the heater box. Also, the plastic heater cowl screen, rubber hood seal, and all fasteners were painted with Rust-Oleum Trim and Bumper Black. By the brake booster you may (or may not) see a windshield wiper motor cover that received the same color, and the blower motor received Rust-Oleum Semi Gloss Black. The rubber turned out a bit shinier than I like but it still looks better than before, and a new one will be purchased in the very distant future. I replaced the windshield trim with a spare unit without dents but both are missing the backing. It's been so long since I've seen one that I forgot what they look like aside from being black.
 
Last edited:
I was going to suggest a product called Q-bond from www,qbond.net for the repairs to the top cover for your HVAC unit but the J-B Weld is right up there as well. The main difference is that the Q product uses a powdered filler base that works with an activator to set almost immediately. With the filler you can build layer by layer to reconstruct areas where there are holes and you don't have the missing material to work with. You can even use the activator by itself on place where you have both of the parts to work with. The activator is some kind of cyano-acrylic product similar to crazy glue but way faster.

As for your issues with your heaters, be charitable to them. They are only looking out for your safety. Before I managed to save up enough to have the Ceiling mount gas furnace put in, I used the small box heaters that were described as being able to heat over a 1000 sq ft of floor space. Yeah, they did, up to the point where the fan motor bearings either blew up or seized up or the heater element melted down. The built in thermostat is there to protect them from committing suicide and taking your shop or garage with them. Right now I have an air circulation pump that came out of the old furnace from my house; think squirrel cage driven by a motor. It will only run at full boogie for about 5 minutes before the t-stat built into the motor shuts it down as a safety precaution against overheating. I need to find a different motor for it to circumvent that problem as, when running, it can really move air which makes it desirable for times in the paint booth. A guy I knew that ran a private paint shop used one with a water trap to catch the air born particulates when he was shooting and the trap looked like a multi-colored beach from all the materials that sank to the bottom.

Anyway, it looks like you are finally having fun? so best of luck to you and please do wear a respirator or high duty dust mask. Most of the dust from the crap you are removing is toxic to one degree or another and at some point your lungs will stage a protest strike if you don't.

CopperNick
Thank you sir, I'll definitely look into that Q Bond product as it sounds quite interesting and useful. The heater thing is just a pet peeve of mine- companies making changes or limits because the general population lacks sense always impacts backyard guys in a negative way it seems. I'm a huge proponent of Natural Selection but your point stands: this heater is far less of a danger to the shed and what's in it, and that's always a positive. I had a metal version of the same type of heater and you could cook on that thing! Sure, it had no ground prong, rattled when shook, and smelled funny but it got orange and stayed that way. I have a full blown respirator but I'll admit to not taking the proper safety precautions often enough and finding a way to rationalize it. Thanks again for the tips.
 
Last edited:
Interior metal looks good. That Q bond is cool stuff. The glue/liquid activator seems to run out before the powder does, but you can use dollar store super glue and it seems to do the same
 
  • Like
Reactions: Sweet_Johnny
Interior metal looks good. That Q bond is cool stuff. The glue/liquid activator seems to run out before the powder does, but you can use dollar store super glue and it seems to do the same
Hell yeah, thanks man!
 
Since the weather warmed a bit I grabbed some more Rust-Oleum Sealer Primer and dispersed two cans amongst the trunk and rear seating area. Once again I used a space heater and Shop-Vac to encourage drying and contain the overspray.

IMG_20241211_170737775.jpgIMG_20241211_170825737.jpg

I also got around to swapping my old weeping cork transmission pan gasket for a Moroso reusable silicone version, though I didn't snap a picture. I had to address this immediately due to an issue that cropped up- I went to leave work after warming the car for about 7 minutes one night and had no 2nd gear so I quickly pulled over and checked the dipstick. It said I should've been good but I added a pint and that solved the problem. At this point I thought perhaps I'd accidentally put the wrong stick back in, and since I have a 2 qt extra capacity I dumped in the rest of the quart and drove home with no issues. Once there I verified that I had the right dipstick which immediately set off alarms in my head- it HAD to be sucking air even though the fluid wasn't foamy at all. Sure enough, the bolts had backed off about a half of a turn so the filter was replaced with one from Raybestos and everything was buttoned up and filled with fresh Valvoline Dex/Merc. The transmission now works just as it should and the fluid level is correct.
 
Last edited:

GBodyForum is a participant in the Amazon Services LLC Associates Program, an affiliate advertising program designed to provide a means for sites to earn advertising fees by advertising and linking to amazon.com. Amazon, the Amazon logo, AmazonSupply, and the AmazonSupply logo are trademarks of Amazon.com, Inc. or its affiliates.

Please support GBodyForum Sponsors

Classic Truck Consoles Dixie Restoration Depot UMI Performance

Contact [email protected] for info on becoming a sponsor