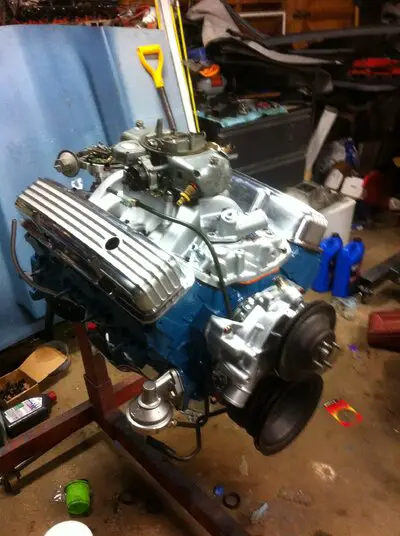
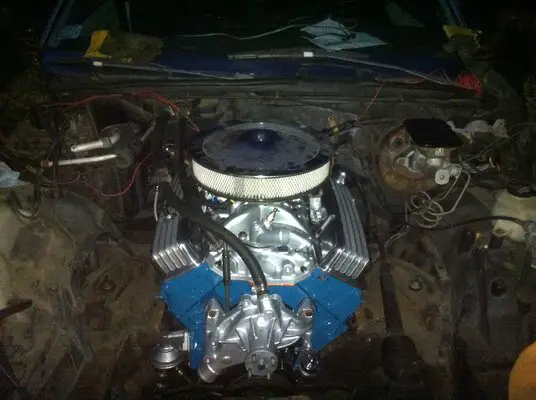
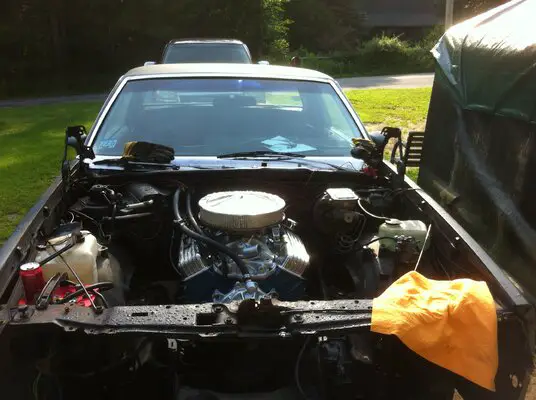
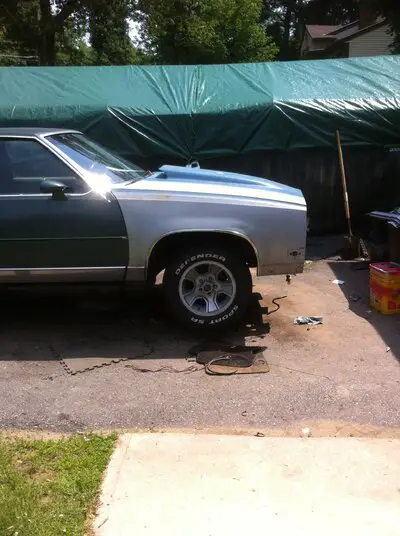
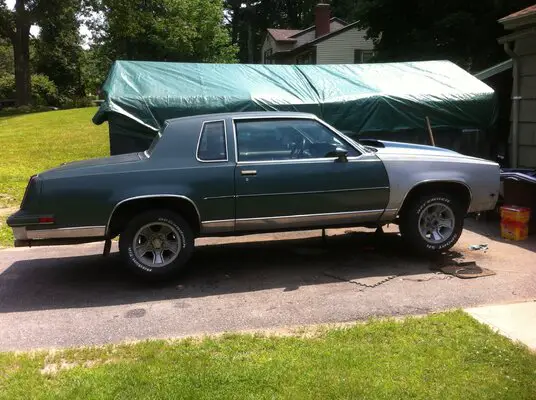
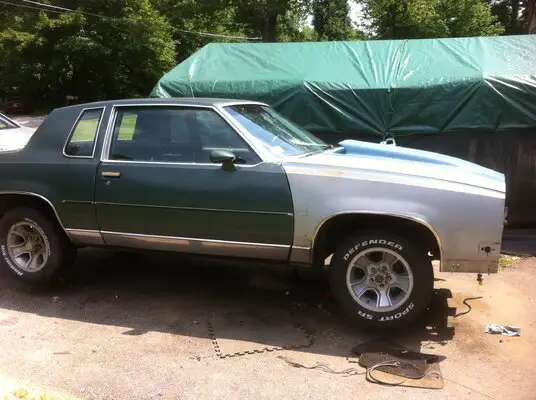
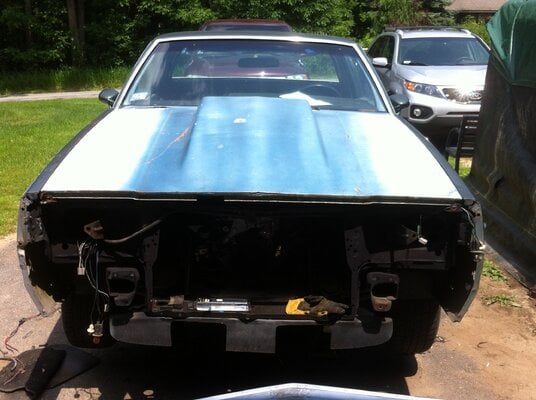
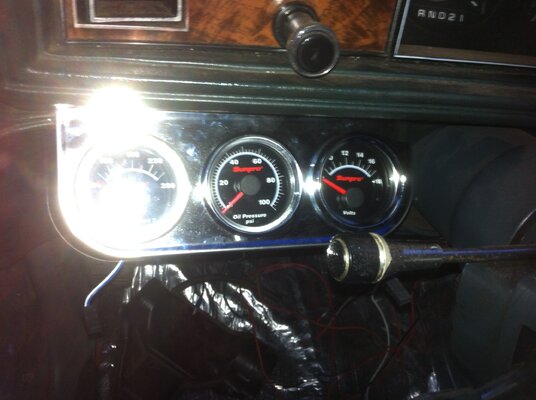
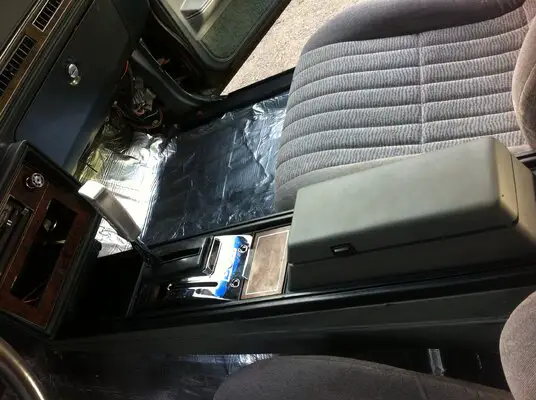
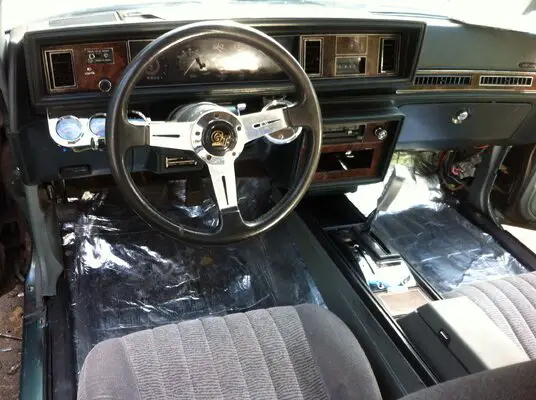
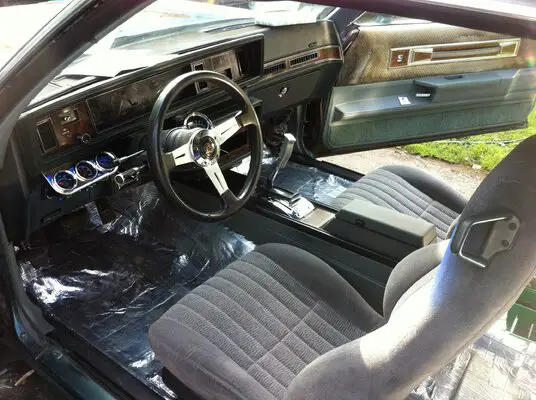
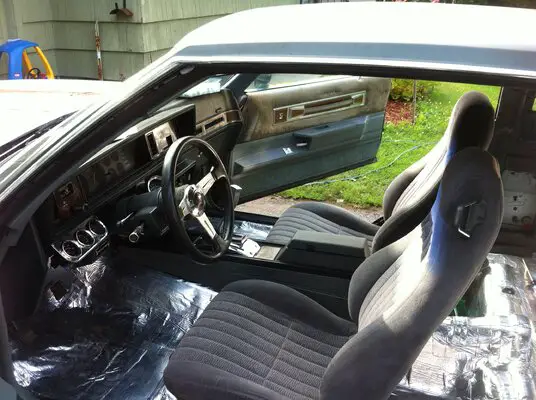
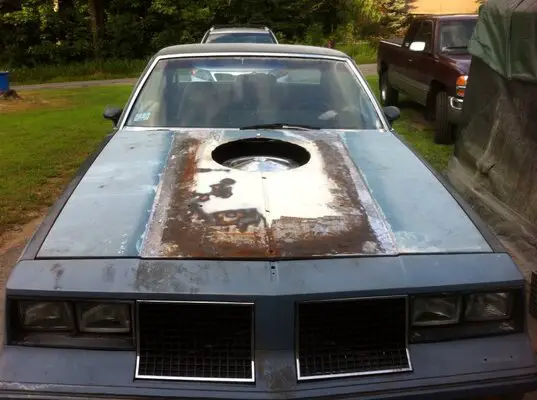
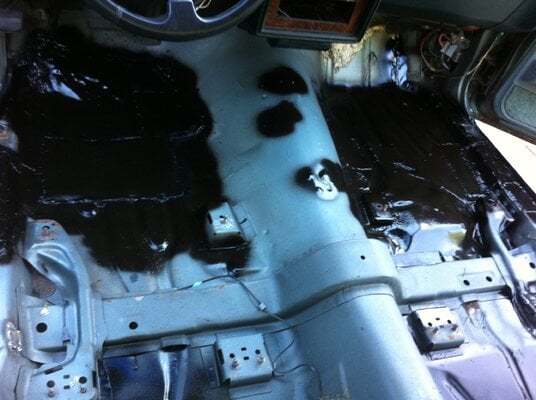
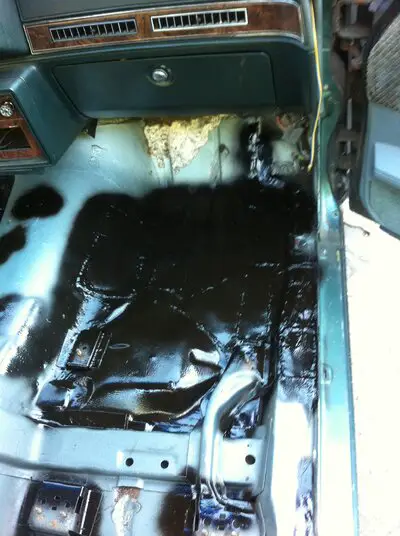
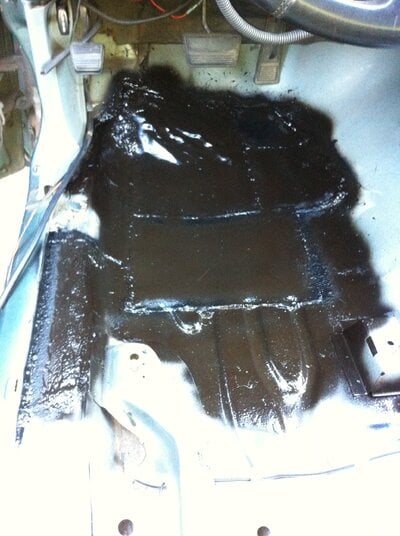
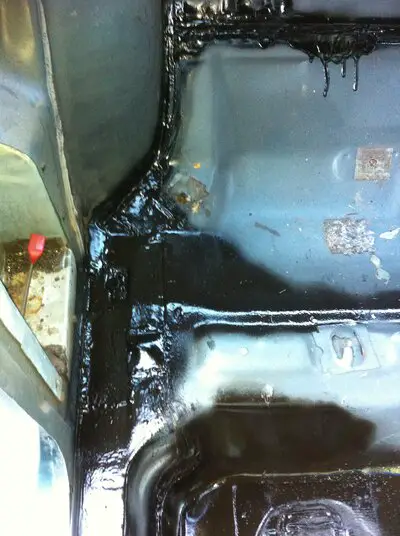
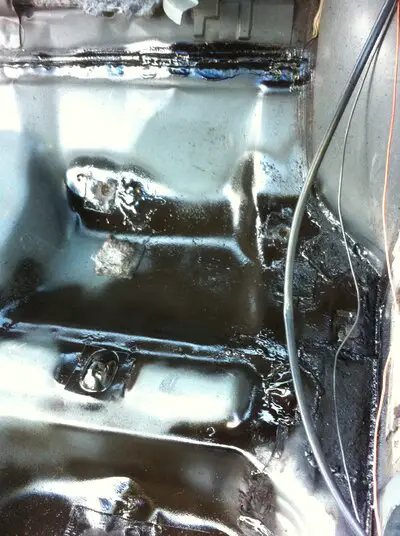
Well, I got the floors done! They aren't very pretty, but they are hole free now! I sprayed all the seams with that 'as seen on tv' leak sealer stuff, then dumped a whole qt of gray rustoleum on the drivers side floor alone after that stuff dried. I gotta paint the passengers side floor too, but I may be able to get the motor and trans back in this weekend!! I also got a center console (actually 3 center consoles in various conditions) , new front 'hi lift' springs, NOS headlight bezels (one ebay), and some crappy sunpro gauges in trade for some old rusty heads, a tailgate, valve covers, and an oil pan I was going to throw out- guy wanted to make lawn furniture out of a Small block chevy he had lying around.
1981 Oldsmobile Cutlass Brougham- my thread
- Thread starter GT_80
- Start date
You are using an out of date browser. It may not display this or other websites correctly.
You should upgrade or use an alternative browser.
You should upgrade or use an alternative browser.
- Status
- Not open for further replies.
I got a lot of work done in the last week. I got my "Dime-O-Mat" in- Its basically like .035 thick with aluminum on both sides of the asphalt deadener. It was cheap, and its very clean to install, easy to mold to the floor, and will work fine for my purposes. Looks pretty good too- I think I paid about $55 for 50sq ft off ebay.
Here is the drivers side done-
I got the motor and trans installed this saturday, most of the connections are done, few minor wiring things to finish, need to finish the vacuum lines, coolant lines, and exhaust. The headers I bought both hit the frame a little, so I am hoping they will 'self clearance' otherwise I will need to clearance them while they are installed. I don't want take them back out! I think they were made for cars with a "Y" pipe as well- the driver side goes straight down, and I had to make a 90 degree elbow by cutting a 30 degree miter, flipping it and welding it, then cutting a 15 degree miter flipping and welding it to get about a 4" radius 90 degree elbow. Its not terrific, but its still better than having exhaust manifolds.
Attachments
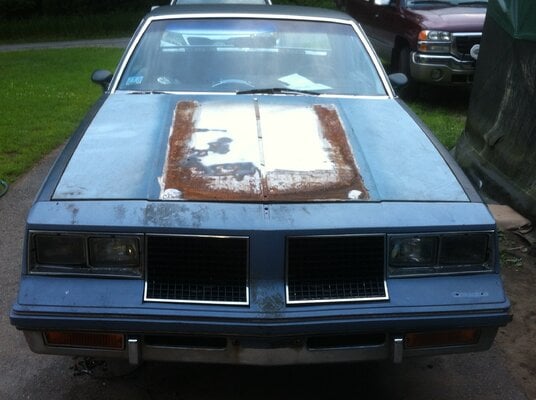
I got the hood test fit too- If you notice the guy that put the scoop on mounted about 4" forward on the hood so it mates with the front of the hood- I am not sure if I will leave it, or move it to the rear of the hood where it should be. I want to open the hood up so it will function and it needs body work on the scoop anyway, I figure it won't be too much work to fix it right...
it's coming along... just very slowly. I haven't had much help from anyone, so trying to get things done in 2 hour increments is tough.
it's coming along... just very slowly. I haven't had much help from anyone, so trying to get things done in 2 hour increments is tough.
Attachments
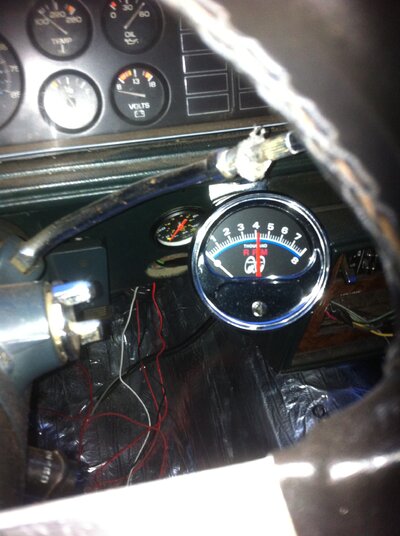
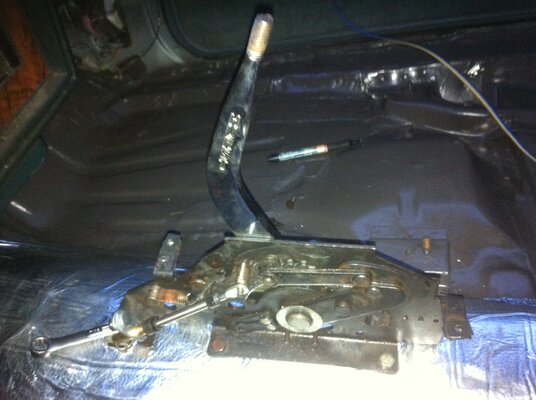
Well, I got a lot done since my last post. I finished the 'dime o mat' sound deadener install, got my gauges installed wired and my tach wired, got my Hurst Pro Matic II shifter installed and test fit the floor console,
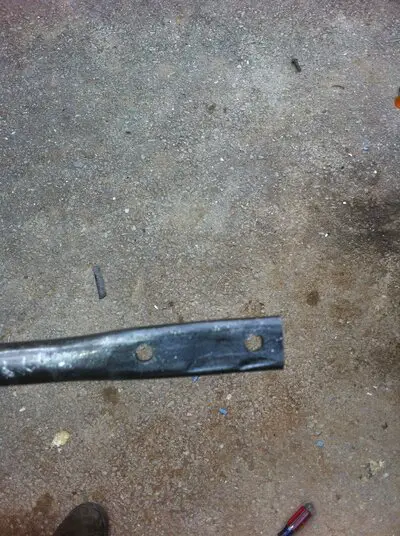
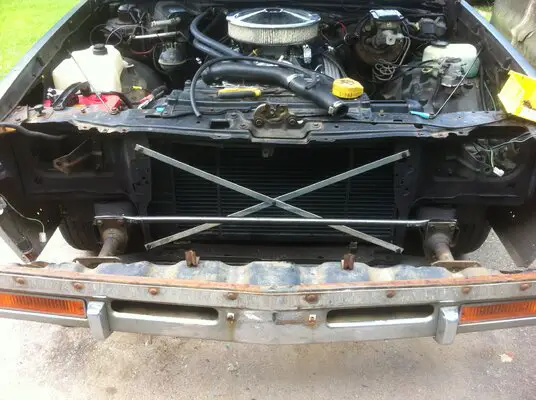
got all my wiring and hoses squared away, got my front grille braces made and installed out of 3/4" x 1/8" flat stock, I made kind of an unorthadox frame brace- I bought two 4 foot length Black pipes, flattened the ends, drilled two holes in each end, and bolted them on for braces.
got all my wiring and hoses squared away, got my front grille braces made and installed out of 3/4" x 1/8" flat stock, I made kind of an unorthadox frame brace- I bought two 4 foot length Black pipes, flattened the ends, drilled two holes in each end, and bolted them on for braces.
Attachments
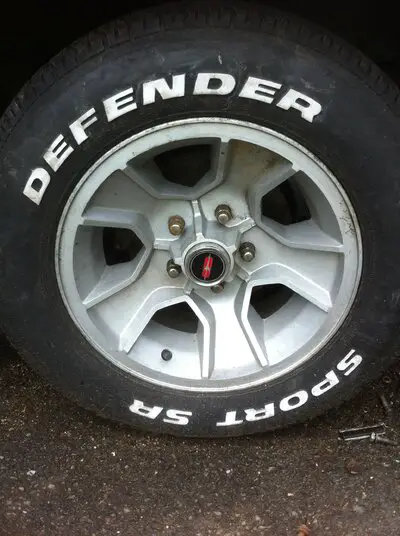
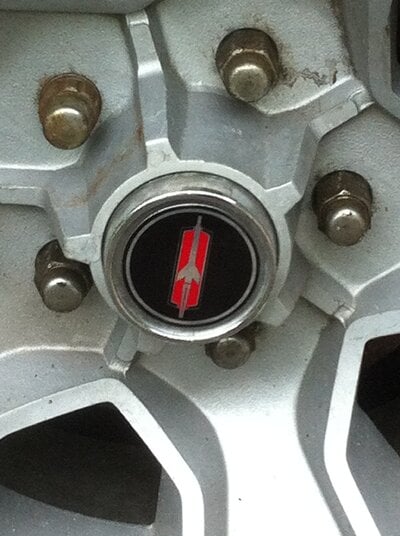
I got a few other things done. Rocket emblems for my wheels
and I got the nose put back together, and took the scoop off the hood so I can fix it right
And I got it running today! Needs some tweaking, but I will have it smoking tires soon!
and I got the nose put back together, and took the scoop off the hood so I can fix it right
And I got it running today! Needs some tweaking, but I will have it smoking tires soon!
Attachments
Well, I got more work done yesterday. I am gladd I took this week off for the fourth of july 🙂
My buddy had a streetfire HEI distributor and almost new wires that he gave me so I could get the car running right. It turns out that I needed to hook up the Vacuum advance to get the timing right, and I think the crappy spectre chrome timing tab I used is not very accurate because it was saying that I was running full advance at 50 degrees- There is not way total is 50 degrees because it wasn't pinging when running it up the street. anyway, I got the motor running great, starts nice and easy idles nice, and then we set to work on the interior. The camaro seats I bought almost went in with no modifications. I had to make three flat brackets to offset the front bolts, and the rear mounts on the drivers side I had to drill new holes, and the passeneger side bolted right up! I took the console I got as part of a trade (for some junk motor parts a guy was makign lawn furniture out of) and cleaned it up, painted it and installed that over the Hurst shifter.
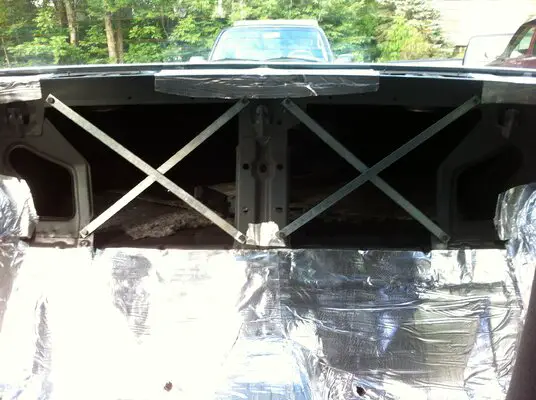
Then I made my x bracing in the back seats out of some 3/4" x 1/8" flat stock and bolted that in place before installing the rear seats.
Next on the docket is the power sterring hoses, and the euro front headlights I bought (not the 87 Cutlass euros, but black reflector projector sealed beam replacements) and blacked out headlight bezels. Once those are done, I need to do some road testing, and tuning and get an inspection sticker so I don't get pulled over.
It's coming along!!
Attachments
Oh, and apparently my neighbor across the street does not like my noisy car or my friends. When my buddy left my house last night, he spun his tires in reverse for like one second and the guy went off on a tirade about he has to put up with noise all the time and how there is no need for tire spin and he was still yelling when I went in my garage and closed the door. These have been great neighbors till now, I even fixed this guys car (the radiator was falling out because the core support rotted out the bottom from always parking his car on dirt). Although I have always talked to his wife, this guy have never said a single word to me for four and a half years I have lived in my house, then he set off like a bomb last night. There must have been something else going on for him to blow up like that, but man yelling across the street at the top of your lungs surely makes you look like a crazy person!!! I have been down this road with my cousins and a bad neighbor they had, and I do not want it to get out of hand. I have never had trouble with the cops or anything before, and I don't want to start now.
Oh well, I will try to be more quiet with my car... Maybe I will mow my grass four times a week now though 🙂
I have an old Sears garden tractor that I mow with that has a big stack for an exhaust.
Oh well, I will try to be more quiet with my car... Maybe I will mow my grass four times a week now though 🙂
I have an old Sears garden tractor that I mow with that has a big stack for an exhaust.
I put some miles on it this week- drove it about an hour on the highway, it drives perfectly smooth at 80 LOL the tires need to be balanced for sure...
I found out though that my torque converter was locked up- If I started the car and put it in drive it would stall, and I could not time it right because the motor was being lugged down. So I went to my Hot Rod buddies house, and we jacked it up, started it, put it in drive, and put my foot on the brake and it killed the motor. So I know the tq converted is locked up. My buddy gave me a stock stall converter that has 500 miles on it, and on Sunday I pulled the trans down, swapped the converter and put the trans back in.
Last night I got most of the loose ends tied back up, got new rubber cooler lines in, all the cables hooked back up, changed the trans filter (and I was happy to find a shift kit already installed in the transmission!!), and swapped out the Vacuum module with another that I had because it was the wrong one, and I think it was sucking fluid through the modulator.
All I have left to do is bolt the torque converter up, and fill it with fluid then rip it! I was getting depressed cause I just want to drive the thing lol
Oh one other thing... The 'cool' black headlights I bought, SUCK!! they don't reflect enough light, and the crappy chinese light bulbs were causing power to back feed through my high beams when low beams were on and vice versa. I put factory bulbs back in, no issues. The rubber seals they gave with the headlights did not work with the headlight buckets even after I trimmed them, so when I drove the car in the dewey morning, the headlights fogged up really badly. I guess $25 for 2 headlighs was a bad deal after all...
I got the trans pulled out, new torque cinverter in, no change. So I changed out the weights and springs in the governor and changed out the spring and valve on the passengers side of the trans, no change... grrr. The trans is messed up, I found it has a shift kit in it, and sometimes I know if you aren;t really careful, they can cause more problems. May be why the kids sold it one week after putting it in his car. It is great on the highway, but a dog around town. With the governor kit in it, it holds 2nd gear way too long as well.... I need to rebuild one of the other transmissions I have, and I will get a transgo kit as I have heard they are better than a b&m kit alone..
I got the hood worked out a bit more today too. Ground off all the crappy bondo work, cut a big hole in it, riveted the sheet metal back to the supports, and glued and screwed the scoop on. Once it dries fully, I will take most of the screws out, use short strand kitty hair and some glass mat/resin to finish it off, then lightweight bondo, sandable primer, and maybe paint it satin black for now...
I got the hood worked out a bit more today too. Ground off all the crappy bondo work, cut a big hole in it, riveted the sheet metal back to the supports, and glued and screwed the scoop on. Once it dries fully, I will take most of the screws out, use short strand kitty hair and some glass mat/resin to finish it off, then lightweight bondo, sandable primer, and maybe paint it satin black for now...
Attachments
- Status
- Not open for further replies.
Similar threads
- Replies
- 1
- Views
- 120
- Replies
- 1
- Views
- 157
- Replies
- 0
- Views
- 116
GBodyForum is a participant in the Amazon Services LLC Associates Program, an affiliate advertising program designed to provide a means for sites to earn advertising fees by advertising and linking to amazon.com. Amazon, the Amazon logo, AmazonSupply, and the AmazonSupply logo are trademarks of Amazon.com, Inc. or its affiliates.


![IMG_0218[1].JPG](https://cdn-0.gbodyforum.com/data/attachments/14/14921-783b1d0b9a2b32dbc53258d589e7ccaf.jpg?hash=eDsdC5orMt)
![IMG_0219[1].JPG](https://cdn-0.gbodyforum.com/data/attachments/14/14922-26b05613b0d8bd3448dc9a1b02c364fe.jpg?hash=JrBWE7DYvT)
![IMG_0220[1].JPG](https://cdn-0.gbodyforum.com/data/attachments/14/14923-d13b2803fbb1d730b4e5c68231d346f4.jpg?hash=0TsoA_ux1z)
