78 malibu factory 4 speed w/bench seat.

Status
Not open for further replies.

mystre71

Apprentice
Apr 7, 2018
79
76
18
Well the powder coater didn't plug all the holes like he assured me he would. Does anyone know the best process to remove powder coat from threads ? I'm going to try and tap them with a carbine tip tap. I did get to mock up some of the UMI parts.
DSCN2386 (640x480).jpg
DSCN2385 (640x480).jpg
 
  • Like
  • Winner
Reactions: 2 users

mystre71

Apprentice
Apr 7, 2018
79
76
18
On vacation this week decided to tackle the front coil overs. They're a little tricky when you have a bare frame, but nothing a set of ratchet straps can't fix. Saw online other were trying to figure out how to do this. So I might post a video of "how to" on youtube of the other side install.
 

Attachments

  • DSCN2426 (640x480).jpg
    DSCN2426 (640x480).jpg
    235.7 KB · Views: 278
  • DSCN2423 (640x480).jpg
    DSCN2423 (640x480).jpg
    257.8 KB · Views: 283
  • Like
Reactions: 1 users

buzz77

Master Mechanic
Jun 11, 2013
304
60
28
This past Monday a few friends and I took a trip up to Philipsburg Pa. To take a tour of UMI performance manufacturing plant. 
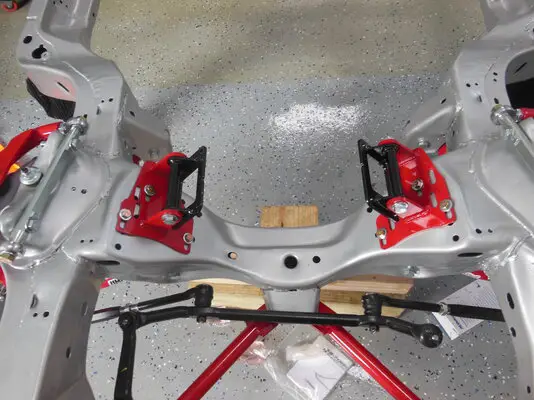
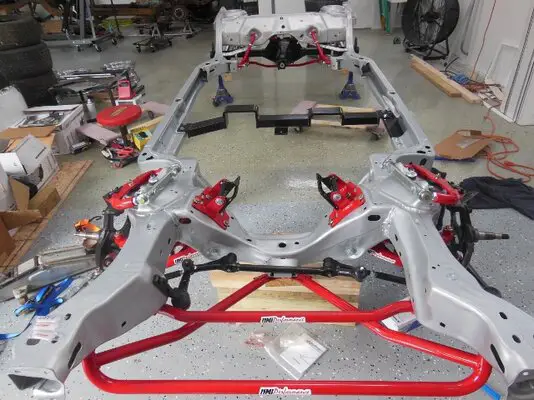
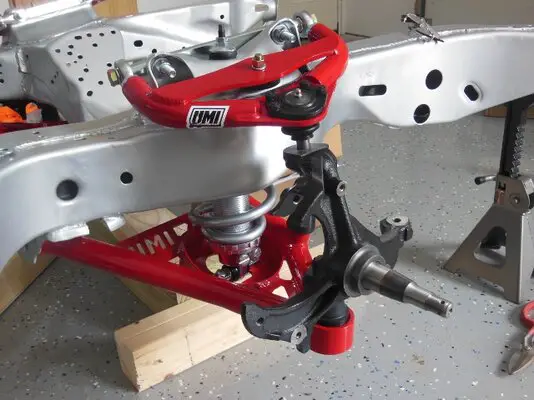
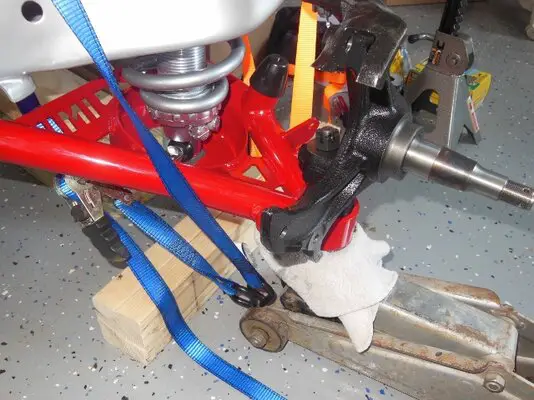
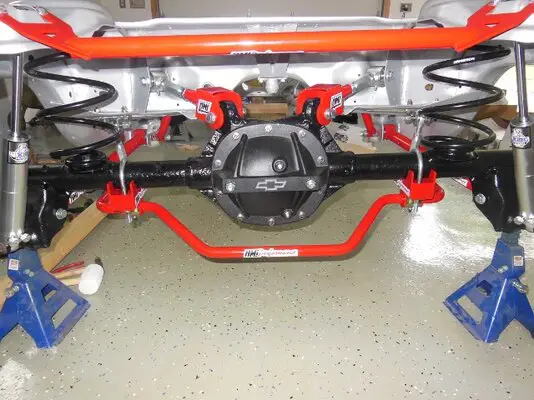
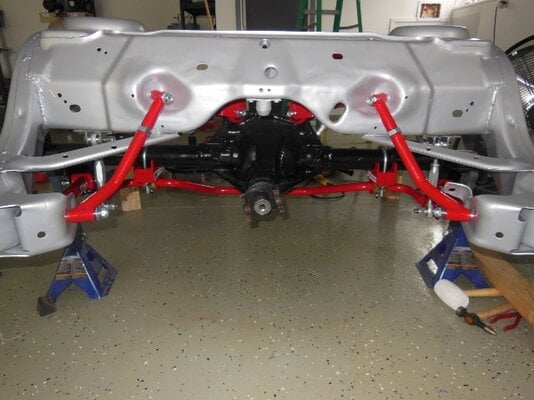
http://www.umiperformance.com/catalog/ and to pick up some goodies for the build (pix will follow). I had been corresponding with Ramey for a few weeks about suspension parts. He invited me up for a tour and had sent me a few videos of their Gbody Monte Carlo with one of their handling kits installed. You can check the clips out on youtube it's a green Monte, whipping through the cones at a high rate of speed and handling like a champ. While there we got to see every step of their manufacturing process from start to finish. From the set up of the jigs to the powder coating, it was amazing to see. Then he took us to the back to see some of their cars. I was disappointed the Monte wasn't there. He told us they had purchased an old race track and they had it at the track working on some new stuff. Then ask if we had time to go to the track. Um yes please! Just us three and two of their guys at the track. I'll see if I can figure out how to post some clips of the Monte. I have to say it was very reassuring to actually be able to see the parts I was purchasing being made and all the time, effort and care that went into them. I just wanted to share this with you guys, if you're looking for suspension parts, I honestly don't think you could go wrong with these guys. All the parts made right here in the USA. Maybe I should said I have no connection to UMI in any way shape or form, other than I bought their product and having seen it first hand. I believe it what they have to offer. Here's a few photos. I won't get my frame back from the powder coater's until next week. Or they would already be installed. :)
I've been wanting to know about those UMI bolt on rear trailing arm braces. I note in the photo you purchased them. Do you have any info on what benefit they may have over just leaving it stock? They are the one thing I cant seem to find feedback on.
 

mystre71

Apprentice
Apr 7, 2018
79
76
18
Hi Buzz77, I do not know all the details about them. But I will get in touch with UMI and ask for some details. I will tell you though. I've seen their Gbody (Monte) with these parts installed run through the cones on the track I could see how well it handled compared to a stock set up. After taking the tour and seeing how much care and pride they take in manufacturing these parts made me feel really good about my purchase. Not to mention all the support after my purchase. I've contacted them many times with questions and they've also been very helpful.
 

Attachments

  • DSCN2429 (640x480).jpg
    DSCN2429 (640x480).jpg
    274.6 KB · Views: 284
  • DSCN2430 (640x480).jpg
    DSCN2430 (640x480).jpg
    223.9 KB · Views: 280
  • Like
Reactions: 1 users

mystre71

Apprentice
Apr 7, 2018
79
76
18
Hi Buzz77, Here's what's posted on UMI's site for the control arms. hope this helps. "UMI Performance single adjustable lower control arms feature an Energy Suspension polyurethane bushing set-up on one end and a QA1 spherical rod end on the other. This type of set-up allows rear end adjustment when needed while also helping to eliminate and reduce rear end bind. The QA1 rod end allows rear end free movement when high handling, auto cross or road race is a concern, it also allows you to lengthen and shorten the control arms adding additional clearance when trying to squeeze those larger tires under the vehicle. The adjustment of these arms can also be used for custom rear end installs when centering and rear end movement is needed. This type of set-up works excellent as a drag race item, auto cross and street driving. The polyurethane bushings are designed to be bolted to the chassis of the vehicle for a quiet comfortable operation while the QA1 rod end attaches at the rear end. Each control arm features the correct provisions for adding a stock or aftermarket sway bar. Sway bar holes are reinforced with a 0.120" wall thickness steel sleeve TIG welded and sanded into place."

Features:
- 1.500" x 0.120" DOM Mild Steel Tubing
- TIG Welded 4140 Chrome Moly Tube Adaptors
- Complete Arm Features TIG Welded Construction
- Energy Suspension Fluted Polyurethane grease-able Bushings
- Durable Long Lasting Powder Coat finish
- QA1 3/4" Hard Chrome Plated, Teflon/Kevlar Self Lubricating Race Rod End
 

mystre71

Apprentice
Apr 7, 2018
79
76
18
Was able to get the front sway bar and brace on today, well almost got the brace on, I need to pick up some 10mm bolts to fasten that into place.The sway bar requires the use of your old bolts (which I do not want to use), quick search I found them online but pricey. Ordered the pre-bent brake lines (from The Right Stuff) so hoping I can get the rotors/breaks all installed later this week. Just an FYI so no one makes the mistake I did of thinking I received the wrong A-arms. The UMI A-arms I received do not have the hole to mount your sway bar bushing "up" through them like my factory arms have. They have a horizontal mount (see photos below) and an end link kit to install the sway bar with this mounting set up (also see photo below).

DSCN2453 (640x480).jpg
DSCN2459 (640x480).jpg
DSCN2458 (640x480).jpg
DSCN2456 (640x480).jpg
 
  • Like
Reactions: 4 users

mystre71

Apprentice
Apr 7, 2018
79
76
18
Been awhile since I've updated this. Here's a few pix of the new LS engine mounts (UMI) and trans cross member (G-force). The plan is to get everything greased up and torqued to specs, install the rotors, brakes and lines (The right Stuff), gear box in place, then get the body sat in place and see what rust needs fixed on that.
 

Attachments

  • LS engine mounts.JPG
    LS engine mounts.JPG
    6.4 MB · Views: 291
  • DSCN2501 (640x480) (640x480).jpg
    DSCN2501 (640x480) (640x480).jpg
    272.3 KB · Views: 280
  • Like
Reactions: 2 users

1evilregal

Comic Book Super Hero
Apr 23, 2009
3,056
4,357
113
Greensboro, NC
coming together beautifully!

don't know how I missed this thread before, but I'm hooked!
 
  • Like
Reactions: 1 user
Status
Not open for further replies.

GBodyForum is a participant in the Amazon Services LLC Associates Program, an affiliate advertising program designed to provide a means for sites to earn advertising fees by advertising and linking to amazon.com. Amazon, the Amazon logo, AmazonSupply, and the AmazonSupply logo are trademarks of Amazon.com, Inc. or its affiliates.

Please support GBodyForum Sponsors

Classic Truck Consoles Dixie Restoration Depot UMI Performance

Contact [email protected] for info on becoming a sponsor