Thanks Jack!, wait till I block it out and polish it, it'll be like glass. It flowed out some more after that video and pics, the orange peel is minute, so just that and some dust nibs to block out.The paint has nice depth, and like Scott said, it's super straight. The reflections are nice and clear. Very nice. I wouldn't be surprised if the car makes it's way into a few magazines.
Did I say I love the color?
BUILD THREAD 81 Buick/Olds Turbo Wagon 02/15/2024 More Parts!
- Thread starter liquidh8
- Start date
You are using an out of date browser. It may not display this or other websites correctly.
You should upgrade or use an alternative browser.
You should upgrade or use an alternative browser.
What size wheels and tires are you using on your wagon?Merry Christmas gbody forum!
I went in the garage last night and made the floor mount for the lightning rods. The stock mount would have worked, but I wanted the shifter back farther, and right on the floor. This does 2 things, makes it more comfortable for me to shift, and will allow me to keep the console a bit lower there. When I build the console it will all make sense.
The stock shifter plate only had 2 holes for retaining the shifter, kinda sloppy TBH, so this has 4 mounting bolts. I used 1/4-20 nuts welded on the back of the plate. I also made stand offs to mount the plate to the transmission tunnel. Then, used 1/4-20 rivet nuts in the tunnel. I now just have to blast and paint the mount, but just am happy with the result. You can see the shifter sits lower that the stock standoff for the plate.
View attachment 58406
View attachment 58407
View attachment 58408
The flash kinda has the color a little off, but you get the idea.
Here is the steering wheel I bought, should be on its way
View attachment 58409
And a few pics of the sides. The garage is real narrow, so getting good pictures is tough.
View attachment 58410
View attachment 58411
So, till next week...
The rears are 17x10.5 or 11 with 315-35-17, and the fronts are 17x9 with a 245-45-17 (for now).What size wheels and tires are you using on your wagon?
Last edited:
This thing is going to look badass when it is all done! That is the kind of car I could spend hours looking at. I enjoy big cars that are straight as an arrow and have nice body gaps. I like your engine combo too.
Thank you!This thing is going to look badass when it is all done! That is the kind of car I could spend hours looking at. I enjoy big cars that are straight as an arrow and have nice body gaps. I like your engine combo too.
Thanks for the vid Jim!
The color looks even better than in the pics. The guys have already said it all: outstanding work, lazer straight, and bad *ss color. My hat's off to you, that's a lot of real estate to get that straight and clean.
Well done sir, and congrats again!


The color looks even better than in the pics. The guys have already said it all: outstanding work, lazer straight, and bad *ss color. My hat's off to you, that's a lot of real estate to get that straight and clean.
Well done sir, and congrats again!


Thank you Donovan! You, like others on here, know what it's like to do sh*t twice or even three times till it's "right". Sometimes that's what it takes.

Jim, I'm hurting inside with past paint snafus lol! I had to paint my stealth ram intake 3 times until i was happy....1st time i got one little run on a corner that pissed me off....sanded it down. 2nd time a little bug landed and stuck to the side before the paint dried-tried to remove it and fix quick to no avail!!! 3rd time was the charm and laid down a heluva paint job!Thank you Donovan! You, like others on here, know what it's like to do sh*t twice or even three times till it's "right". Sometimes that's what it takes.

Like you said, sometimes that's what it takes....i tend to be a bit of a perfectionist when it comes to the cutlass. I don't wanna debut it to see something i shoulda taken more time and patience on because i felt rushed!
Small update, I went back at the trim, grills, headlight buckets, and plate pocket yesterday to finish prep and paint.
Final sanding the grills to 5 hours for the pair, using a combination of sanding sponges cut into slithers, paint sticks cut into different sizes with adhesive backed sandpaper, and my fingers. Tedious, but it worked. I covered everything in one coat of epoxy, the the 2k satin black.
The finish is what I was after, in no particular order here are some pictures.
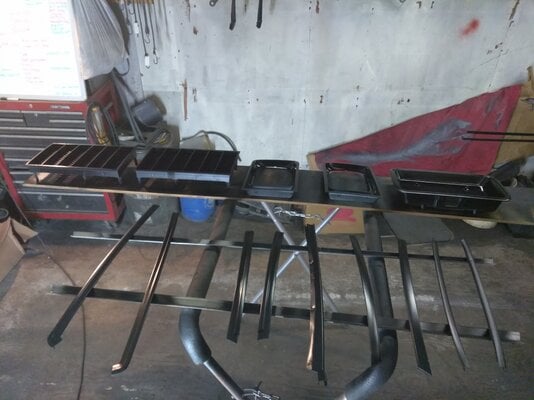
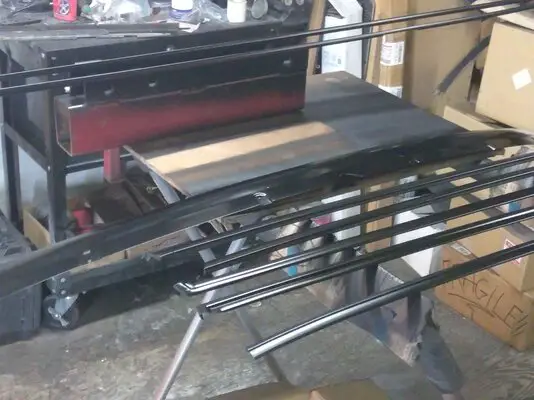
Just a few pieces of trim.
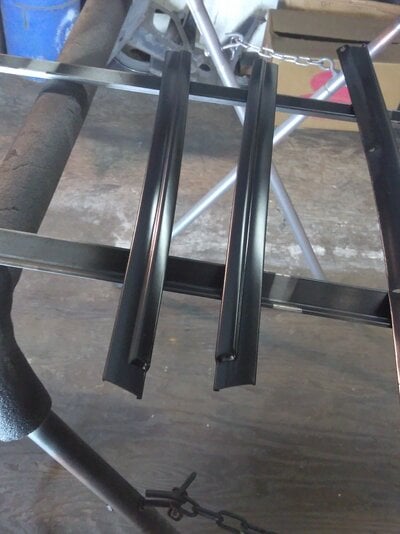
I put the new rubber bumpers in, and have a new plate light lense.
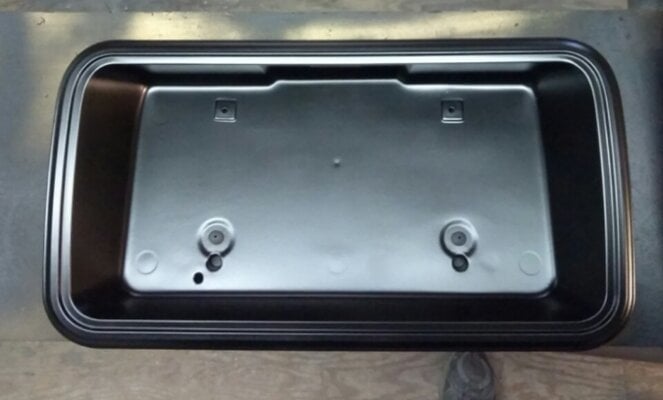
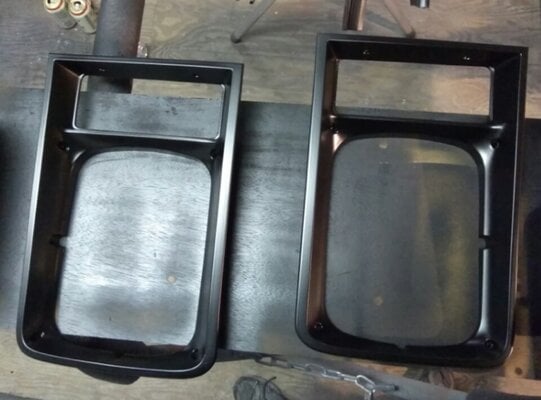
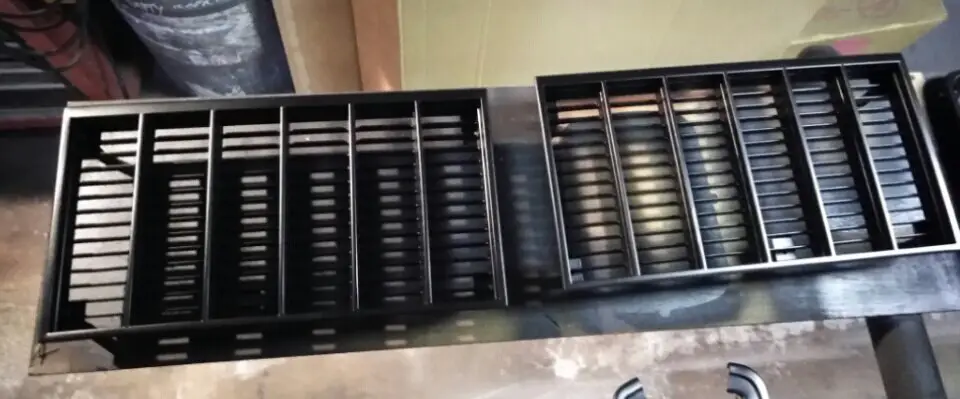
I still have the wheel well trim to do, along with the vent window frames, hatch glass frame, and some other bits, but this was a bulk of it.
Final sanding the grills to 5 hours for the pair, using a combination of sanding sponges cut into slithers, paint sticks cut into different sizes with adhesive backed sandpaper, and my fingers. Tedious, but it worked. I covered everything in one coat of epoxy, the the 2k satin black.
The finish is what I was after, in no particular order here are some pictures.


Just a few pieces of trim.

I put the new rubber bumpers in, and have a new plate light lense.


I still have the wheel well trim to do, along with the vent window frames, hatch glass frame, and some other bits, but this was a bulk of it.
Looks killer Jim! Oh, the stupid amount of prep work all of us are putting into trim stuff is outrageous....but that's what it takes! I've enjoyed seeing all these parts get done....it's cold again in KY and having no garage, or making time to get to my brother in laws heated shop makes it tough to stand out in the cold prepping parts for black out or paint.
I spent a couple hours outside friday evening degreasing the blazer spindles and backing plates in prep for paint, and it sucked royally!
Excited to see the trim, grilles and such back on the wagon Jim, as I'm sure others are as well!
I spent a couple hours outside friday evening degreasing the blazer spindles and backing plates in prep for paint, and it sucked royally!
Excited to see the trim, grilles and such back on the wagon Jim, as I'm sure others are as well!
Similar threads
- Replies
- 5
- Views
- 559
- Replies
- 10
- Views
- 366
- Replies
- 0
- Views
- 144
GBodyForum is a participant in the Amazon Services LLC Associates Program, an affiliate advertising program designed to provide a means for sites to earn advertising fees by advertising and linking to amazon.com. Amazon, the Amazon logo, AmazonSupply, and the AmazonSupply logo are trademarks of Amazon.com, Inc. or its affiliates.

