

83 Buick Regal Estate Wagon 5.3 LS, bagged
- Thread starter vandall
- Start date
You are using an out of date browser. It may not display this or other websites correctly.
You should upgrade or use an alternative browser.
You should upgrade or use an alternative browser.
About a year ago I finally started gathering parts after researching LS books, magazines and especially LS1tech.com. I can't stress how helpful that forum is for this type of swap. There are a bunch of other sites like LT1swap.com for electrical but the LS1tech forums are helpful and have the most up-to-date info.
I found a complete dropout in Tacoma on craigslist which seems to be pretty rare in the northwest, I'm not sure why though. There are tons of LS's on ebay but never up here - the closest seems to be in California. There are other options like LKQ or Copart.com. Anyway, mine was advertised as a 5.3l and 4L60E from a 2004 Silverado with 104k, and included everything like the ECU, harness, drive by wire pedal and was complete with all accessories, etc. Many people say you can determine the difference between 4.8 and 5.3 engines only by checking if the piston tops are flat or dished.. but at least on my engine I just had to remove the rust on the head gasket tab that is sticking out - it should have the specific engine size engraved on that tab. Well, my engine turned out to be a 4.8. Of course. But, it's not all that bad - these small V8's (293 ci) have almost as much power potential as their larger siblings. If you are interested Super Chevy did a great series of articles on the 4.8, here is the first one:
http://www.superchevy.com/how-to/en...84-hp-out-of-a-4-8l-engine-mini-mouse-part-1/
So anyway, after getting my drivetrain I had to gather the essentials for an LS swap: the oil pan, motor mounts, the trans crossmember, plan the exhaust, cooling, fuel systems and the electrical harness. Since Holley had just finished engineering the LS swap parts for G-bodies I didn't want to try and piece different manufacturer parts together and hope for the best, I decided to use all Holley. I'm really glad I did because these are seriously well made pieces that work perfectly together.
Pics:
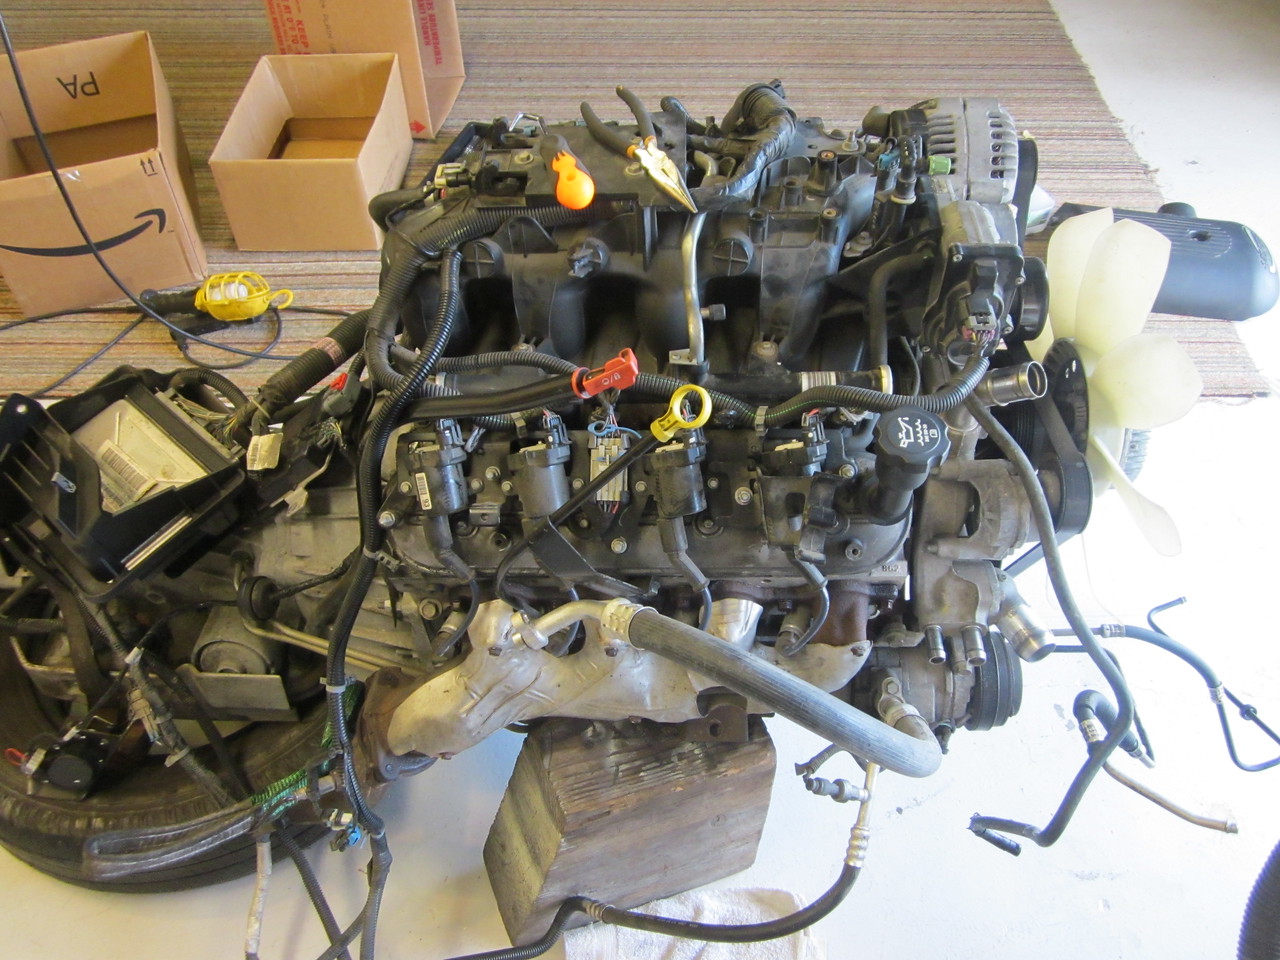
Don't be too intimidated; these engines have a lot of extra stuff you may remove such as EGR, much of the electrical, brackets, etc
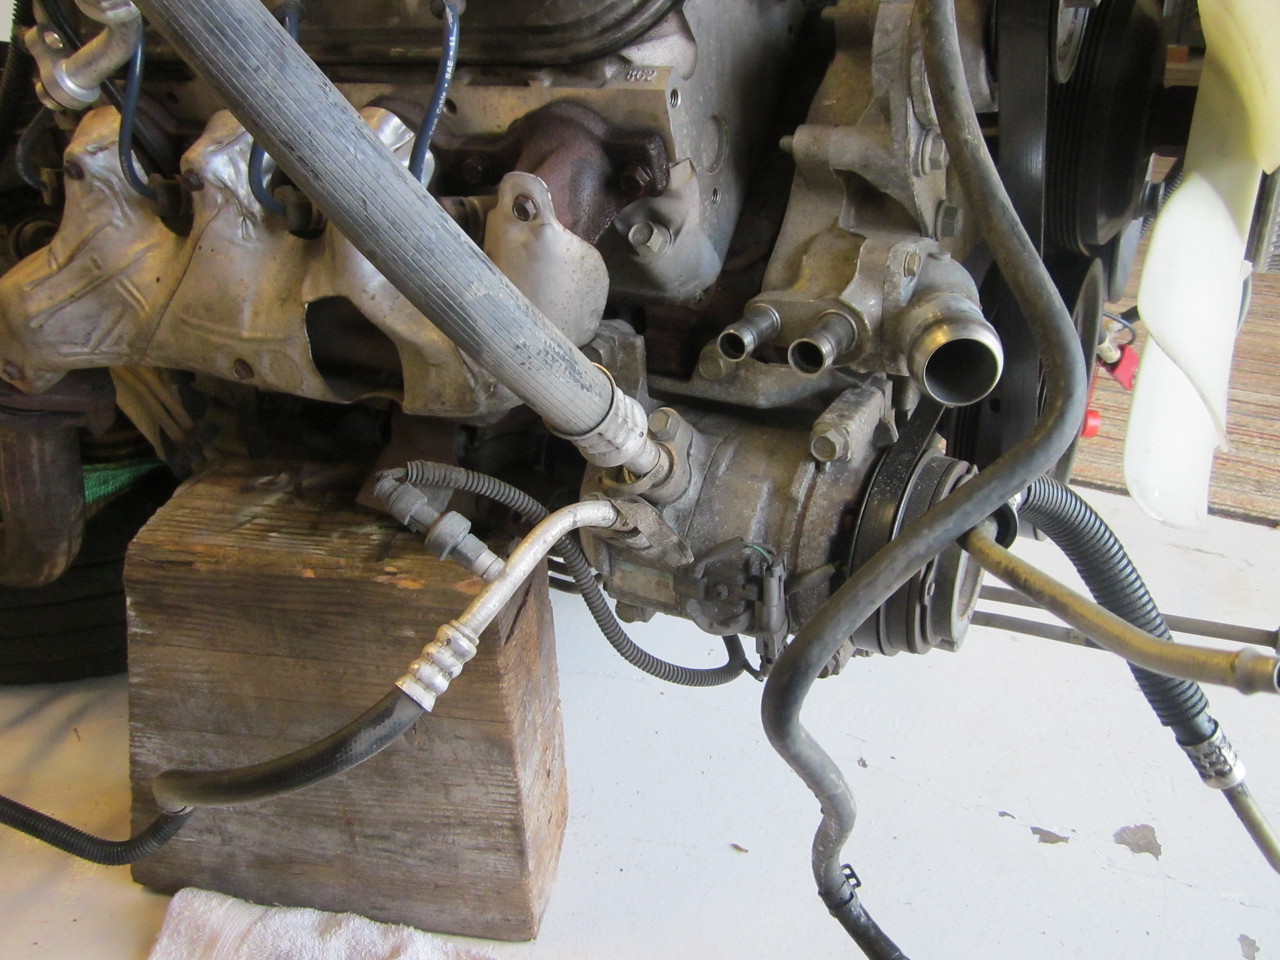
Trucks have the low mount AC compressors, which usually will not work in passenger cars.. luckily for me I'm removing the AC system.. parasitic loss!
Many people convert to an old school cable throttle, but I really wanted to retain the drive-by-wire (DBW) system
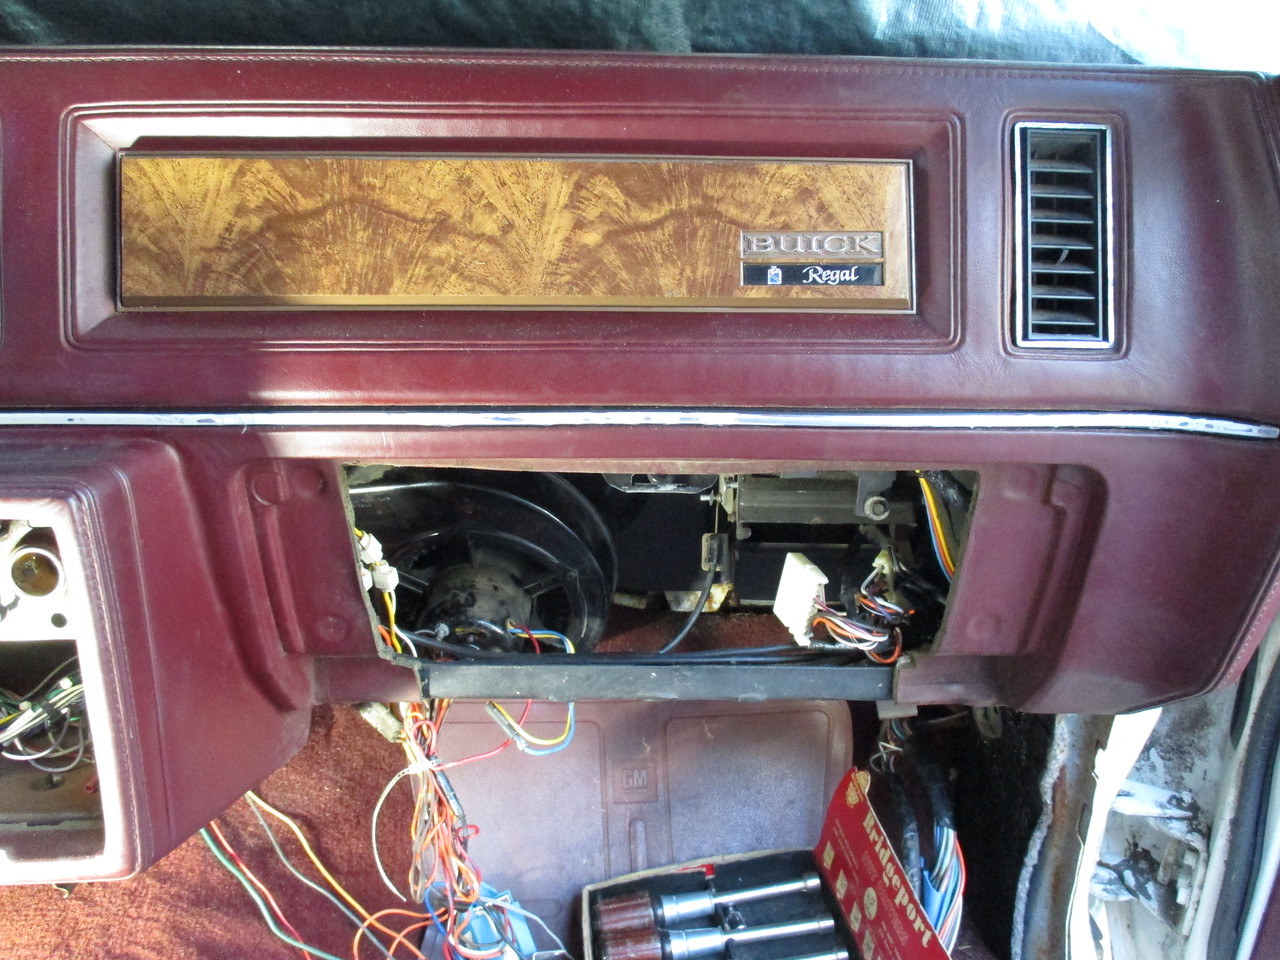
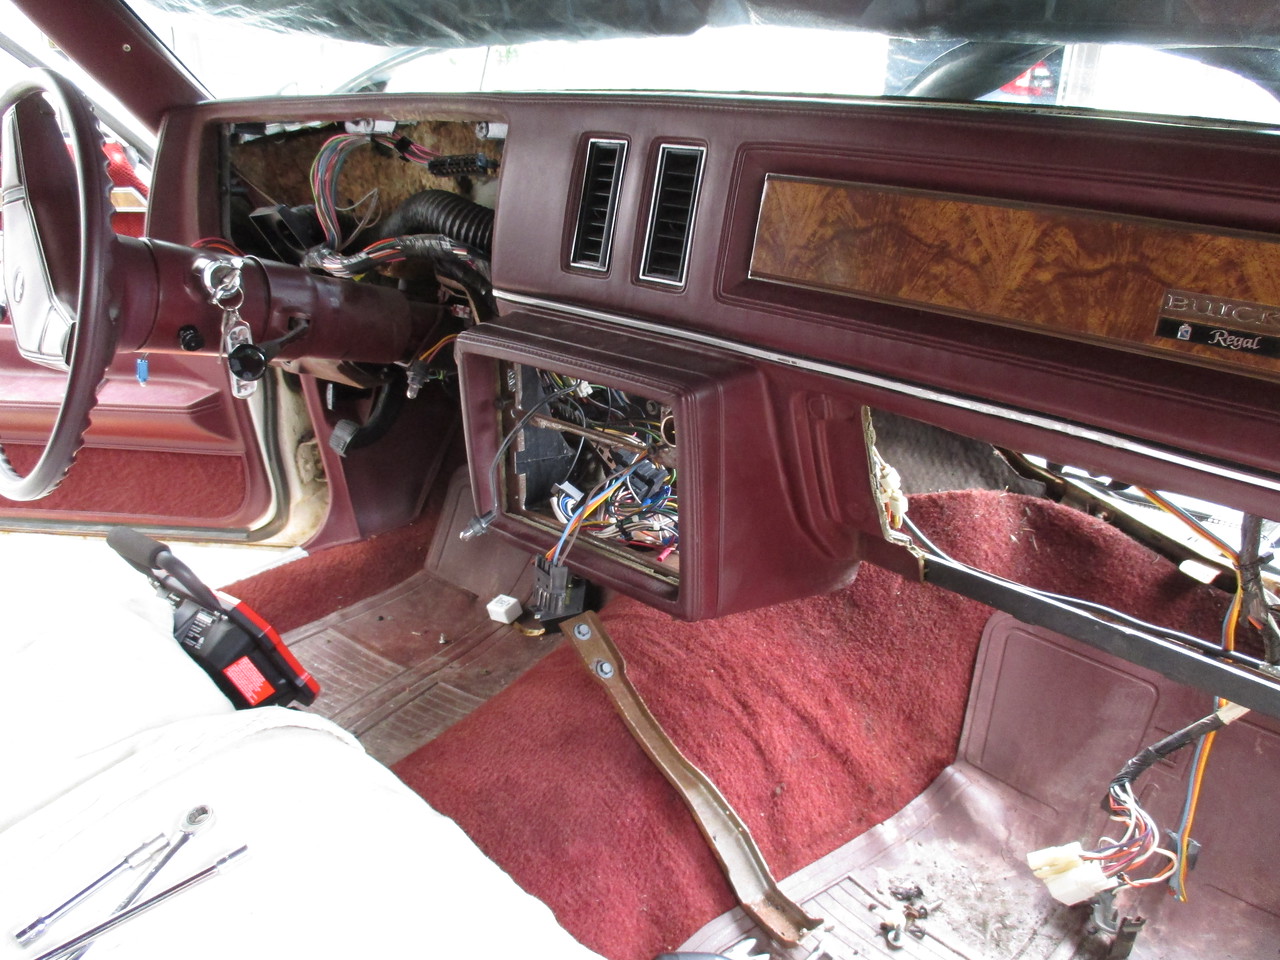
So it begins... you can even see some of the hacked up HVAC wiring going on here

Wasn't sure what to do about gauges and i still need to figure that out
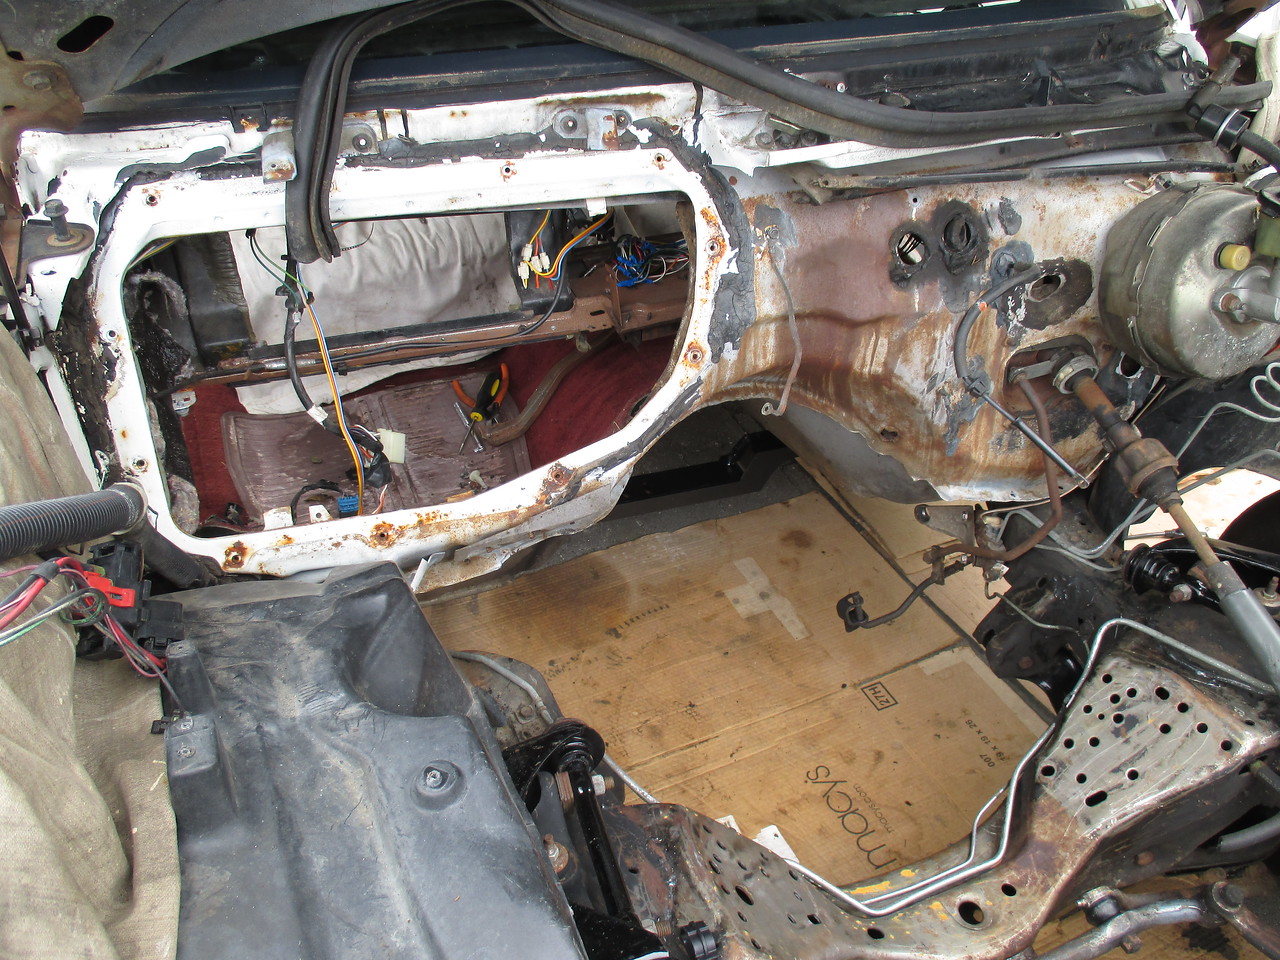
Old box out, time to clean the compartment
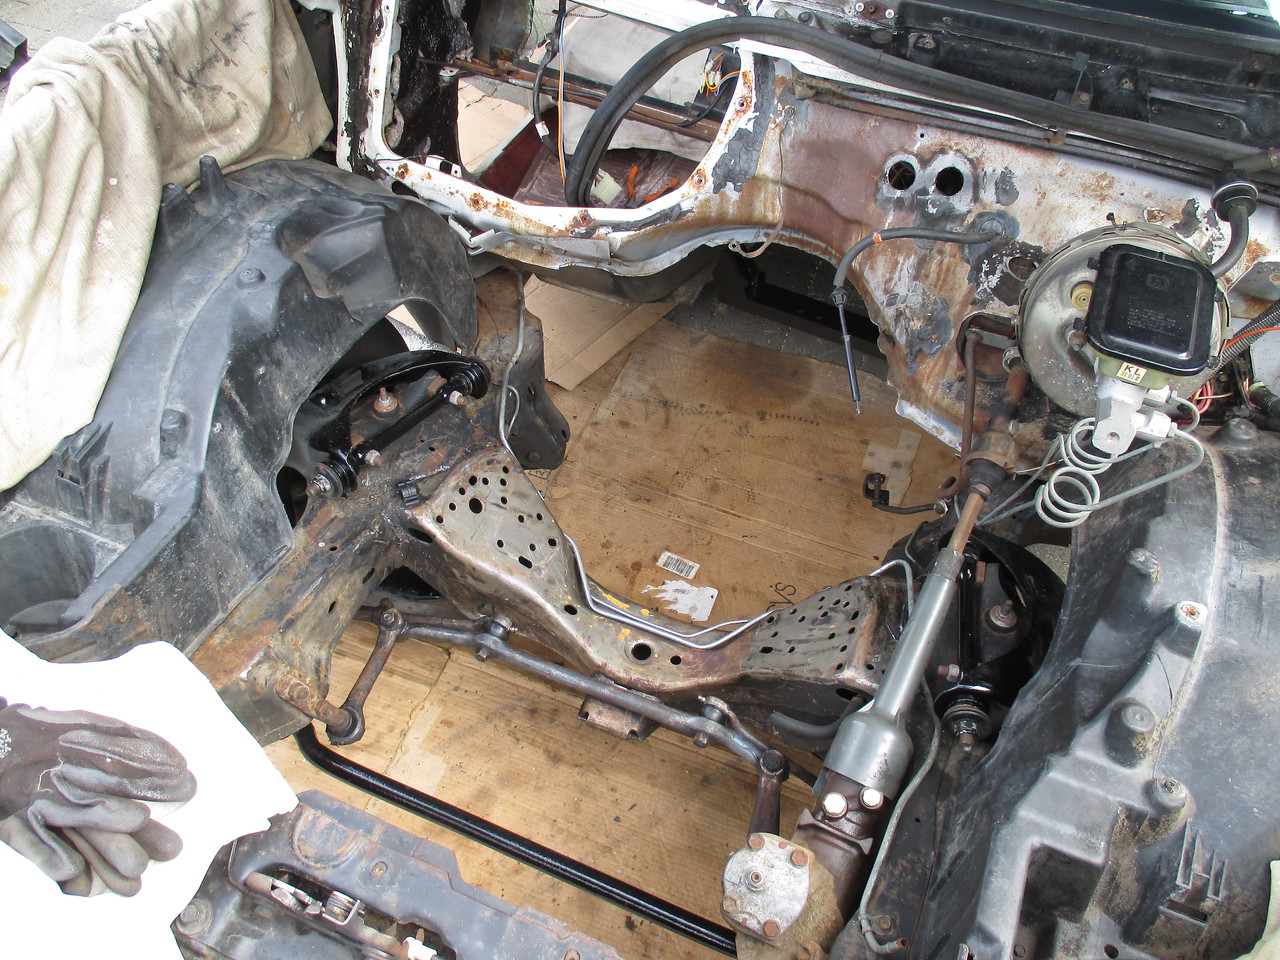
You can see those two big holes in the firewall they punched out for the add-on AC system from the dealer.. it absolutely boggles my mind why they would hack up a perfect new car instead of just ordering correct from the factory. I cannot fathom anyone doing that

I found a complete dropout in Tacoma on craigslist which seems to be pretty rare in the northwest, I'm not sure why though. There are tons of LS's on ebay but never up here - the closest seems to be in California. There are other options like LKQ or Copart.com. Anyway, mine was advertised as a 5.3l and 4L60E from a 2004 Silverado with 104k, and included everything like the ECU, harness, drive by wire pedal and was complete with all accessories, etc. Many people say you can determine the difference between 4.8 and 5.3 engines only by checking if the piston tops are flat or dished.. but at least on my engine I just had to remove the rust on the head gasket tab that is sticking out - it should have the specific engine size engraved on that tab. Well, my engine turned out to be a 4.8. Of course. But, it's not all that bad - these small V8's (293 ci) have almost as much power potential as their larger siblings. If you are interested Super Chevy did a great series of articles on the 4.8, here is the first one:
http://www.superchevy.com/how-to/en...84-hp-out-of-a-4-8l-engine-mini-mouse-part-1/
So anyway, after getting my drivetrain I had to gather the essentials for an LS swap: the oil pan, motor mounts, the trans crossmember, plan the exhaust, cooling, fuel systems and the electrical harness. Since Holley had just finished engineering the LS swap parts for G-bodies I didn't want to try and piece different manufacturer parts together and hope for the best, I decided to use all Holley. I'm really glad I did because these are seriously well made pieces that work perfectly together.
Pics:
Don't be too intimidated; these engines have a lot of extra stuff you may remove such as EGR, much of the electrical, brackets, etc
Trucks have the low mount AC compressors, which usually will not work in passenger cars.. luckily for me I'm removing the AC system.. parasitic loss!
Many people convert to an old school cable throttle, but I really wanted to retain the drive-by-wire (DBW) system
So it begins... you can even see some of the hacked up HVAC wiring going on here
Wasn't sure what to do about gauges and i still need to figure that out
Old box out, time to clean the compartment
You can see those two big holes in the firewall they punched out for the add-on AC system from the dealer.. it absolutely boggles my mind why they would hack up a perfect new car instead of just ordering correct from the factory. I cannot fathom anyone doing that
wow nice clean wagon find
would love to a regal wagon w/a 83 regal front clip
and a 79 cutlass wagon made into a hurst w30 white and gold setup
very cool ill be checkin in on your project
would love to a regal wagon w/a 83 regal front clip
and a 79 cutlass wagon made into a hurst w30 white and gold setup
very cool ill be checkin in on your project
Thanks for all the replies! Sometimes I think my posts are rambling and lack focus.. hope some of this entertains, as I really like reading through other peoples build threads.
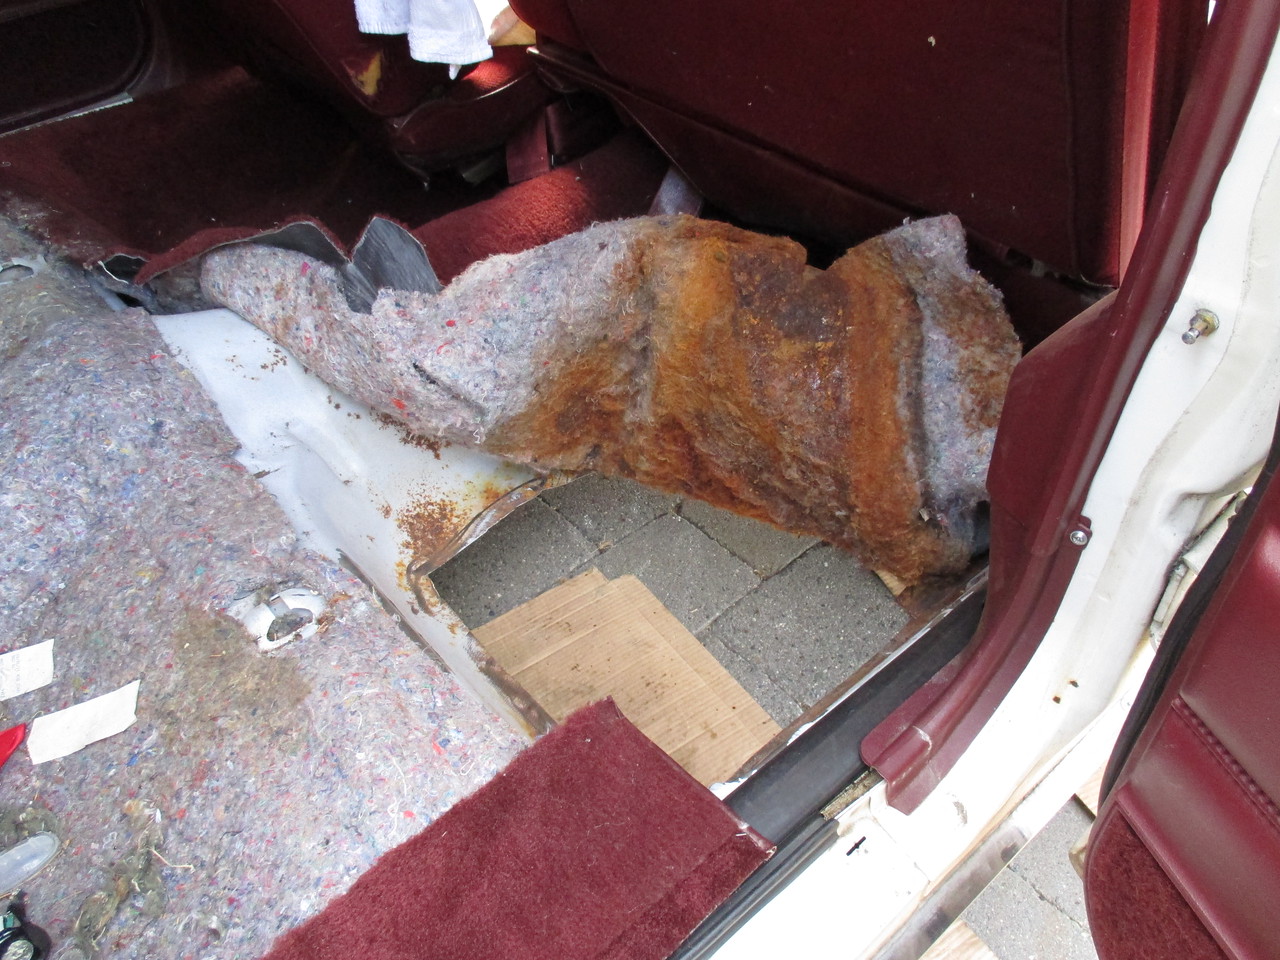
On to the dirty work.. Thankfully, my dad is more of a body man and even does electrical so we make a pretty good team. As nice as my wagon looks from a distance or in pics, it does have some issues that needed to be addressed. The floors are nice but the rear passenger was pretty rotted, so we cut that out. I do like the "archaeology" part of working on old vehicles. Finding cool items that haven't seen the light of day for decades is kinda fun
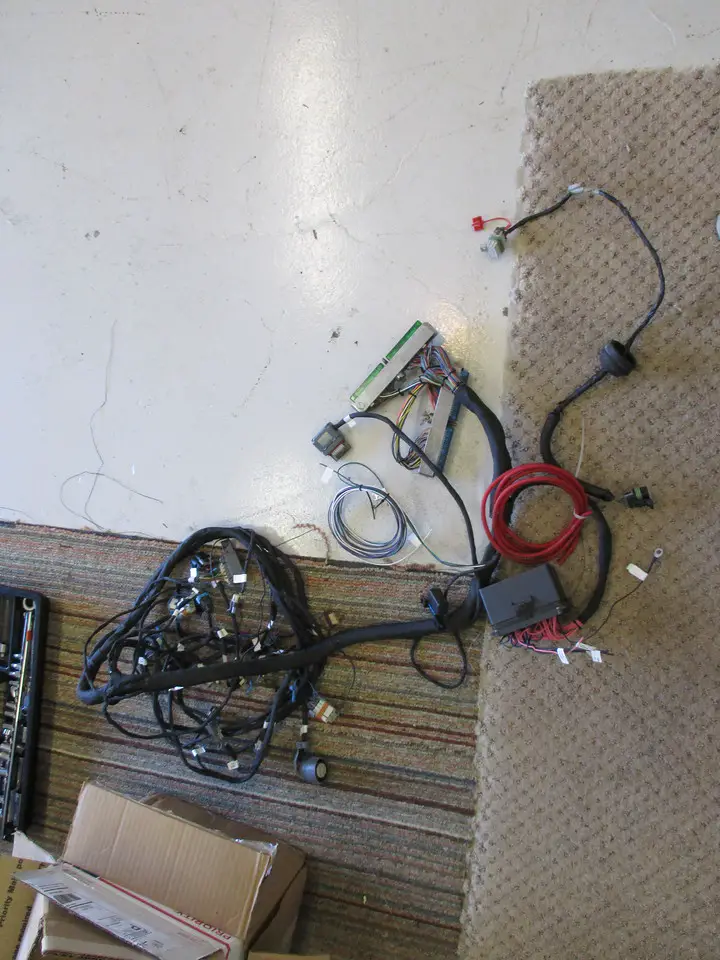
One of the first items I took care of was the wiring harness only because I don't know much about these modern systems so it weighed on my mind. I found Steve at Westcoast Wirewerks in Vancouver, B.C. who did a fantastic job and was quick and responsive. He even test runs his harnesses on an LS prior to shipping. I sent the ECU to get reflashed to Brendan who runs LT1swap.com. I feel with that website resource and the right tools, making your own harness could be kinda fun. Noted for future builds. We got all the Holley pieces on the motor and it was time for the initial test fit. I think in total we had the engine/trans in and out of the car 3 times, which isn't that bad but I do give credit to Holley engineering for the fit.
Trap door if the cops pull me over
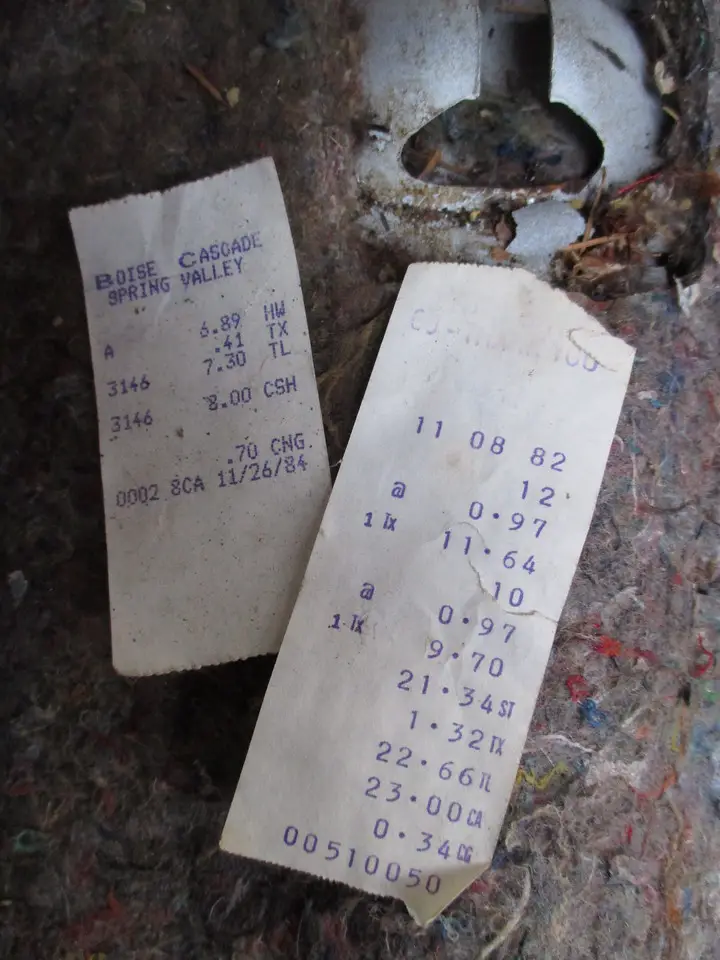
It's so cool to think that receipt fell under the seat pretty much perfect condition and stayed there for over 30 years!
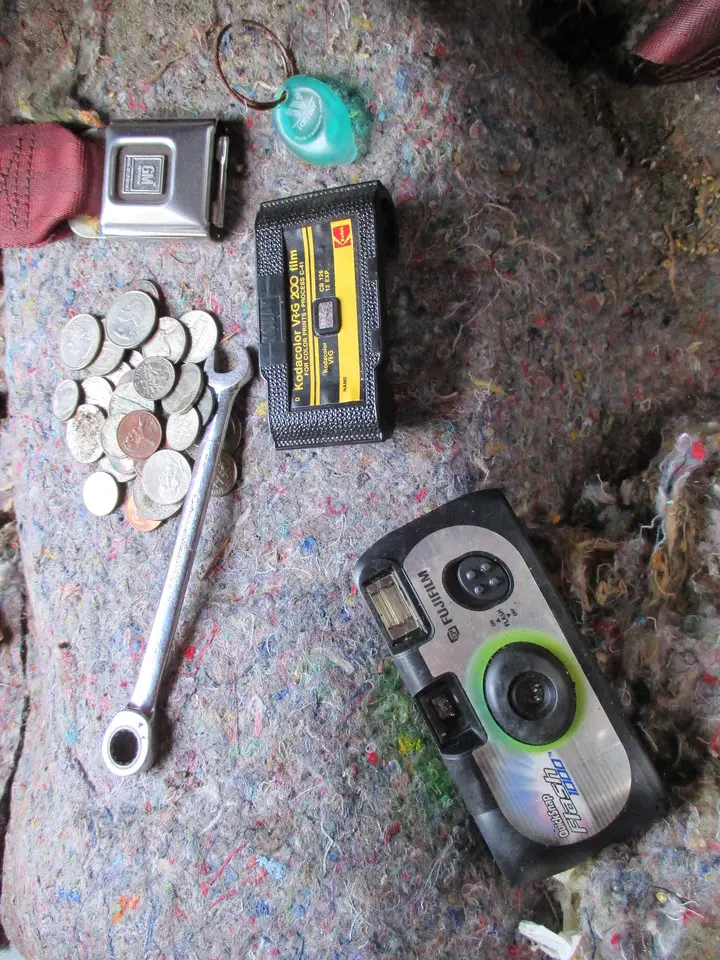
More cool junk.. I took a bunch of pics on that disposable camera to get it developed.. I'll have to follow up on that. The ratcheting 10 mm wrench is awesome and will be used a LOT. I have like 2 others haha
http://www.westcoastwirewerks.com/
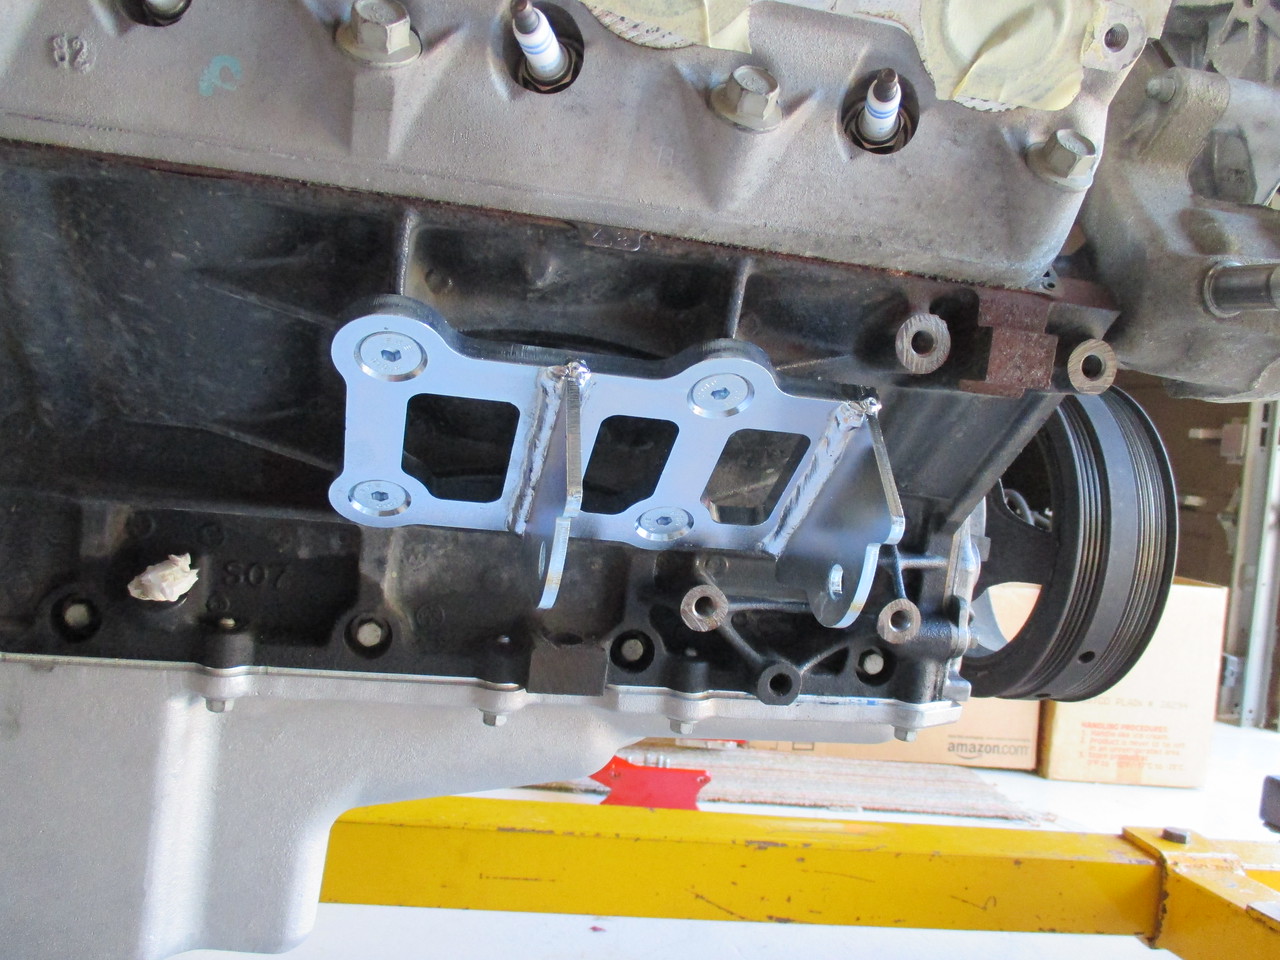
This shows the new oil pan profile and the mounts bolted to the block.. you can also see the head gasket tab
New clamshells ready to rock

Having the leveler on the hoist is nice because you can change angles on the fly
On to the dirty work.. Thankfully, my dad is more of a body man and even does electrical so we make a pretty good team. As nice as my wagon looks from a distance or in pics, it does have some issues that needed to be addressed. The floors are nice but the rear passenger was pretty rotted, so we cut that out. I do like the "archaeology" part of working on old vehicles. Finding cool items that haven't seen the light of day for decades is kinda fun
One of the first items I took care of was the wiring harness only because I don't know much about these modern systems so it weighed on my mind. I found Steve at Westcoast Wirewerks in Vancouver, B.C. who did a fantastic job and was quick and responsive. He even test runs his harnesses on an LS prior to shipping. I sent the ECU to get reflashed to Brendan who runs LT1swap.com. I feel with that website resource and the right tools, making your own harness could be kinda fun. Noted for future builds. We got all the Holley pieces on the motor and it was time for the initial test fit. I think in total we had the engine/trans in and out of the car 3 times, which isn't that bad but I do give credit to Holley engineering for the fit.
Trap door if the cops pull me over
It's so cool to think that receipt fell under the seat pretty much perfect condition and stayed there for over 30 years!
More cool junk.. I took a bunch of pics on that disposable camera to get it developed.. I'll have to follow up on that. The ratcheting 10 mm wrench is awesome and will be used a LOT. I have like 2 others haha
http://www.westcoastwirewerks.com/
This shows the new oil pan profile and the mounts bolted to the block.. you can also see the head gasket tab
New clamshells ready to rock
Having the leveler on the hoist is nice because you can change angles on the fly
Nice work! Looking forward to seeing more photos, and seeing/hearing about how all of the Holley LS swap parts work together.
liquidh8
Comic Book Super Hero
The whole unit went in without much drama.. with hindsight we probably should have removed the front clip to make life easier overall - especially with so much suspension work (coming soon!). The one thing that did cause a little hang up was the passenger side mount not aligning perfectly with the hole in the frame mount. I know these cars had some loose tolerances from the factories, which may be the culprit. Anyway, with a really big stick we had to work that b*st*rd in with brute force. Amazing that a half inch discrepancy can derail progress very quickly.
The truck pedal assembly had to be modified to fit. Since vans and trucks have a ton of room they have pretty long arms, so we cut out maybe a couple inches and reversed the curve of the arm. So basically cut, cut, cut, flip, weld, weld. Of course, we had to measure, mock up, measure, mock up, ad infinitum. I used one stock bolt hole for reference - luckily the bolt worked for the new pedal. Then I had drilled an upper hole, but my mistake was not fully uncovering the firewall where I was working. There's a small pedestal tab that I failed to see and ended up having to cut back more insulation and cut the tab off so the pedal would sit flush and be rock solid. It did mess up the pedal travel a tiny bit but it bottoms out before hitting the floor so it's OK.
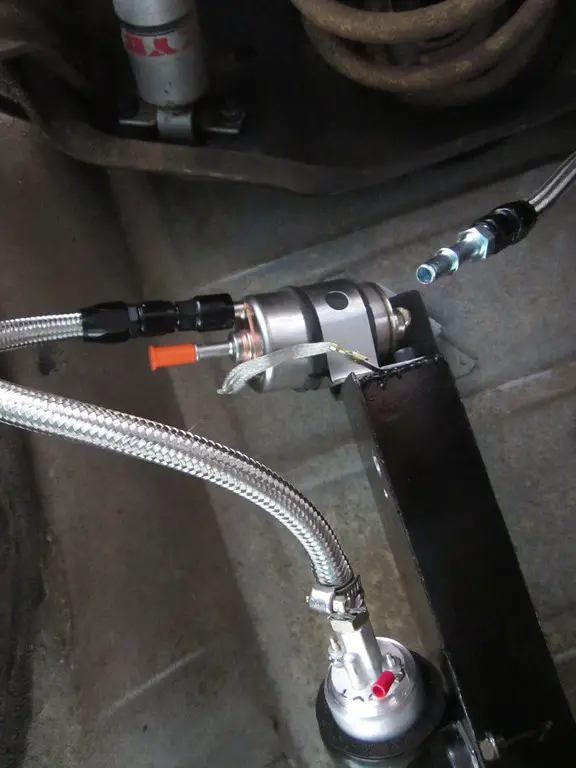
Ah, on to the fuel system. This turned out to be the biggest headache overall, only because we had planned it and changed it so many times.. and not knowing what fittings work with what components.. it lead to a ton of extra work, curse words and bathing hands and arms in gasoline. Not great times. We had started with the idea of a hanger to put the pre-filter, pump and filter/regulator all in one tidy row. Hell no. It's way too much stuff to jam up in the rear axle well area, not to mention the pump would sit higher than the tank (really not good) and the exhaust probably wouldn't clear. More on this system later, but my best advise to prospective LS swappers is to plan the fuel system well, and if something like an EFI replacement tank is available for your car, just spend the $$. Well worth it in the end.
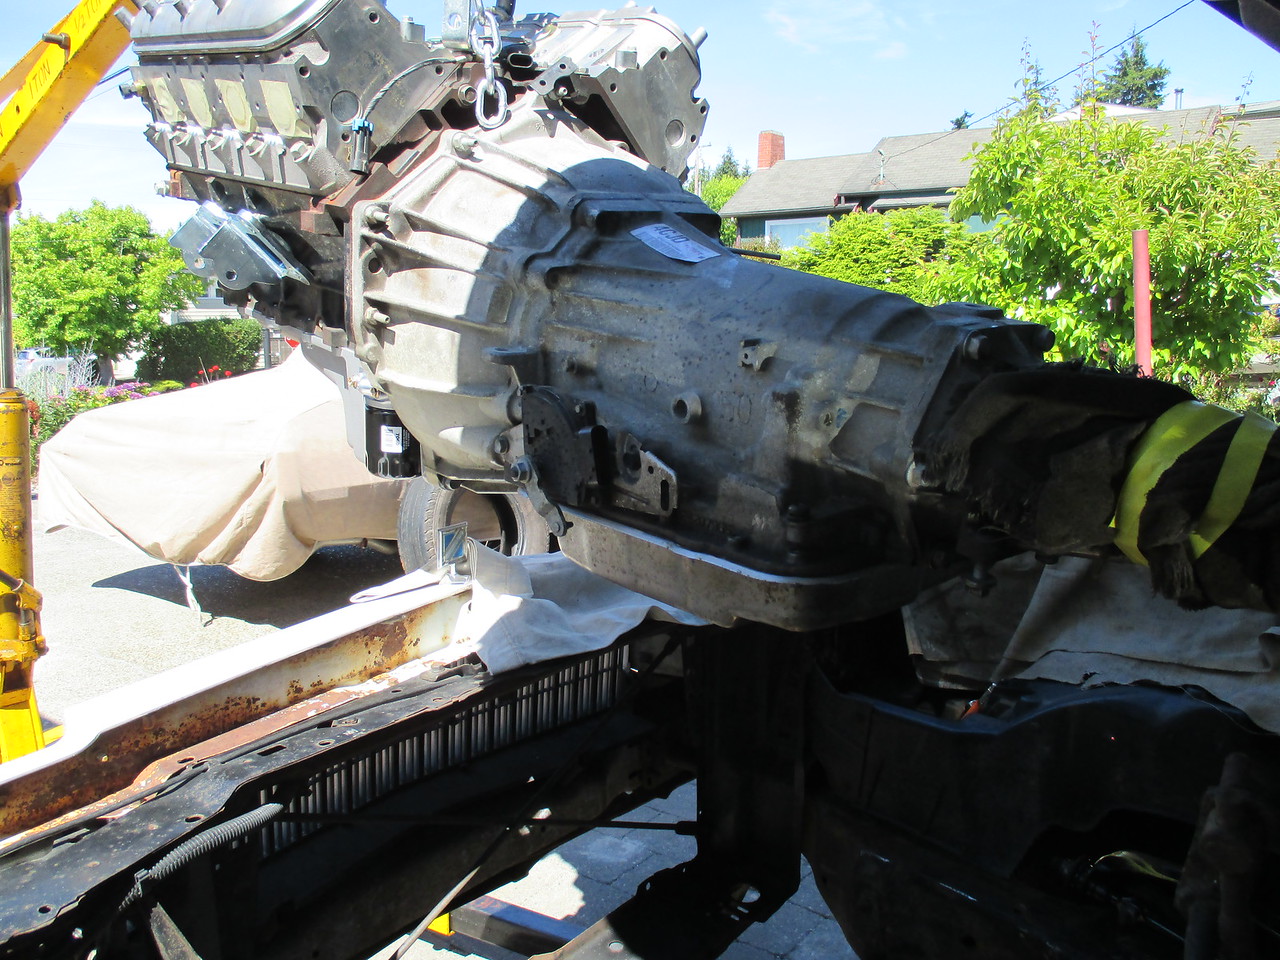
And we're up...
bingo!
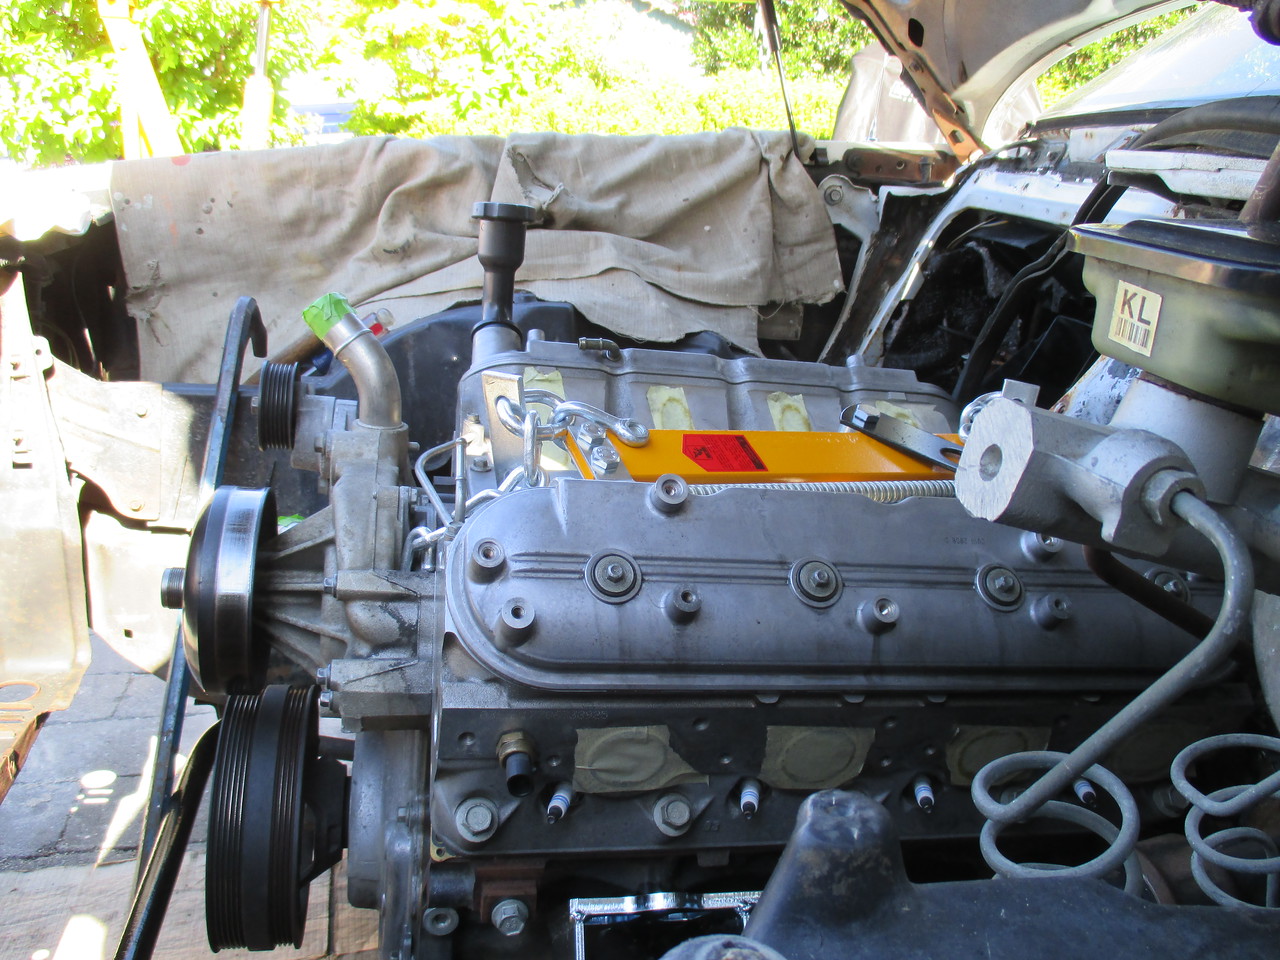
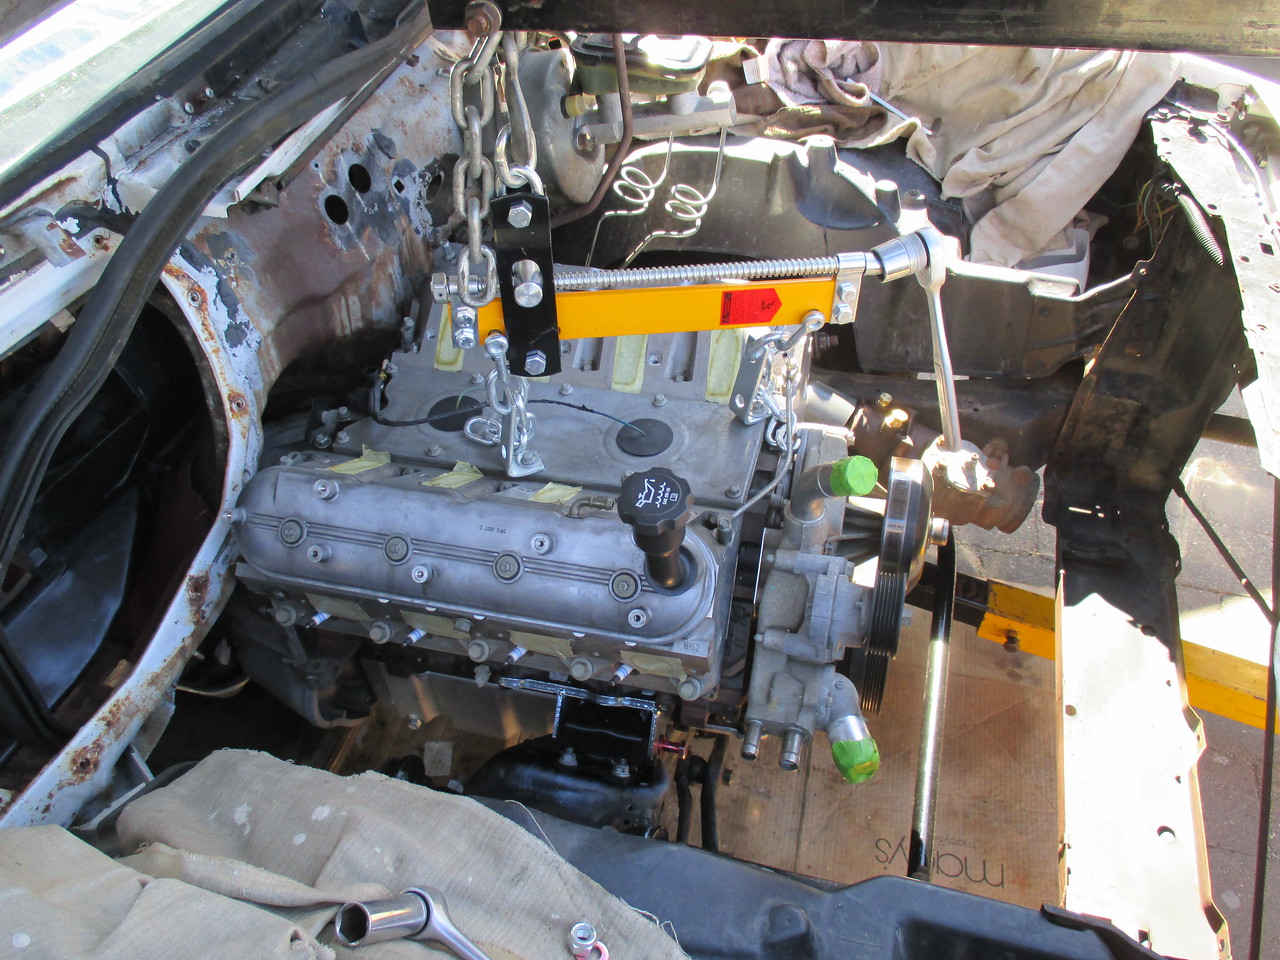
It looks really low in this shot, but you have to remember the truck intake is very tall. You can see the "persuader" bar in the front 🙂
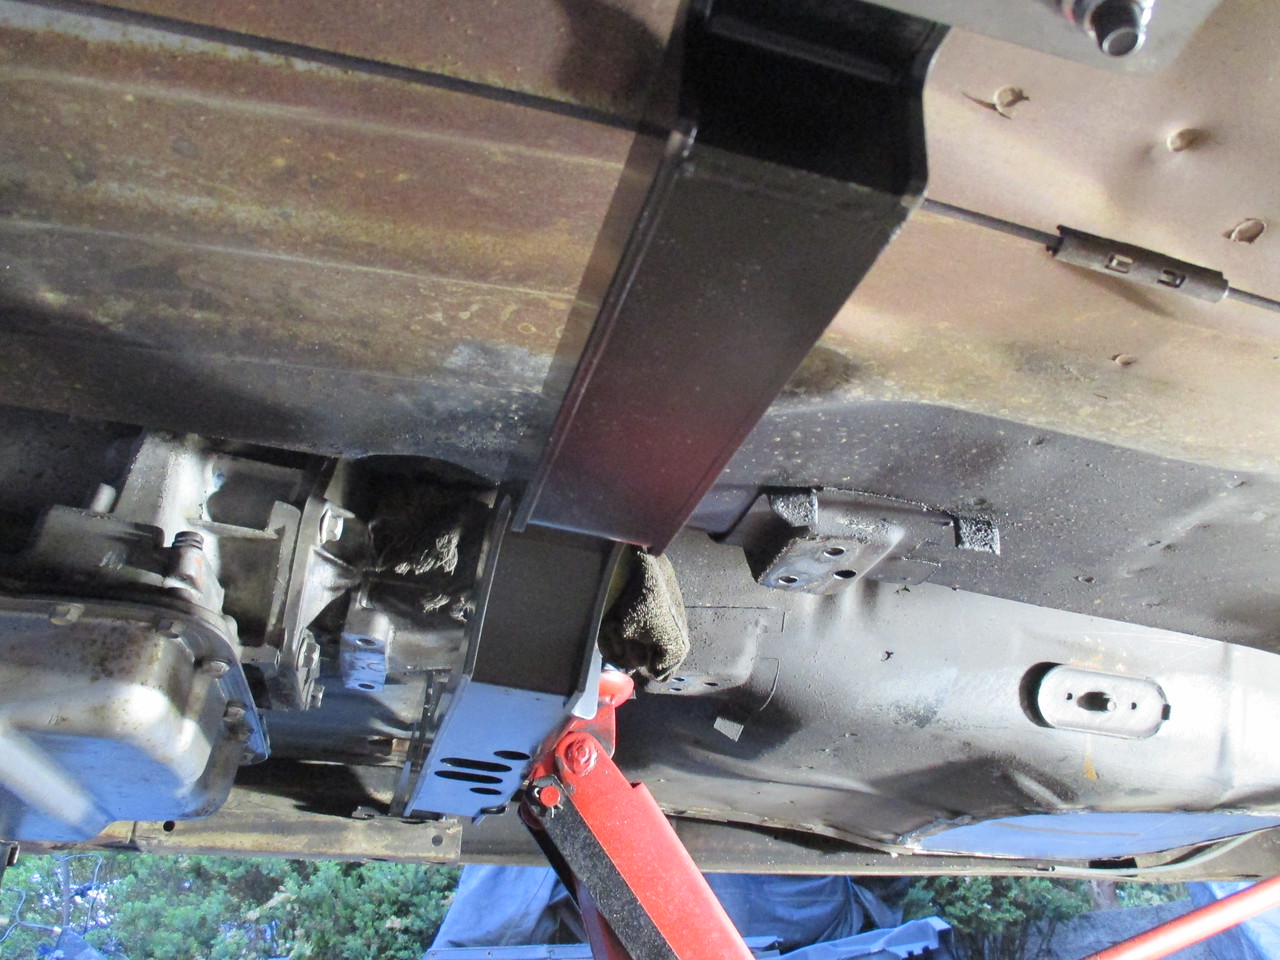
Initial mock up of the trans crossmember.. Since the car was originally a 3-speed, we had to use the frame extender from Holley. It was not at all clear how these 3 or so pieces bolted together. After some back and forth on the LS forum with with "Toddoky" who is an engineer with Holley, it easily bolted right up. If they only included a clear diagram (Ikea style), it would be a quick step
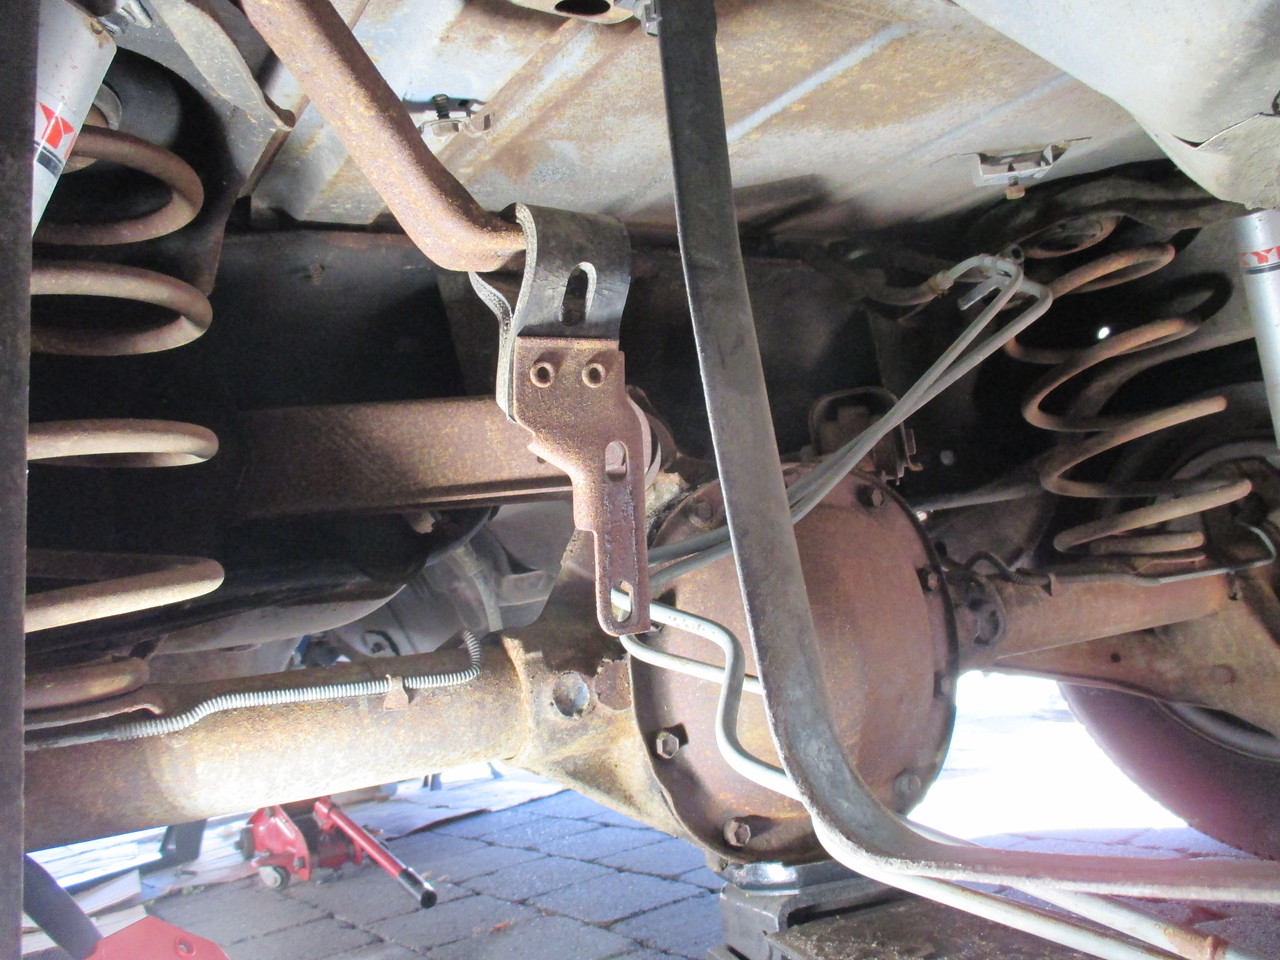
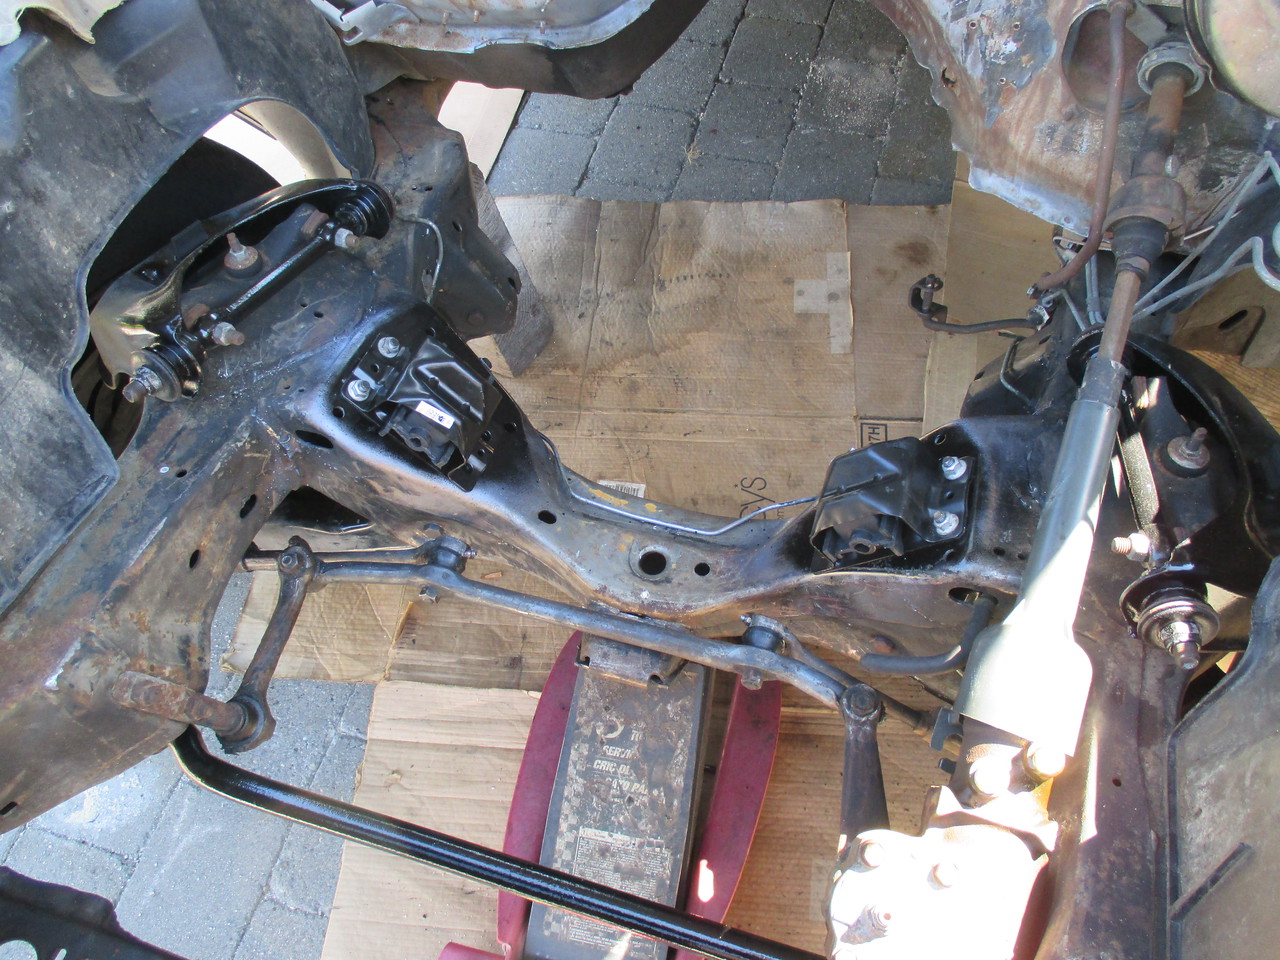
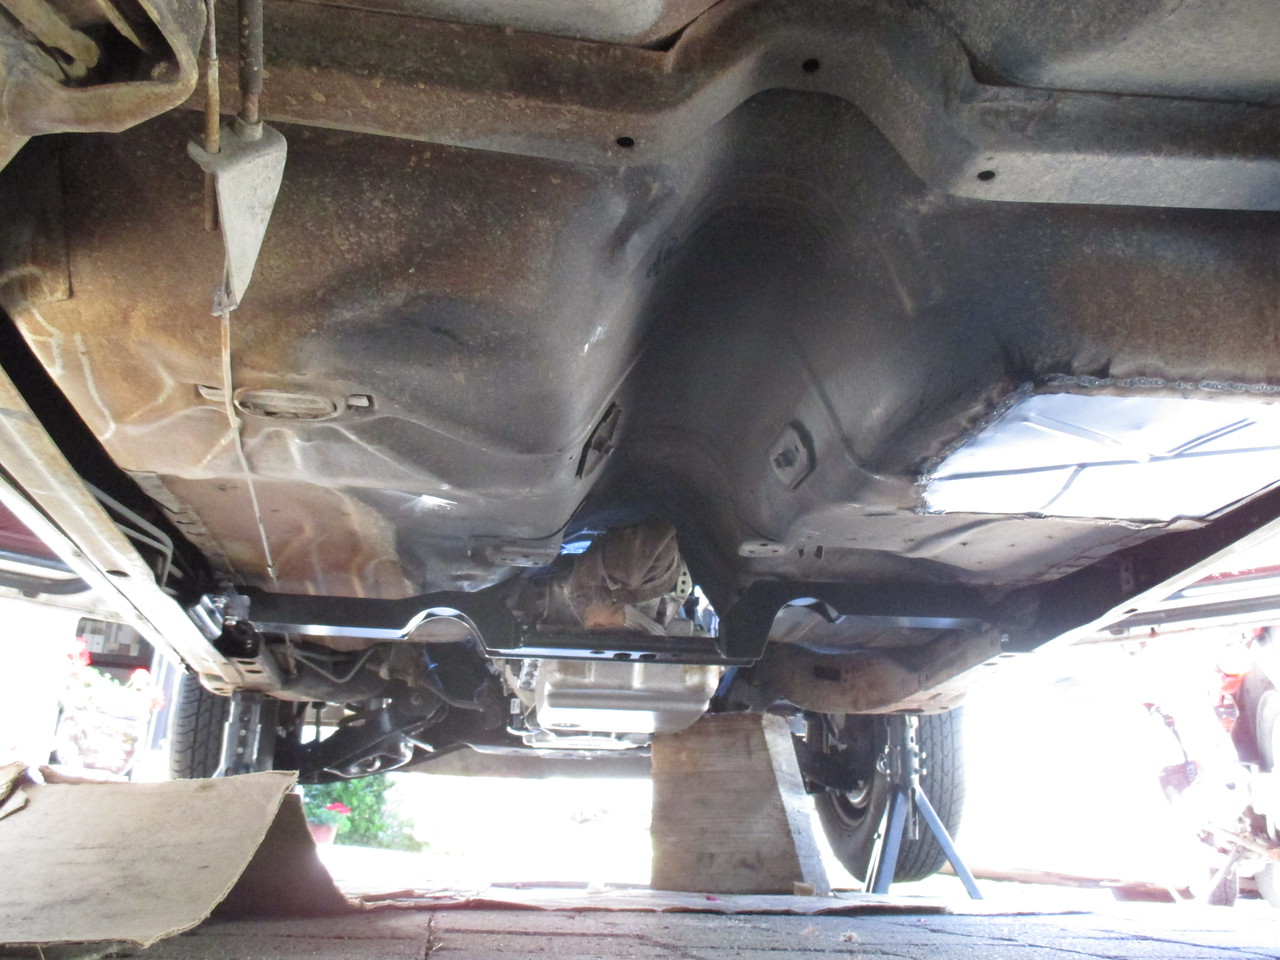
Here's a tanks-eye-view (station wagon tanks are different from other models!) of the rear underside. Still need to replace that little 7.5" rear

pedal assy with the curve piece flipped
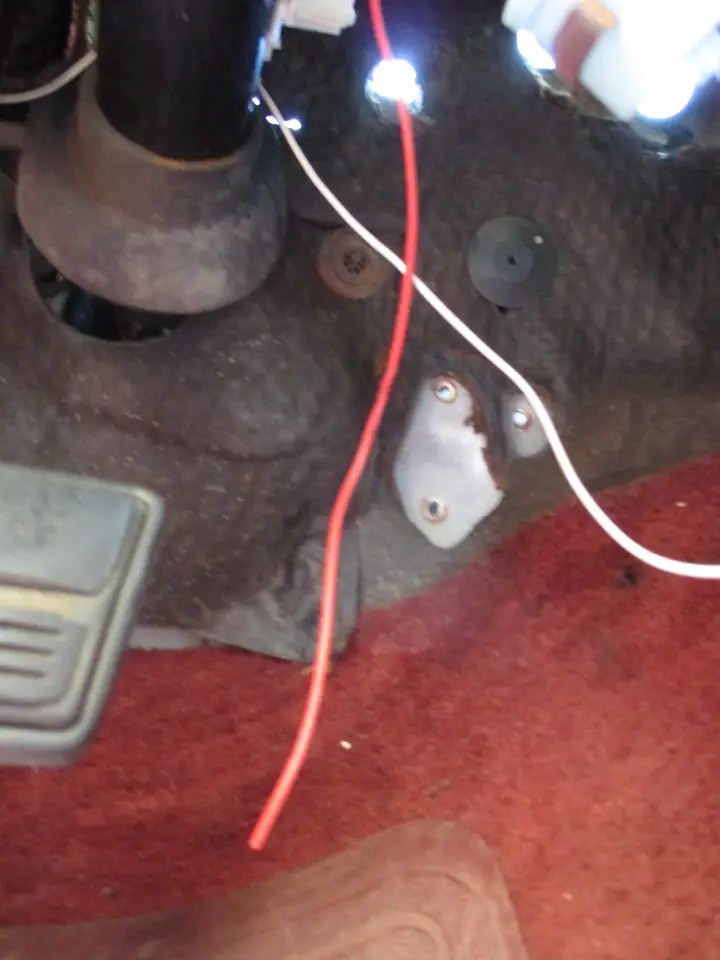
Sorry for crappy pic, but this shows where I would bolt the new pedal. Using the stock bottom hole and drilling up to the right of that insulation retainer - which turns out is on a little pedestal! WTF!
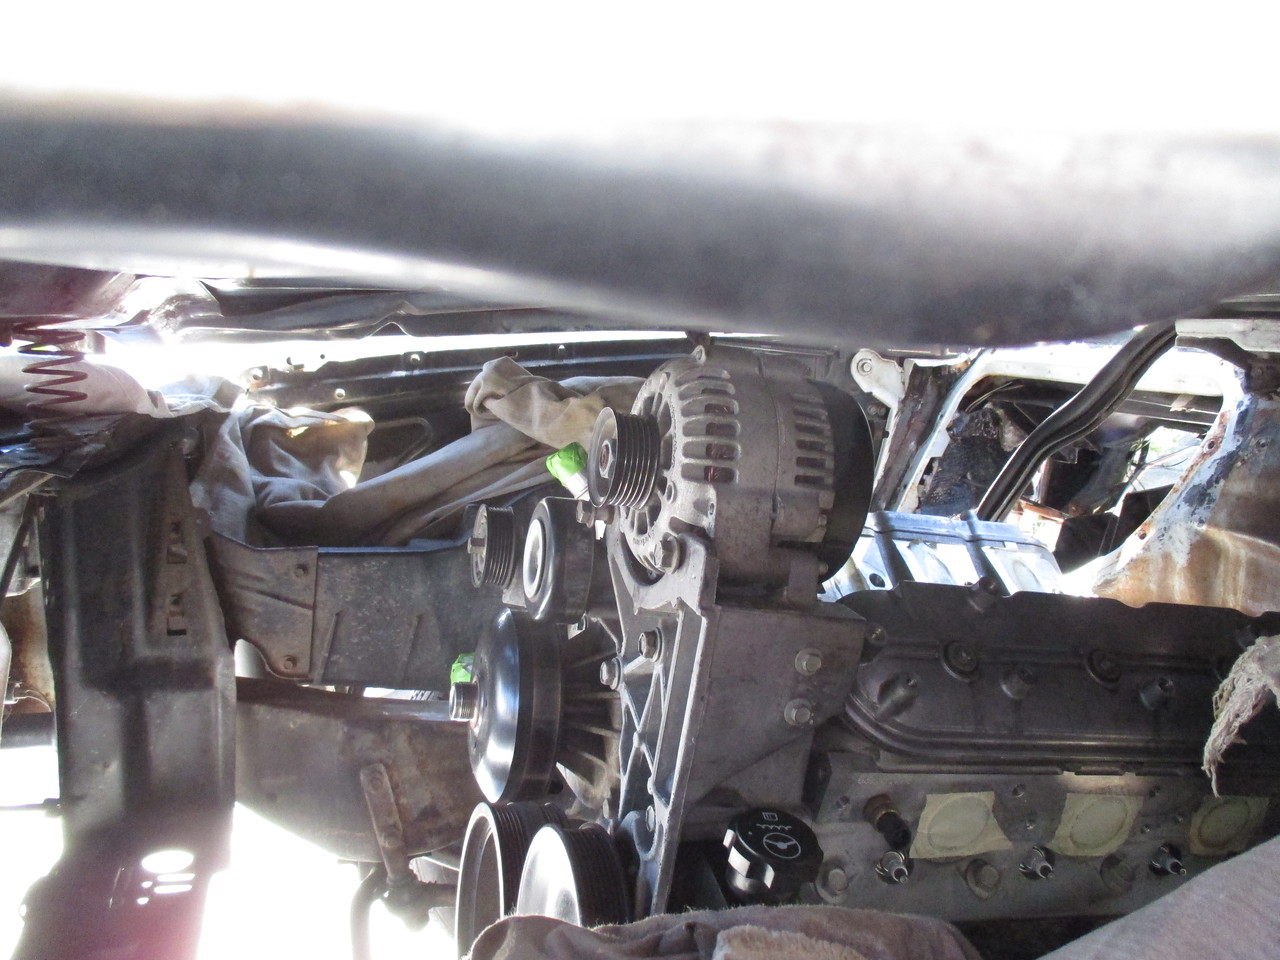
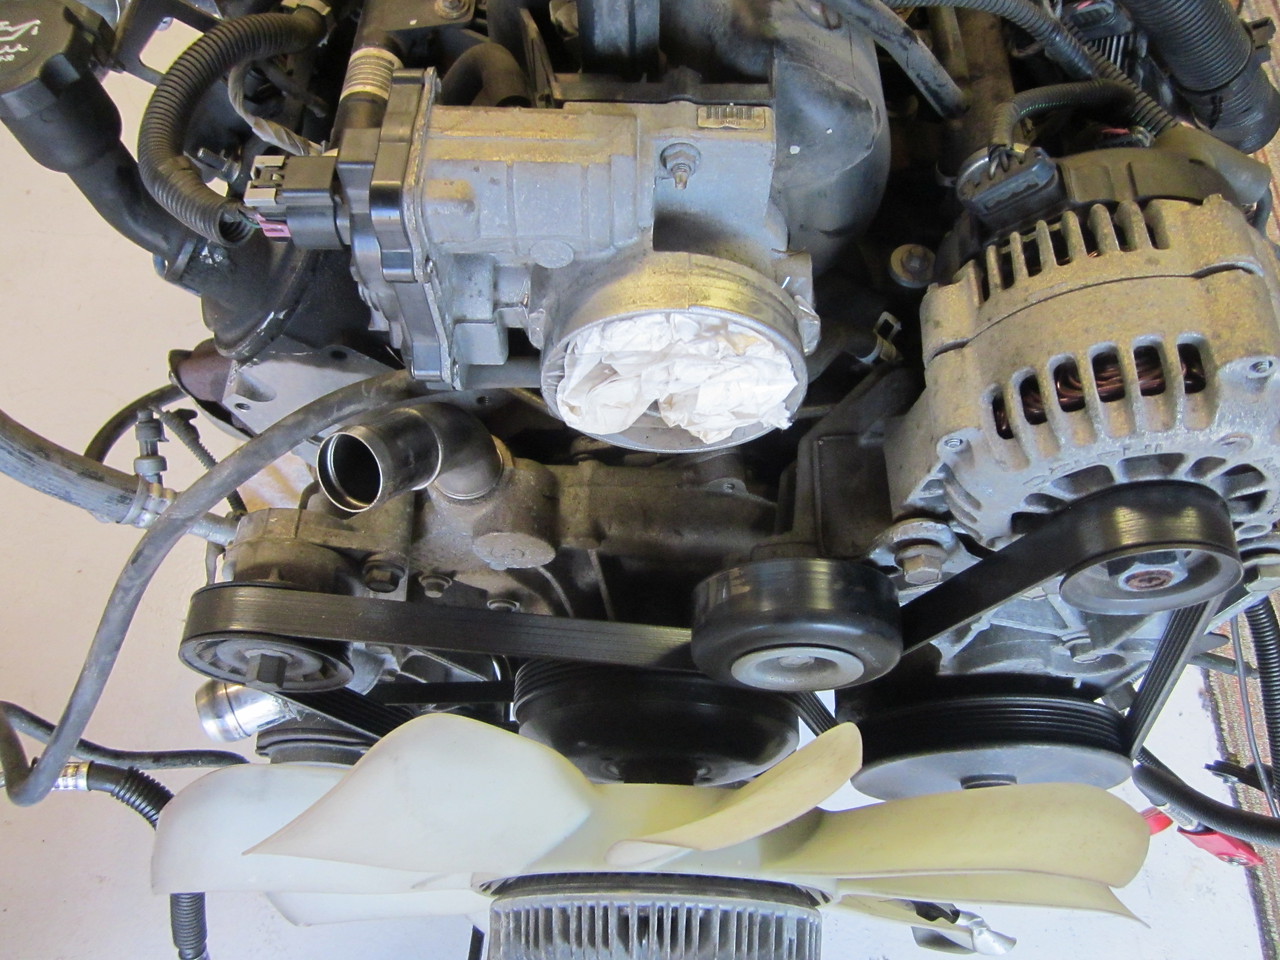
This shows a little of the clearance - the truck alternator mount sits really high, but thankfully this cleared fine. The truck intake is another issue, but one can cut off some material on the top to help
Here's the final trans x-member fitment.. and you can see the New New Stock floorpan in place

Here's our trick fuel system bracket that would prove to be a waste of time
Much more fuel system to come in future installments!
The truck pedal assembly had to be modified to fit. Since vans and trucks have a ton of room they have pretty long arms, so we cut out maybe a couple inches and reversed the curve of the arm. So basically cut, cut, cut, flip, weld, weld. Of course, we had to measure, mock up, measure, mock up, ad infinitum. I used one stock bolt hole for reference - luckily the bolt worked for the new pedal. Then I had drilled an upper hole, but my mistake was not fully uncovering the firewall where I was working. There's a small pedestal tab that I failed to see and ended up having to cut back more insulation and cut the tab off so the pedal would sit flush and be rock solid. It did mess up the pedal travel a tiny bit but it bottoms out before hitting the floor so it's OK.
Ah, on to the fuel system. This turned out to be the biggest headache overall, only because we had planned it and changed it so many times.. and not knowing what fittings work with what components.. it lead to a ton of extra work, curse words and bathing hands and arms in gasoline. Not great times. We had started with the idea of a hanger to put the pre-filter, pump and filter/regulator all in one tidy row. Hell no. It's way too much stuff to jam up in the rear axle well area, not to mention the pump would sit higher than the tank (really not good) and the exhaust probably wouldn't clear. More on this system later, but my best advise to prospective LS swappers is to plan the fuel system well, and if something like an EFI replacement tank is available for your car, just spend the $$. Well worth it in the end.
And we're up...
bingo!
It looks really low in this shot, but you have to remember the truck intake is very tall. You can see the "persuader" bar in the front 🙂
Initial mock up of the trans crossmember.. Since the car was originally a 3-speed, we had to use the frame extender from Holley. It was not at all clear how these 3 or so pieces bolted together. After some back and forth on the LS forum with with "Toddoky" who is an engineer with Holley, it easily bolted right up. If they only included a clear diagram (Ikea style), it would be a quick step
Here's a tanks-eye-view (station wagon tanks are different from other models!) of the rear underside. Still need to replace that little 7.5" rear
pedal assy with the curve piece flipped
Sorry for crappy pic, but this shows where I would bolt the new pedal. Using the stock bottom hole and drilling up to the right of that insulation retainer - which turns out is on a little pedestal! WTF!
This shows a little of the clearance - the truck alternator mount sits really high, but thankfully this cleared fine. The truck intake is another issue, but one can cut off some material on the top to help
Here's the final trans x-member fitment.. and you can see the New New Stock floorpan in place
Here's our trick fuel system bracket that would prove to be a waste of time
Much more fuel system to come in future installments!
Last edited:
Sorry it's been forever since I've updated this thread.. onward!
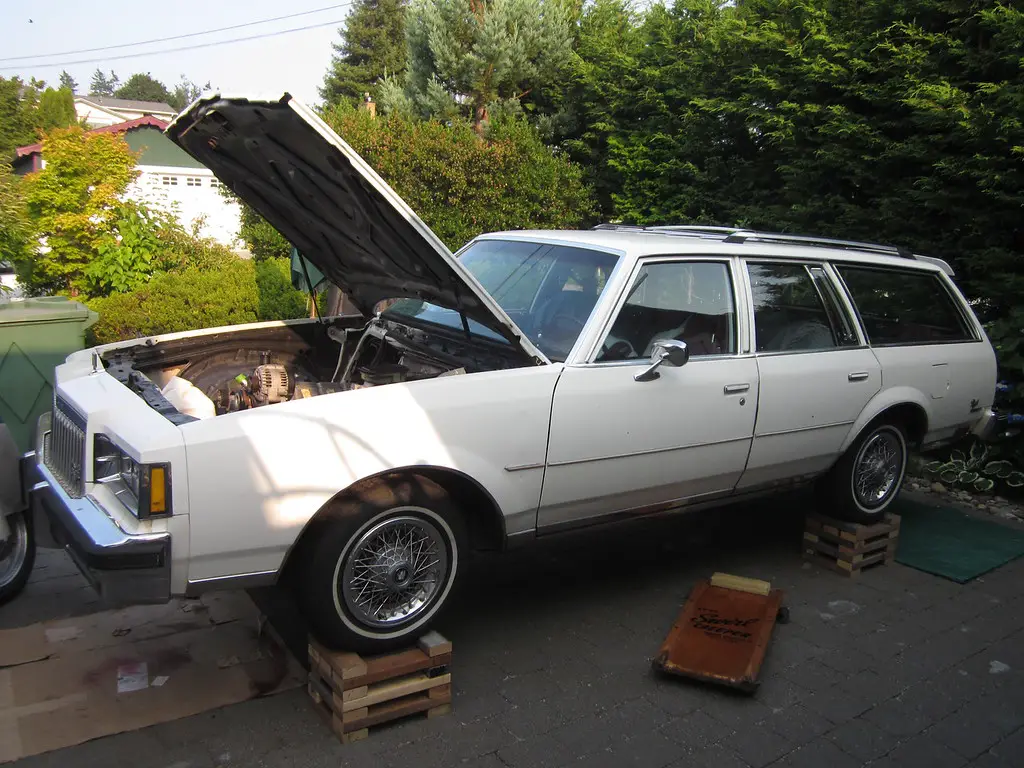
We had built homemade cribs to raise the vehicle up on the tires - this is nice to have unless you have the luxury of a lift. We were sliding and rolling around a lot under the car. Especially for that damn gas tank! For all the effort it would have been well worth having a custom tank built and I'm still contemplating it now as the fuel system leaves a lot to be desired.
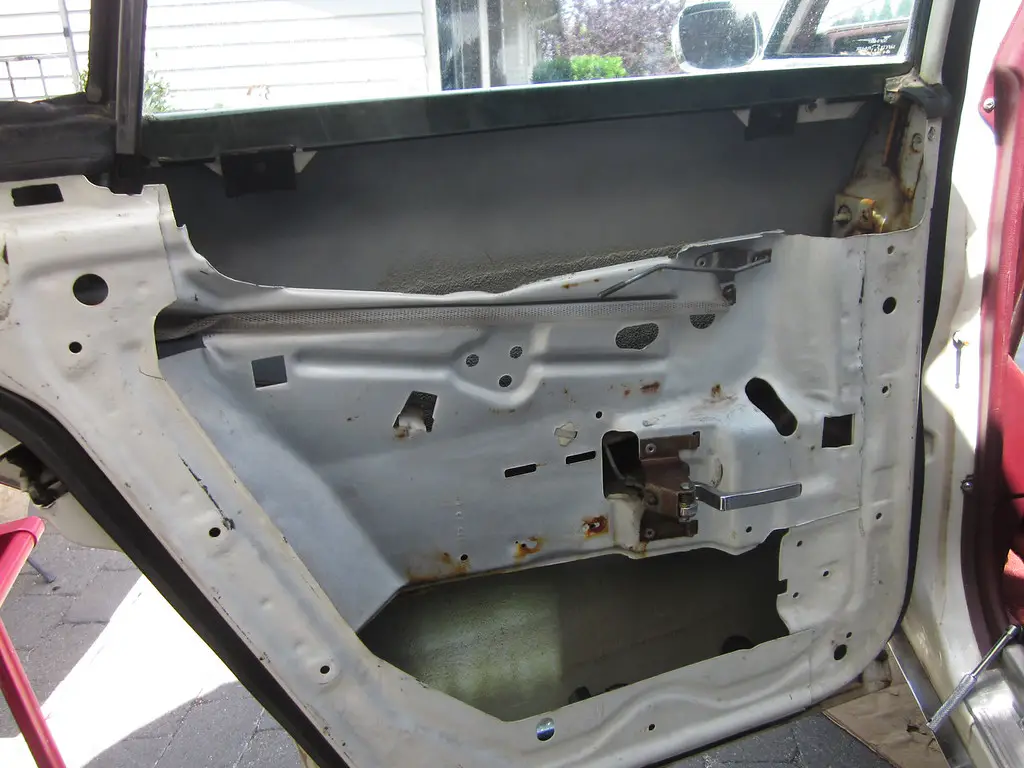
Luckily my dad likes a challenge as he took on the unenviable task of fixing the rear vent windows - the bottom posts rust out and I think it's a pretty common problem. The real bear was getting the trim off of them as the factory must have used some crazy industrial adhesive to put the assembly together. It took repeated heating, hammering and prying to get them off. He then welded the posts back in place, cleaned them up and put it all back together.
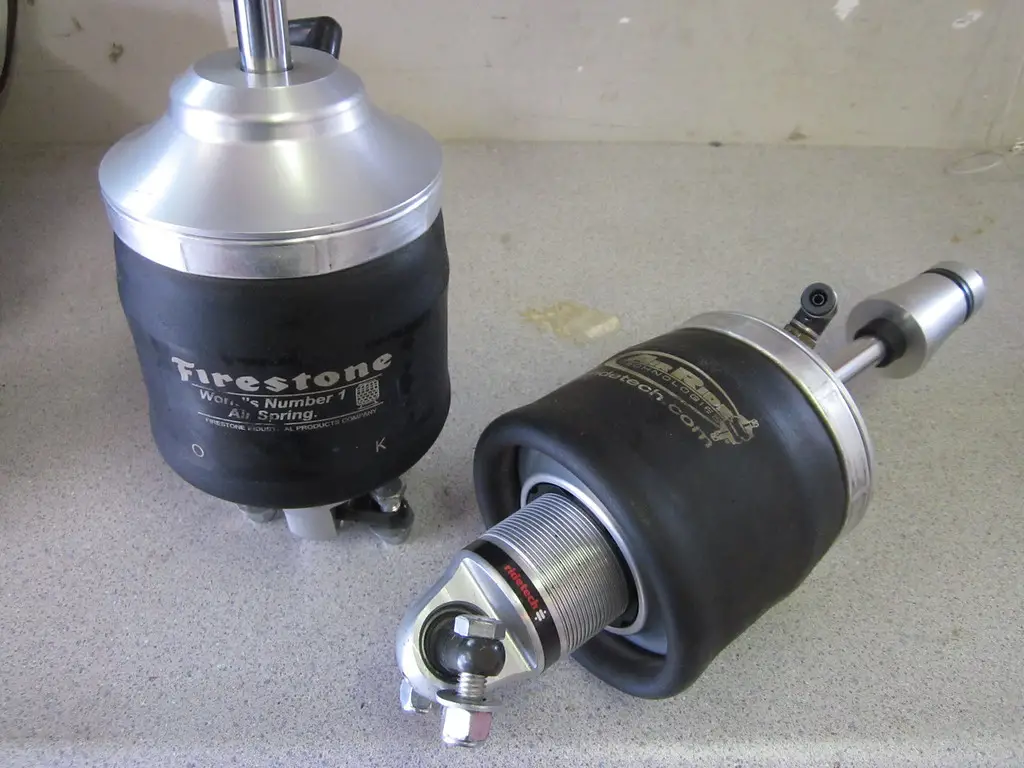
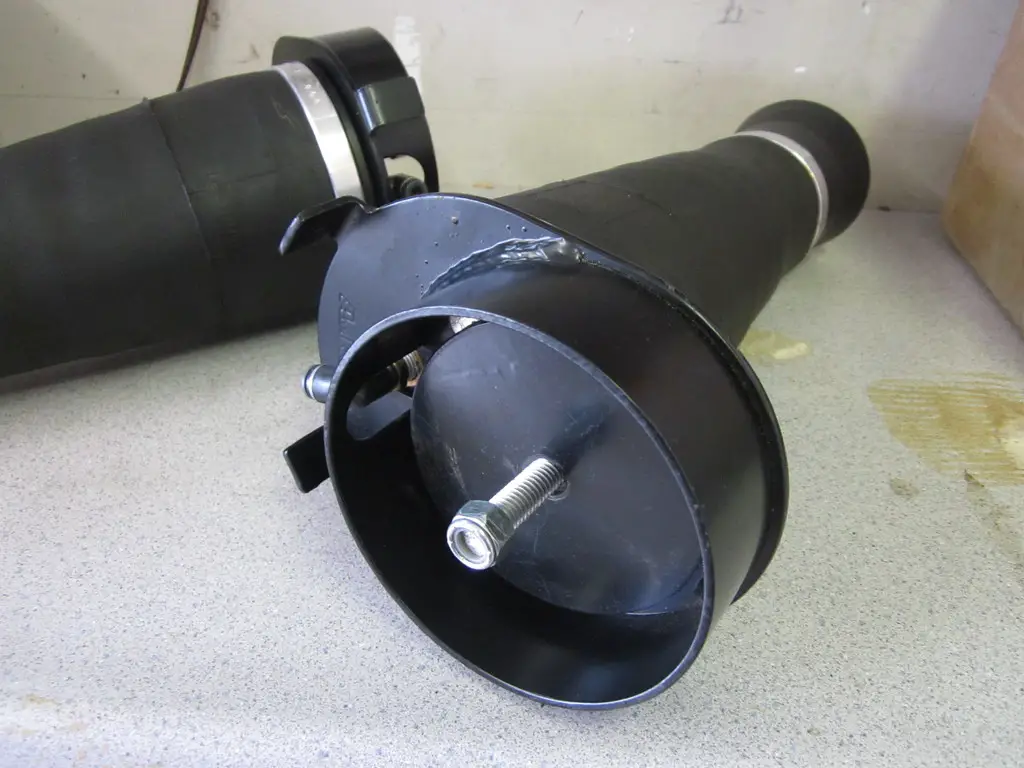
And the icing on the cake is the entire G-body Ride Tech system I found on Craigslist for about half the retail price. It's a gamble, but the parts appeared to be nice and not abused so I took a risk. It's amazing being able to change ride height whenever you want. However, it was tough to cut in to the car as you cannot really undo some of the installation steps. And it was a huge pain to install. 🙁
the vintage roller is essential

I wish I could just buy a tank, but the wagon ones are more square than rectangular
just dumb
wagon rear windows don't roll down
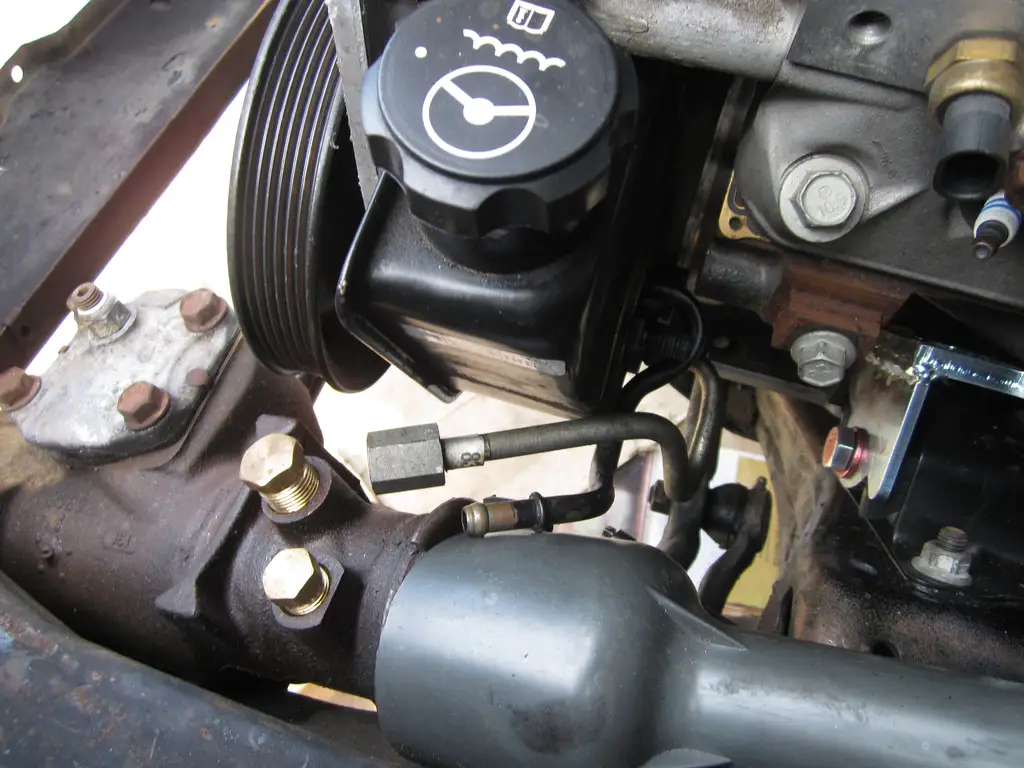
luckily the power steering pump cleared the box with minimal effort
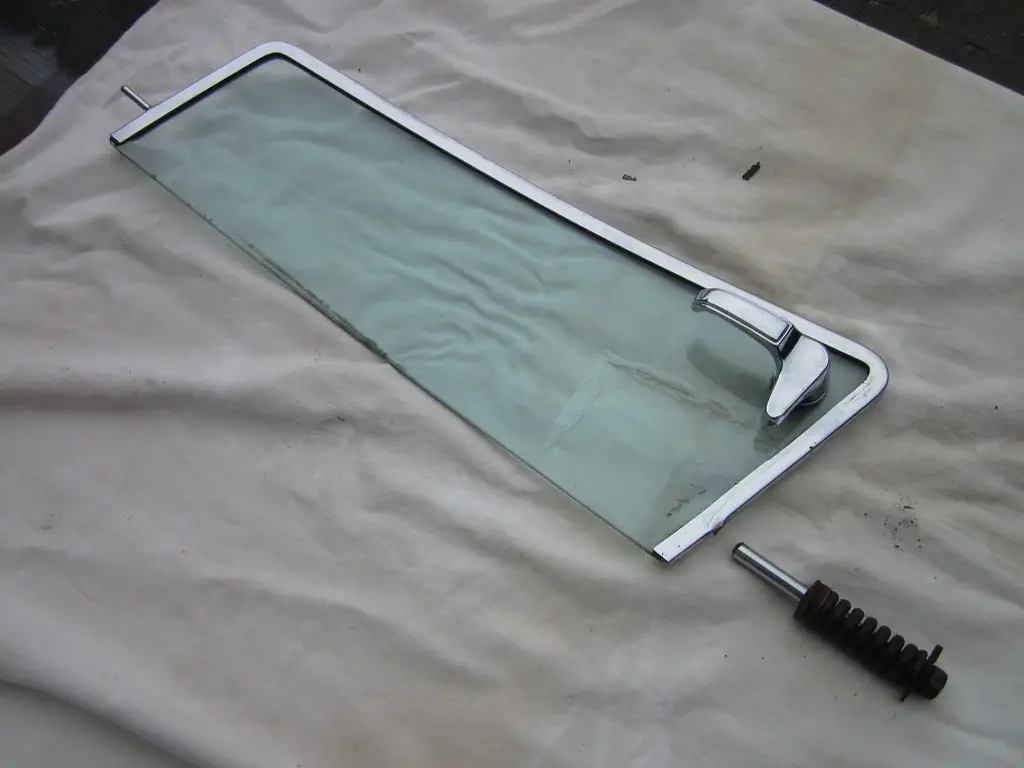
the lower posts rust off
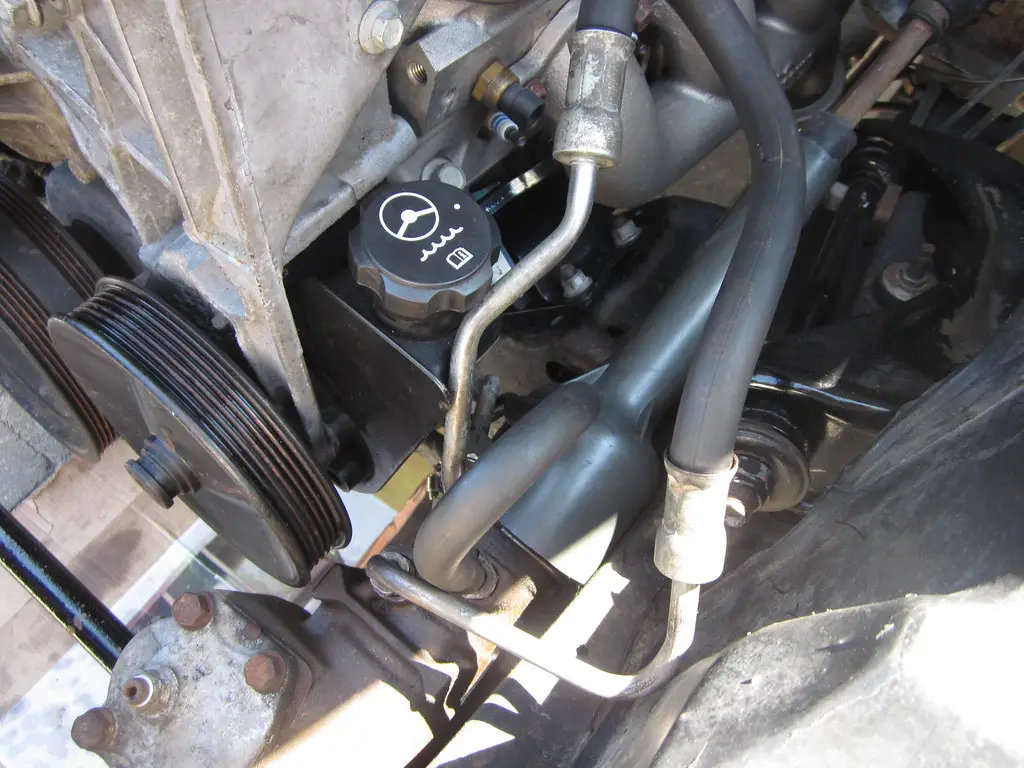
someday maybe I'll get a new pressure hose made
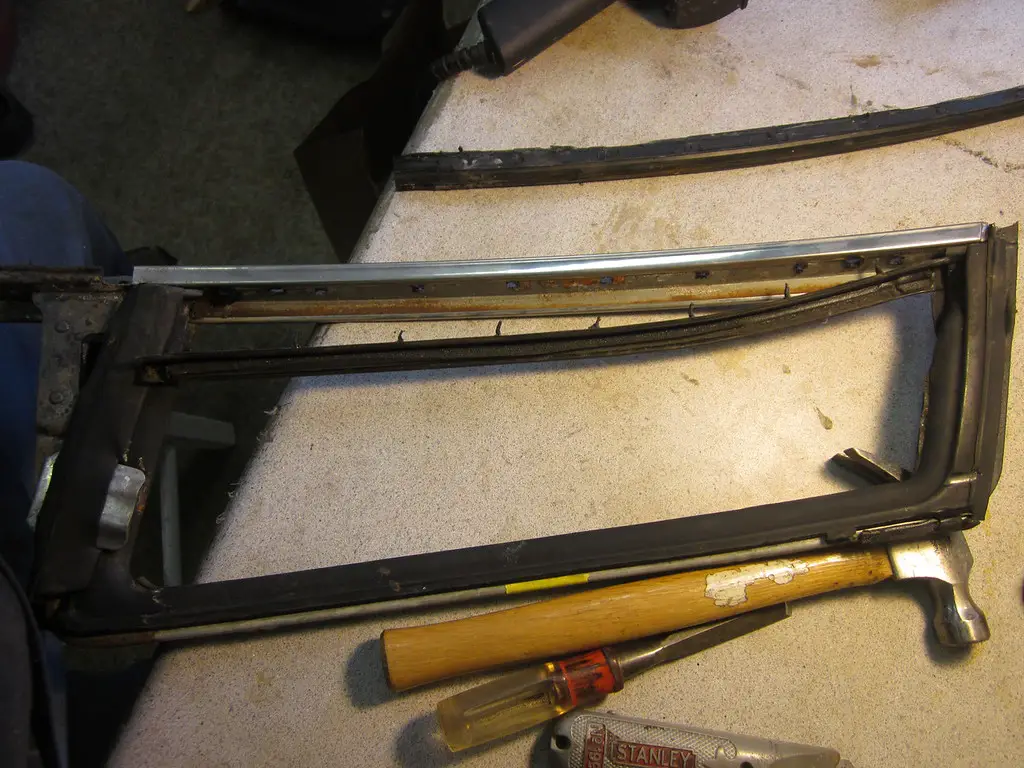
save the weatherstrip!!
ooooooooh!
ahhhhhhhh!
We had built homemade cribs to raise the vehicle up on the tires - this is nice to have unless you have the luxury of a lift. We were sliding and rolling around a lot under the car. Especially for that damn gas tank! For all the effort it would have been well worth having a custom tank built and I'm still contemplating it now as the fuel system leaves a lot to be desired.
Luckily my dad likes a challenge as he took on the unenviable task of fixing the rear vent windows - the bottom posts rust out and I think it's a pretty common problem. The real bear was getting the trim off of them as the factory must have used some crazy industrial adhesive to put the assembly together. It took repeated heating, hammering and prying to get them off. He then welded the posts back in place, cleaned them up and put it all back together.
And the icing on the cake is the entire G-body Ride Tech system I found on Craigslist for about half the retail price. It's a gamble, but the parts appeared to be nice and not abused so I took a risk. It's amazing being able to change ride height whenever you want. However, it was tough to cut in to the car as you cannot really undo some of the installation steps. And it was a huge pain to install. 🙁
the vintage roller is essential
I wish I could just buy a tank, but the wagon ones are more square than rectangular
just dumb
wagon rear windows don't roll down
luckily the power steering pump cleared the box with minimal effort
the lower posts rust off
someday maybe I'll get a new pressure hose made
save the weatherstrip!!
ooooooooh!
ahhhhhhhh!
What's the setback on the mounts your using
He is doing it right. Those are the Holley mounts for a G body.
Similar threads
- Replies
- 2
- Views
- 122
- Replies
- 28
- Views
- 1K
GBodyForum is a participant in the Amazon Services LLC Associates Program, an affiliate advertising program designed to provide a means for sites to earn advertising fees by advertising and linking to amazon.com. Amazon, the Amazon logo, AmazonSupply, and the AmazonSupply logo are trademarks of Amazon.com, Inc. or its affiliates.