83 Buick Regal Estate Wagon 5.3 LS, bagged

64nailhead

Goat Herder
Dec 1, 2014
5,712
1
12,229
113
Upstate NY
Advice about Holley, in case you aren’t aware, once you get this tuned after some reasonable amount of drive time - turn off the learn table via setting all of the values to 0%. I’ll explain if you ask, but you might know about this.

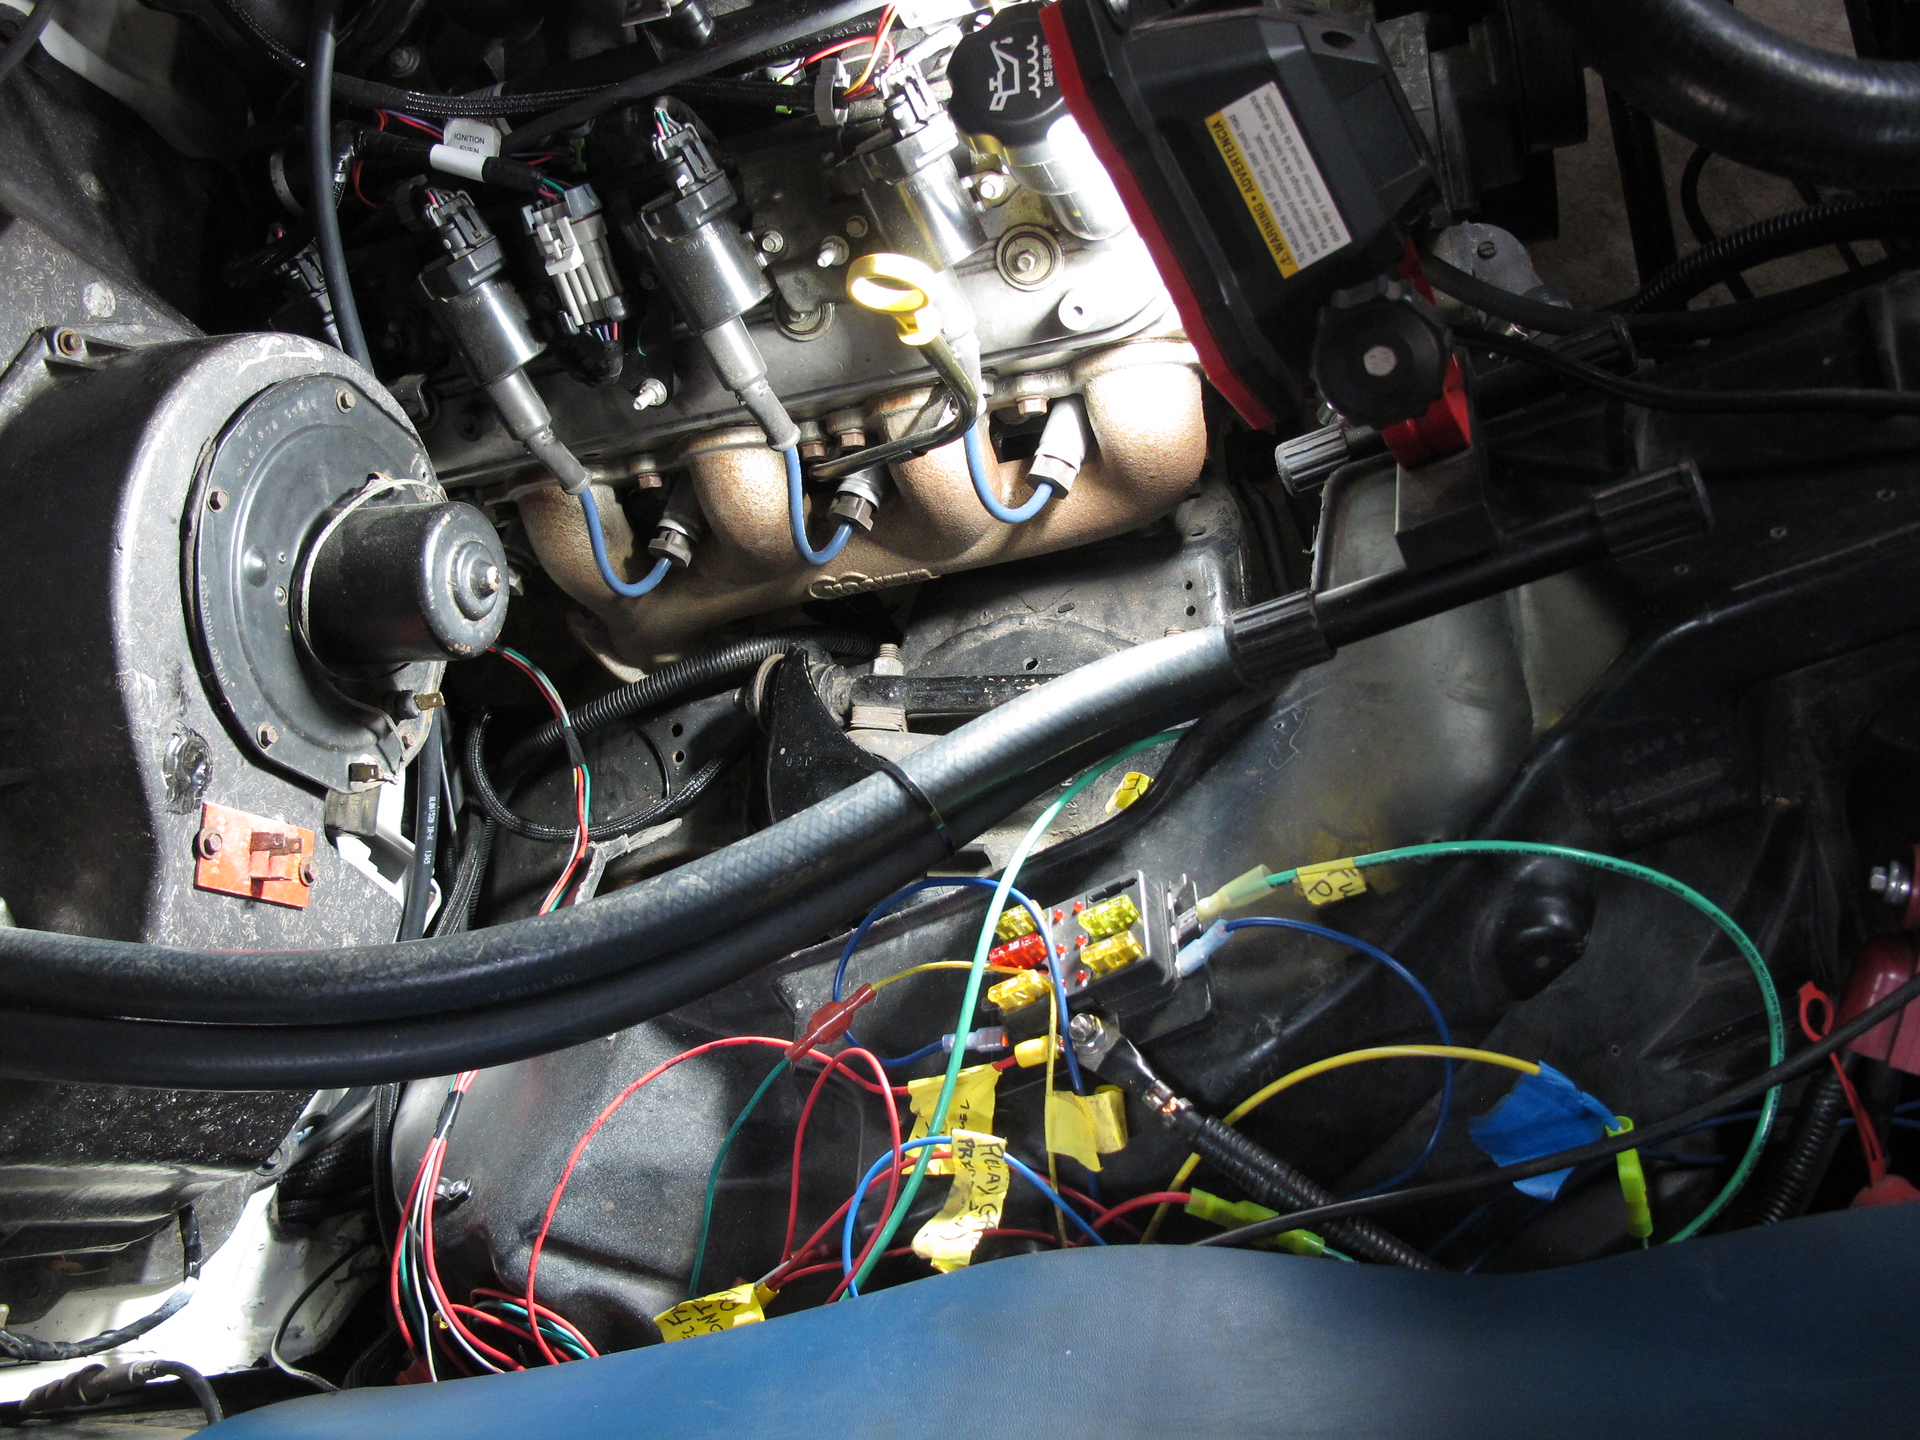
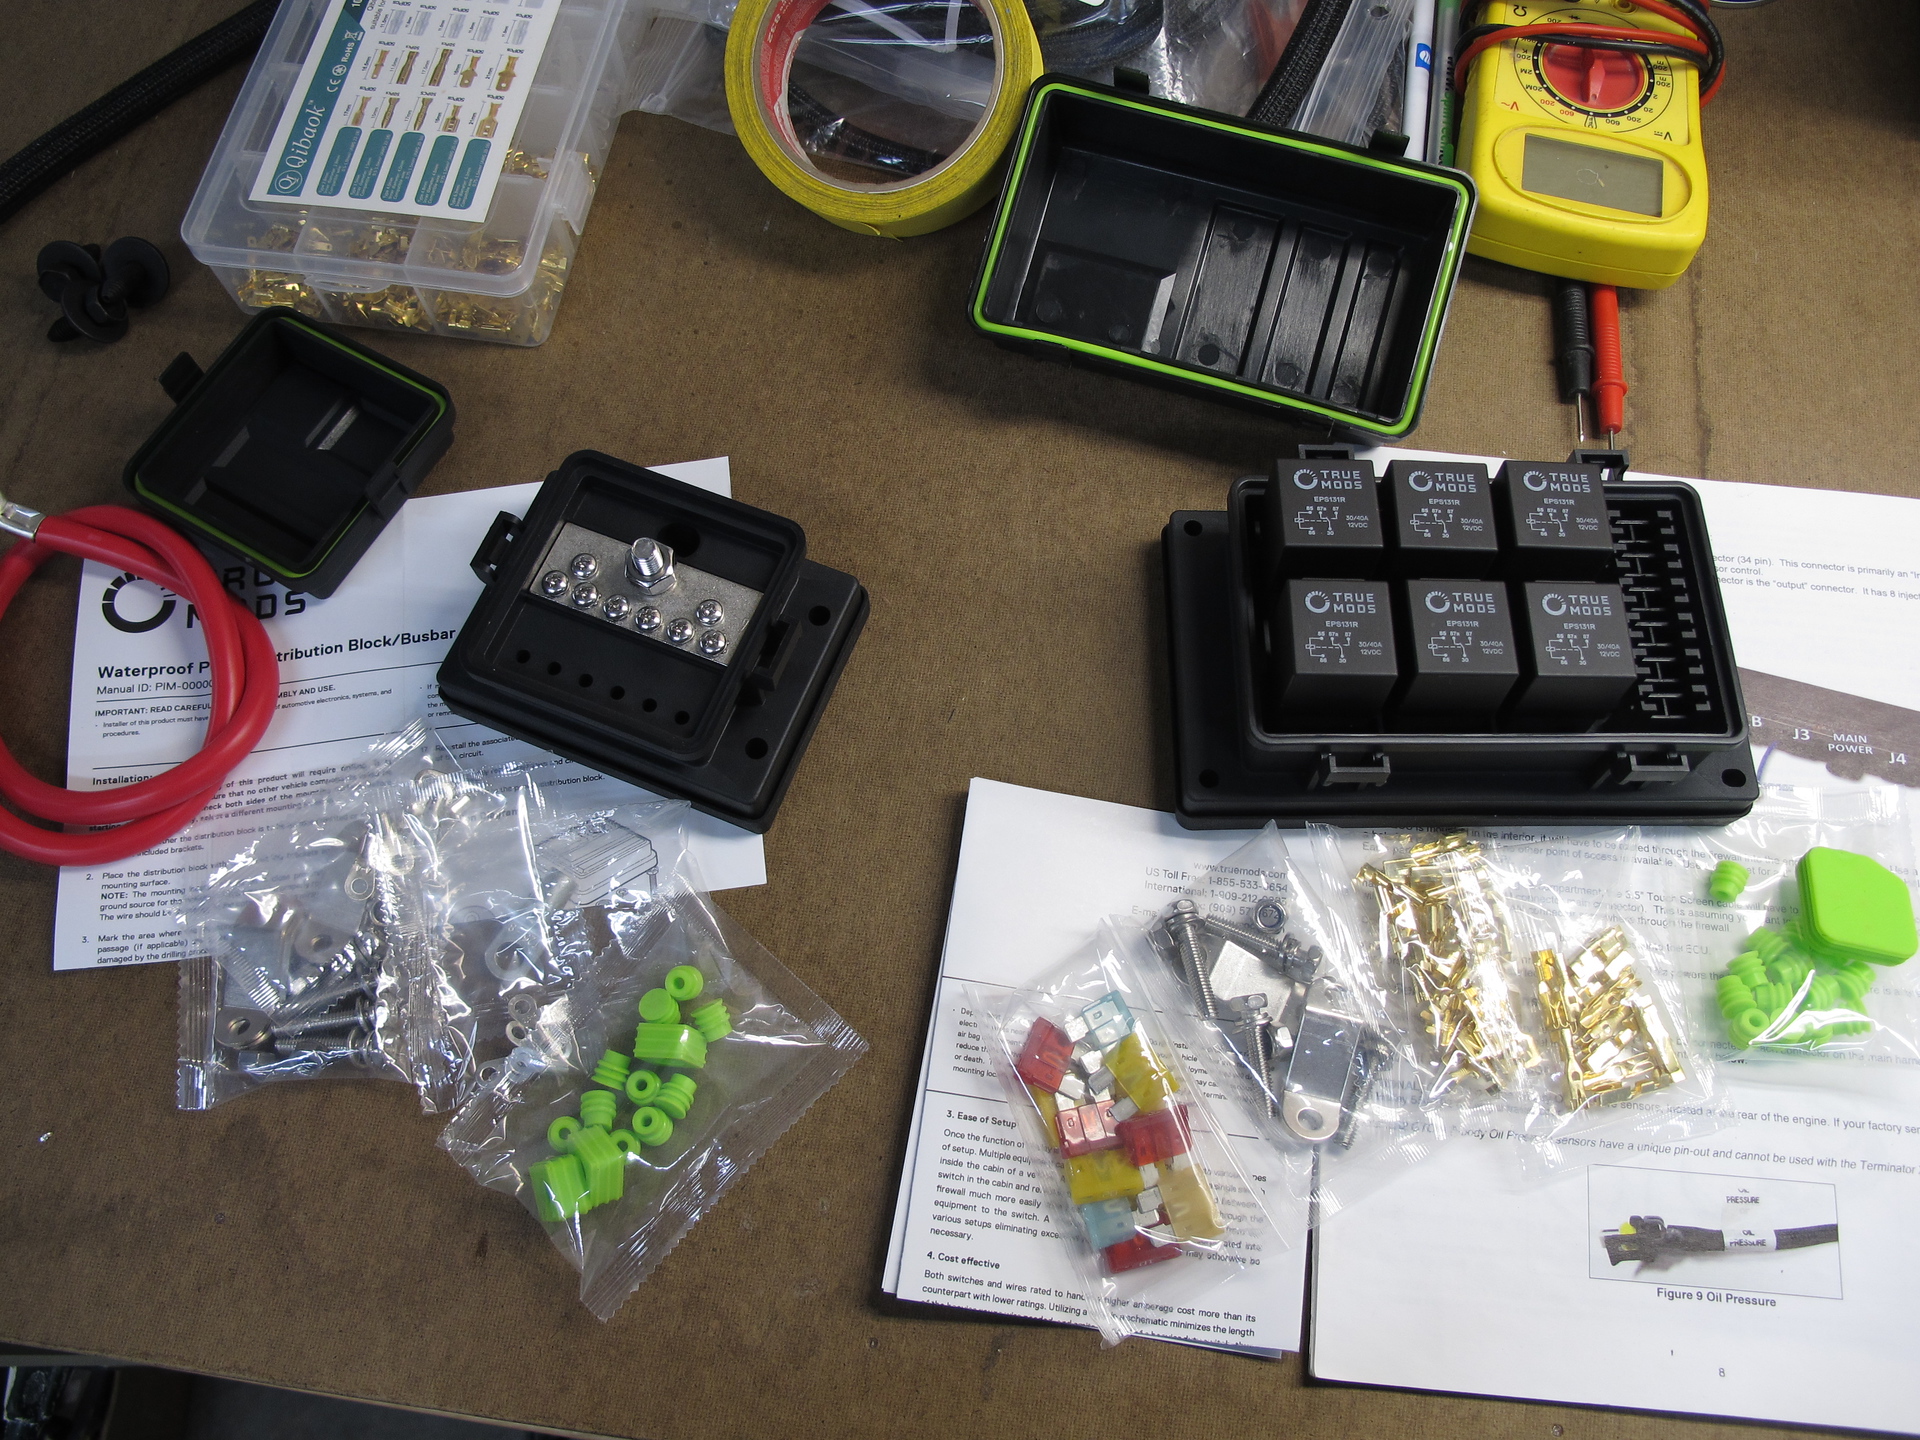
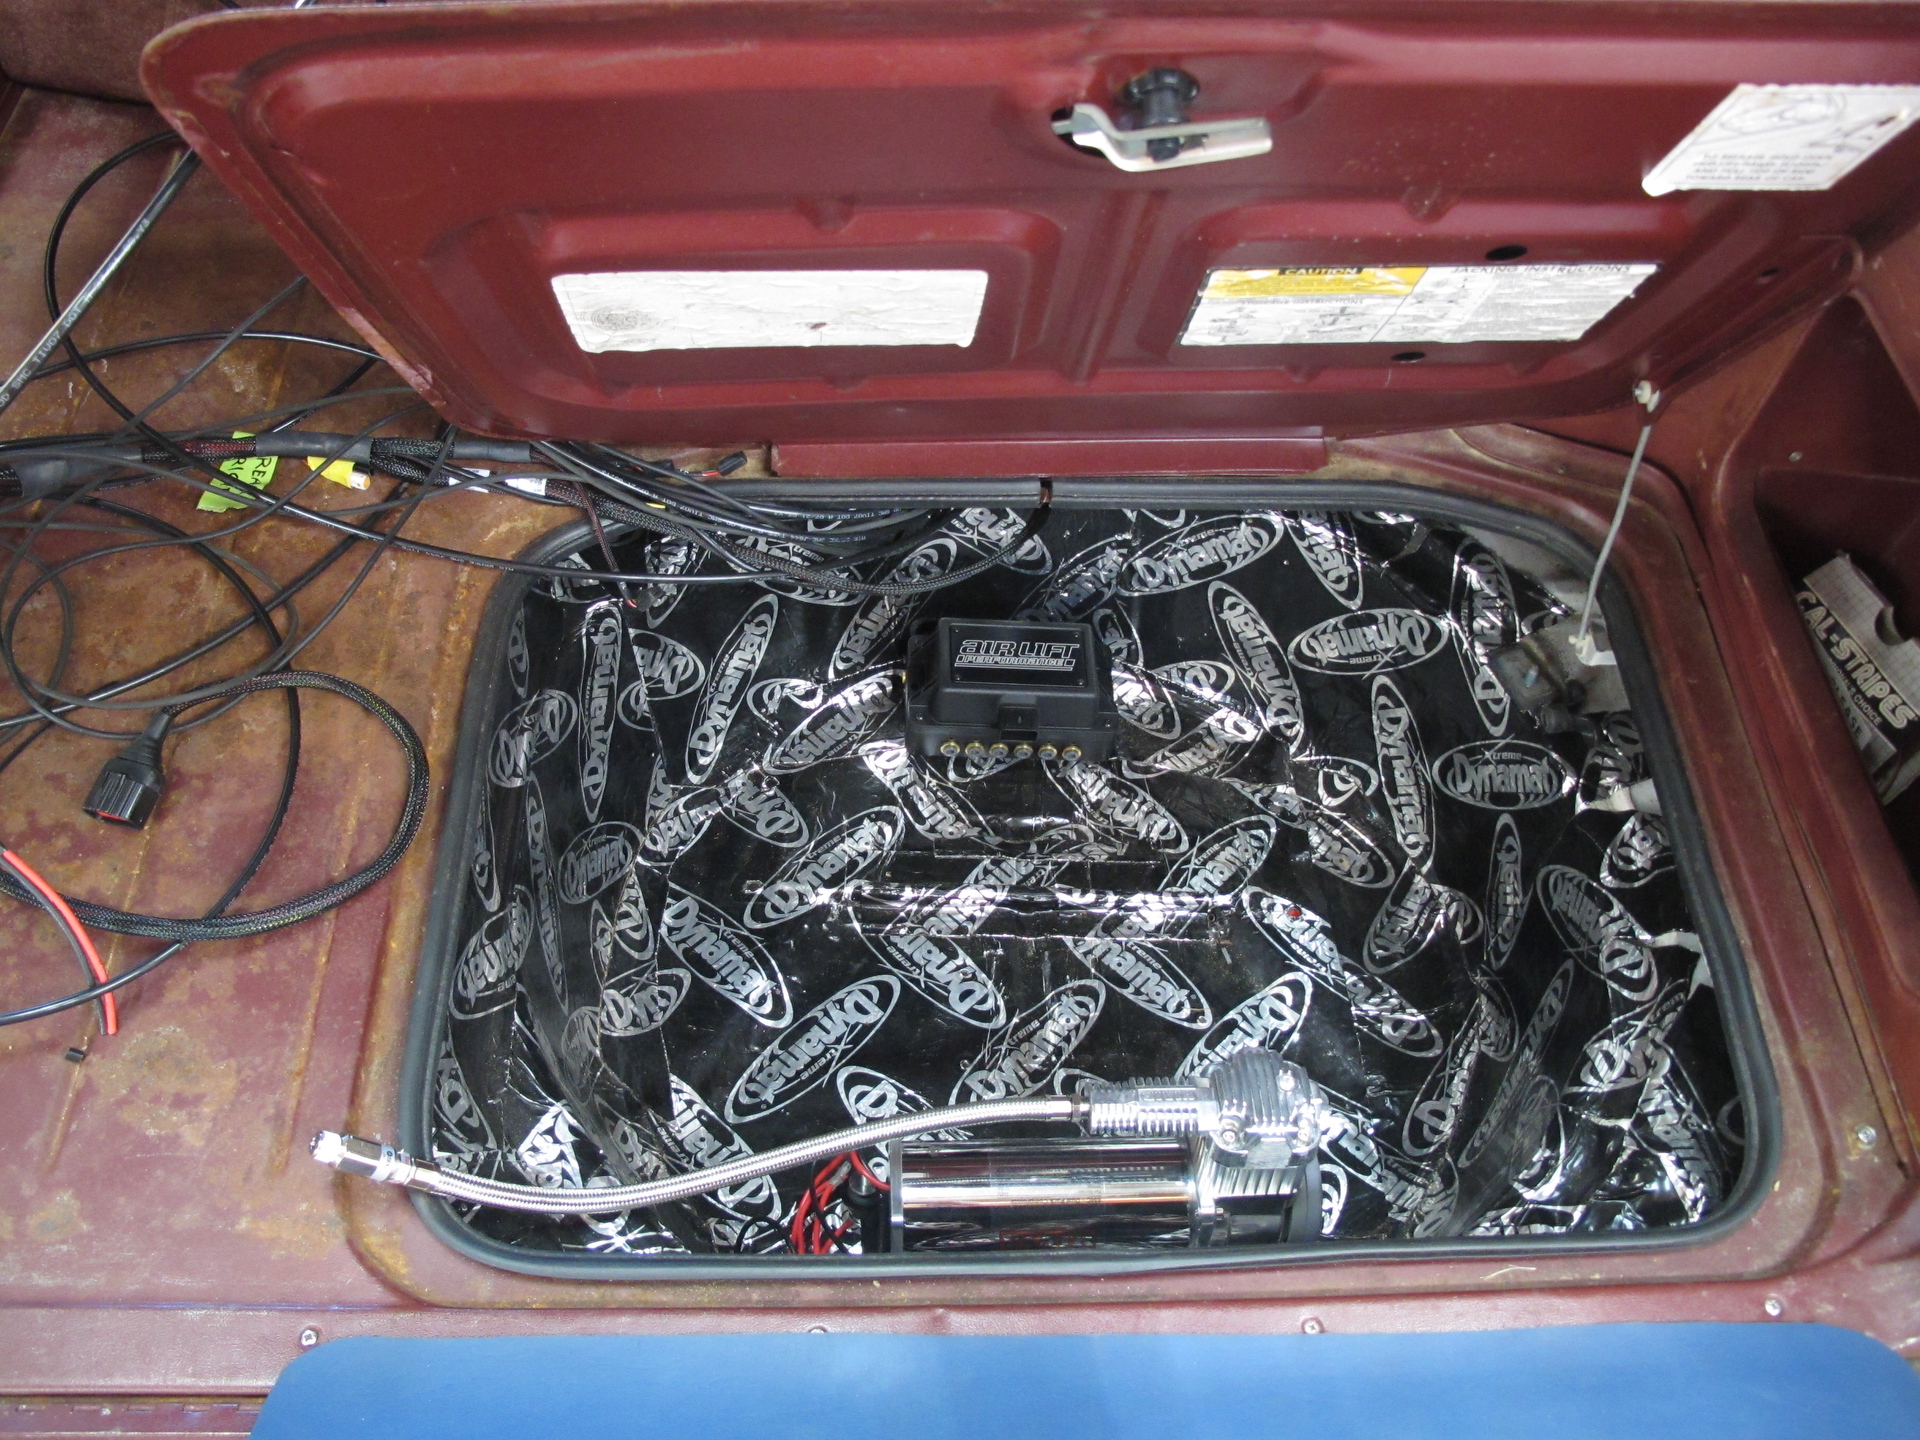
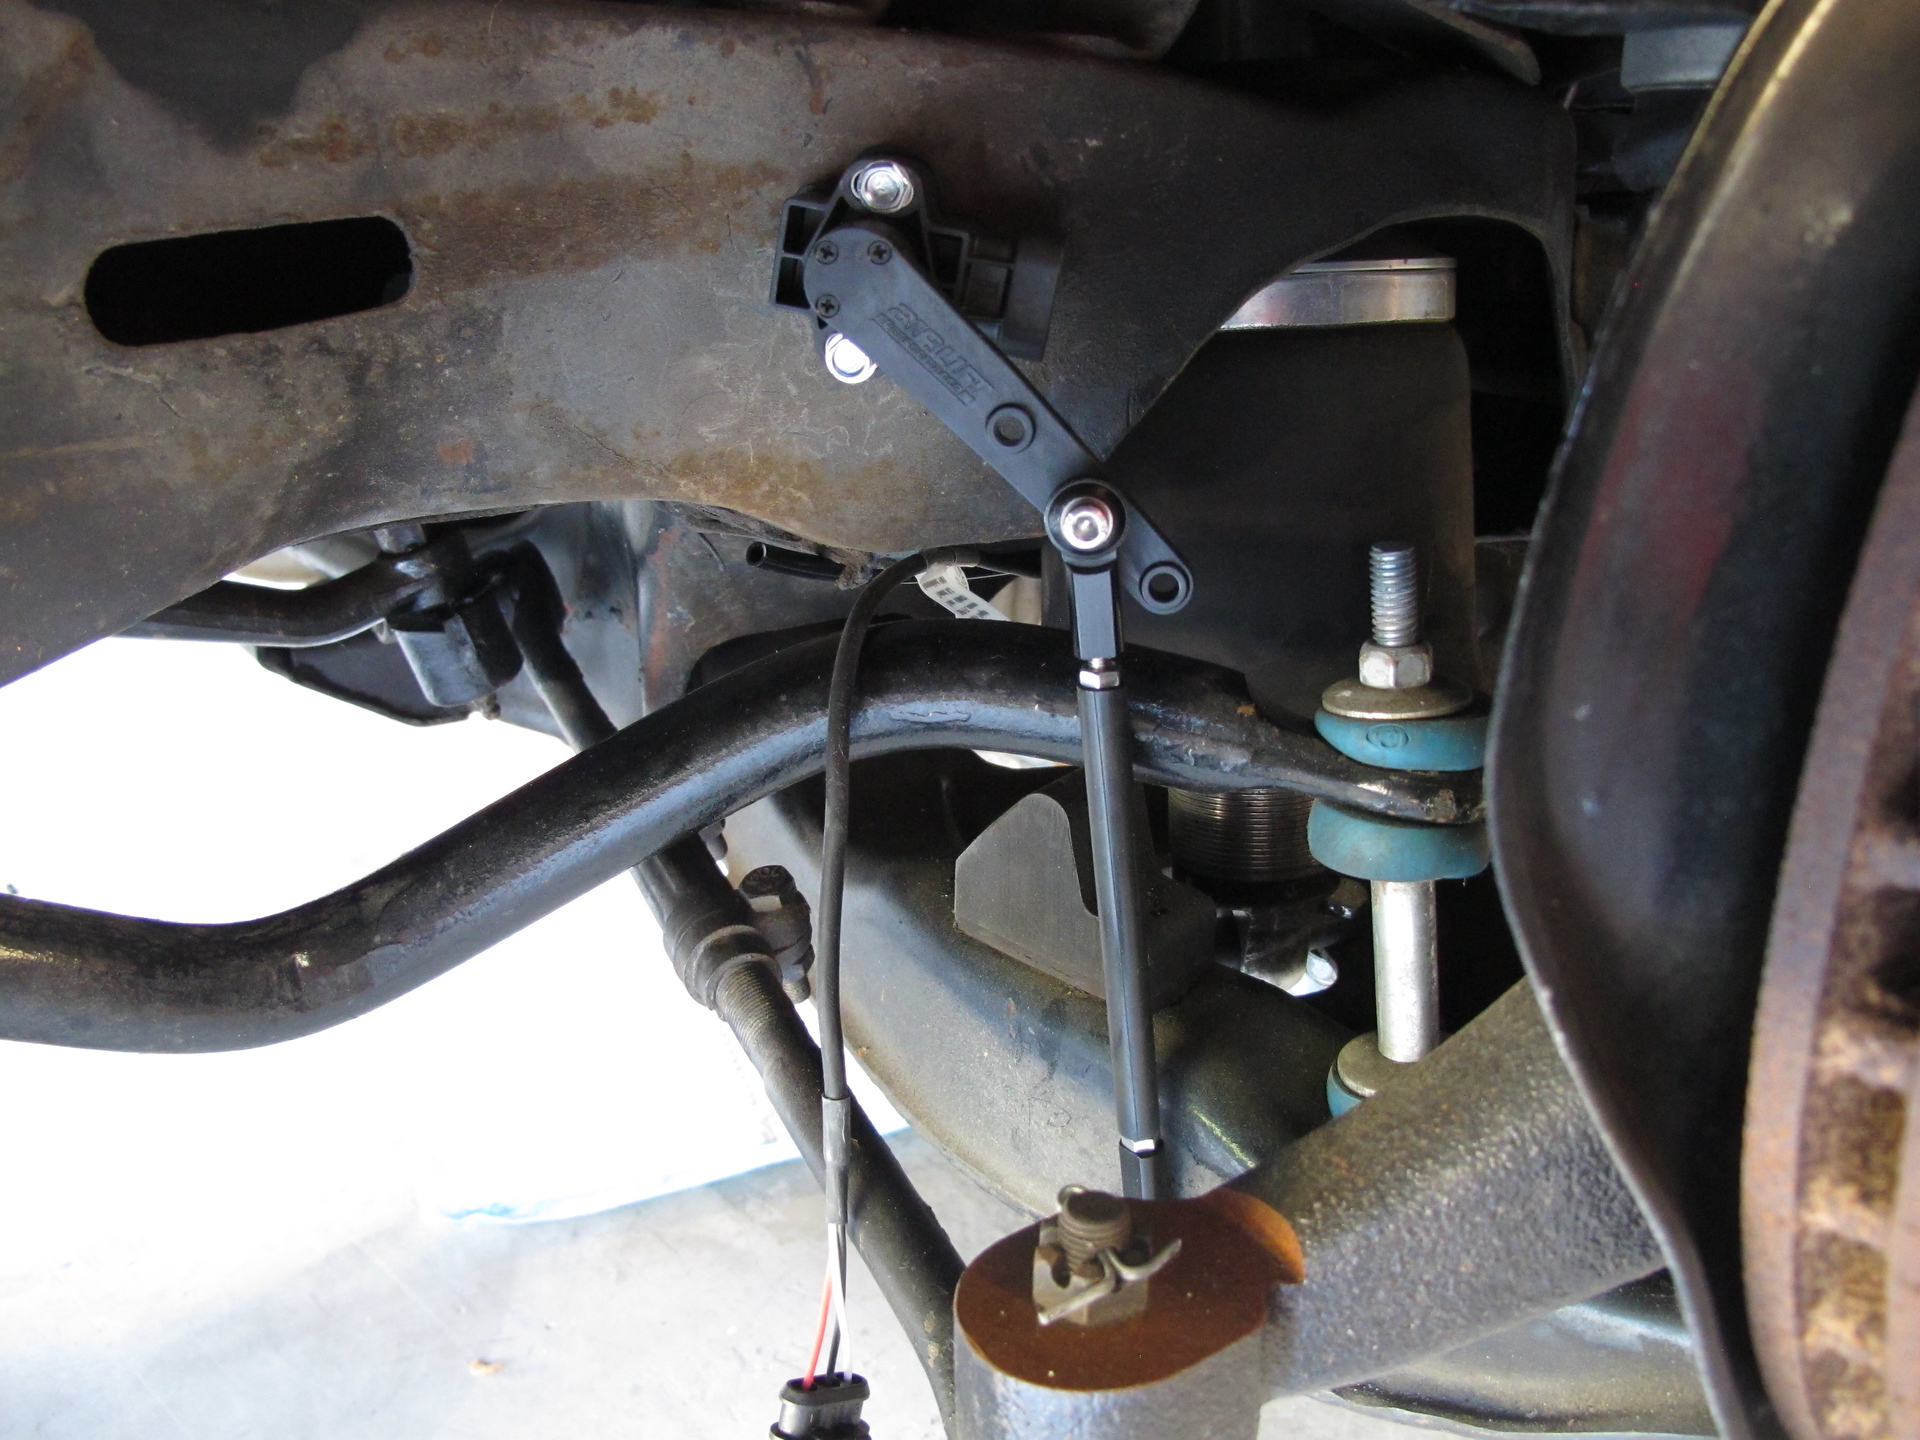
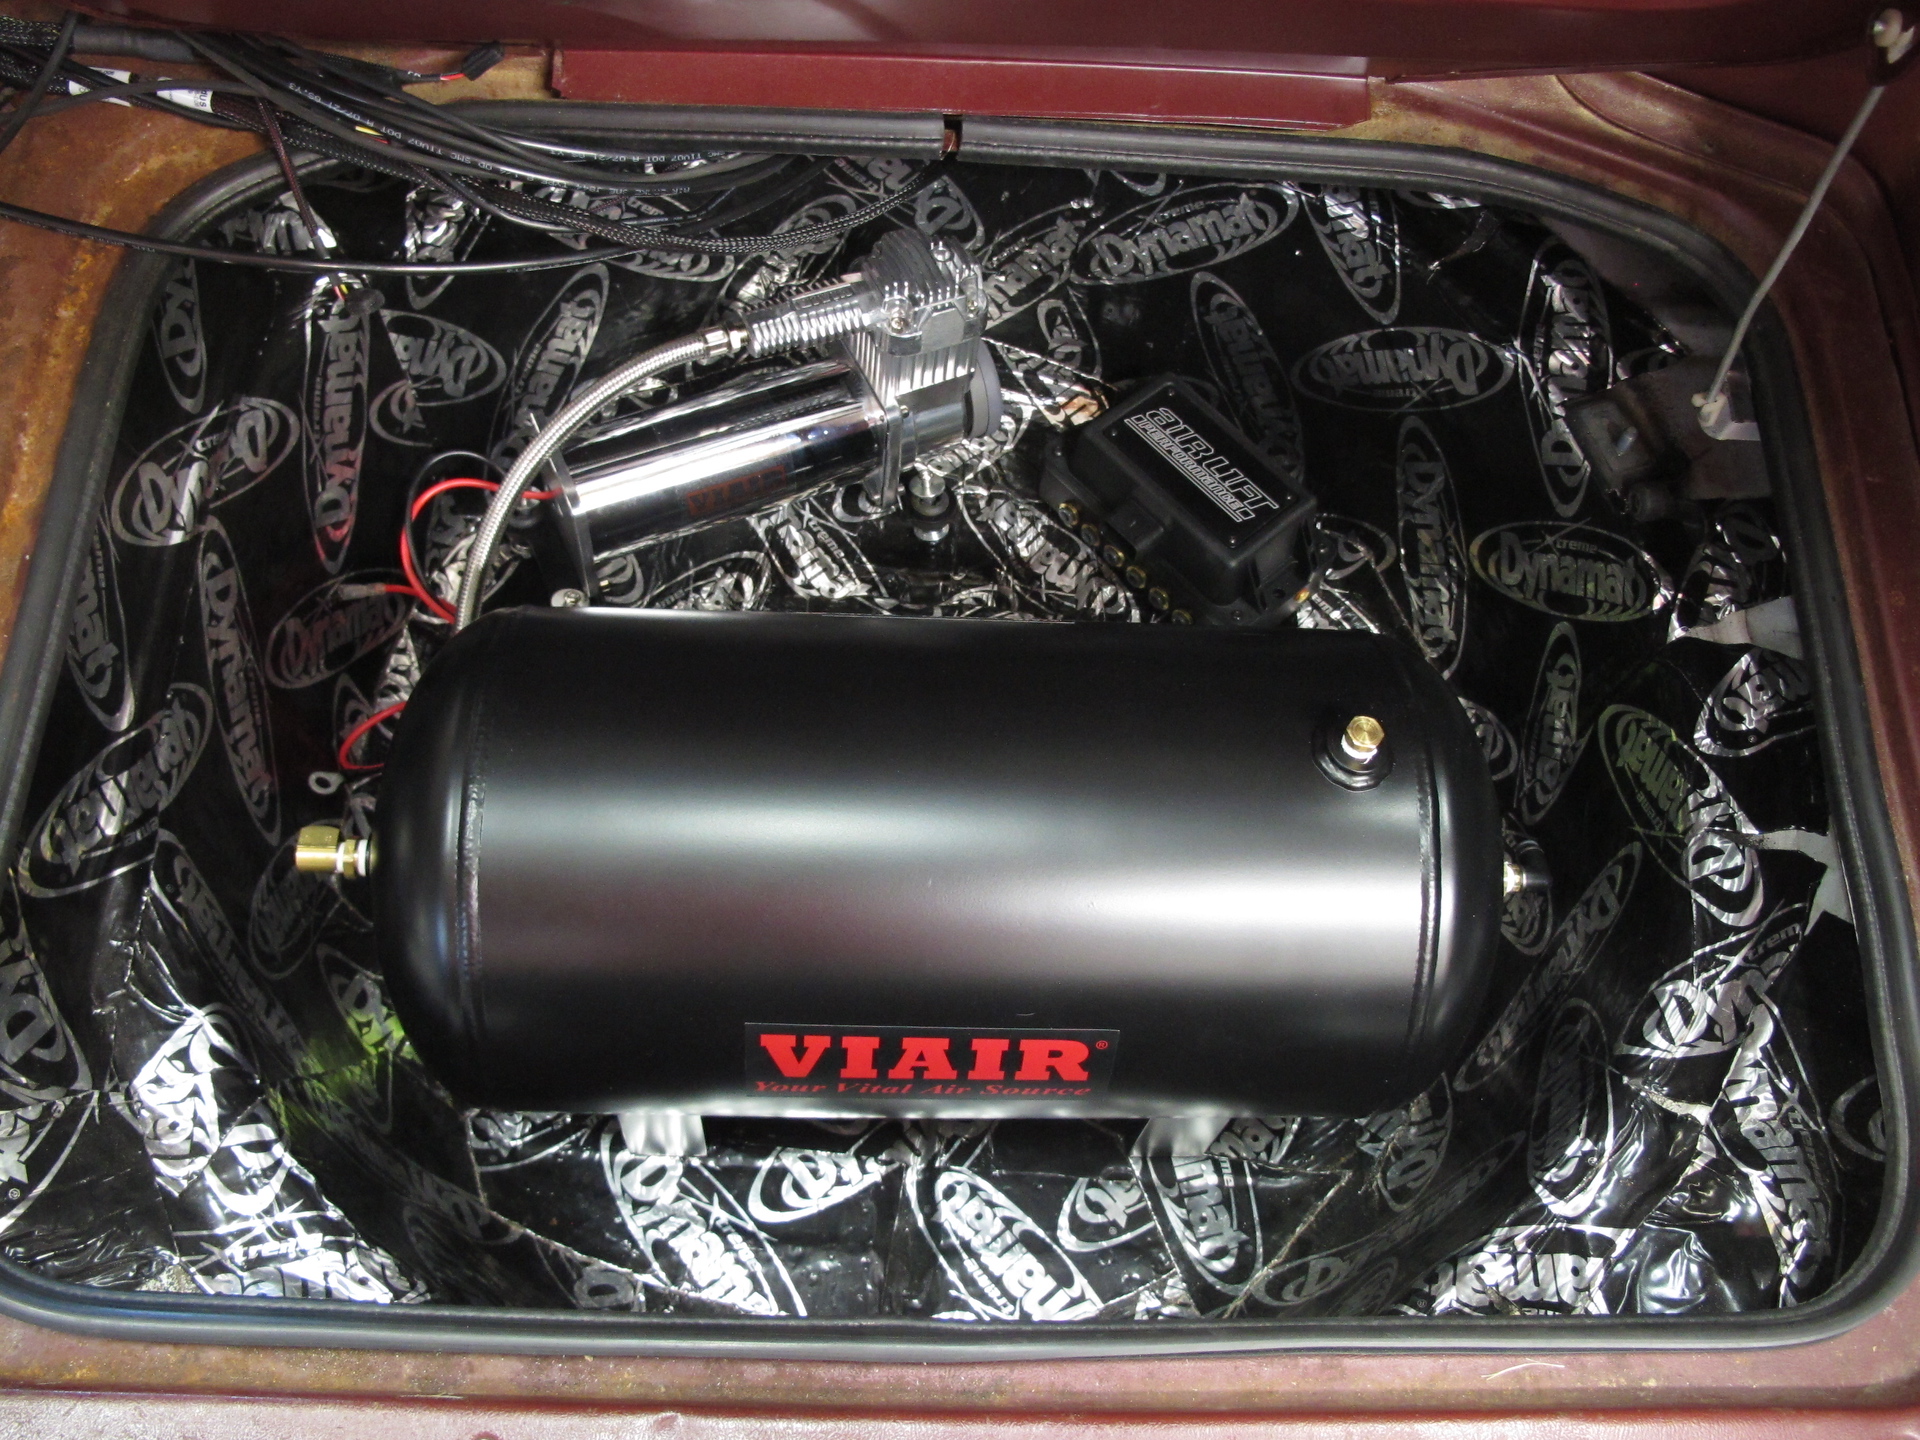
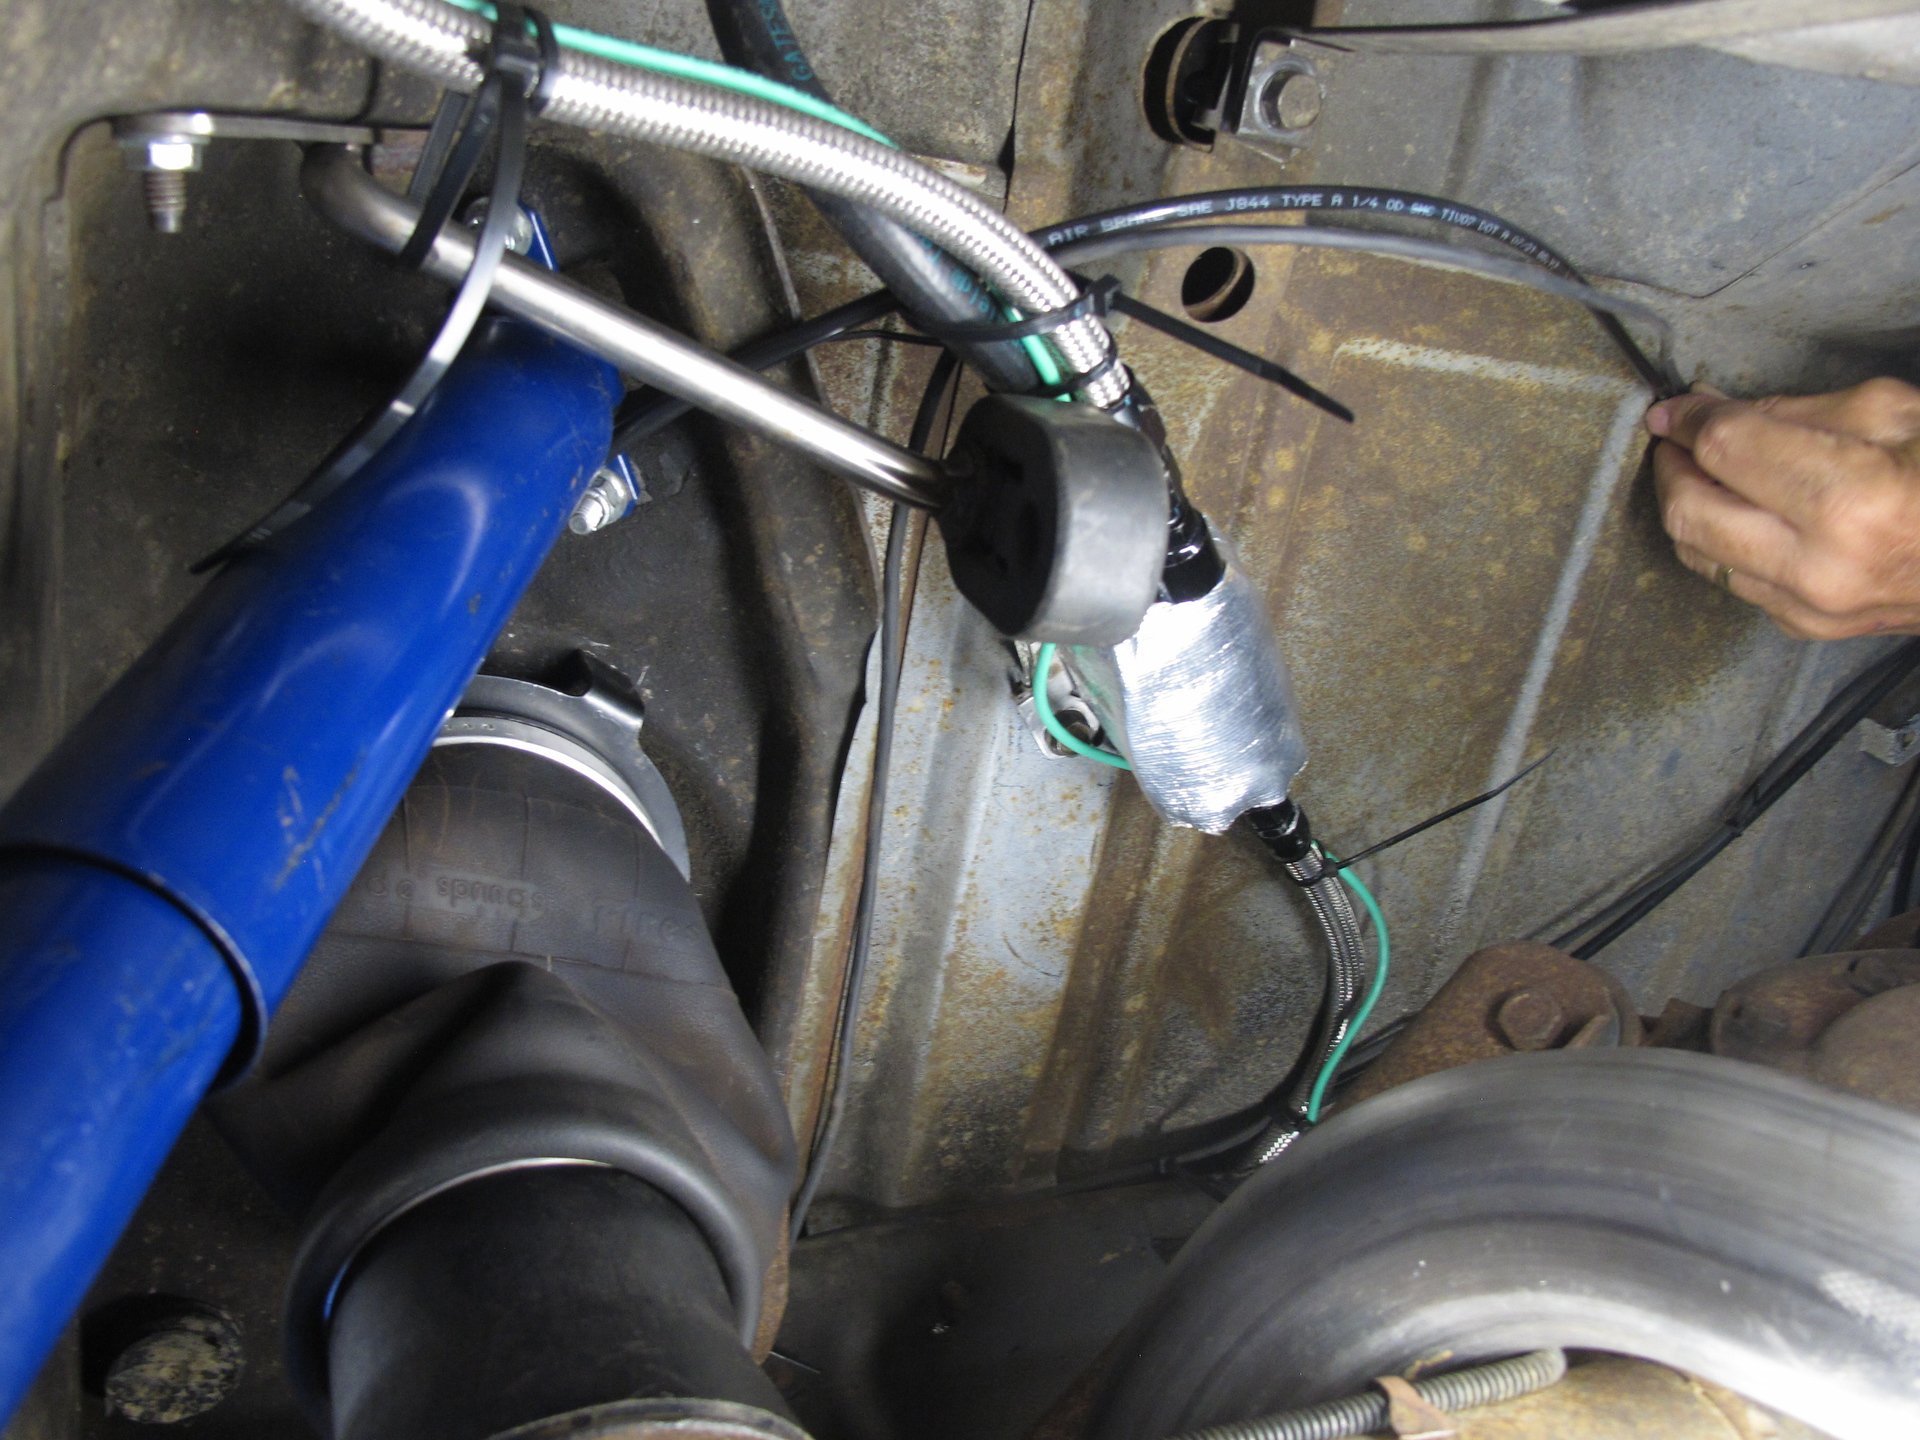
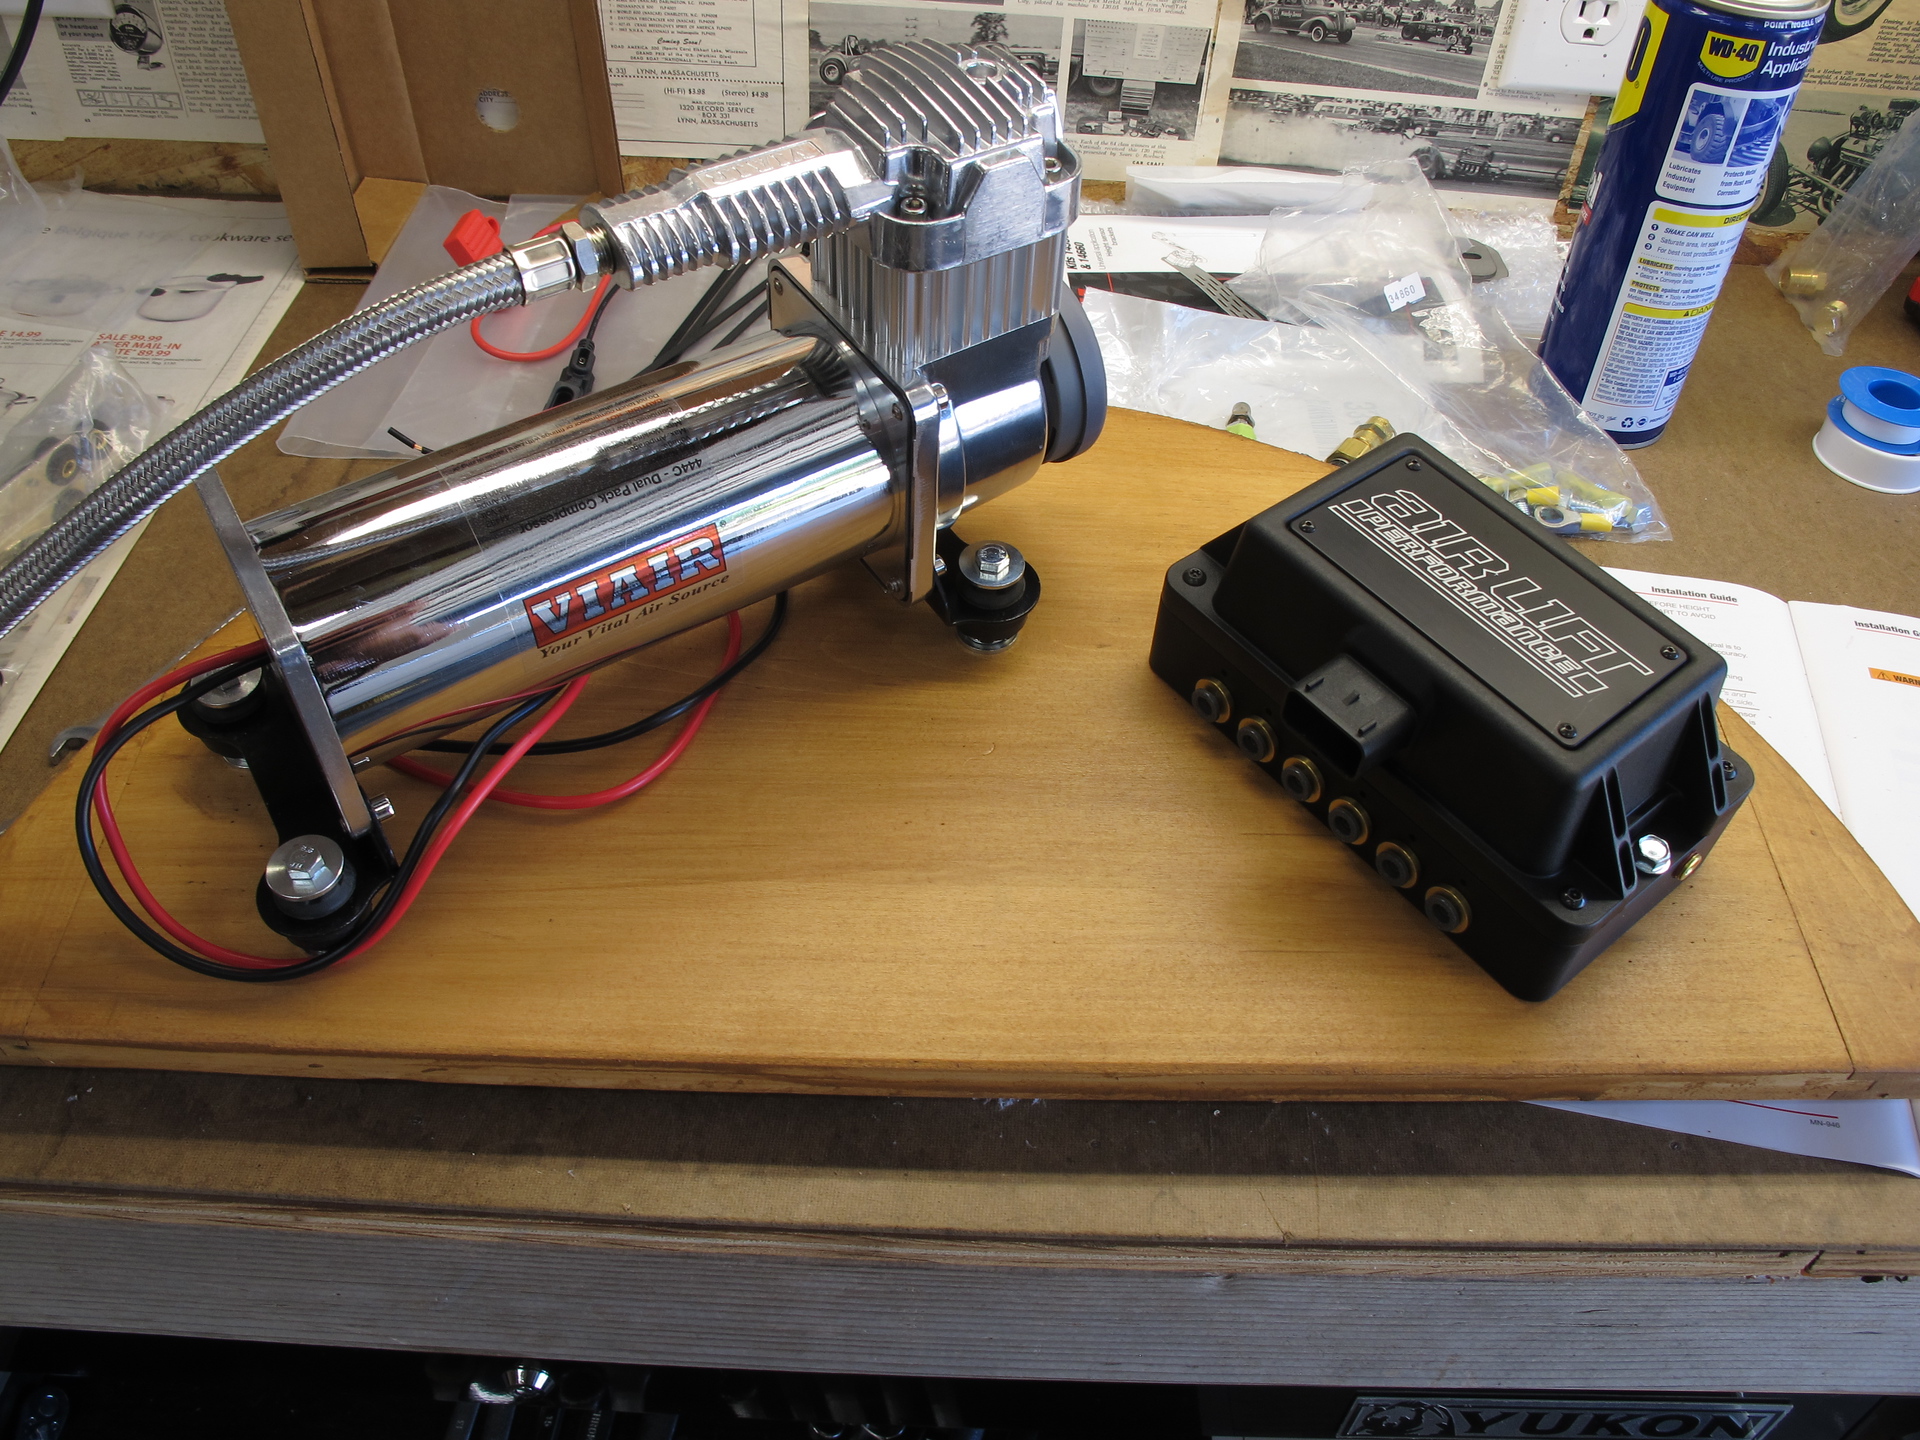
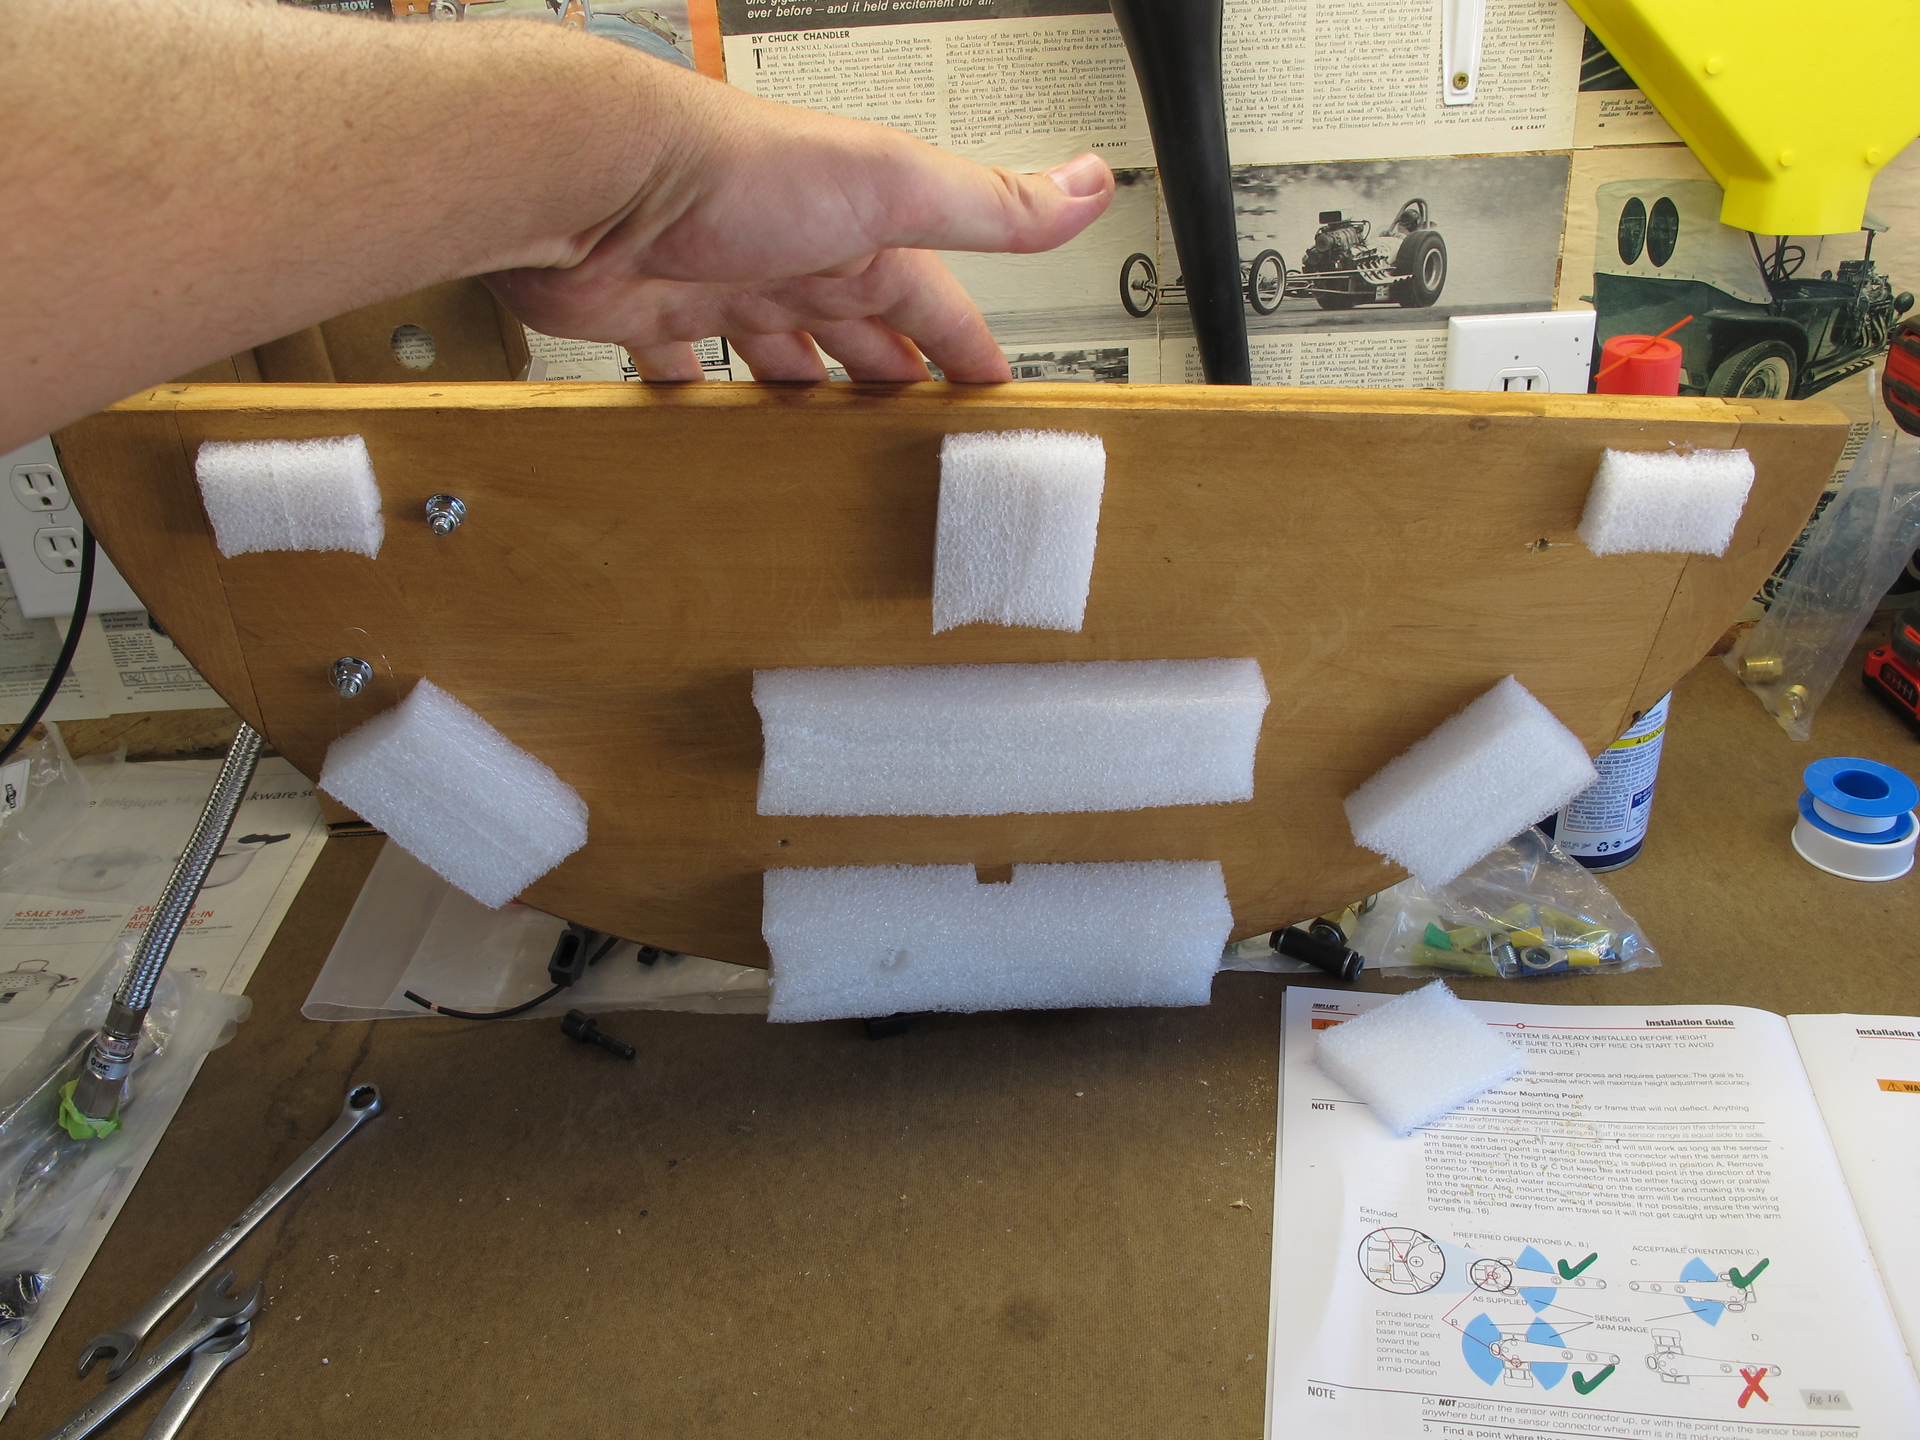
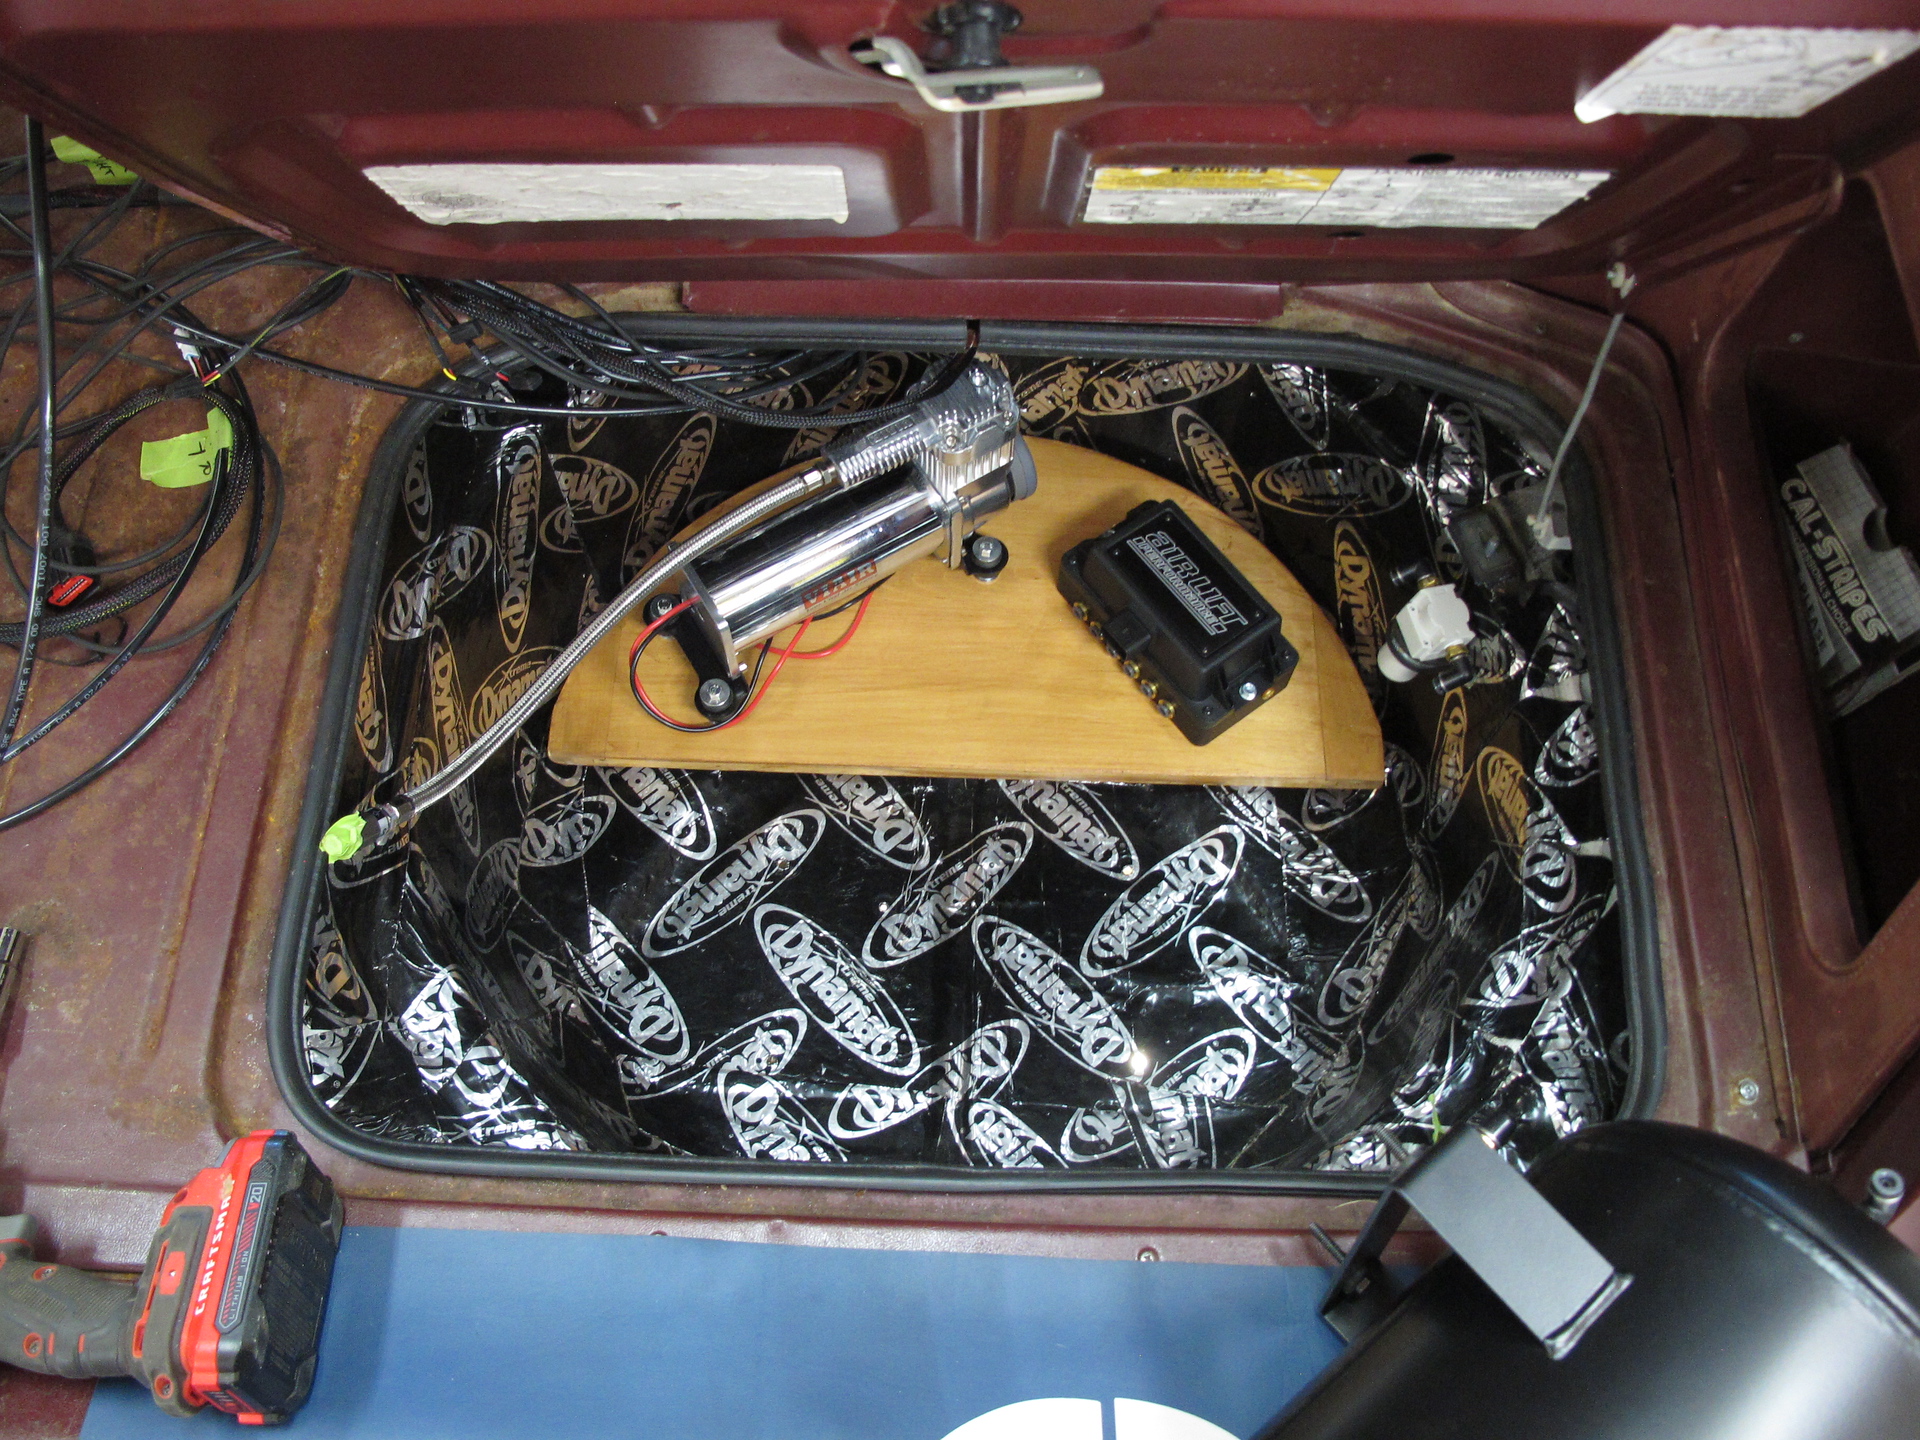
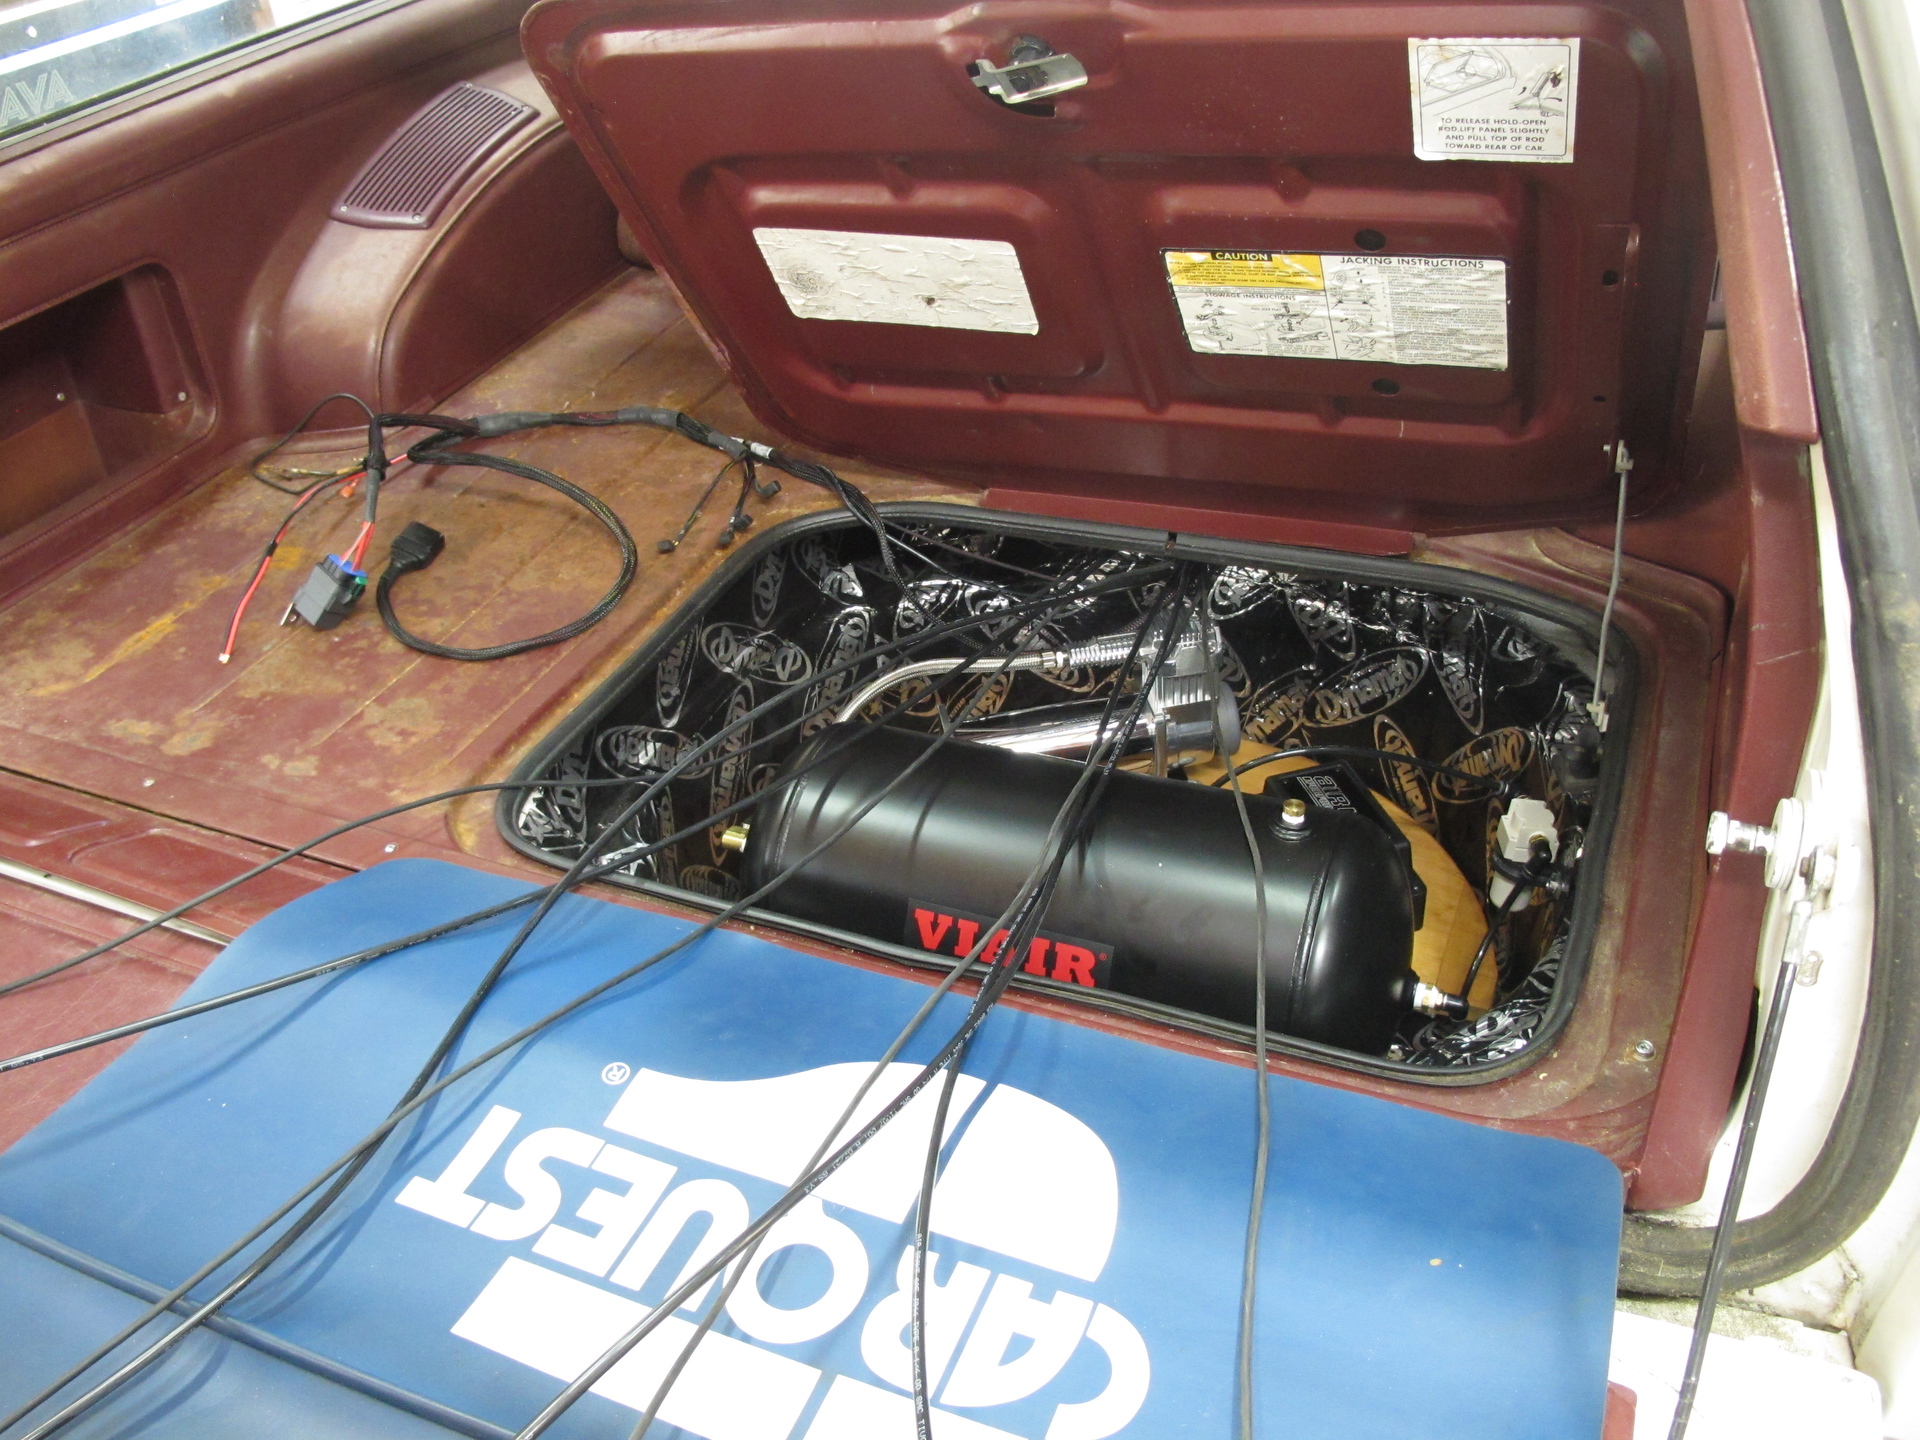
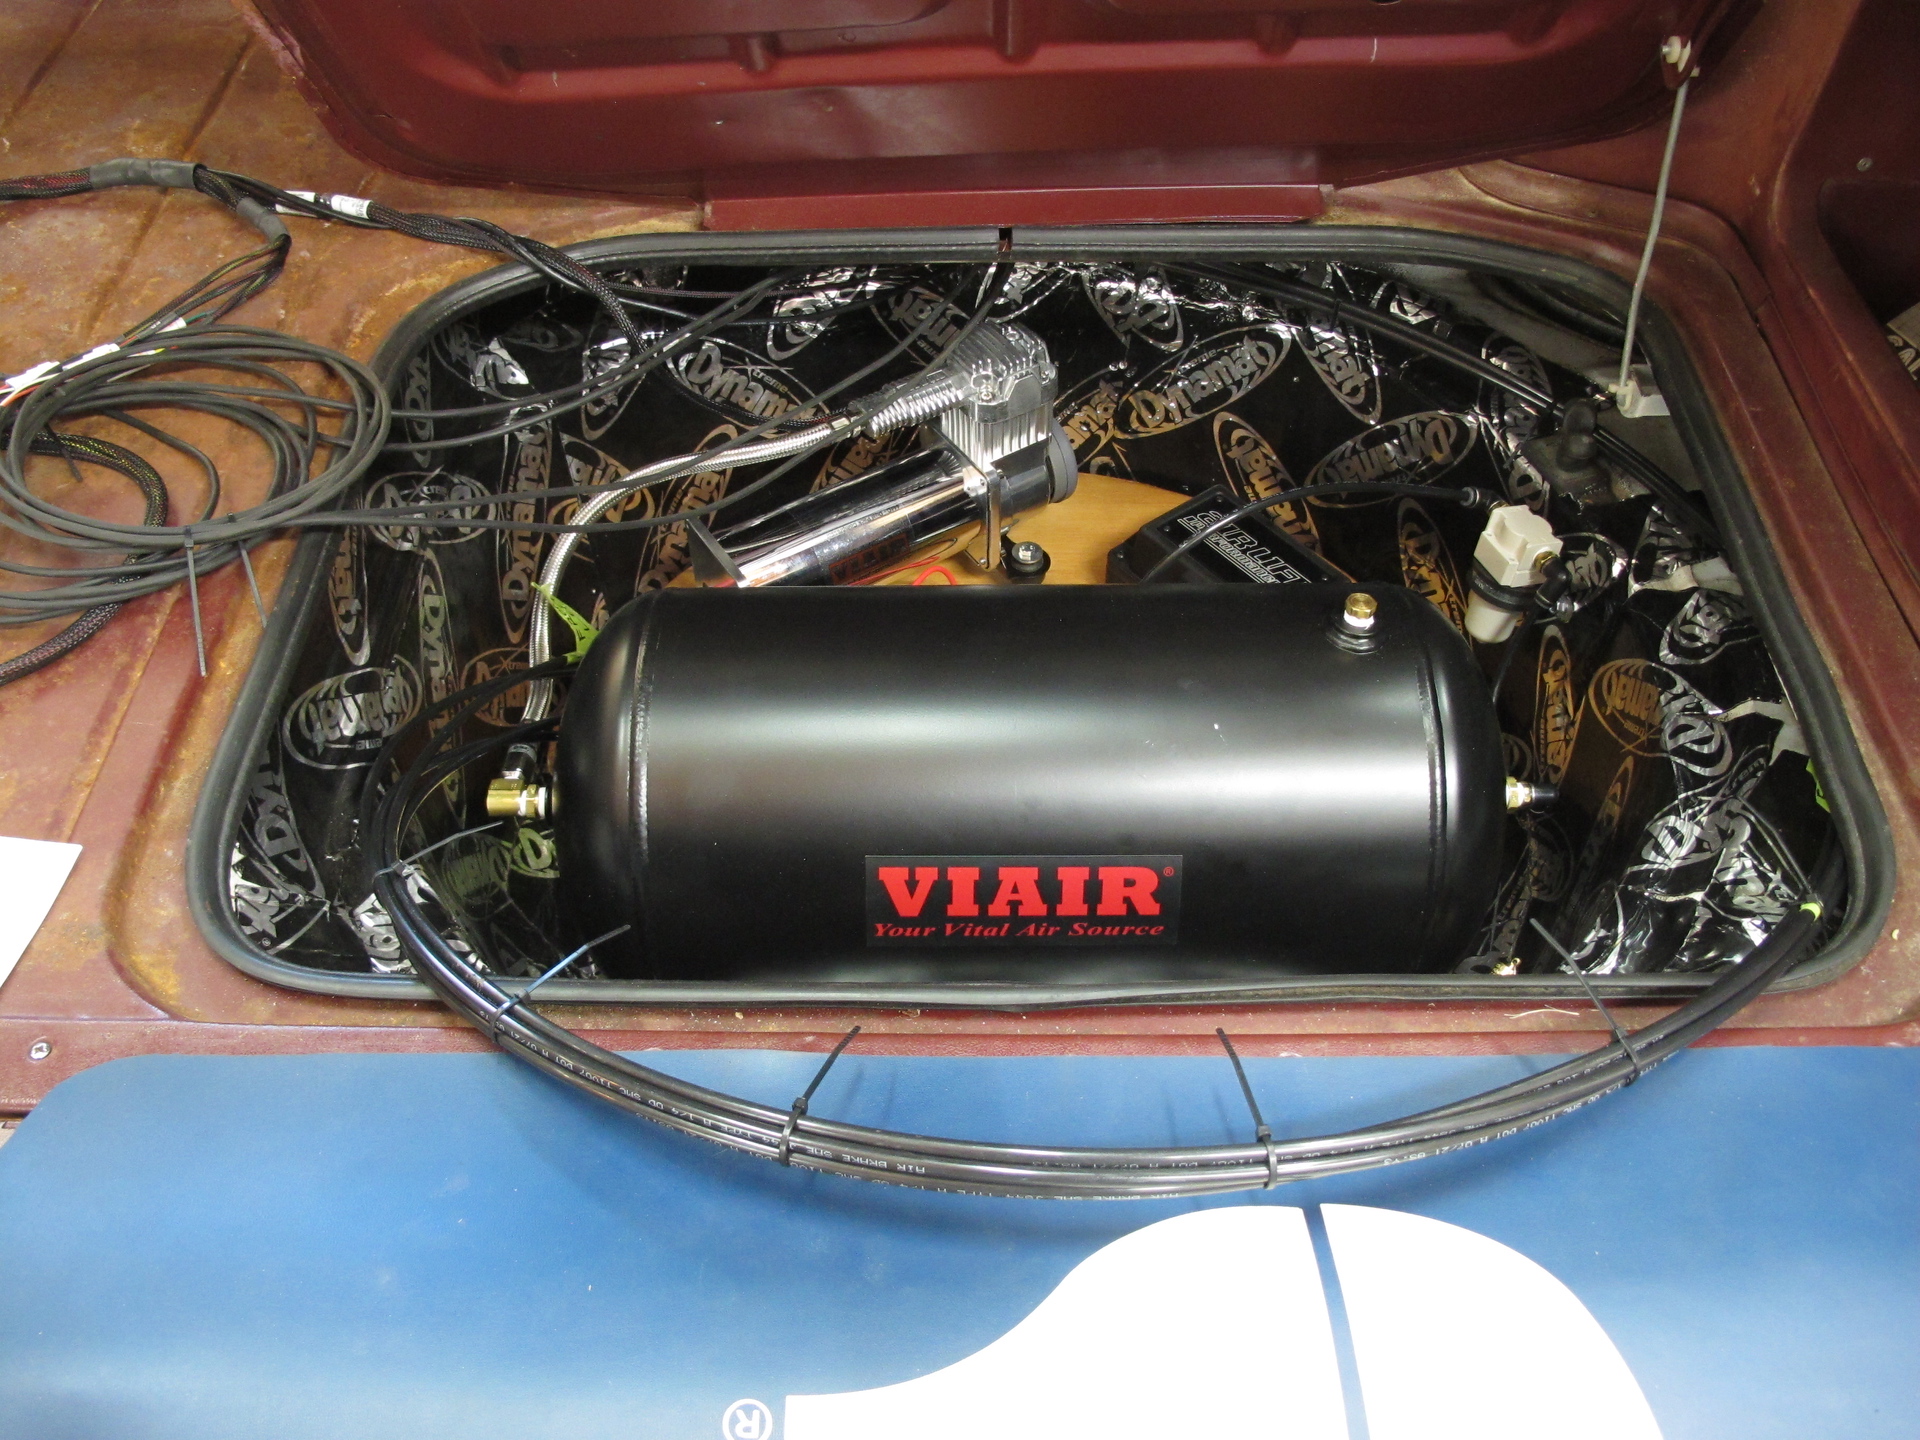
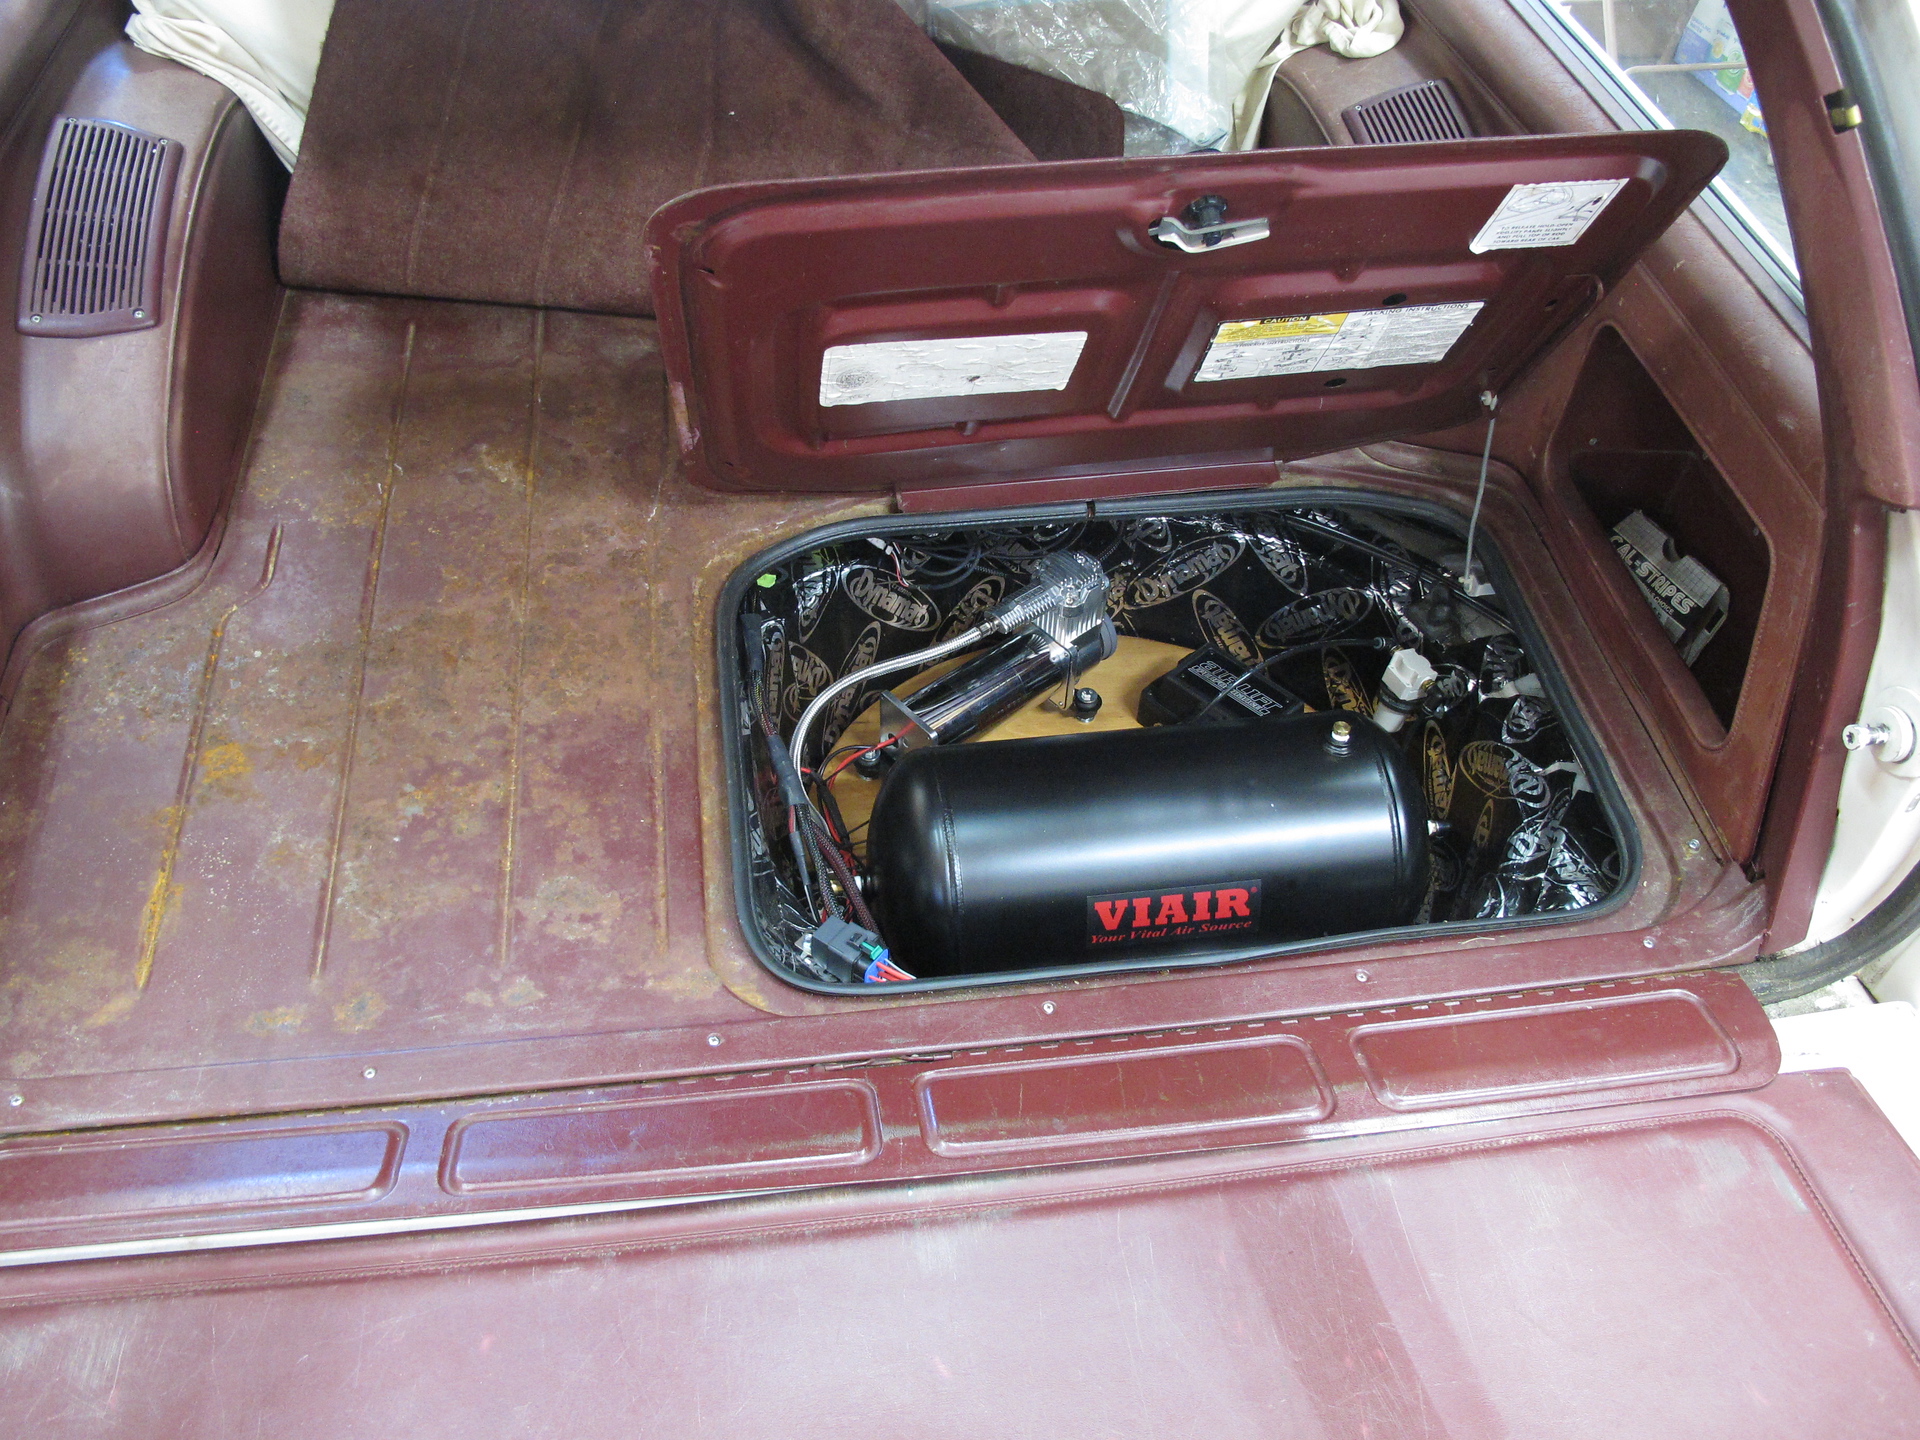
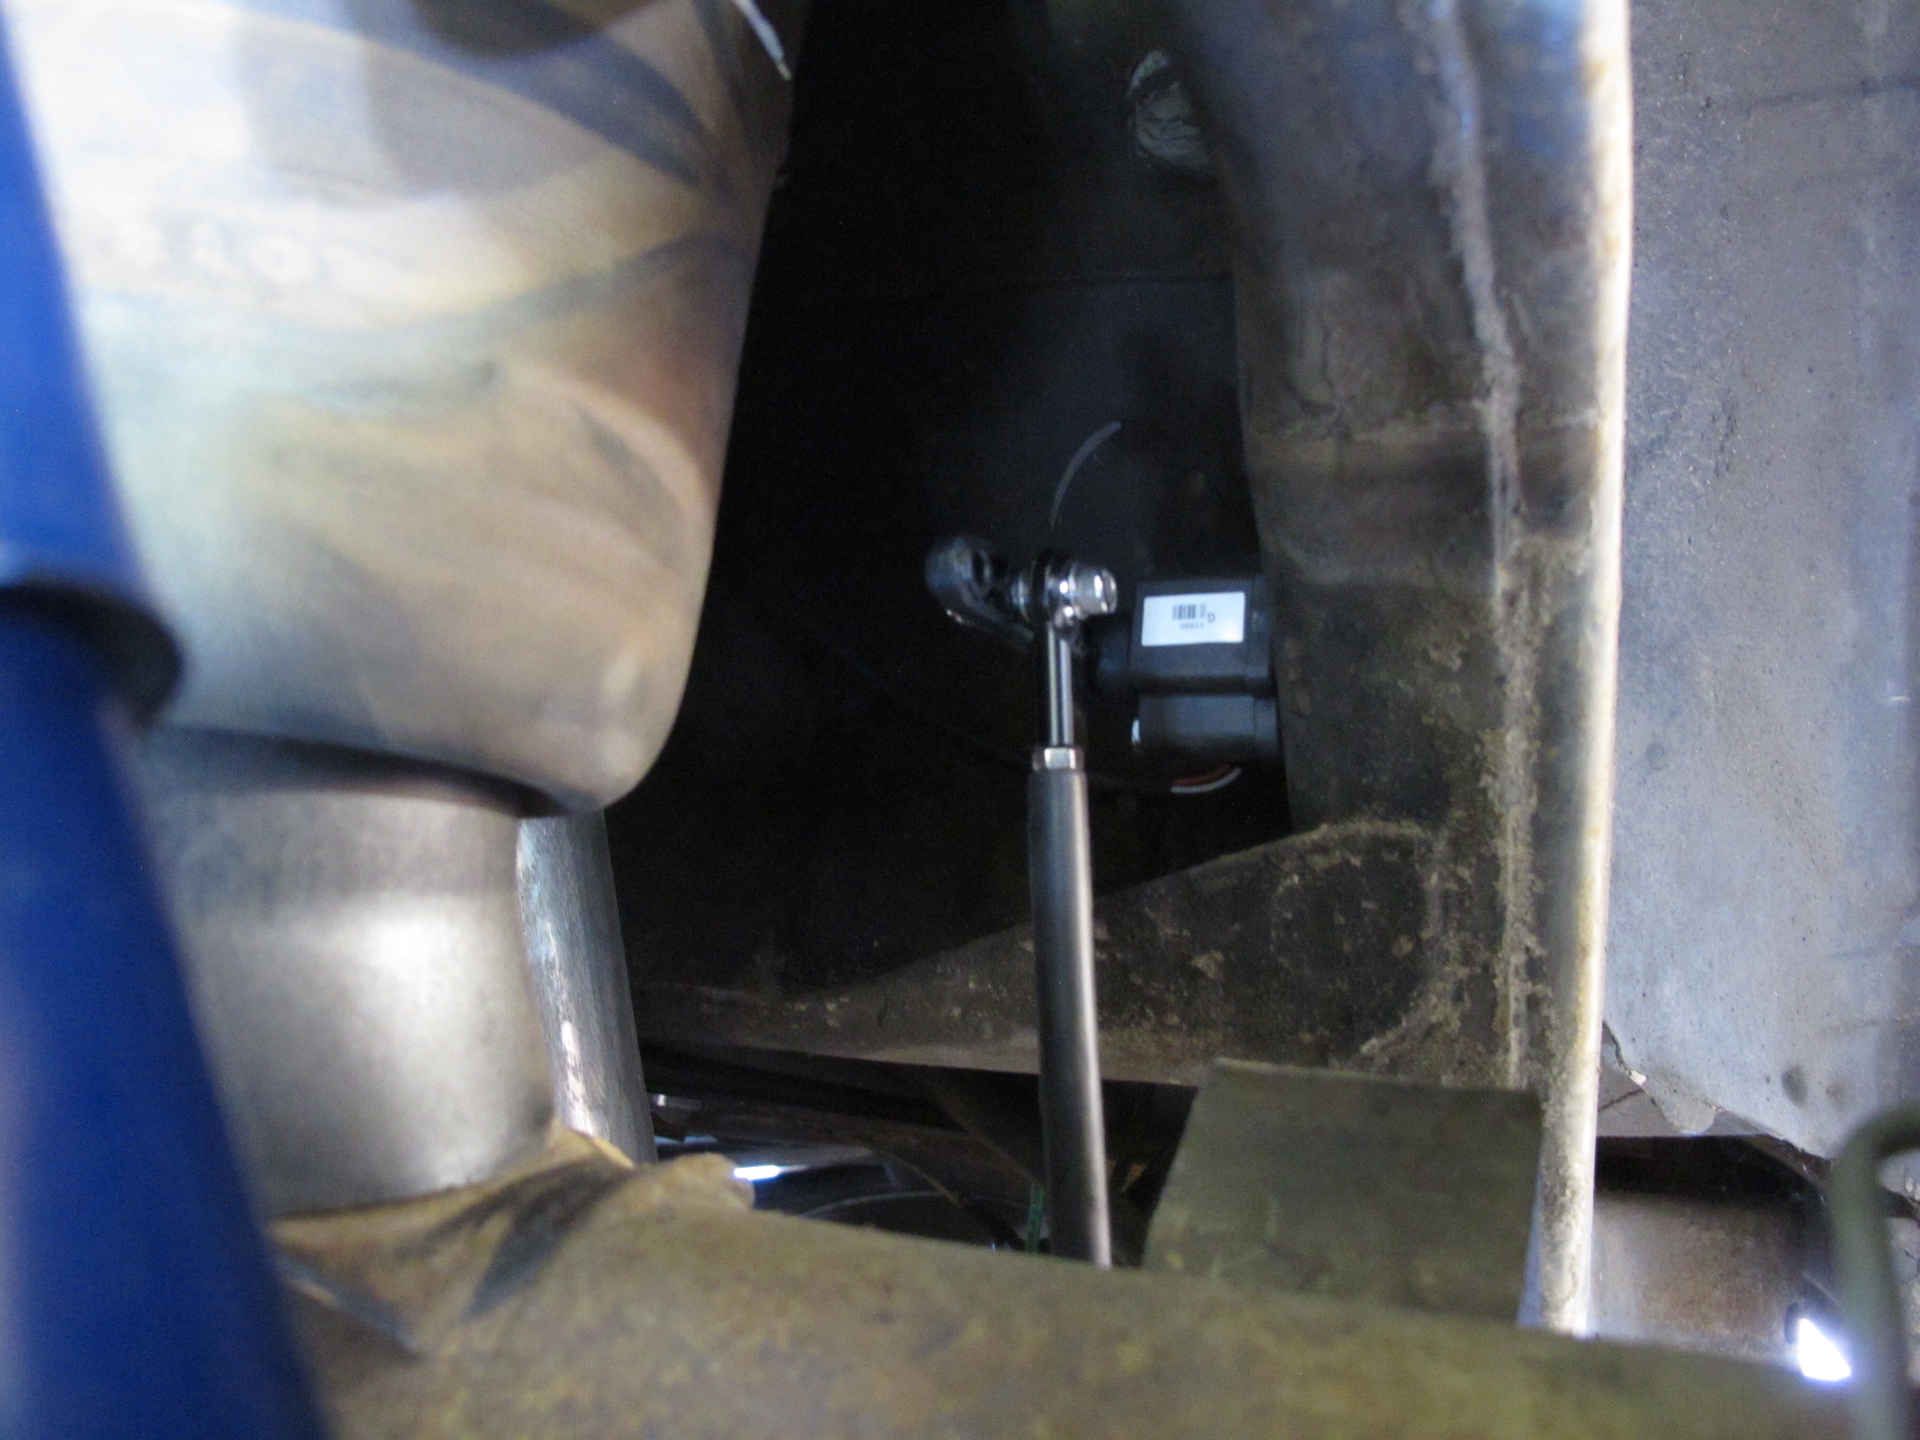
Regarding the air system and leaks over a couple of days, umm yeah, you’ll be living with that or have it chasing your tail forever with push lok fittings. There is a solution, but it has some unfriendly aspects.

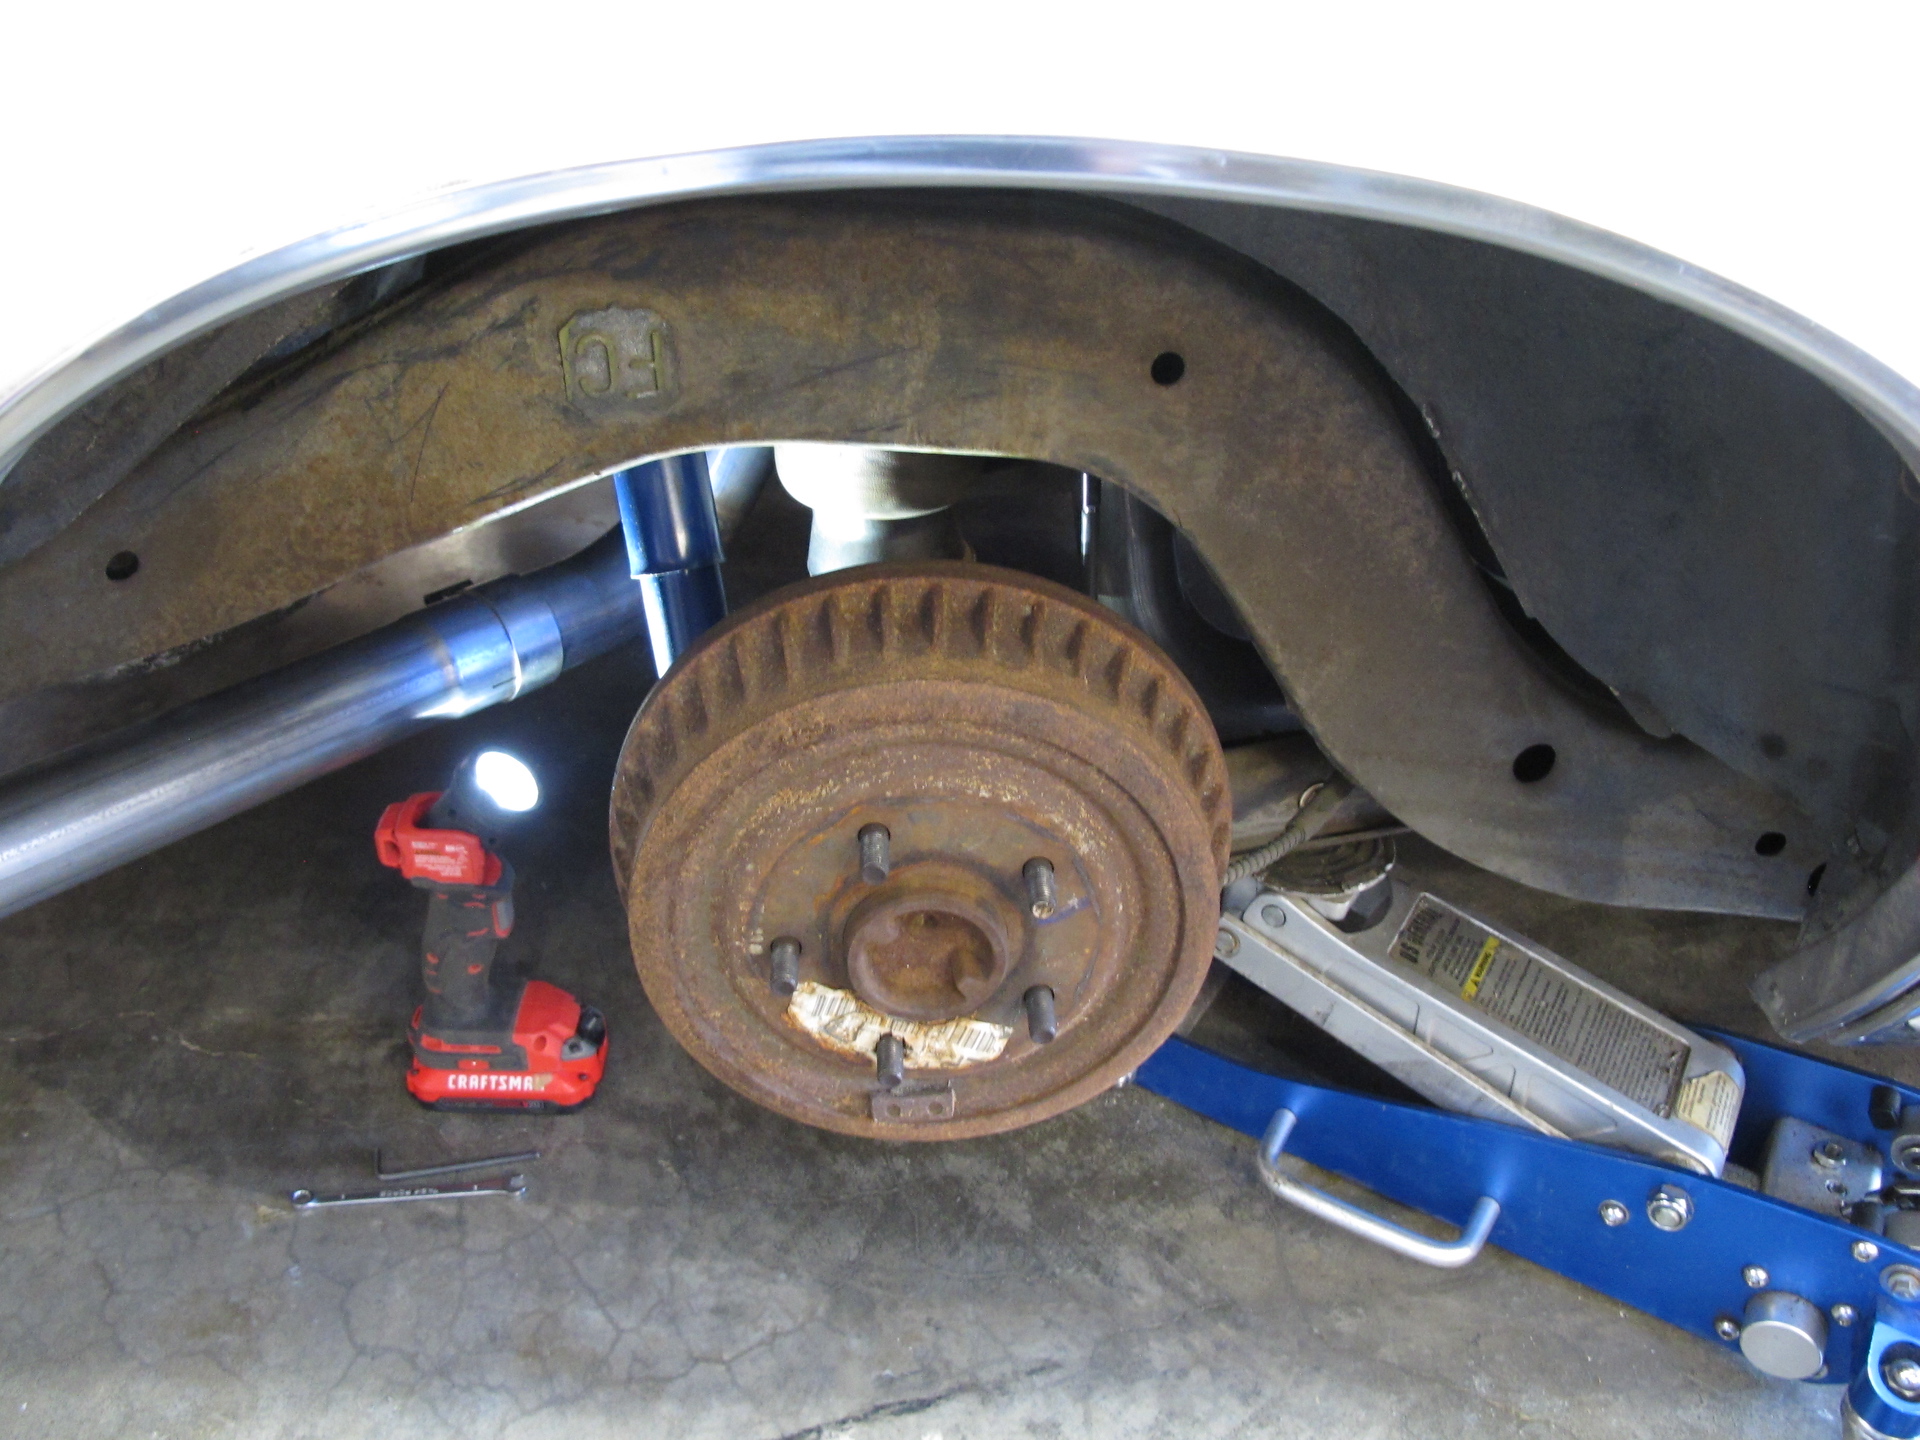
I’d like to see the air system in use in person.
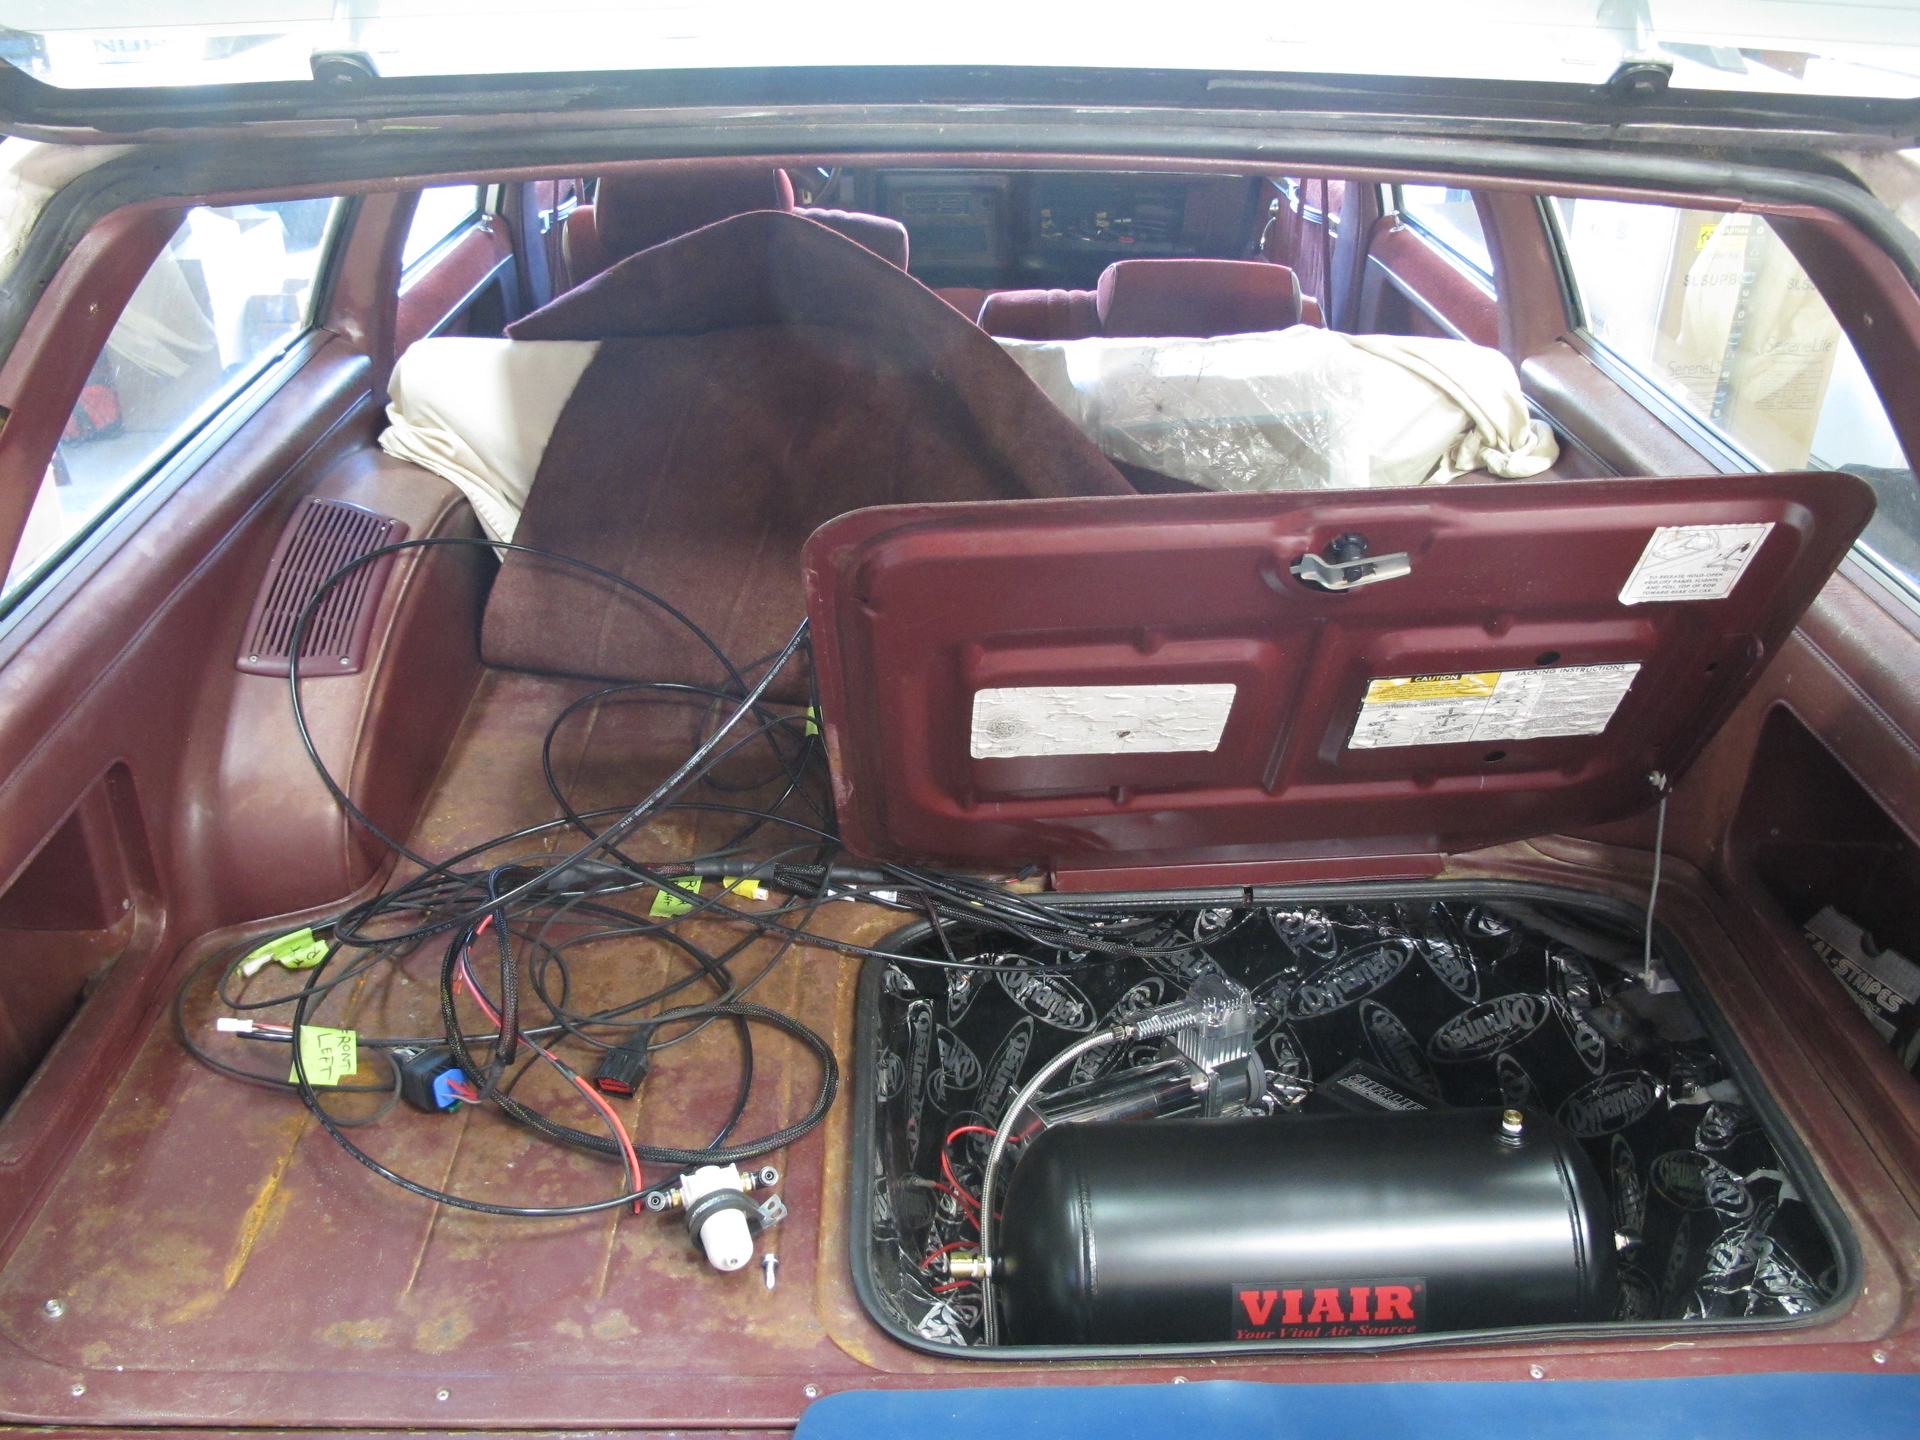
 
  • Like
Reactions: 1 user

vandall

Greasemonkey
Aug 3, 2015
109
187
43
Seattle, WA
Hey 64nailhead, I will for sure look in to turning off the learning once I get more miles on it. Thanks for the heads up!

For the non-engine wiring I really wanted to re-do some of the fuse block, relays, and ground wires. We got some nice components online and went to work!

On the air system I bought a new 3H Air Lift system. They are not cheap but considering what they do compared to the basic analog system I had installed previously it was like a big technological leap forward. More details to come...


IMG_1548-2090x1440.jpg


This stuff bugged me as it looked unfinished

IMG_1549-2090x1440.jpg


The amount of cool electrical components that are easy to get is crazy

IMG_1612-2090x1440.jpg


I cleared out the old air system and started laying out the new kit

IMG_1614-2090x1440.jpg


I'm using the pressure + height-sensing system so it can self-adjust. I embarrassingly broke a couple sensors because I did not run them through their entire range and rushed to the set up steps.. I knew it was risky and did it anyway. :(
 
  • Like
Reactions: 4 users

vandall

Greasemonkey
Aug 3, 2015
109
187
43
Seattle, WA
From the previous work, my dad had fabricated a cool little breakout box to house the switches and 2 analog gauges for the old air system. We had tack welded that to the lower seat pan and it looked pretty trick and moved with the seat, too. But we had to remove it which involved grinding the welds off and almost starting a small fire in the insulation haha. But I consider it an improvement because the new controller is so slick in comparison, and it is easily hidden away.

One of the reasons I wanted to upgrade was the old tank was only like 2.5 gallons and with the small compressor could barely keep up with demand. It ran way too often and too long, so getting a larger capacity was critical. At first I was concerned the only way to install was to mount inside the rear cargo area which would ruin the vibe and the space available to load stuff. But since I wanted to keep everything in the spare tire area I couldn't use the long skinny tank I had ordered, so I got this fatter 5 gallon tank to fit. The height might be really close to the compartment cover!


IMG_1616-2090x1440.jpg


Leaned back

IMG_1617-2090x1440.jpg


Fat boy

IMG_1618-2090x1440.jpg


Rough lay out for now

IMG_1619-2090x1440.jpg


I like the challenge of figuring out the fitment
 
  • Like
Reactions: 2 users

vandall

Greasemonkey
Aug 3, 2015
109
187
43
Seattle, WA
To mount the rear height sensors we had to remove the rear exhaust pipes. Even with those out of the way it was a real b---- to get at the frame to drill pilot holes. I ended up having to move them and remount multiple times. Super fun! I did order a couple plates that Bag Riders carries to help the mounting process but there was no room in the rear for those.

Back to the rear gear, in the wheel well it slopes forward and I was trying to use the existing holes wherever possible. Initially I was thinking to mount the components directly on the sheet metal but ended up only mounting the tank and then cut a piece of old cutting board for the manifold and pump. I also used these Powermaxxx (?) spring loaded feet I had from another project to help isolate and quiet the pump. I think with the Dynamat, spring feet, and the wood mount it really helped. It's much quieter than the small pump mounted directly to the body.

IMG_1620-2090x1440.jpg


You can see the rear stabilizer bar we also installed.. more on that later

IMG_1621-2090x1440.jpg


I was so naive!

IMG_1623-2090x1440.jpg


Ran new air lines with the wiring harnesses and tried to clean up wherever possible

IMG_1625-2090x1440.jpg


Mounted on the board. I finished it with a light sanding and some deck stain
 
  • Like
Reactions: 2 users

scoti

Royal Smart Person
Sep 5, 2019
1,985
3,423
113
Texas
Tagging in to read all the way through this. Looks like it was a clean starting point!
 
  • Like
  • Agree
Reactions: 1 users

vandall

Greasemonkey
Aug 3, 2015
109
187
43
Seattle, WA
I cut up some packing foam blocks and hot glued to the bottom in different heights to get the board to sit relatively level, then sized up deck screws (lol) to attach with washers from the bottom through the existing holes. I was also trying to keep it somewhat clean underneath whereas before it had some bolts sticking down from the previous equipment. I mounted the moisture trap to the side of the well.

IMG_1626-2090x1440.jpg


This stuff is great, it only has some give so it will conform but not too much

IMG_1627-2090x1440.jpg


Mounted in place

IMG_1631-2090x1440.jpg


Tank mounted and running the final air line lengths

IMG_1632-2090x1440.jpg


Everything comes through a hole we cut up high in the front of the well area, and I wound the lines around inside a void in the upper part of the well so they would be hidden but still accessible
 
  • Like
Reactions: 2 users

vandall

Greasemonkey
Aug 3, 2015
109
187
43
Seattle, WA
I got everything tucked away nicely, mounted the relay on the side, etc. When doing initial set up I was getting an error and traced it back to the right rear sub-harness in the system. Kinda cool you can use the tools in the menu to pretty easily find this stuff, but I had to ask Air Lift tech support to find it. They are super quick and professional.

After getting that sorted I wrestled with the rear sensor placement - I kept getting an out of range error meaning the gauge was traveling too far from aired up to down. I even welded some cool little mounting tabs on the top of the control arms I was proud of how they came out. I will grab photos later.

We pulled the gas tank due to the gas gauge reading off the scale. It is usually a bad connection, ground, or faulty sender. Once we got it back in it is working again, so I think some connector wasn't fully seated. The inside is so clean, I really should have tried to install the Astro Van in-tank pump instead of installing the sump. Because I still have to figure out how to either reroute or cover the exposed external pump and lines.

IMG_1634-2090x1440.jpg


The lid closes and overall it's very quiet compared to the earlier set up

IMG_1635-2090x1440.jpg


Removed the gas tank for the millionth time. Didn't win a prize :(

IMG_1637-2090x1440.jpg


The fuel gauge was reading off so we weren't sure what was causing it.. we tested the sender

IMG_1639-2090x1440.jpg


Just some grit in the lower area.. I am running a pre-filter and then the filter / regulator set up
 
  • Like
Reactions: 1 user

vandall

Greasemonkey
Aug 3, 2015
109
187
43
Seattle, WA
I did grab a shot of the custom mounts I welded (horribly) to the control arms. I have 3 holes to try and get the armature lined up properly. I am still wrestling with the sensor layout to get within the correct range of motion.

I added in a UMI rear stabilizer bar because the one I got from a fellow G-body owner wouldn't fit properly. So I am not sure if different makes/models had different bars. He also traded me a bunch of the stabilizer bars I am planning on refinishing and installing soon. It should help tighten the car up.

This is it for now, but once I sell my '69 Riviera I will have room to put the Regal back in the shop for work. It looks so good! I will try to make a video and take some really nice photos in the coming months and post those here. I also got new tires for the original wheels as the old ones cracked through the sidewalls.. I will have to do shoots with both sets. It's a totally different feel. I asked the guy at the tire shop about replacements for the Appliance wheels and he said they are hard to get the right sizes and turned out to be expensive so I left the old ones for now. Can't beat the white walls!

IMG_1646-2090x1440.jpg


I fear for the integrity of the rear end when I stomp the gas pedal

IMG_1647-2090x1440.jpg


Pay no attention to the welds... it'll hold haha

IMG_1648-2090x1440.jpg


This shows the sensor tucked up in there.. it's such a pain to get in there with a drill I may have to weld in those plates to allow adjustments.

IMG_1649-2090x1440.jpg


The new UMI bar installed nicely
 
  • Like
Reactions: 2 users

vandall

Greasemonkey
Aug 3, 2015
109
187
43
Seattle, WA
I am getting red X's for some of my images and I have tried to resave some posts with varying success. I am not sure if something was updated on the site that breaks some (but not all?) external image links. So I apologize if something is missing now. Someday I may go back through and attempt to fix all of it, but would have to find some time.

Really quick update on the car:

After going back and forth on the idea of 3D printing replacement bumper fillers, I just decided due to the cost of getting a scanner and not having nice enough condition fillers that I will simply fiberglass the backs of the fillers to try and save them as best I can. It turned out OK, but really wish I had done this first thing had I known fillers are impossible to find.

IMG_1836-2090x1440.jpg


Pretty ugly but it's very strong once all set up

IMG_1837-2090x1440.jpg


Passenger side filler is far worse condition, just trying to save them for now

IMG_1838-2090x1440.jpg


Be careful to not get any material on the front, it will never come off
 
  • Like
Reactions: 1 users

vandall

Greasemonkey
Aug 3, 2015
109
187
43
Seattle, WA
I had the fuel pump hanging out in space at the rear which always bugged me and was potentially dangerous. I made a couple 90* brackets out of heavy gauge sheet metal to tuck it up above the hitch receiver sub frame. It works nicely as it is well protected up there. The idea was to at least hard line from the sump outlet to the pump inlet, but since I needed a pre-filter inline I could not figure out the fitting situation. I may have enough different pieces to try it now, though.

IMG_1851-2090x1440.jpg


Just mocked up but it's easier to see how things will lay out without the tank in there

IMG_1853-2090x1440.jpg


Initially when I had mounted the pump I drilled and tapped that solid steel bar, which was a real b*tch but now it's nice to be able to quickly remove bolts

IMG_1854-2090x1440.jpg


With everything installed it's not hanging down like before, and yes those zip ties are NHRA approved :)
 
  • Like
Reactions: 2 users

GBodyForum is a participant in the Amazon Services LLC Associates Program, an affiliate advertising program designed to provide a means for sites to earn advertising fees by advertising and linking to amazon.com. Amazon, the Amazon logo, AmazonSupply, and the AmazonSupply logo are trademarks of Amazon.com, Inc. or its affiliates.

Please support GBodyForum Sponsors

Classic Truck Consoles Dixie Restoration Depot UMI Performance

Contact [email protected] for info on becoming a sponsor