for those who have nice aluminum plate for the gauge's can someone make me one or maybe have an extra one i can buy off them, i know some peeps on here made some an look really nice but i just dont have the time or materials to make one..
custom cluster
- Thread starter Cutty1
- Start date
You are using an out of date browser. It may not display this or other websites correctly.
You should upgrade or use an alternative browser.
You should upgrade or use an alternative browser.
- Status
- Not open for further replies.
Get ahold of this guy, he's up in the Saginaw area last I knew. He may be able to make one for you, but you'll probably need to ship him your cluster for him to make an accurate blank.
http://www.maliburacing.com/forum/membe ... ile&u=4679


http://www.maliburacing.com/forum/membe ... ile&u=4679


If this is for a Cutlass, they are very simple to make. Here's a few pictures of how I did one years ago.
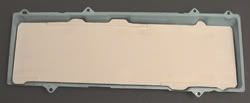
I used a stock metal gauge face piece to make a paper template.
This is the backside with the template inside:
Then used templates I cut out for my gauges and moved them around on the paper template until I was happy with the layout and taped them down. The gauge templates have the centers marked for the next procedure.
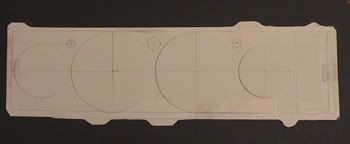
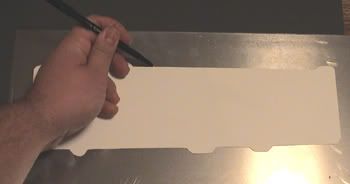
Traced the template out onto a sheet of aluminum and also center punched the center of the gauges as well as the indicator lights.
I then take the stock clear plastic gauge cover and cut the front of it out like this and paint the rest of the plastic black. This keeps you from seeing inside the dash from the sides:
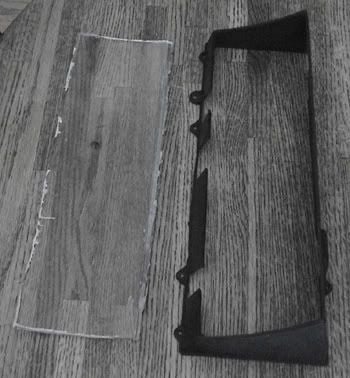
I also take the stock plastic "bucket" piece in the back that has the printed circuit board attached as well as the lights and remove all of that stuff then cut it for clearance with the gauges:
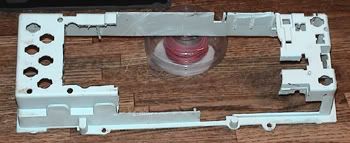
Then the aluminum piece I riveted to the stock metal gauge face after cutting the face and leaving an 1/8" or so lip around for the rivets:
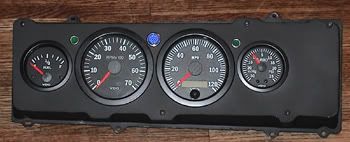
Everything bolts back in just like the stock cluster:
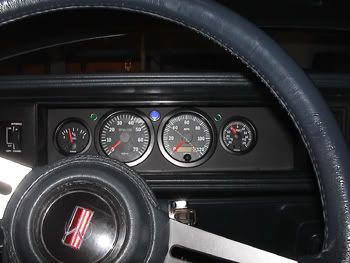
That was my first attempt 7-8 years ago but I used the same technique for my latest gauges but just did a few things differently. For one I used steel instead of aluminum and just tack welded it to the stock steel gauge face piece so that I wouldn't have any rivets showing. I also used Deustch connectors in the dash to make disconnecting the cluster very easy.
The new cluster:
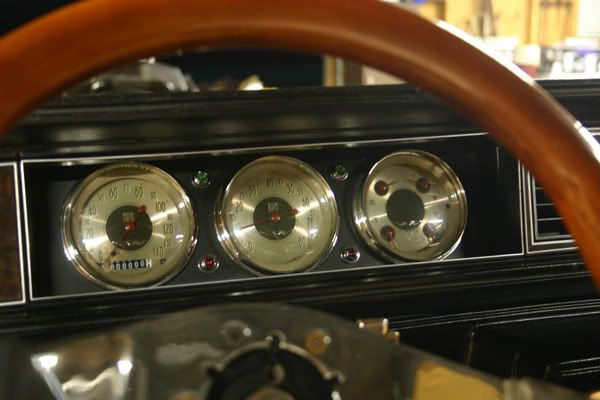
I also found some nicer LED's for the turn signals and brights.
I used a stock metal gauge face piece to make a paper template.
This is the backside with the template inside:

Then used templates I cut out for my gauges and moved them around on the paper template until I was happy with the layout and taped them down. The gauge templates have the centers marked for the next procedure.

Traced the template out onto a sheet of aluminum and also center punched the center of the gauges as well as the indicator lights.

I then take the stock clear plastic gauge cover and cut the front of it out like this and paint the rest of the plastic black. This keeps you from seeing inside the dash from the sides:

I also take the stock plastic "bucket" piece in the back that has the printed circuit board attached as well as the lights and remove all of that stuff then cut it for clearance with the gauges:

Then the aluminum piece I riveted to the stock metal gauge face after cutting the face and leaving an 1/8" or so lip around for the rivets:

Everything bolts back in just like the stock cluster:

That was my first attempt 7-8 years ago but I used the same technique for my latest gauges but just did a few things differently. For one I used steel instead of aluminum and just tack welded it to the stock steel gauge face piece so that I wouldn't have any rivets showing. I also used Deustch connectors in the dash to make disconnecting the cluster very easy.
The new cluster:

I also found some nicer LED's for the turn signals and brights.
Both of those clusters look sweet but im really diggin those gauges in the second one, what are they?
wow thats awesome fe3x, where did u get the little plastic arrow and bright light pieces, and how did you get the bulbs to stay in? Ive got a rally gauge cluser im wanting to install, but i might try to do this instead 🙂
Oh yeah, also, for hooking up the fuel gauge, can you use the existing fuel gauge wire, or did you have to do some new wiring?
- Status
- Not open for further replies.
Similar threads
- Replies
- 6
- Views
- 558
- Replies
- 17
- Views
- 1K
- Replies
- 2
- Views
- 527
GBodyForum is a participant in the Amazon Services LLC Associates Program, an affiliate advertising program designed to provide a means for sites to earn advertising fees by advertising and linking to amazon.com. Amazon, the Amazon logo, AmazonSupply, and the AmazonSupply logo are trademarks of Amazon.com, Inc. or its affiliates.

