now you get to the fun,first confirm and repair any vacuum leaks and a good source vacume coming inside,if that is good you probly need that bell looking thing that has little arm moving it.it is how it adjust temp.use to change them all the time at work.dont know it they make anymore.will check tomoro.but it all requires vacuum system to be good.Ok so I got into my footwell again and snapped that straight threaded metal rod into the plastic clip that's on the bent metal rod. I can confirm that:
That being said, I can't figure out a way to make the temperature control cable (the cable behind the controls that moves in and out when you adjust the temp from 65 to 85) do anything to the bent metal rod with the plastic clip in it, or the straight threaded metal rod. It's like they don't interact. I recorded an update video on my phone, I'll link it below.
- When the straight threaded rod is pushed all the way back into the dash (aka towards the firewall), the air coming into the cab is cooler.
- When the straight threaded rod is pulled all the way out (aka towards the seat), the air coming into the cab is hot.
I also have not made any headway in terms of figuring out how to get air to come out the dash vents instead of just the windshield and floor vents.
Sorry for the portrait video orientation...I know it's annoying lol. I thought I'd be able to get the phone up into the glove box area better.
CUTLASS Issues with HVAC System - 1982 Cutlass Supreme
- Thread starter studer
- Start date
You are using an out of date browser. It may not display this or other websites correctly.
You should upgrade or use an alternative browser.
You should upgrade or use an alternative browser.
- Status
- Not open for further replies.
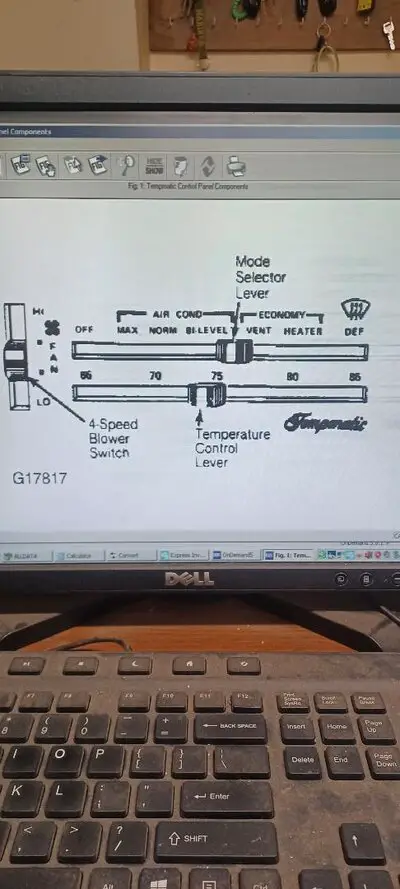
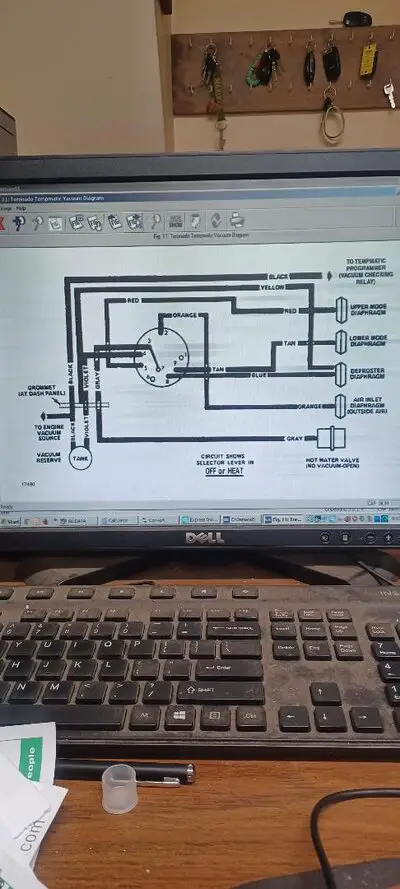
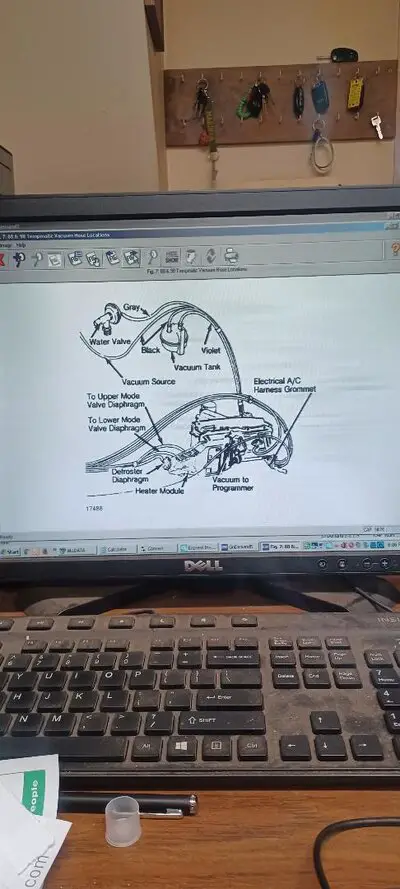
Do I need vacuum for temp adjustment? it seems like the temp adjustment on the controls only moves that cable that I showed in the video. I believe I need vacuum to sort out the blend door issue where I'm not getting any air out of the dash vents?now you get to the fun,first confirm and repair any vacuum leaks and a good source vacume coming inside,if that is good you probly need that bell looking thing that has little arm moving it.it is how it adjust temp.use to change them all the time at work.dont know it they make anymore.will check tomoro.but it all requires vacuum system to be good.
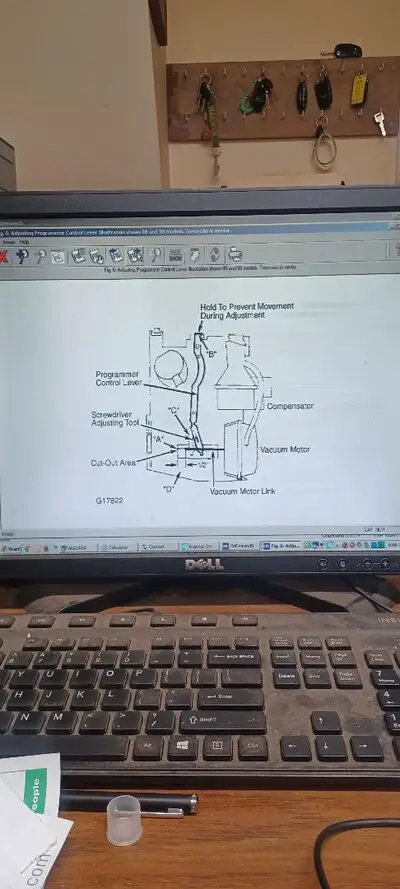
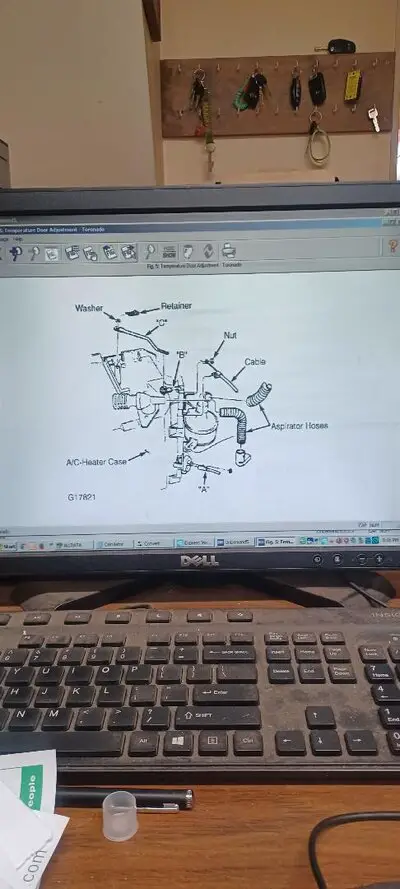
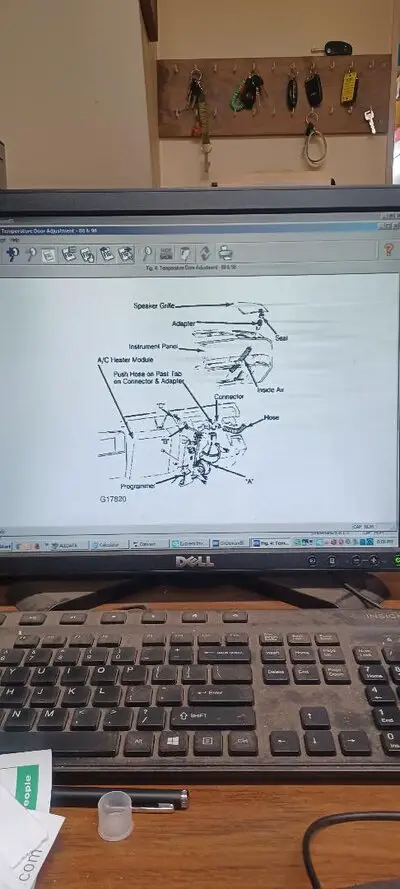
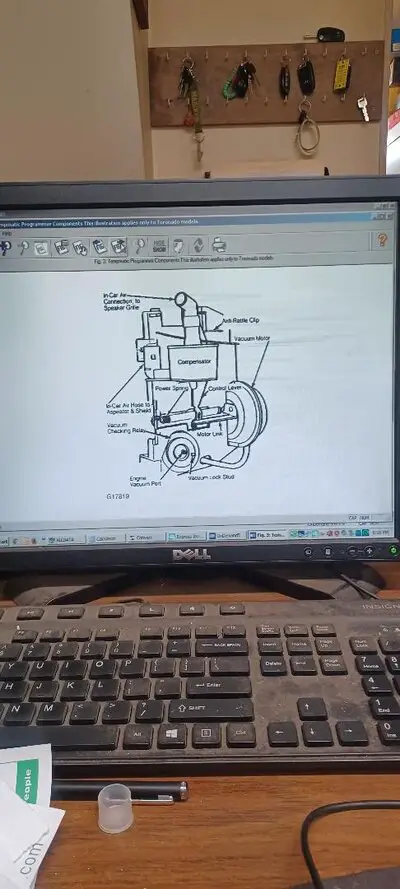
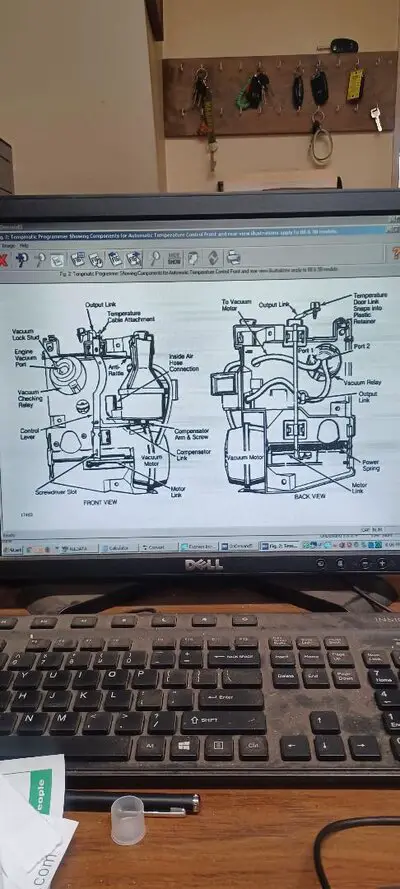
big yes on vacuum,the arm that is attached to threaded rod is actuated buy the big vacuum actuator below it.it is controled buy the compensator and check valve to the right.since you have no control of where air comes out,vent defrost ect.address vacuum first.Do I need vacuum for temp adjustment? it seems like the temp adjustment on the controls only moves that cable that I showed in the video. I believe I need vacuum to sort out the blend door issue where I'm not getting any air out of the dash vents?
big yes on vacuum,the arm that is attached to threaded rod is actuated buy the big vacuum actuator below it.it is controled buy the compensator and check valve to the right.since you have no control of where air comes out,vent defrost ect.address vacuum first.
big yes on vacuum,the arm that is attached to threaded rod is actuated buy the big vacuum actuator below it.it is controled buy the compensator and check valve to the right.since you have no control of where air comes out,vent defrost ect.address vacuum first.
Attachments
-
 olds10.jpg73.8 KB · Views: 97
 -
 olds1.jpg82.6 KB · Views: 104
 -
 olds2.jpg79.6 KB · Views: 102
 -
 olds3.jpg85.7 KB · Views: 97
 -
 olds4.jpg77.7 KB · Views: 101
 -
 olds5.jpg72.3 KB · Views: 104
 -
 olds6.jpg71 KB · Views: 99
 -
 olds7.jpg74 KB · Views: 100
 -
 olds8.jpg76.4 KB · Views: 106
 -
 olds9.jpg89.6 KB · Views: 97
Thanks for this, this is helpful. It might be worth just removing the auto climate control feature like he mentioned in the video.Here's a guy dealing with something similar. He might have other videos & maybe he could help:
Ok well I took apart the system from the footwell. It's now apart and I hope I remember how to put it back together. The tempmatic system has a vacuum chamber/solenoid/whatever that opposes the force of a tension spring.big yes on vacuum,the arm that is attached to threaded rod is actuated buy the big vacuum actuator below it.it is controled buy the compensator and check valve to the right.since you have no control of where air comes out,vent defrost ect.address vacuum first.


That vacuum chamber has a diaphragm in it, and I think that's the source of my vacuum leak:

Personally I don't need the auto climate control to work, so I may try putting it back together and leaving the vacuum chamber/solenoid disconnected from the bar/rod that actuates the temperature blend door. This was mentioned in one of the videos that brrian posted above. If I want to stop the hissing sound from the leaking diaphragm, I can probably pull the vacuum line from the vacuum chamber and cap it. The vacuum is quite strong going into the chamber, so I guess that's a good sign for the overall health of my vacuum system?
If that doesn't work and I end up having to seal that diaphragm, I'm not sure how that'll get done. Potentially some silicone caulking and then a small piece of gorilla tape. Not sure, and I doubt a replacement part is available. And if it's somehow available, I doubt the price is something I'd pay lol
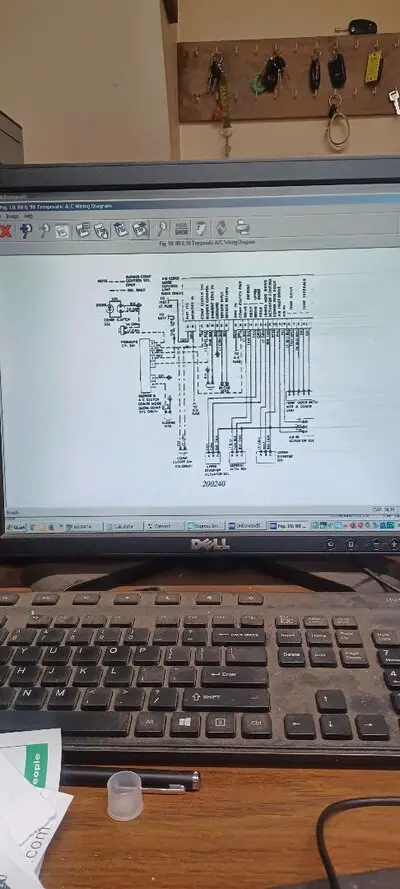
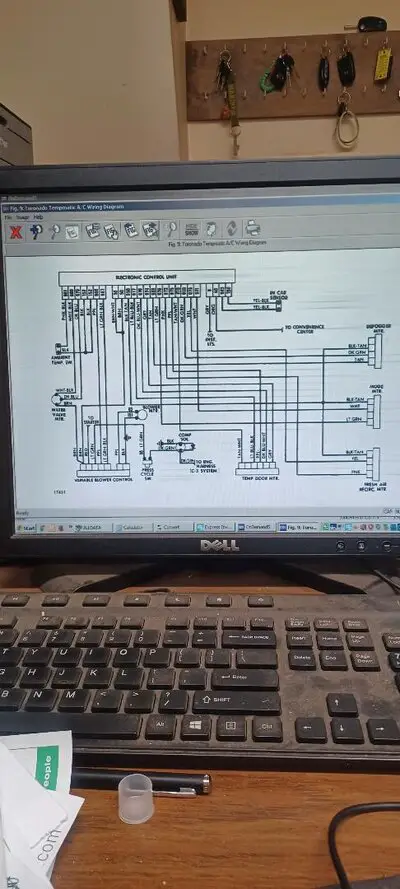
edit: Thank you for the images from the service manual as well!
now that programmer assembly is out the way,feel around the front top of case and see if there is a hole shaped like a key hole.if so get a transfer leaver and it will be manual control.it will be near threaded rod and look like one of the first pics you posted.g body . com sells them for like fourty bucks.Ok well I took apart the system from the footwell. It's now apart and I hope I remember how to put it back together. The tempmatic system has a vacuum chamber/solenoid/whatever that opposes the force of a tension spring.
View attachment 228054 View attachment 228055
That vacuum chamber has a diaphragm in it, and I think that's the source of my vacuum leak:
View attachment 228056
Personally I don't need the auto climate control to work, so I may try putting it back together and leaving the vacuum chamber/solenoid disconnected from the bar/rod that actuates the temperature blend door. This was mentioned in one of the videos that brrian posted above. If I want to stop the hissing sound from the leaking diaphragm, I can probably pull the vacuum line from the vacuum chamber and cap it. The vacuum is quite strong going into the chamber, so I guess that's a good sign for the overall health of my vacuum system?
If that doesn't work and I end up having to seal that diaphragm, I'm not sure how that'll get done. Potentially some silicone caulking and then a small piece of gorilla tape. Not sure, and I doubt a replacement part is available. And if it's somehow available, I doubt the price is something I'd pay lol
edit: Thank you for the images from the service manual as well!
So here's what I did to fix my heater control issues in the end:
- Only hot air coming into the cab. I basically deleted the Tempmatic system without making any non-reversible modifications. So if my silicone patch on the diaphragm works and I want to go back to the semi-auto climate control system (not sure why I would), it would be possible. I basically removed the vacuum chamber, the spring that attaches to it, etc. I then drilled a pivot point for the vertical bar, and put that together with an M4 bolt, washers, and a lock nut. I made a video describing it. That video was taken before I fixed my "no air through the dash vents issue", which I fixed later on.
- Air only coming out the windshield and floor vents, never the dash vent. Basically the slider that goes AC to vent to heater to defrost was completely useless. It did nothing and changed nothing. I couldn't hear a vacuum leak/hiss from behind the heater controls as brrian had suggested earlier. I decided to take the heater controls out anyways just to double check. Turns out that was an issue. I fixed it with a similar method as the video he linked, using a bolt, washer, nut, and threadlock, along with cleaning the circular vacuum maze back there (man there's some weird vacuum stuff in these vehicles). As a note, I was going to use a nylon locknut instead of a regular nut and threadlock...that did not work for me. I don't have a photo of it, but basically the nylon nut would stick too far out of the back of the vacuum maze assembly and hit the bracket that moves with the slider control. I had to use a regular nut, threadlock, and then also flapper-wheeled down the nut a bit to make sure it wouldn't ever hit the metal bracket. Sorry I don't have pics of this.
- Status
- Not open for further replies.
Similar threads
- Replies
- 2
- Views
- 155
- Replies
- 20
- Views
- 700
GBodyForum is a participant in the Amazon Services LLC Associates Program, an affiliate advertising program designed to provide a means for sites to earn advertising fees by advertising and linking to amazon.com. Amazon, the Amazon logo, AmazonSupply, and the AmazonSupply logo are trademarks of Amazon.com, Inc. or its affiliates.

