Hi, Everyone!
I have an '84 Caprice with a 305.
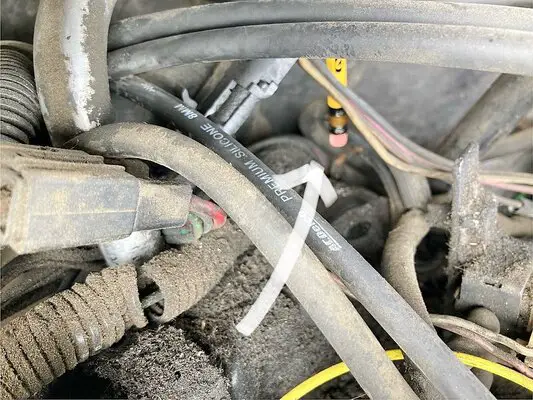
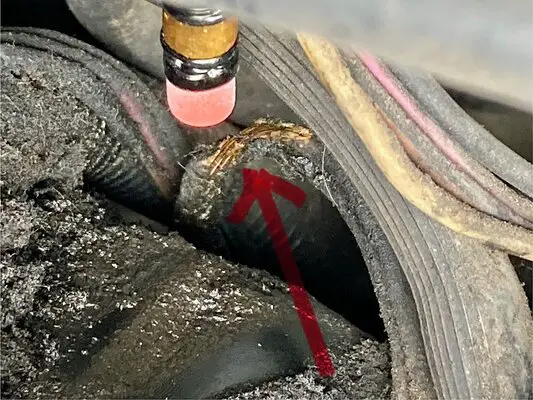
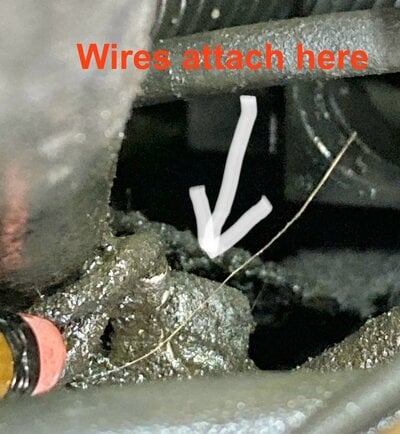
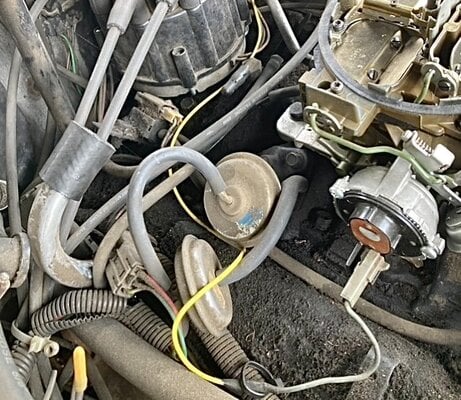
For months, I've not driven the car except to move it for street-cleaning days due to smelling burning plastic, and seeing a whisp of smoke coming from the rear of the engine once the engine warmed up--but I couldn't locate the source. Yesterday, as I looked at how much stuff I'd need to pull off to remove the left valve cover (to replace the slowly seeping gasket), I saw that the two Ground System wires at the rear of the engine were bare--the insulation had melted--this must have been the cause of the burning smell and smoke. I found a small piece of wiring loom around the wires, I figure the loom eventually deteriorated, letting the wires touch the block. The bolt that the wires attach to, I guess on the bell housing (near the trans dipstick tube), is nearly impossible to get at, so I figure I'd just splice in new wire and attach it onto a ring terminal, securing that on an easier engine bolt, maybe on a bracket.
How does this sound?
Also, as I'm intending to keep the car for awhile--getting it almost five years ago--I'm trying to find detailed diagrams of the wire routing--not the nearly indecipherable schematics in the rear of the 1984 Chevrolet Shop Manual ST-329-54 that I got from a CD-Rom, there's no drawing of the rear of the engine where the System Ground wires attach, for example.
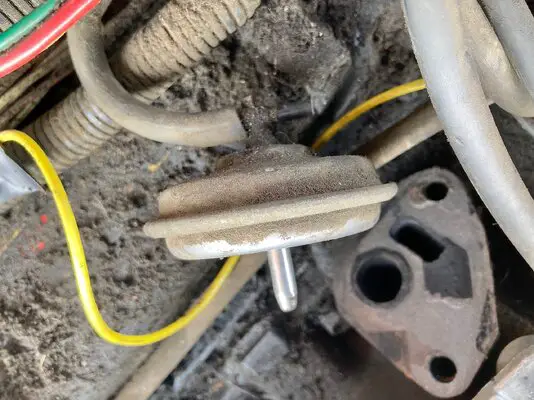
In the attached photos, I'm using a pencil eraser to point.
I have an '84 Caprice with a 305.
For months, I've not driven the car except to move it for street-cleaning days due to smelling burning plastic, and seeing a whisp of smoke coming from the rear of the engine once the engine warmed up--but I couldn't locate the source. Yesterday, as I looked at how much stuff I'd need to pull off to remove the left valve cover (to replace the slowly seeping gasket), I saw that the two Ground System wires at the rear of the engine were bare--the insulation had melted--this must have been the cause of the burning smell and smoke. I found a small piece of wiring loom around the wires, I figure the loom eventually deteriorated, letting the wires touch the block. The bolt that the wires attach to, I guess on the bell housing (near the trans dipstick tube), is nearly impossible to get at, so I figure I'd just splice in new wire and attach it onto a ring terminal, securing that on an easier engine bolt, maybe on a bracket.
How does this sound?
Also, as I'm intending to keep the car for awhile--getting it almost five years ago--I'm trying to find detailed diagrams of the wire routing--not the nearly indecipherable schematics in the rear of the 1984 Chevrolet Shop Manual ST-329-54 that I got from a CD-Rom, there's no drawing of the rear of the engine where the System Ground wires attach, for example.
In the attached photos, I'm using a pencil eraser to point.