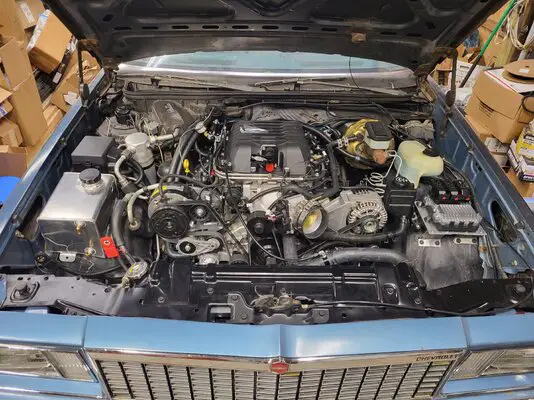
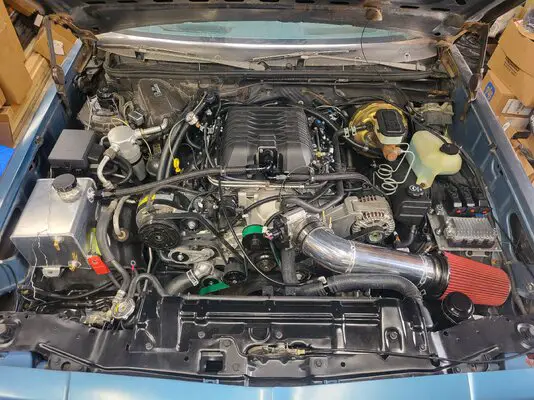
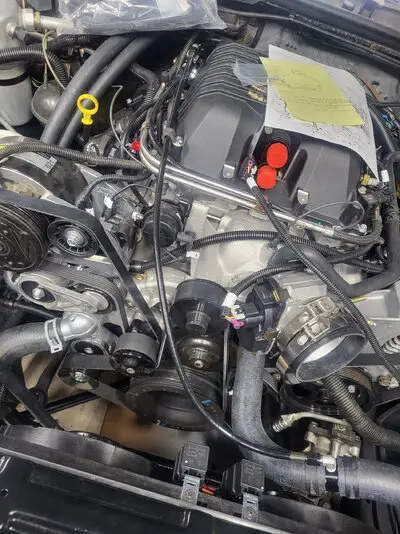
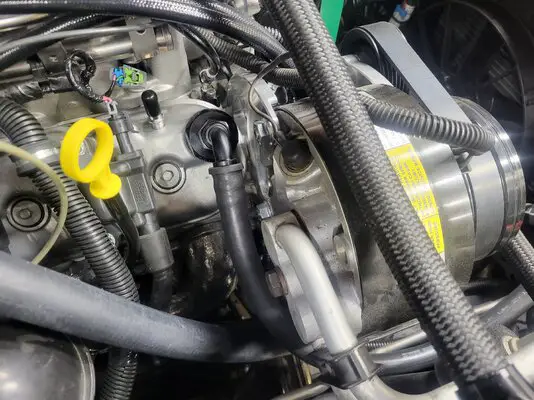
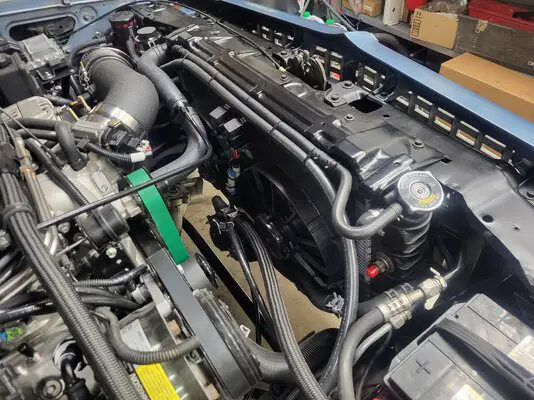
Finally finished my LSA swap in my 78 Malibu.

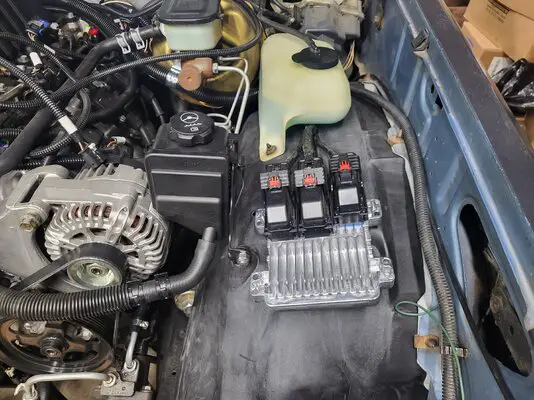
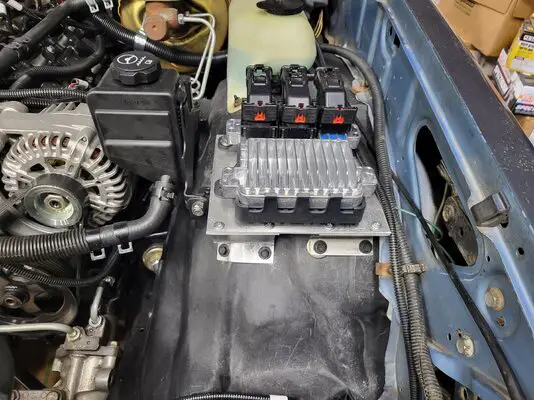
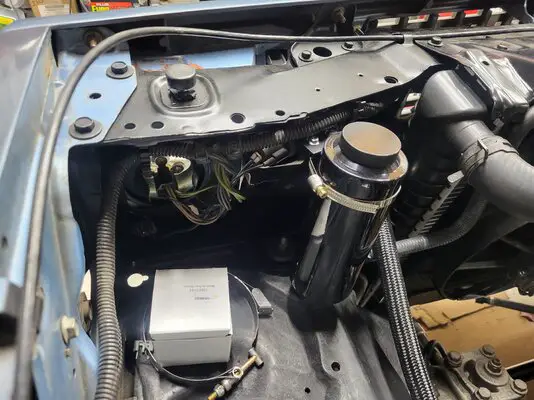
My next projects were mounting of the pcm on the left side and the fuse/relay junction box on the right. I also wanted to have a reservoir for the intercooler (stock CTS V and ZL1 do not actually have a reservoir). I played around with mounting locations staying aware of the hood hinges and other accessories. For the pcm I made an aluminum plate with support legs. I was very careful to make sure the pcm would be level once mounted. I did the same for the fuse/relay box. Once completed they were powdercoated satin wrinkle black. 20241009_204822.jpg20241020_174516.jpg20241020_174452.jpg
 
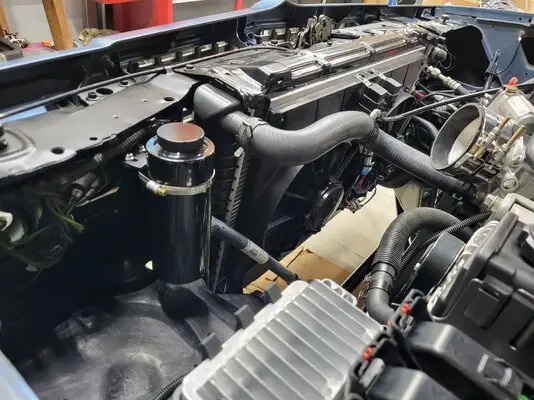
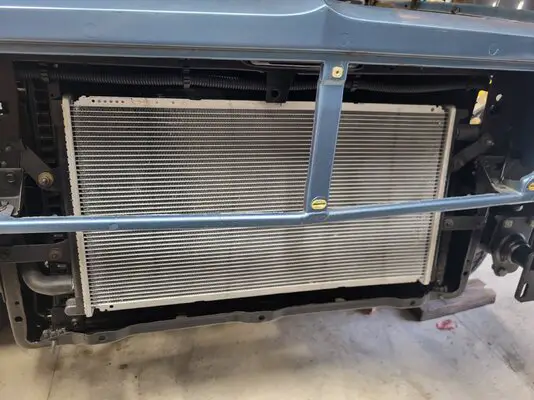
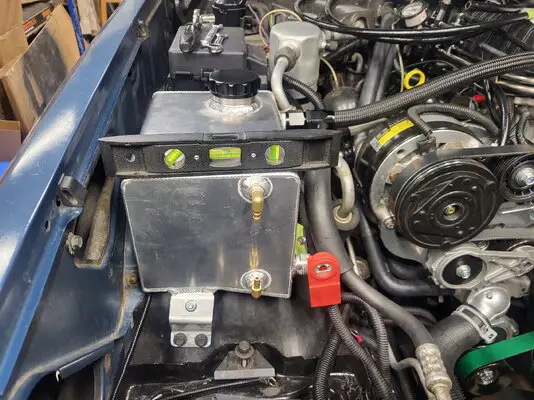
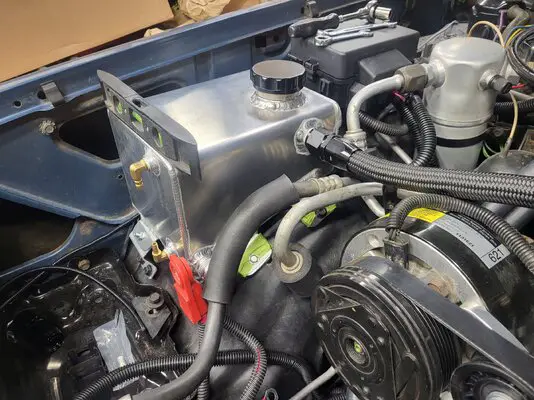
My overflow bottle for the radiator in an Ebay find and I relocated it to the left side of the radiator support. I bought a bunch of 3/8" coolant bends and put them together with double ended hose barbs and retained them with OEM looking pinch clamps from McMaster Carr. I ran the hose along the rear edge of the radiator retaining plate.

20241020_184300.jpg20241028_203311.jpg
 
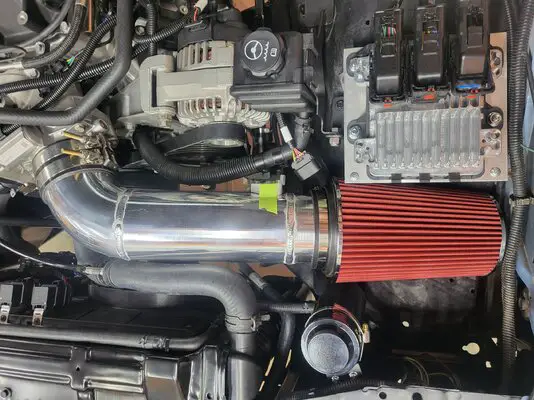
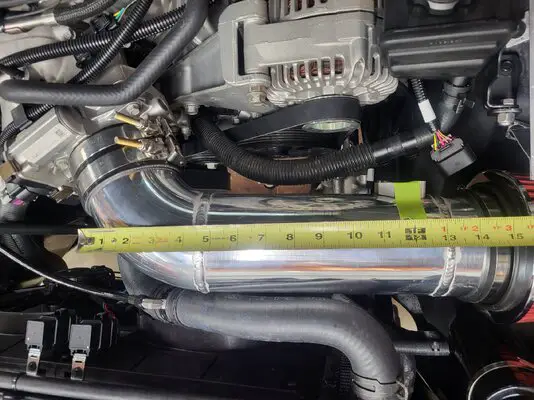
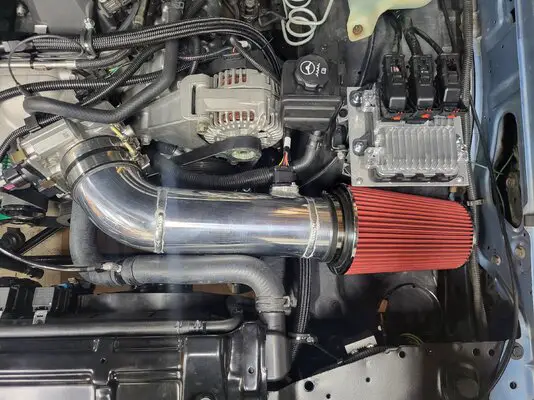
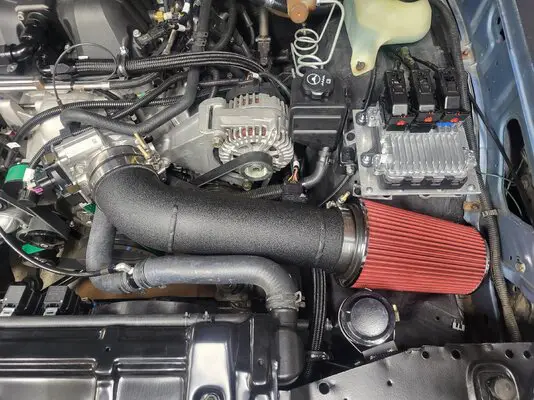
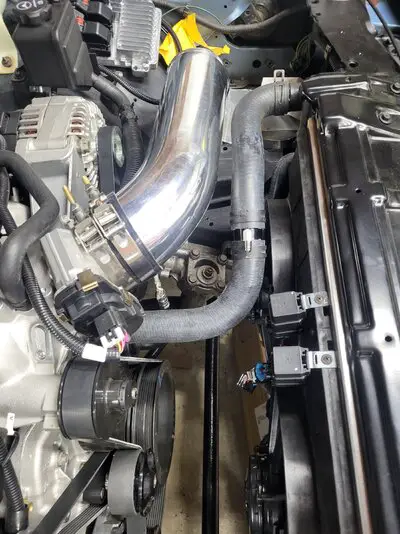
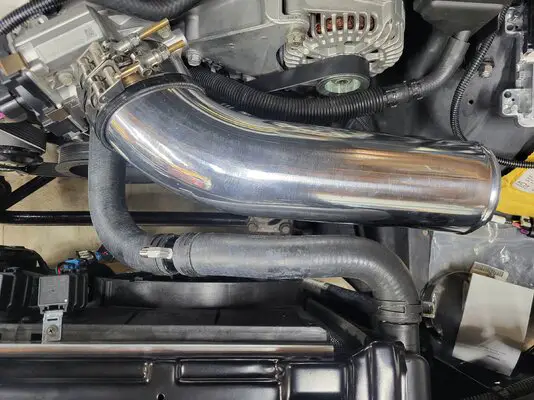
My air inlet is 4" diameter aluminum tubing that I cut and fit and tig welded together. The harness kit came with an aluminum weld bung for the card style mass air flow sensor. It turns out that the best location for it is also the exact distance it needs to be from the throttle body. Fitment was tricky because I didnt want the pipe to rub on my upper hose or the filter on the pcm bracket. I also powder coated this satin wrinkle black once all the welding and fitting were done. The air filter is a 9" cone from Summit Racing.
20241024_160548.jpg20241024_160613.jpg20241025_201329.jpg20241026_124254.jpg20241029_153006.jpg
 
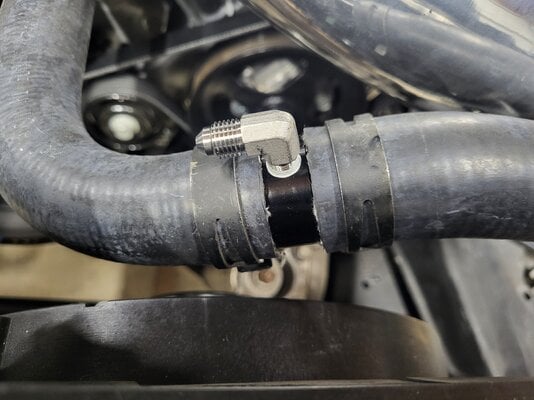
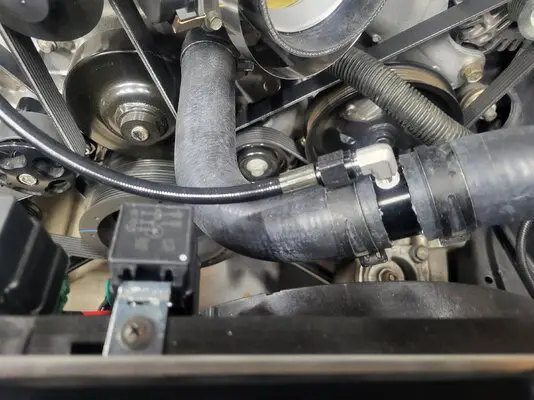
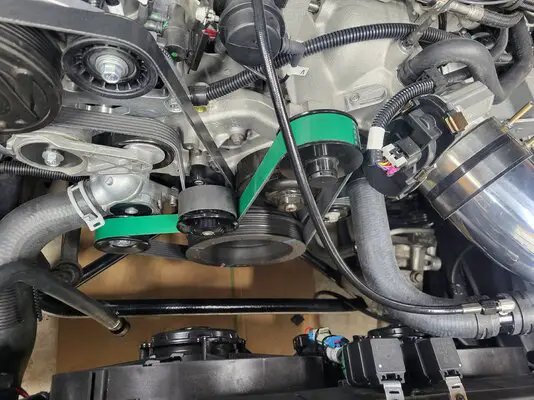
The hoses took some research. Thank goodness for patient autoparts stores and Amazon. I ended up using a C6 LS3 upper hose mated to a universal 90 degree bend both purchased on Amazon. I spliced the 2 together using an aluminum double ended hose barb that also included an 1/8" NPT hole that was perfect for attaching my steam vent hose. I am using a 4 corner steam vent kit from Motion Raceworks. The lower radiator hose took many tries. I settled on an upper hose from an 88 Ford F150 6 cylinder. Its not perfect but works.


20241012_160229.jpg20241012_160236.jpg20241012_160320.jpg20241014_211353.jpg20241014_211358.jpg.
 
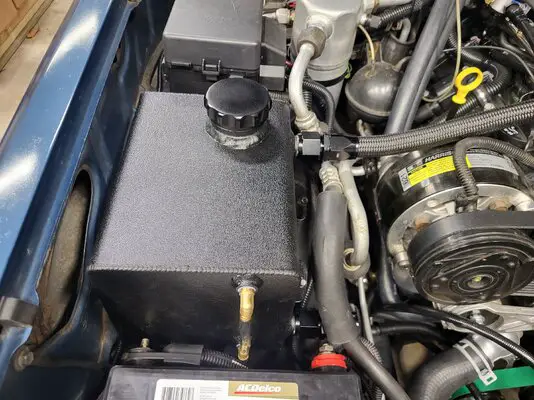
Intercooler heat exchanger and reservoir and hoses. As previously mentioned, I am using a reservoir. The one I am using is an aluminum radiator overflow for a 78-88 Chevrolet G body. These are all over Ebay. I modified it with a thread on cap that seals better than the cap it came with. I also tig welded on 2 -12AN male bungs. I had to make spacers to level the reservoir on the inner fender. I also shifted it forward for more clearance of the fuse/relay box. After all the modifications I had it powder coated the satin wrinkle black.
For hoses I used a combination of OEM ZL1 hoses spliced to 12AN hose. I am using a billet water manifold at the brick and special tight radius 90 degree 12 AN hose ends.
The heat exchanger is from a 2012-2015 ZL1 brand new from GM. I made my own mounting brackets that fit nicely in front of the ac condenser. Malibus do NOT give you a lot of room for these things behind the header panel.
The pump is a GM pump for the 2012-2015 ZL1. The engine harness was wired for that pump. I made my own bracket to mount it to the bottom of the radiator support (I need to take a picture of this as I dont seem to have one in my files).20241013_171910.jpg20241029_202549.jpg20241029_202553.jpg20241104_204850.jpg
 
Fuel system is stock 09-14 CTS V rails because of their passenger side fuel line connection better suited what I wanted to do. By comparison the 12-15 ZL1 have connections on the driver side.
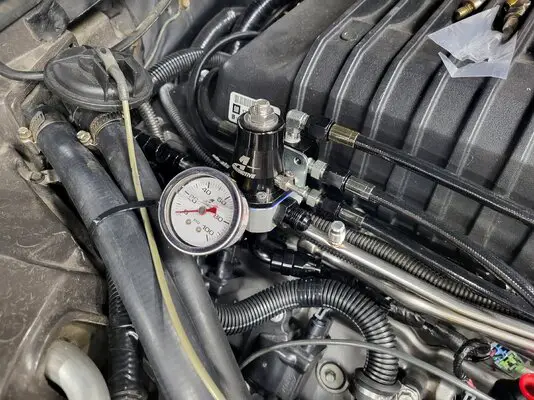
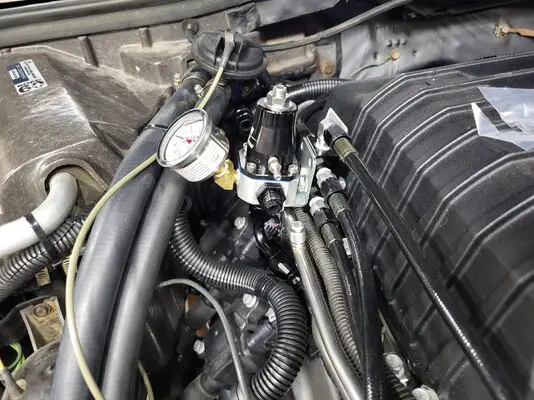
I am not using the returnless style set up. Mine is a dead head with a return. The regulator is an Aeromotive. The lines are all Fragola 6AN PTFE for feed and return. There is an Aeromotive 10 micron microglass filter inline under the passenger side door.
The other major componets are Grand National items or I should say items meant for installation on a Grand National.
The pump, hanger and hot wire kit are from Racetronix and purchased through Full Throttle Speed. The pump is a Walbro/TI Automotive Hellcat 525lph pump. The pump connections were terminated using Grand National weather pack connections. All the power and grounds to it are 10 gauge.
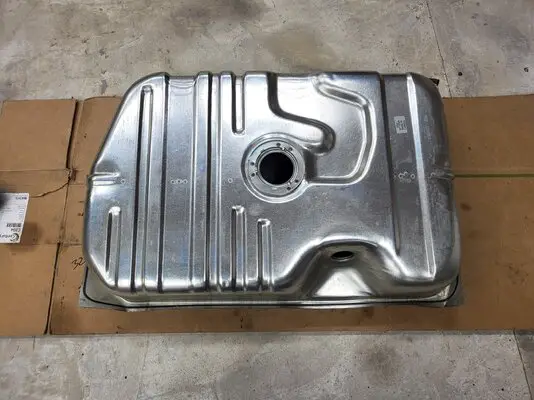
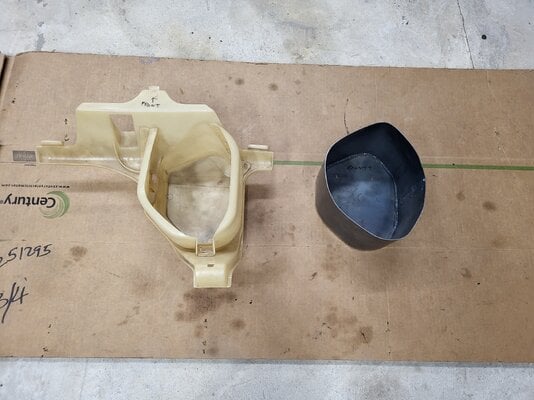
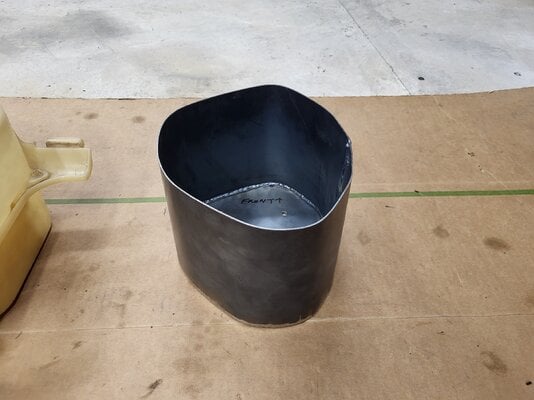
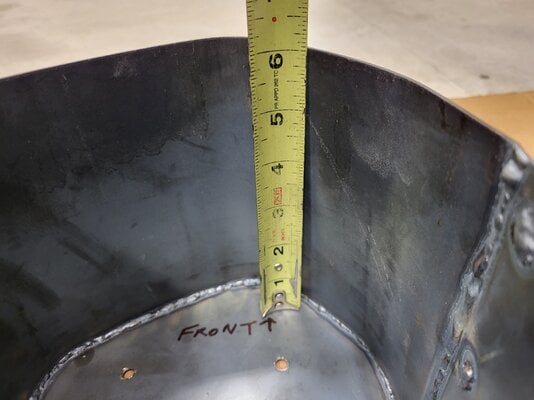
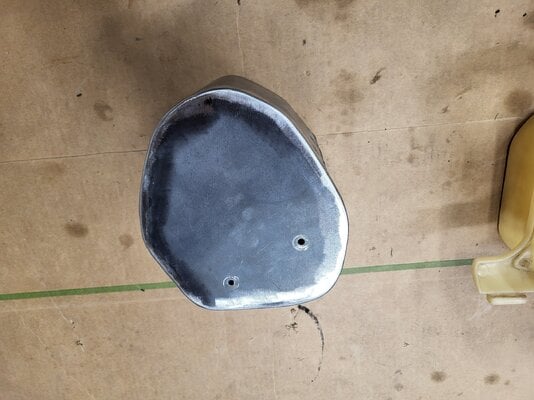
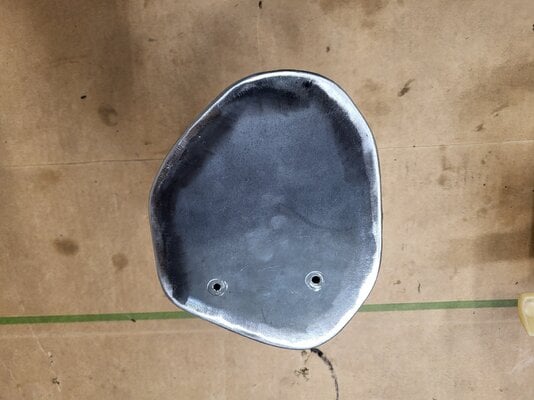
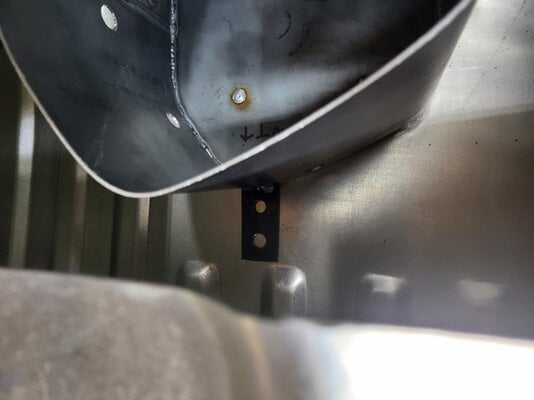
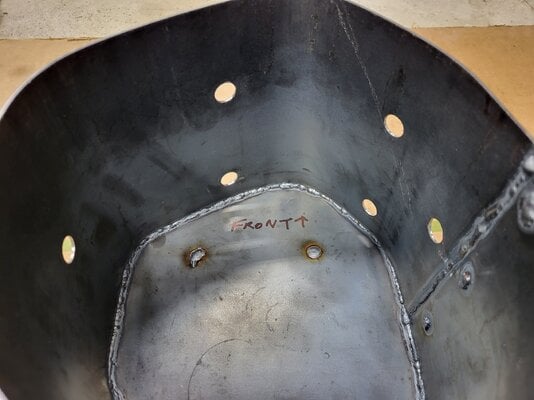
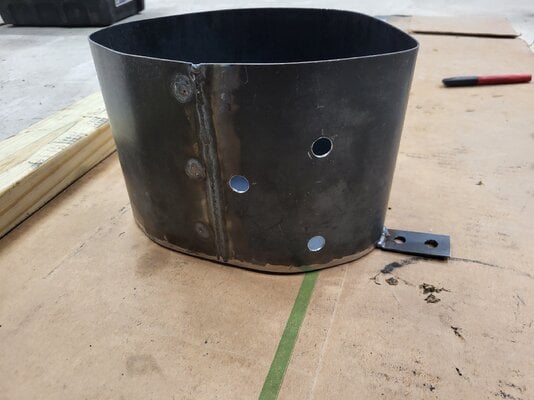
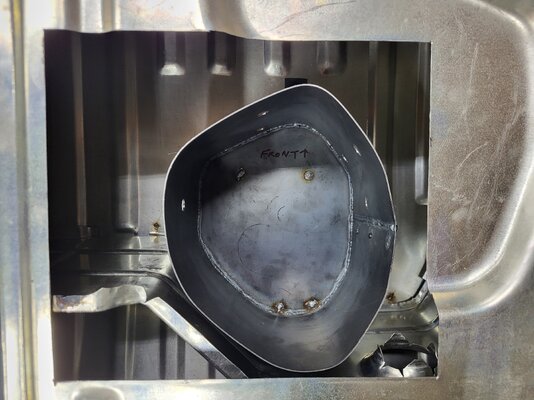
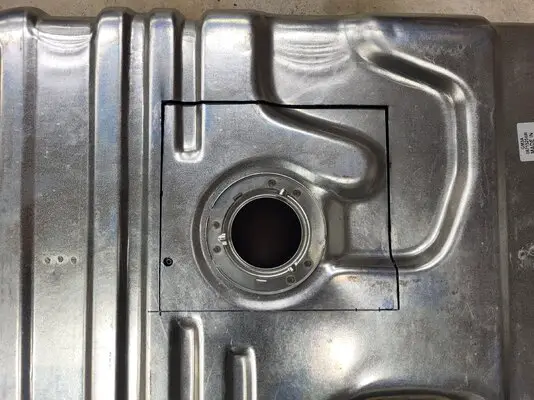
The tank is my own creation to mimic the original baffled Grand National tank; which in the Turbo Buick community is considered the best internally baffled tank you can get. The Spectra and Dorman baffles are barely 2.5 inches tall. The OEM is 6. I saved the original baffle out of the rusted original tank from my Buick. I used it to create a digital image and had a friend CNC cut a wooden buck for bending 16 gauge steel over it. I then tig welded the baffle together. I then used a Spectra non baffled tank that I cut open and spot welded my baffle in. It took 2 tries as the first try I didnt position it forward enough for the float arm to clear. Also note that the next one I make will be with a non galvanized tank as tig welding it was a b*tch!! I did save an original Malibu filler neck and silver soldered that in. I can say that I no longer have the spitting back when trying to fill the tank as I had with the other aftermarket tanks and filler necks.

20241020_174650.jpg20241020_174653.jpg20241214_201845.jpg20241214_201918.jpg20241214_201921.jpg20241214_201931.jpg20241214_201940.jpg20241214_201945.jpg20241214_204401.jpg20241215_113203.jpg20241215_155811.jpg20241215_155815.jpg
 

Attachments

  • 20241215_161704.jpg
    20241215_161704.jpg
    1.6 MB · Views: 7
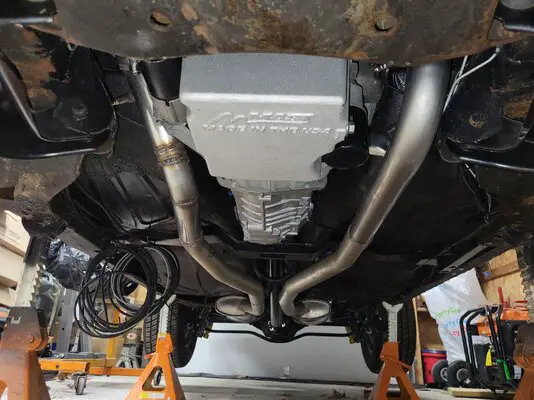
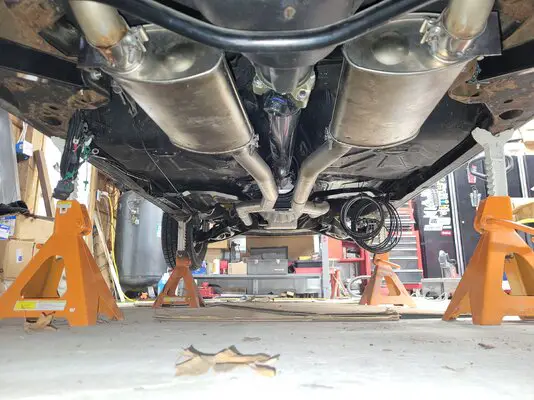
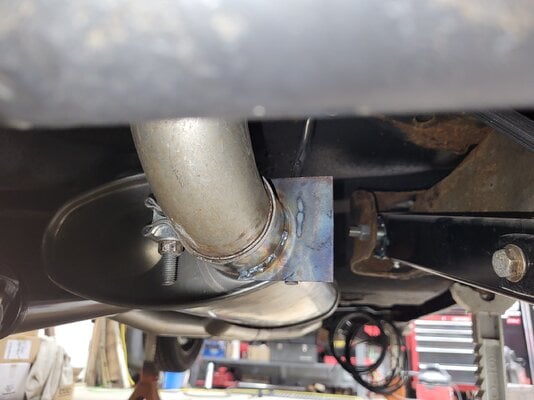
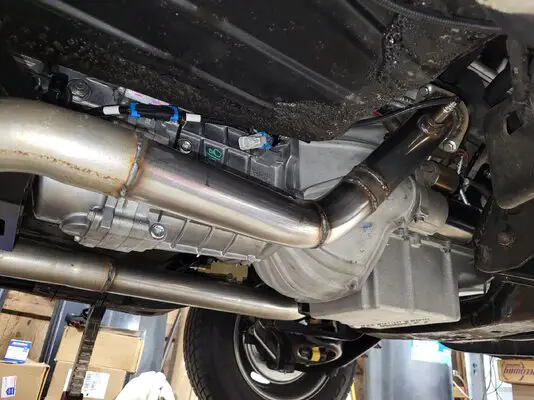
Exhaust system is my own concoction. I am using the same universal 2.5" system I bought from Summit Racing. I am running Walker Quiet Flow mufflers. I made my own hangers at the back of the mufflers. The front pipes are head pipes for exhaust manifolds from Pypes. The left side fit with minimal modifications. The right side had to be cut and fitting. Its not my best work but does the job and isn't leaking. At some point I will add a cross over/ H section behind the transmission and V band flange connections at the front of the mufflers to make removing the exhaust easier should I have to pull the transmission.

20241112_213121.jpg20241112_213146.jpg20241112_213203.jpg20241112_213223.jpg
 
Details.....
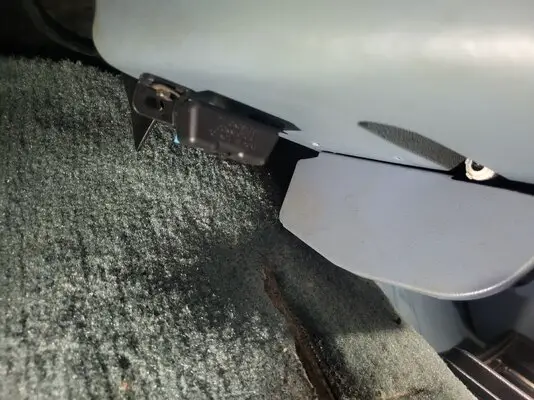
The harness has a diagnostic port. I mounted it in the factory location.
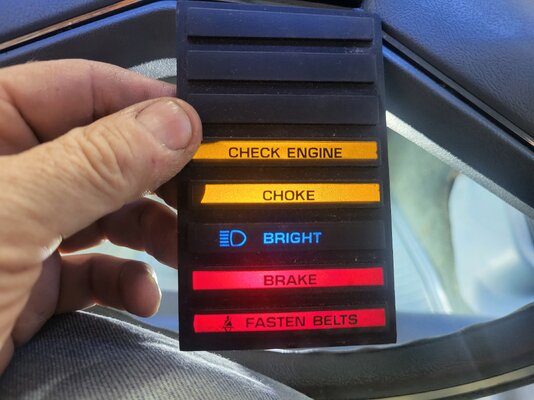
The harness also had a provision for a check engine light. That wire was in the part of the harness that goes into the car. I found a lens thanks to Steve (El Camino Kid LLC) and had an original GM bulb socket pigtail that fit the metal bulb housing in the cluster. You can see the light working in my first video that I will post later.
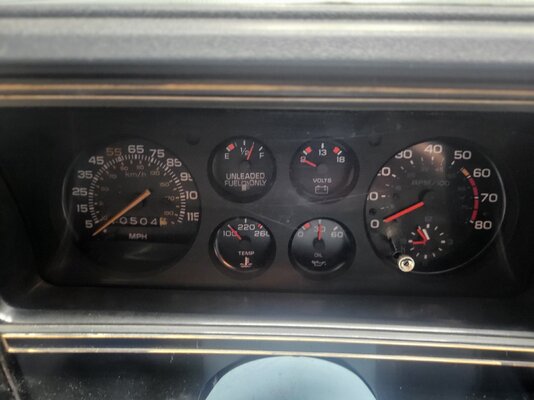
Also the tach was kind of a pain. So the E67 computer has a white wire output, but the signal is weak. When I first wired it up I simply ran the white wire from the computer to the original tach wire. It did not work
The instructions were to run a 12 volt switched wire out of the bulkhead connector that the tach wire comes out of. This is a connector attached over at the fuse/relay box. They want you to use a 5,000 ohm resistor on this wire. They want this in series with the tach wire from the computer. I ran them to a steel crimp connector and the the other side of the connector is the wire to the tach. That got the tach working but it was reading half the rpm it should. After more research I found that the tach output signal out of the computer is the same as a 4 cylinder. My factory tach did not have a selector/dipswitch. My options were:
Have someone modifiy the tune by changing the tach calibration ($$$)
Buy the HP Tuner software and modify it myself (More $$$)
Buy the Dakota Digital conversion box (Again, more $$$)
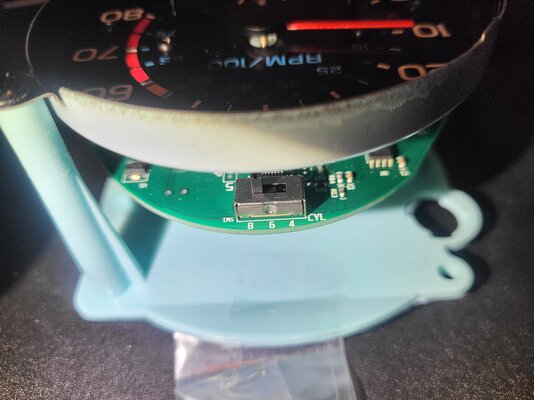
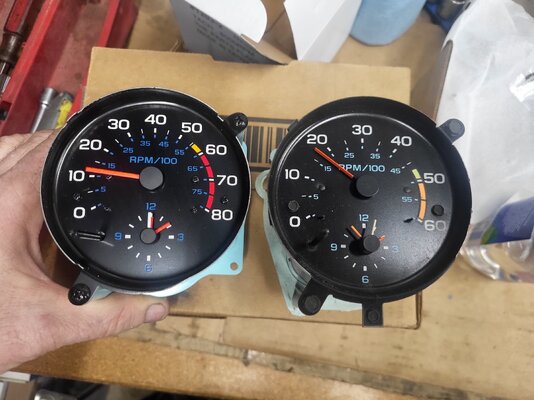
I actually ordered the Dakota Digital box but before it showed up I found a super nice reproduction/ custom tachometer from the Parts Place on Ebay. It looks like the original tach but goes to 8,000 rpms which is nice since the factory only goes to 6,000 and my camshaft shifts at 6600. The tach showed up and to my surprise has a dipswitch for 4, 6 or 8 cylinder. I set it to 4 cylinder and the tach is now accurate.. I corroborated it with my scan tool at different rpms. It was money well spent! So I sent the Dakota Digital box back.
20241029_212531.jpg20241029_212638.jpg20250102_153949.jpg20250102_200229.jpg20250102_205515.jpg
 
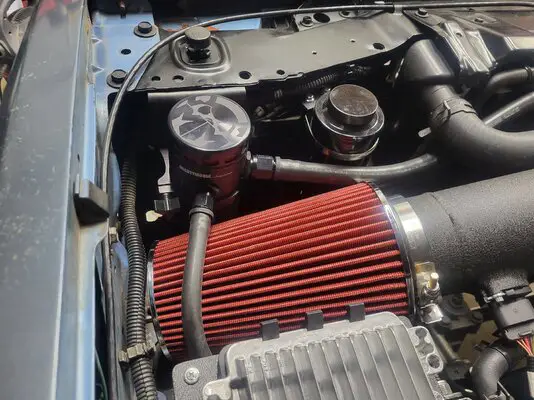
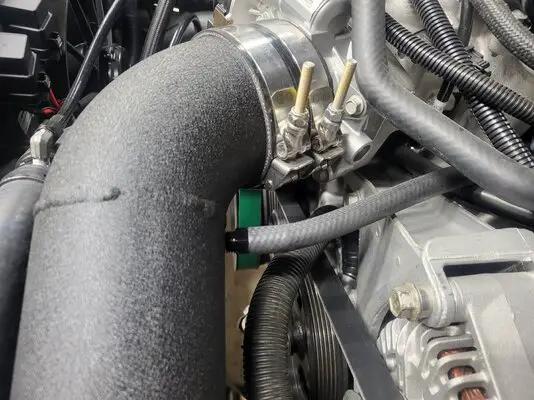
Crank case breather is from Mighty Mouse. The factory pcv was barely adequate and enough to get the CTS V and ZL1 through emissions. I installed the Mighty Mouse breather next to my overflow located behind the left head light. Because it uses a mass air flow sensor I had to add a nipple to my inlet pipe and run a hose from the pcv valve built into the left valve cover. A reproduction pcv hose for a 69 Z28 worked like a champ.
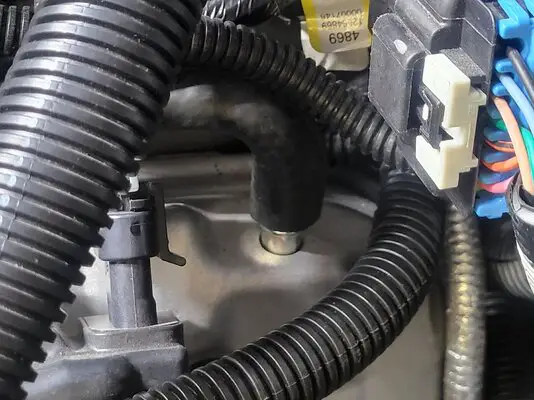
The vacuum connection to the brake booster is via a vacuum hose for a 12-15 ZL1 that is cut and spliced at the booster. The hose is half inch compared to the 11/32 on the G bodies. I simply used a booster check valve I had in my tool box from a 96 Beretta I parted out years ago. That worked perfectly as well!


20241116_101151.jpg20241116_101155.jpg20241116_101210.jpg20241116_101239.jpg20241116_101243.jpg
 

GBodyForum is a participant in the Amazon Services LLC Associates Program, an affiliate advertising program designed to provide a means for sites to earn advertising fees by advertising and linking to amazon.com. Amazon, the Amazon logo, AmazonSupply, and the AmazonSupply logo are trademarks of Amazon.com, Inc. or its affiliates.

Please support GBodyForum Sponsors

Classic Truck Consoles Dixie Restoration Depot UMI Performance

Contact [email protected] for info on becoming a sponsor