1983 Big Block Monte Slow Build (Lowered Expectations)

Supercharged111

Comic Book Super Hero
Oct 25, 2019
4,934
7,719
113
Colorado Springs, CO
Been chipping away at this thing here and there, got both belt receptacles installed but the passenger belt still needs to be bolted in. I seem to be missing that fastener.

PXL_20231121_030932901.MP.jpg


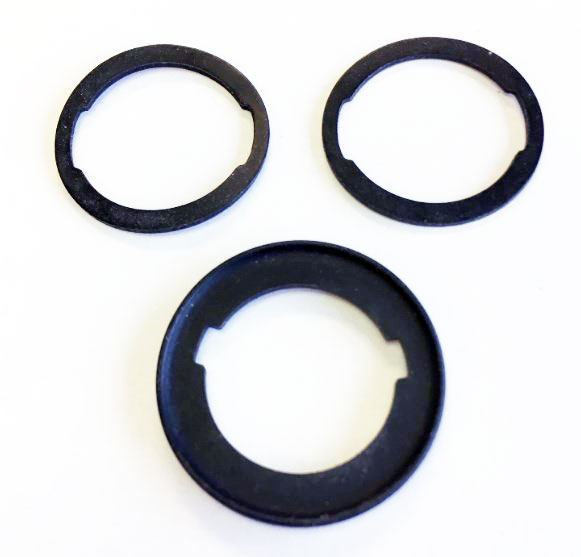
1 less law to simultaneously break while piloting this whip. No pics at the moment of the weather stripping, but I'm working on the lower piece on the driver's side. My dad had bought all 4 door strips plus the window felt swiper dealies. The existing felts feel fine, but they also look like they've been replaced so not sure what to make of that. I looked up how to install these and found out that I needed an adhesive. Instinctively I walked over to the box of all that crap, and lo and behold I had a tube of it. No doubt it came from him, it's really satisfying to be able to button this thing up with stuff that's already on hand and not have to open my wallet for every little thing. One of my goals here is to get this weather proofed so it can sit outside for a year or 2 once we move. My dad had installed the upper strip on the driver's side and the lower strip on the passenger side, but not very well so I revisited that. I got the upper installed on the passenger side which necessitated rooting through the trunk for a piece of trim for it to bite into. It was there and I got that all in. Next up was the passenger lock tumbler that was missing. The exterior door handle also was inop. I found the linkage lying in the bottom of the door in this wonderful rat's nest.

PXL_20231122_220310768.jpg


I seem to recall it being worse than that after emptying the shop vac yesterday. At any rate I was missing the clip to hold that tumbler in. He'd bought new tumblers at some point and all of this is residual reassembly from the paint job. I went digging through my brake line clips and found these.

PXL_20231202_191352603.MP.jpg


The thin one on the left slipped right in and held the tumbler securely. Unfortunately I'm missing the arm that goes onto it and connects to the linkage but the hole is plugged now and the car looks complete so I'm happy with that.

PXL_20231202_191453109.MP.jpg


Going back to the week of Thanksgiving I managed to get the suction line replaced.

PXL_20231120_035010561.MP.jpg


Not only was I able to remove all the factory clamps, I was able to reuse enough to get me by.

PXL_20231120_034933392.MP.jpg

PXL_20231120_034859768.MP.jpg


And out back I went through some old pics to determine that the 2nd line does in fact have a rollover valve in the tank so I crammed a diff breather onto the end of the existing rubber hose and zip tied that into place to clean things up.

PXL_20231203_023019321.jpg


Much better. So now I'm piddling with the lower strip on the driver's side and a PS leak at the front of the housing on the pump itself. But first a side job to make a few bucks.
 
  • Like
Reactions: 5 users

565bbchevy

Geezer
Aug 8, 2011
9,616
12,688
113
Michigan
I can't tell from you picture but did you install the rubber gasket under the door lock tumbler?
 
  • Like
Reactions: 1 user

Supercharged111

Comic Book Super Hero
Oct 25, 2019
4,934
7,719
113
Colorado Springs, CO
I can't tell from you picture but did you install the rubber gasket under the door lock tumbler?

No, didn't know it was a thing. Kinda like the plastic gasket thing that goes under the door handle. I realized that existed after the fact too. Are those easy to find?

And should I trim this or is this just the way they are?

1000004476.jpg


It's flush with the door on either end.
 

565bbchevy

Geezer
Aug 8, 2011
9,616
12,688
113
Michigan
No, didn't know it was a thing. Kinda like the plastic gasket thing that goes under the door handle. I realized that existed after the fact too. Are those easy to find?
It is just a rubber gasket, they might still be available through GM but they are out there regardless of who you get them from.
I bought mine in a set with the trunk lock gasket also.
door-trunk-lock-gaskets1.jpg
 
  • Like
Reactions: 2 users

Supercharged111

Comic Book Super Hero
Oct 25, 2019
4,934
7,719
113
Colorado Springs, CO
Noice. I was able to locate them through a mere Google search as well. Now that I know they're a thing they're on the to (re?)do list.

Before I started on the side job I realized I needed jack stands. Stands that were occupied by the Monte. So I set about to free them up. The big reason this is still on stands is because I wasn't 100% happy with the aft-most section of suction line. While it appears to thread the needle I can't help but think it's gonna chafe itself to death, so I went through my convoluted wire tubing and came up with a solution.

PXL_20231203_175626243.jpg


Now to see how far up I got it.

1000004471.jpg


That'll do. It was at this point I remembered that the trailer was just around the corner armed with 4 willing non-Harbor Freight jackstands so I grabbed 2 and got to work on my side job.

1000004472.jpg


Master cylinder was bone dry for the rear circuit. It got new shoes, hardware, and wheel cylinders. And an oil change and air filter. This next weekend it's getting u-bolts, those were looking thin down at the bottom. But now that it's out of my garage for the time being I can finish dealing with the PS reservoir leak and the last remaining weather strip I've been avoiding.
 
  • Like
Reactions: 5 users

Supercharged111

Comic Book Super Hero
Oct 25, 2019
4,934
7,719
113
Colorado Springs, CO
So I finally got off my lazy *ss and dealt with the PS leak. Back in September I put a normal reservoir and put the remote RV type reservoir on the shelf, ideally for one of my trucks where the Whipple makes power steering pump fluid access a nightmare. I removed the reservoir and inspected the o ring. It was immaculate. The thing was leaking at the bottom where the housing and reservoir meet up. The reservoir looked just fine in that area too. It looked dinged up on the top, but nothing conclusive. So I grabbed a tube of black silicone and slathered some on the pump side and more on the reservoir side and bolted it back up. It's now holding fluid and not making a mess on my floor, so pretty happy about that. I also got that last bit of weather stripping installed. And while I was at it I bled the front brakes some more with some leftover brake fluid. I did get a good bit of air out. I would have liked to continue bleeding, but I ran out of what I had on hand. Tomorrow we'll see if the pedal is any less bad. It's a bit of a low pedal and recently I grabbed a handful to stop and chat with a friend and I noticed the rears locked first. Yeah there was definitely still a problem up front. My Motive bleeder wouldn't move any fluid through the thing so last winter we did it with my friend pumping the pedal. We got to a point where I was out of fluid but I also really really wanted my car out of his shop so just drove it as is because it did stop. But we're getting to a point where that's not good enough anymore. This thing is approaching road worthiness and with that comes the temptation to go for a rip every now and again so it really needs to be on the up and up. We'll see what tomorrow brings. For now it's back on the ground and the idea is to return it to the hangar for storage.
 
  • Like
Reactions: 2 users

Supercharged111

Comic Book Super Hero
Oct 25, 2019
4,934
7,719
113
Colorado Springs, CO
With the weatherstripping installed and adhesive now dry I slipped the top part of the door panel back in and fired the thing up. Aside from an extended crank to full the bowl and empty fuel line it was as it should have been. But when I backed it out into the driveway it became clear there was no power steering assist. The fluid that I had on hand wasn't enough, so off to O'Reilly's I went. $10 later I had a quart of fluid. Since when it this stuff so damn expensive? It didn't take hardly anything to get assist, the pump is clocked at a really weird angle. From there I loaded it and some tools up to be returned to the hangar. Once at the hangar I loaded the Camaro and tucked away the Monte, but first I decided the right rear tire had too much meat. I tried a brake stand, but that was met with limited success. This confirms the rear are still hitting much harder than the fronts. The brake pedal is less bad, but still not what it should be. I guess I ought to plan to pump a couple big bottles through it to get it 100%. I just can't fathom why this thing is so stubborn about getting all the air out. There is no ABS pump to create problems. Once I released the brakes it rapped out real quick. This thing really needs a posi, I see Yukon makes a 9" posi for $310 so will probably go that route down the road. The open diff absolutely kills this thing.
 
  • Like
Reactions: 3 users

Supercharged111

Comic Book Super Hero
Oct 25, 2019
4,934
7,719
113
Colorado Springs, CO
So today I went for a quick rip. I hadn't verified if last year's fuel suction line replacement took. I think I need to better characterize the car's performance. It seems every time I fire the thing up it's just a little less bad but never 100%. It seemed to drop around 4psi for the 1 prolonged 1-2 rip I was able to record. The second one the car tried cutting loose while I had 1 hand on the camera. When I laid back into it it dropped around 4psi though, so what I'm wondering is what should I expect in terms of fuel pressure from this thing? The instant those massive secondaries begin to crack open the fuel pressure heads for the hills.
 

Supercharged111

Comic Book Super Hero
Oct 25, 2019
4,934
7,719
113
Colorado Springs, CO
Today I wandered over to a friend's transmission shop near my hangar and saw a 60s Chevy truck peeking out of a bay so decided to investigate. Owner said the engine was a 402? Never heard of that, looked like any old big block in there. Clean and green, air cleaner looked brand new and had an AC Delco sticker on it. But he'd just done a 4L80 swap with some aftermarket controller and was monkeying around with some electrical box that would ingest a speed signal from the trans controller and drive an electric motor that would run the old school speedo. He mentioned that he needed to add a TPS to the carb and that made me remember that I needed a WOT switch for the carb to use as a kickdown switch which I mentioned, and he offered up the switch from that truck to me. It was dead weight at that point. So now I just need to make a bracket for the thing and I can have that working.
 
  • Like
Reactions: 6 users

L05edSS

Greasemonkey
Nov 29, 2022
208
113
43
Today I wandered over to a friend's transmission shop near my hangar and saw a 60s Chevy truck peeking out of a bay so decided to investigate. Owner said the engine was a 402? Never heard of that, looked like any old big block in there. Clean and green, air cleaner looked brand new and had an AC Delco sticker on it. But he'd just done a 4L80 swap with some aftermarket controller and was monkeying around with some electrical box that would ingest a speed signal from the trans controller and drive an electric motor that would run the old school speedo. He mentioned that he needed to add a TPS to the carb and that made me remember that I needed a WOT switch for the carb to use as a kickdown switch which I mentioned, and he offered up the switch from that truck to me. It was dead weight at that point. So now I just need to make a bracket for the thing and I can have that working.
i understand the 402 to be basically a 396, that's the extent of my knowledge.
 
  • Agree
Reactions: 1 user

GBodyForum is a participant in the Amazon Services LLC Associates Program, an affiliate advertising program designed to provide a means for sites to earn advertising fees by advertising and linking to amazon.com. Amazon, the Amazon logo, AmazonSupply, and the AmazonSupply logo are trademarks of Amazon.com, Inc. or its affiliates.

Please support GBodyForum Sponsors

Classic Truck Consoles Dixie Restoration Depot UMI Performance

Contact [email protected] for info on becoming a sponsor