More progress
New Brake Master Cylinder
If you read my last installment, you'll know that we're quarantined at home working through COVID-19. Not being able to run out to the auto parts store added a level of challenge to replacing the failed master cylinder. I thought maybe I might be able to convince my local O'Reilly to help me out with a curbside pickup, but O'Reilly one-upped me delivering the new master cylinder to our front porch, for free, in just 48 hours. Once we had the new part in hand, it only took a few minutes to bench bleed it and install it on the car. I think we may finally have the brake system finished (quickly kocks on nearest wooden object). The brakes feel solid and they held pressure over night without leaking. We'll keep any eye on them for the next few days for puddles, but I'm cautiously optimistic.
Heater A/C Box Cleanup
Years ago, when my younger brother was driving the El Camino, he parked it every night under a pine tree in our parents yard. We've cleaned at least a million pine needles out of every crack and crevice of the car. We found needles in the carpet, inside the frame, stuck to the side of the old engine block, and just about everywhere else a needle could settle. You can imaging my trepidation about the condition of the heater A/C box. I had visions of a solid mass of mud and pine droppings. So, when I pulled the heater fan motor, I was pleasantly surprised. There were, of course, pine needles, but blissfully, these was no mud. In fact, there wasn't even very much dust. I pulled the top of the heater box and used the shop vac to suck out the pine needles around the AC condenser and the heater core. Everything appears to be in good shape. The heater door moves freely and even the drain flap opens and closes as it should. At some point, we will need to order a seal kit and reseal the whole box, but for now, it's servicable.
Headliner
Like most old GM cars, the El Camino's headliner was drooping badly. That same younger brother attempted to resecure the headliner with thumbtacks. While functional, his solution looked about as classy as you would expect. In the twenty years since, the headliner, and the foam above it, have continued to deteriorate. I turned my son loose with the task of forcefully removing the old headliner. Once the dust cleared, the headliner and backer board were in pieces and gone. We have a new headliner on order. In the meantime, we installed sheets Kilmat sound deadening material to the underside of the roof. We used the same Kilmat on the floor pans before we reinstalled the carpet. The goal is to make the El Camino's cab a little more like the quiet interiors of today's modern cars. Even if we can't quiet it down that far, it certainly won't hurt anything.
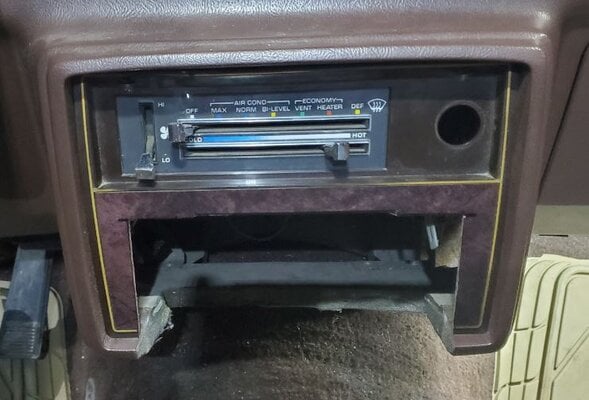
Heater Controls
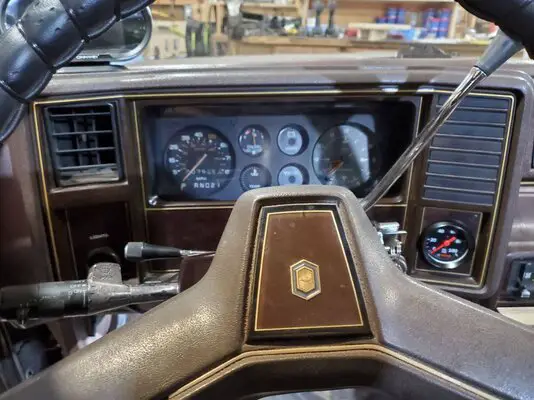
Back when we sorted through the wiring, we had to do some creative rewiring to revive the heater fan motor. At that point, we had low, medium, other medium, and high, but we were stuck in Defrost mode. The slider on the heater control panel was physically stuck on DEF. While I was sucking trash out of the heater box, my son was standing on his head inside the cab eye-balling the heater controls. He immediately spotted the problem. If you've ever had one of these control panels apart, you'll be familiar with the 9 port vacuum valve that controls which mode your HVAC system is in. In basic terms, this valve is a pair of wheels with tiny holes in them. As you move the mode lever on the control panel, the one of the wheels turns against the other wheel to align holes that connect vacuum circuits to activate the various HVAC modes (defrost, heater, vents, etc.). The two wheels are held together, face-to-face by a plastic clip. At some point, the clip broke and jammed the control lever. As you might expect, that clip isn't available on the after-market. A new repop control valve is $75. A NOS valve is is $150!!! Luckily, I found a really smart guy on the Internet who discovered that the clip can be replaced by a #8-32 machine screw with a lock nut. I have a reasonable stock of hardware in my shop. So, a #8-32 machine screw was no problem The challenge was that the head of the machine screw was too tall and it interfered with the control lever, just like the broken clip did. It took some fiddling around, but I ground enough off the head of the screw to make it clear the control lever. With everything pieced back together, the controls work perfectly.
Backup Lights
This problem turned out to be incredibly easy to solve. When we tested out all of the lights, several weeks ago, my son pointed out that we had no back up lights. Then, when we were working on the transmission shifter linkage, we discovered that the back up lights actually DID work, they just didn't work when the shifter was in reverse. It turned out that the back up light switch was just out of adjustment. The problem was that my old El Camino was a 3-speed manual, so I've never messed with a column mounted switch. Some quick Internet research showed me just how easy these things are to adjust. In case it might help someone else with the same problem, you're looking for a white semi-circular piece of plastic mounted to the top side of the steering column just above the brake pedal. The switch is mounted on toothed rack that "pivots" around the steering column. All you have to do to adjust the switch is use your finger tip to rotate the switch one way or the other a few clicks. It's easier to do than it is to describe. Once I knew how it worked, it literally took 30 seconds to adjust. The only reason it took that long is that I went three clicks the wrong direction. Six clicks back and the lights came on.
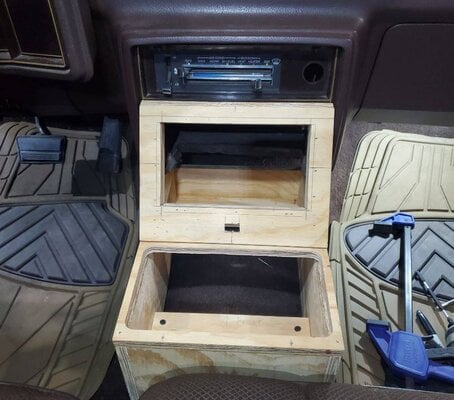
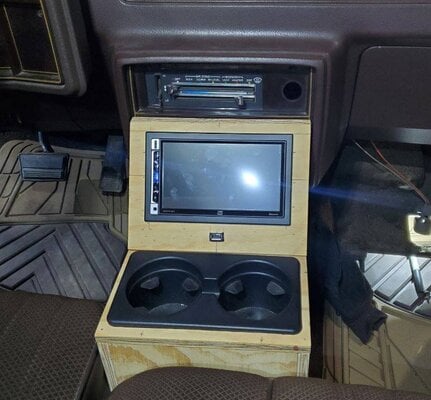
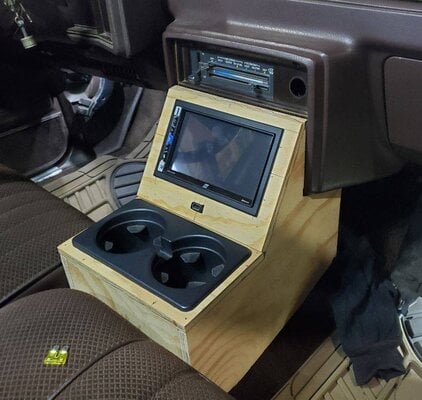
What's next?
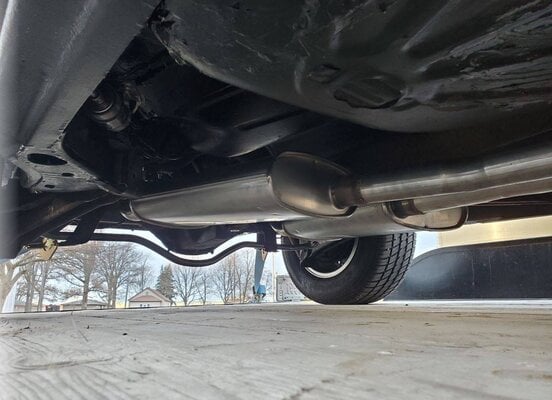
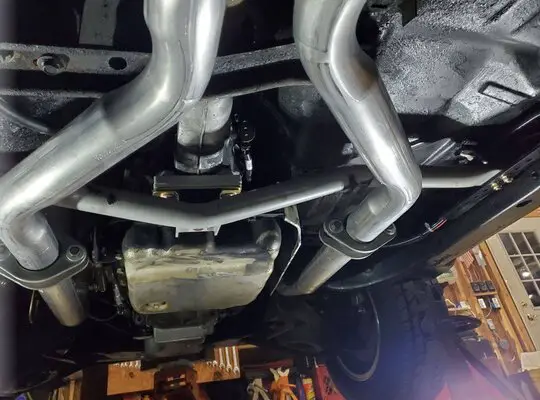
Well, we were supposed to drop the car off at the exhaust shop on Dec 27. But, since we have several days left of our Christmas vacation quarantine, that will have to wait. In the meantime, we'll keep picking away at the lesser items on the punch list. My son doesn't know it yet, but he's about to get a new touchscreen stereo receiver for Christmas. I suspect we'll be installing it in the car sometime very soon. That will lead to more wiring, more wiring after that, and some console fabrication.
New Brake Master Cylinder
If you read my last installment, you'll know that we're quarantined at home working through COVID-19. Not being able to run out to the auto parts store added a level of challenge to replacing the failed master cylinder. I thought maybe I might be able to convince my local O'Reilly to help me out with a curbside pickup, but O'Reilly one-upped me delivering the new master cylinder to our front porch, for free, in just 48 hours. Once we had the new part in hand, it only took a few minutes to bench bleed it and install it on the car. I think we may finally have the brake system finished (quickly kocks on nearest wooden object). The brakes feel solid and they held pressure over night without leaking. We'll keep any eye on them for the next few days for puddles, but I'm cautiously optimistic.
Heater A/C Box Cleanup
Years ago, when my younger brother was driving the El Camino, he parked it every night under a pine tree in our parents yard. We've cleaned at least a million pine needles out of every crack and crevice of the car. We found needles in the carpet, inside the frame, stuck to the side of the old engine block, and just about everywhere else a needle could settle. You can imaging my trepidation about the condition of the heater A/C box. I had visions of a solid mass of mud and pine droppings. So, when I pulled the heater fan motor, I was pleasantly surprised. There were, of course, pine needles, but blissfully, these was no mud. In fact, there wasn't even very much dust. I pulled the top of the heater box and used the shop vac to suck out the pine needles around the AC condenser and the heater core. Everything appears to be in good shape. The heater door moves freely and even the drain flap opens and closes as it should. At some point, we will need to order a seal kit and reseal the whole box, but for now, it's servicable.
Headliner
Like most old GM cars, the El Camino's headliner was drooping badly. That same younger brother attempted to resecure the headliner with thumbtacks. While functional, his solution looked about as classy as you would expect. In the twenty years since, the headliner, and the foam above it, have continued to deteriorate. I turned my son loose with the task of forcefully removing the old headliner. Once the dust cleared, the headliner and backer board were in pieces and gone. We have a new headliner on order. In the meantime, we installed sheets Kilmat sound deadening material to the underside of the roof. We used the same Kilmat on the floor pans before we reinstalled the carpet. The goal is to make the El Camino's cab a little more like the quiet interiors of today's modern cars. Even if we can't quiet it down that far, it certainly won't hurt anything.
Heater Controls
Back when we sorted through the wiring, we had to do some creative rewiring to revive the heater fan motor. At that point, we had low, medium, other medium, and high, but we were stuck in Defrost mode. The slider on the heater control panel was physically stuck on DEF. While I was sucking trash out of the heater box, my son was standing on his head inside the cab eye-balling the heater controls. He immediately spotted the problem. If you've ever had one of these control panels apart, you'll be familiar with the 9 port vacuum valve that controls which mode your HVAC system is in. In basic terms, this valve is a pair of wheels with tiny holes in them. As you move the mode lever on the control panel, the one of the wheels turns against the other wheel to align holes that connect vacuum circuits to activate the various HVAC modes (defrost, heater, vents, etc.). The two wheels are held together, face-to-face by a plastic clip. At some point, the clip broke and jammed the control lever. As you might expect, that clip isn't available on the after-market. A new repop control valve is $75. A NOS valve is is $150!!! Luckily, I found a really smart guy on the Internet who discovered that the clip can be replaced by a #8-32 machine screw with a lock nut. I have a reasonable stock of hardware in my shop. So, a #8-32 machine screw was no problem The challenge was that the head of the machine screw was too tall and it interfered with the control lever, just like the broken clip did. It took some fiddling around, but I ground enough off the head of the screw to make it clear the control lever. With everything pieced back together, the controls work perfectly.
Backup Lights
This problem turned out to be incredibly easy to solve. When we tested out all of the lights, several weeks ago, my son pointed out that we had no back up lights. Then, when we were working on the transmission shifter linkage, we discovered that the back up lights actually DID work, they just didn't work when the shifter was in reverse. It turned out that the back up light switch was just out of adjustment. The problem was that my old El Camino was a 3-speed manual, so I've never messed with a column mounted switch. Some quick Internet research showed me just how easy these things are to adjust. In case it might help someone else with the same problem, you're looking for a white semi-circular piece of plastic mounted to the top side of the steering column just above the brake pedal. The switch is mounted on toothed rack that "pivots" around the steering column. All you have to do to adjust the switch is use your finger tip to rotate the switch one way or the other a few clicks. It's easier to do than it is to describe. Once I knew how it worked, it literally took 30 seconds to adjust. The only reason it took that long is that I went three clicks the wrong direction. Six clicks back and the lights came on.
What's next?
Well, we were supposed to drop the car off at the exhaust shop on Dec 27. But, since we have several days left of our Christmas
Last edited: