

1988 Monte Carlo LS ProCharger Build (10/12/21 - Back to Painting, Switching directions for power added)
- Thread starter Burning
- Start date
You are using an out of date browser. It may not display this or other websites correctly.
You should upgrade or use an alternative browser.
You should upgrade or use an alternative browser.
- Status
- Not open for further replies.

Stop buying fuel where ever you've been buying it. And stop selling cars to buy ex fiancé's a ring.
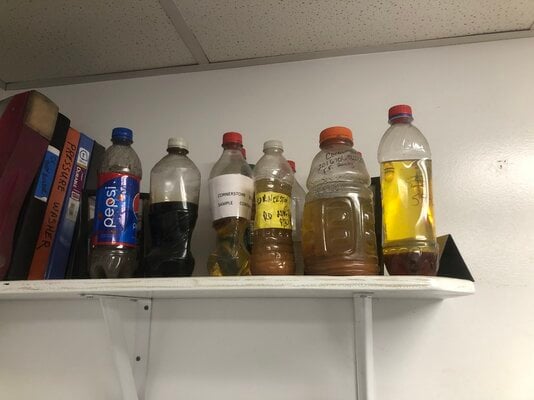
I have no words for whatever is in that fuel. None
I still dont know what the hell it is. Its separated even more now which makes me think that maybe water got into the tank somehow. Look up Fuel Phase Separation, thats exactly what the fuel looks like now that it has been there for a full day.
Cars>b*tches

Yup, not making the same mistake again. I wont let this thread die out though. Ill be like Rktpwrd and have another car project while im finishing a car project lol.
Well, it has been a little bit since I have updated you all on anything. Partly because i haven't really done much on the car until now. Got a little side tracked with my parting out trucks business.
Started back on the car as i am wanting to atleast drive this thing by spring even if its N/A for a little bit.
Started off by practicing some painting with a new front end on my personal truck. Ended up running the hell out of the two fenders learned that day that lighting is very very important.
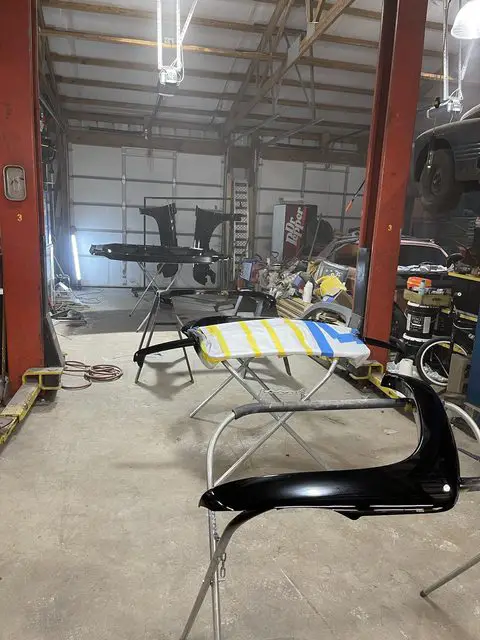
So we sanded the runs flat, and resprayed both fenders and also my hood with better lighting. It came out pretty glass with the exception of the hood where we didn't block the primer prior to base coat.
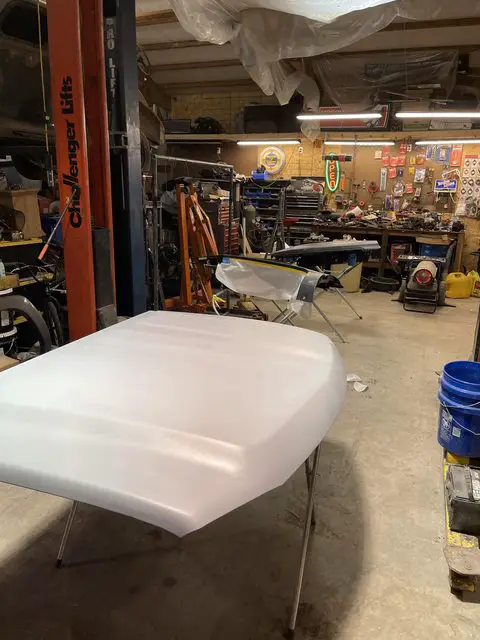
This whole time my buddy has been spraying the majority of the panels to date. I told him i wanted to be able to get more comfortable so that's why we chose the front end of my truck to trial on. I have to admit I'm starting to get the hang of it, or at least the concept.
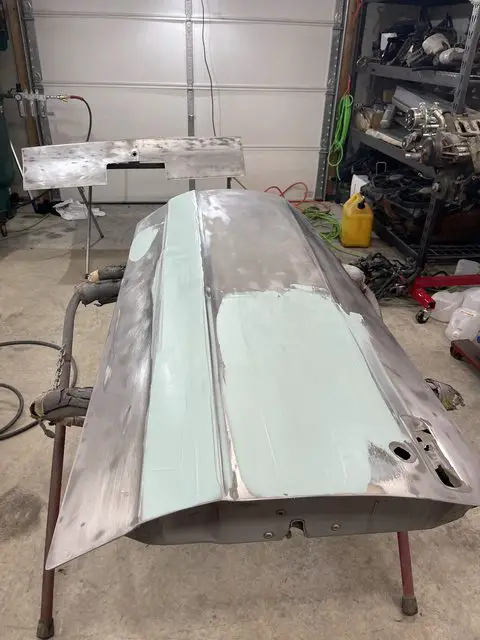
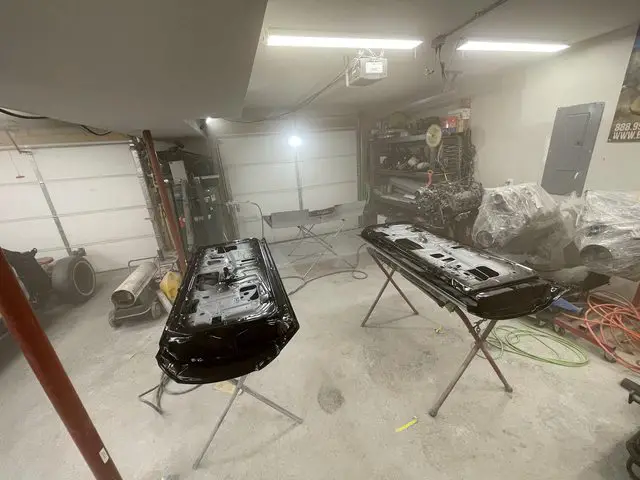
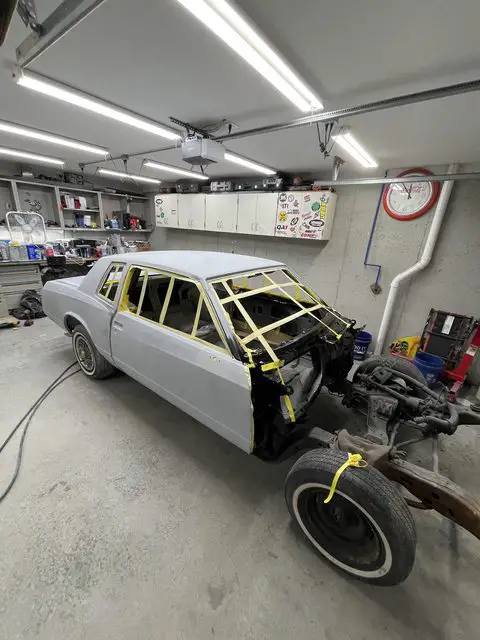
Started back on the doors and trunk lid of Carlos last night. I ended up not having the epoxy hardener on hand until late that night so i ended up putting my filler over metal (i checked to make sure it was corrosion resistant) working a couple of dents in the panel, and smoothing out where i knocked the trim studs. Once my buddy got there we epoxied the backs, flipped them over when they flashed and then sprayed the epoxy on the exterior skins. Then i mixed up some 2k High build and laid down 2 heavy coats on the panels. We did a wet on wet on these panels since we are wanting to block sand them tonight.
Couple of waves in the door which i believe are coming from the reinforcing bars glued to the skin. I may just try and work the whole panel with filler, or cut the glue and see if that helps.
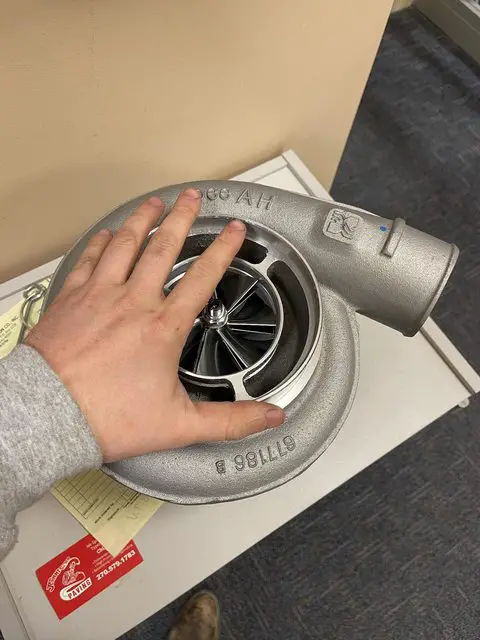
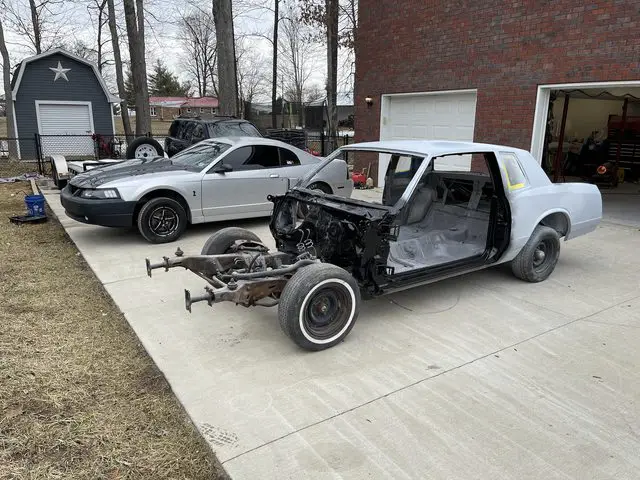
Oh, and i have been steadily collecting parts for both my Mustang and Carlos, so the first order of buisiness was a turbo for the Mustang obviously. I went with a Forced Inductions S485 Billet Wheel with the race cover and the V band 1.31 A/R housing. Should be plenty for 1200-1300 rwhp.
Started back on the car as i am wanting to atleast drive this thing by spring even if its N/A for a little bit.
Started off by practicing some painting with a new front end on my personal truck. Ended up running the hell out of the two fenders learned that day that lighting is very very important.
So we sanded the runs flat, and resprayed both fenders and also my hood with better lighting. It came out pretty glass with the exception of the hood where we didn't block the primer prior to base coat.
This whole time my buddy has been spraying the majority of the panels to date. I told him i wanted to be able to get more comfortable so that's why we chose the front end of my truck to trial on. I have to admit I'm starting to get the hang of it, or at least the concept.
Started back on the doors and trunk lid of Carlos last night. I ended up not having the epoxy hardener on hand until late that night so i ended up putting my filler over metal (i checked to make sure it was corrosion resistant) working a couple of dents in the panel, and smoothing out where i knocked the trim studs. Once my buddy got there we epoxied the backs, flipped them over when they flashed and then sprayed the epoxy on the exterior skins. Then i mixed up some 2k High build and laid down 2 heavy coats on the panels. We did a wet on wet on these panels since we are wanting to block sand them tonight.
Couple of waves in the door which i believe are coming from the reinforcing bars glued to the skin. I may just try and work the whole panel with filler, or cut the glue and see if that helps.
Oh, and i have been steadily collecting parts for both my Mustang and Carlos, so the first order of buisiness was a turbo for the Mustang obviously. I went with a Forced Inductions S485 Billet Wheel with the race cover and the V band 1.31 A/R housing. Should be plenty for 1200-1300 rwhp.
Alrighty!
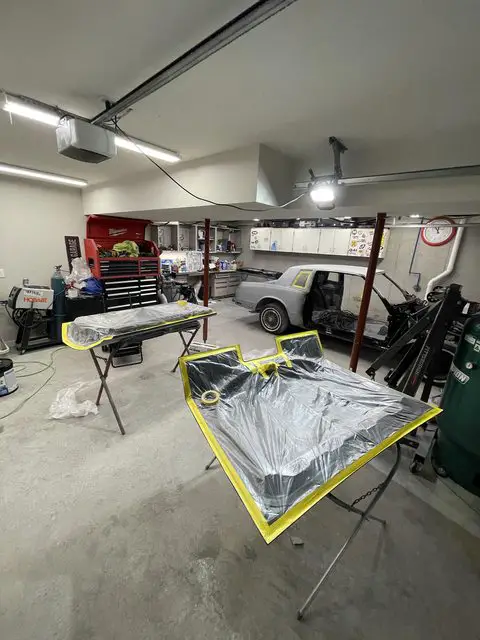
So after spraying the high build on the faces of the doors we go them flipped back over and sprayed the jambs and parts that will be exposed. Also got the car buttoned up on jambs, firewall and rear trunk area.
We made sure to keep the doors closed during the spraying, then open the one up half way and the other cracked to draw fresh air and exhausted between the coats.
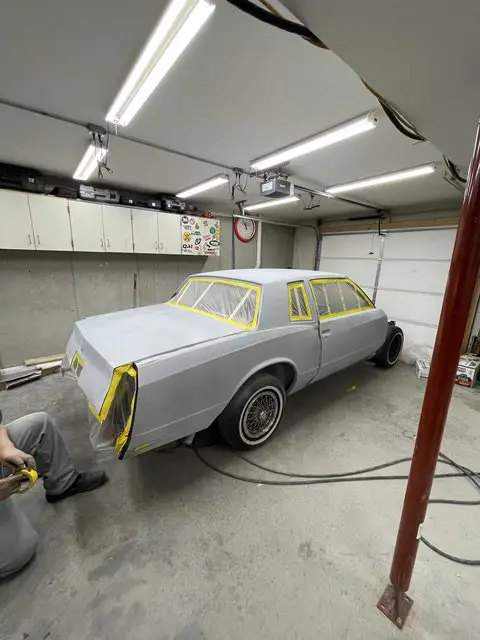
Next day i masked up the doors and trunk so that i could finish up some fine detailing of the doors and trunk.
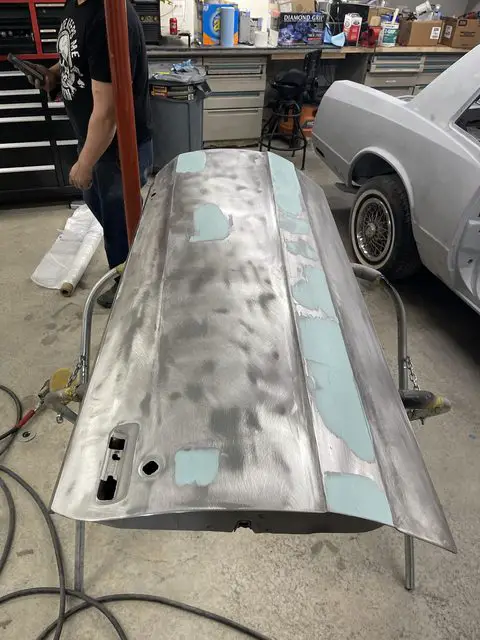
Got them flipped over and started to work on the wave in the door and making sure the trunk was nice and flat where the metal was wavy due to the trunk hinges at some point. I was blocking the with 400 grit at this point.
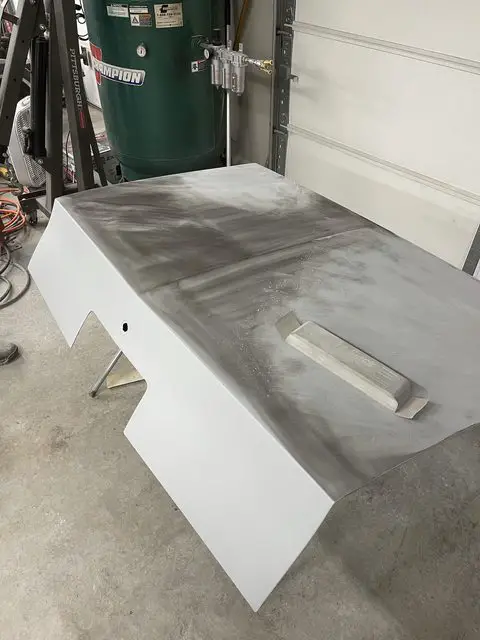
Broke through to metal and filler in some places, reapplied epoxy and wet on wet 2k high build on them once more time.

Some last fine tuning!
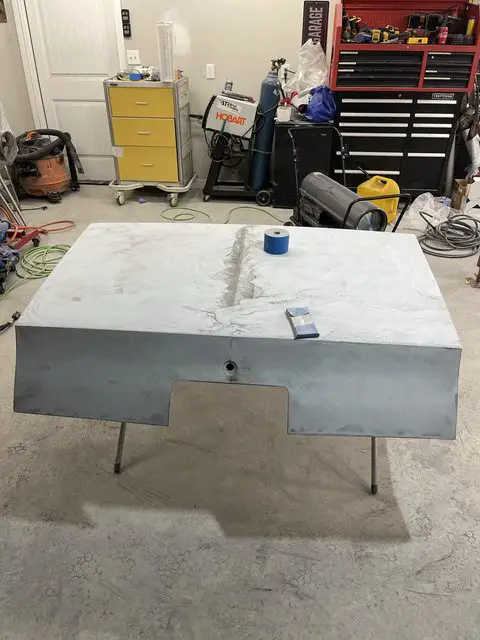
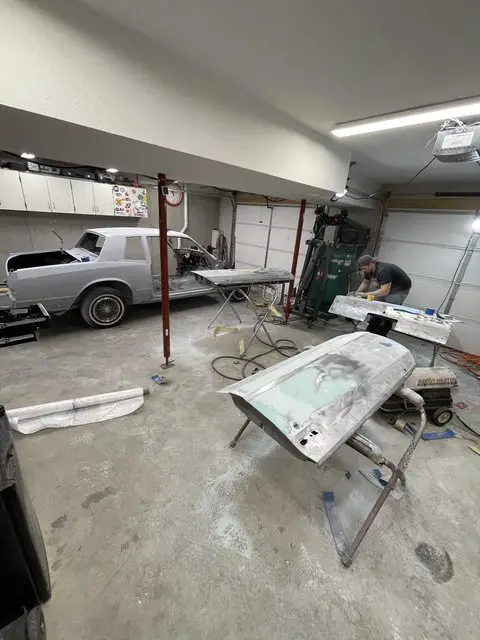
Roller her out to blow out the garage of any loose dust and debris before we started to assemble to doors and prep the car for paint. While we had it out side we went ahead and hit everything with 800 grit on a DA interface pad just to take out some more of the 400 grit scratches. We followed up with doing the door faces and trunk as well.
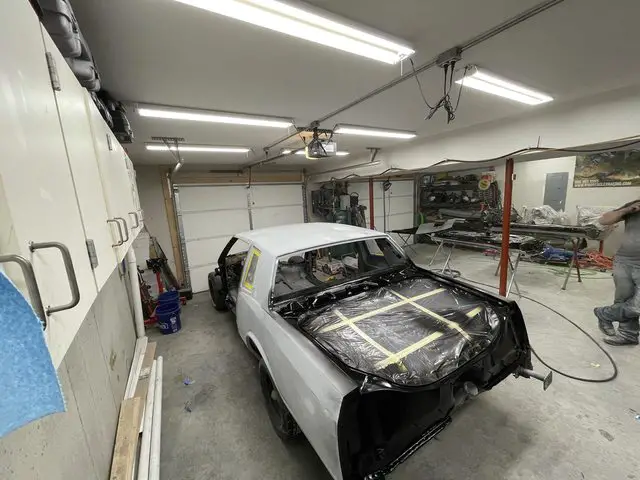
NOW this was the long process of masking everything off, back taping and all the fun stuff.. Luckily i had my buddy for this part because he knew how to fold the tape just right so that there would be no hard lines in the jambs.
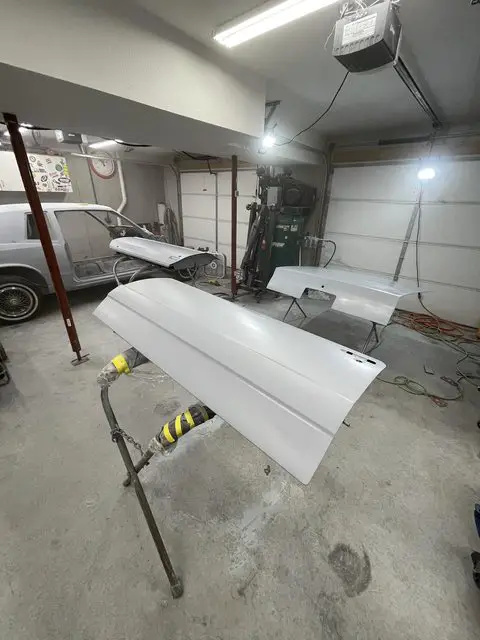
Did once more blow over on the car, let the dust settle... Wax and Grease remover, tack, and then sloshed water on the car and we started to lay down the base coat. Ended up doing 3 coats of base tacking off the over spray between coats and then 3 coats of clear.
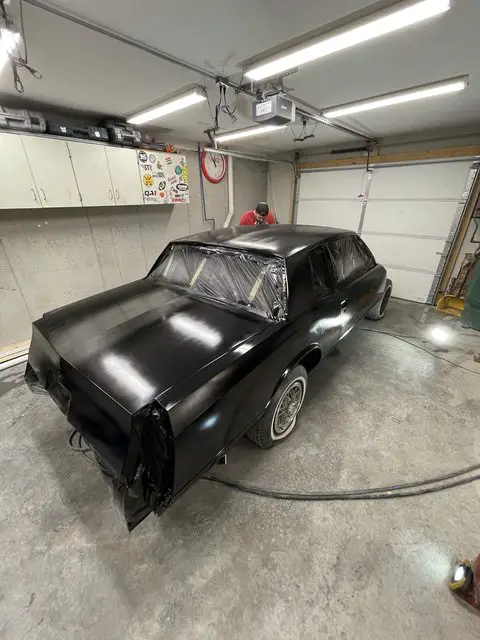
Then the clear... Now this is where i made a rookie mistake! See that box fan in the back on the work bench. That fan has been used to help get some of the air flowing to remove the particulate in the air between coat when the doors were cracked during primer, epoxy. We turned it on after the first coat of clear went on and almost instantly regretted that decision. The Trunk lid was pelted by debris from the fan blades. Luckily it was during clear that this happened and not the base so we will be able to get most of it out i think.
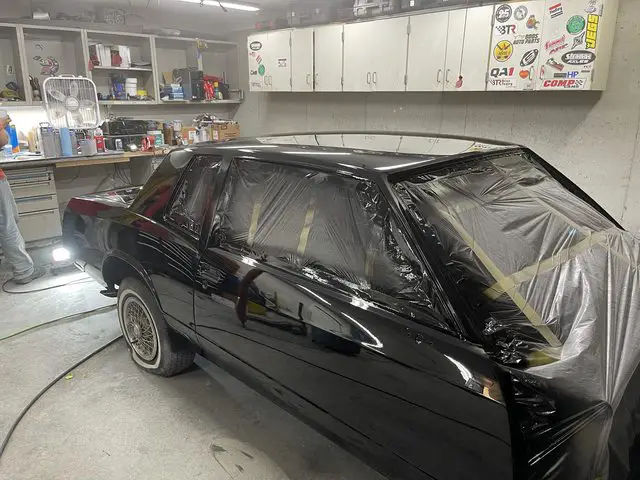
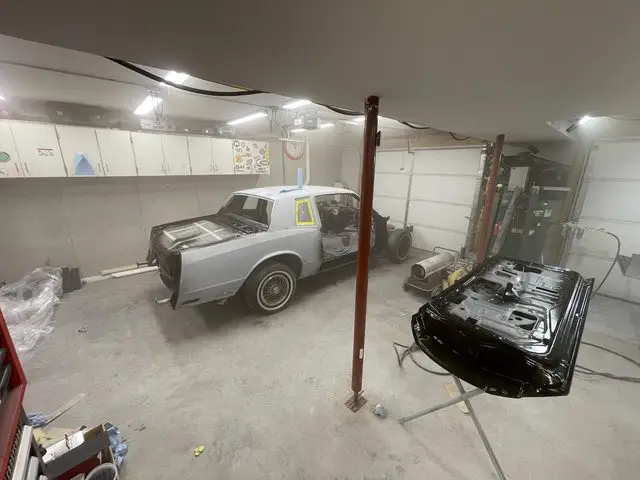
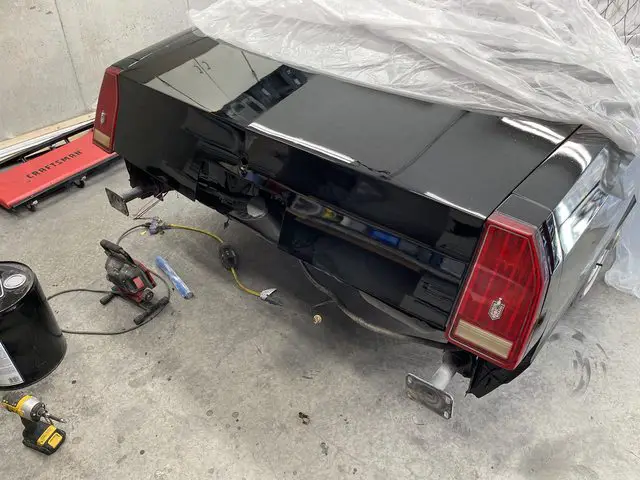
All in all, the paint turned out awesome. Had a couple of runs that need to be addressed in the clear coat. But the body lines are straight as a arrow, the doors have no waves in them, the trunk is perfect. The roof line which was biggest worry due to the amount of work i had in it actually turned out almost damn near perfect. There is a couple little areas if you get REALLY close that you can tell have been worked but form 5' you wouldn't know the difference.
As the paint cures out ill take the masking off and get some more pictures of the final product for everyone. Im super happy about how far this has come and how the car turned out. Now its on to the front end to be worked on, and then getting all the little trim pieces painted.
So after spraying the high build on the faces of the doors we go them flipped back over and sprayed the jambs and parts that will be exposed. Also got the car buttoned up on jambs, firewall and rear trunk area.
We made sure to keep the doors closed during the spraying, then open the one up half way and the other cracked to draw fresh air and exhausted between the coats.
Next day i masked up the doors and trunk so that i could finish up some fine detailing of the doors and trunk.
Got them flipped over and started to work on the wave in the door and making sure the trunk was nice and flat where the metal was wavy due to the trunk hinges at some point. I was blocking the with 400 grit at this point.
Broke through to metal and filler in some places, reapplied epoxy and wet on wet 2k high build on them once more time.
Some last fine tuning!
Roller her out to blow out the garage of any loose dust and debris before we started to assemble to doors and prep the car for paint. While we had it out side we went ahead and hit everything with 800 grit on a DA interface pad just to take out some more of the 400 grit scratches. We followed up with doing the door faces and trunk as well.
NOW this was the long process of masking everything off, back taping and all the fun stuff.. Luckily i had my buddy for this part because he knew how to fold the tape just right so that there would be no hard lines in the jambs.
Did once more blow over on the car, let the dust settle... Wax and Grease remover, tack, and then sloshed water on the car and we started to lay down the base coat. Ended up doing 3 coats of base tacking off the over spray between coats and then 3 coats of clear.
Then the clear... Now this is where i made a rookie mistake! See that box fan in the back on the work bench. That fan has been used to help get some of the air flowing to remove the particulate in the air between coat when the doors were cracked during primer, epoxy. We turned it on after the first coat of clear went on and almost instantly regretted that decision. The Trunk lid was pelted by debris from the fan blades. Luckily it was during clear that this happened and not the base so we will be able to get most of it out i think.
All in all, the paint turned out awesome. Had a couple of runs that need to be addressed in the clear coat. But the body lines are straight as a arrow, the doors have no waves in them, the trunk is perfect. The roof line which was biggest worry due to the amount of work i had in it actually turned out almost damn near perfect. There is a couple little areas if you get REALLY close that you can tell have been worked but form 5' you wouldn't know the difference.
As the paint cures out ill take the masking off and get some more pictures of the final product for everyone. Im super happy about how far this has come and how the car turned out. Now its on to the front end to be worked on, and then getting all the little trim pieces painted.
Well really no update at all on this project. Had my beautiful baby girl enter this world on February 4th, so i have had my hands pretty full with her.
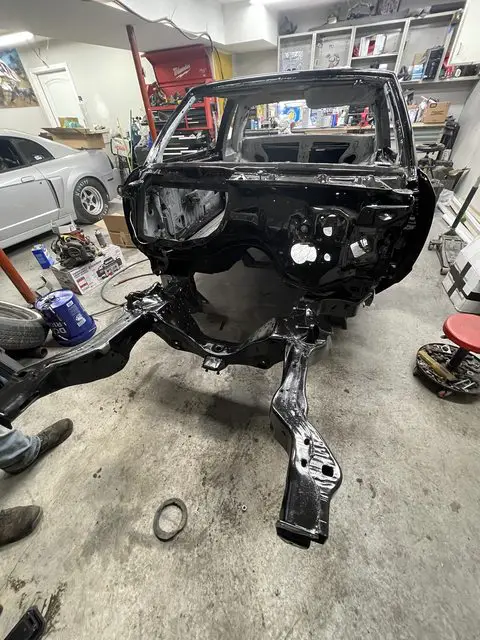
Ended up getting a hell of a deal on a Full UMI front end Kit. So that meant i needed to strip the front of the frame off and have some goodies to show off so it needed to be painted lol. I also ended up getting the double adjustable rear upper/lower control arms and bracing kit.

Decided to paint the mirrors and tail light extensions. Ill end up removing the lights and shaving the emblem off, restoring the lenses and then doing a ruby red light black tint on them.
Ended up buying a 01 Camaro Z28 that has a fresh Tick Stage 2 T56 in it that ill be parting out and keeping the trans for this car, so this car will be a 6 speed manual car now as well!
Due to lack of time i have decided to shift gears with this build a little bit. As most of you know i got my old car back a couple months ago. It is probably the easiest project i have right now to get back on the road the quickest. So this car will go on the back burner until i have my mustang on the street. At that point ill switch back to this car and get the front end painted, brace the chassis, and get it on the road.
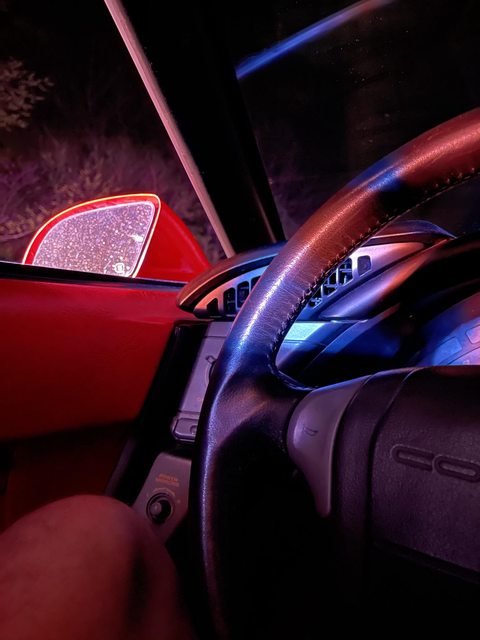
Also been daily driving my 1990 Corvette for the last two weeks and finally got my first speeding ticket. 85 in a 55! Got me right as i was passing another car going 45 in front of me. He was going the opposite way just as i passed the car. Hoping I can get it dropped down or maybe a prayer for judgement as this is my first ticket.
If i get time waiting on parts for my Mustang ill try and work on this car and post updates. But as of right now it is on hold.
Ended up getting a hell of a deal on a Full UMI front end Kit. So that meant i needed to strip the front of the frame off and have some goodies to show off so it needed to be painted lol. I also ended up getting the double adjustable rear upper/lower control arms and bracing kit.
Decided to paint the mirrors and tail light extensions. Ill end up removing the lights and shaving the emblem off, restoring the lenses and then doing a ruby red light black tint on them.
Ended up buying a 01 Camaro Z28 that has a fresh Tick Stage 2 T56 in it that ill be parting out and keeping the trans for this car, so this car will be a 6 speed manual car now as well!
Due to lack of time i have decided to shift gears with this build a little bit. As most of you know i got my old car back a couple months ago. It is probably the easiest project i have right now to get back on the road the quickest. So this car will go on the back burner until i have my mustang on the street. At that point ill switch back to this car and get the front end painted, brace the chassis, and get it on the road.
Also been daily driving my 1990 Corvette for the last two weeks and finally got my first speeding ticket. 85 in a 55! Got me right as i was passing another car going 45 in front of me. He was going the opposite way just as i passed the car. Hoping I can get it dropped down or maybe a prayer for judgement as this is my first ticket.
If i get time waiting on parts for my Mustang ill try and work on this car and post updates. But as of right now it is on hold.
Last edited:
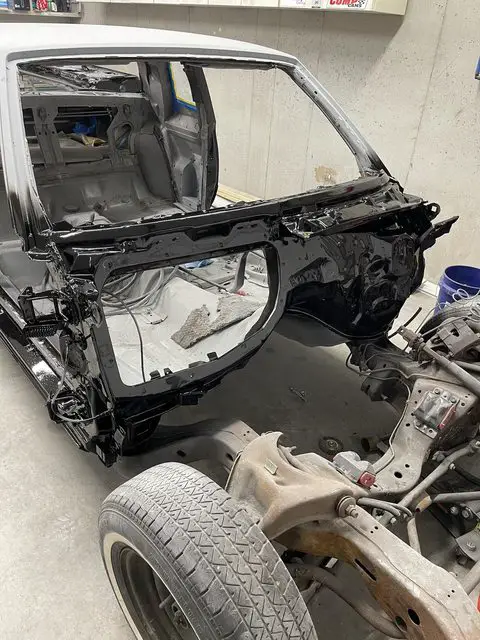
Well the updates will start to flow back into this thread as the driving season comes to an end for my corvette. She will be trading spaces with the monte carlo at storage.
This winter goals are to get the front end painted, frame braced, and then start assembly of the interior and exterior.
Oh and there has been a change of plans.... The car will now be getting a built T56 and D1SC. Hoping to make this a nice family car that will be able to take my 3 girls to go get ice cream.
- Status
- Not open for further replies.
Similar threads
- Replies
- 2
- Views
- 360
- Replies
- 10
- Views
- 1K
- Replies
- 9
- Views
- 286
GBodyForum is a participant in the Amazon Services LLC Associates Program, an affiliate advertising program designed to provide a means for sites to earn advertising fees by advertising and linking to amazon.com. Amazon, the Amazon logo, AmazonSupply, and the AmazonSupply logo are trademarks of Amazon.com, Inc. or its affiliates.