79 Cutlass Wagon G-machine build

Status
Not open for further replies.

SRD art

G-Body Guru
Jun 16, 2011
550
442
63
St. George, UT
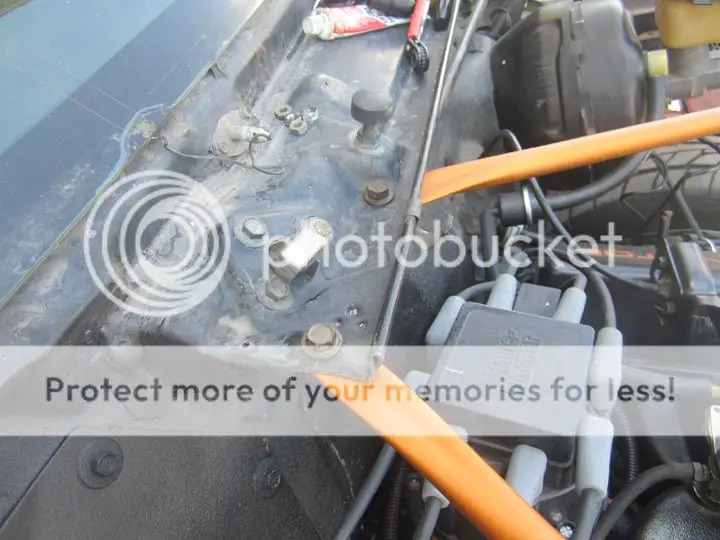
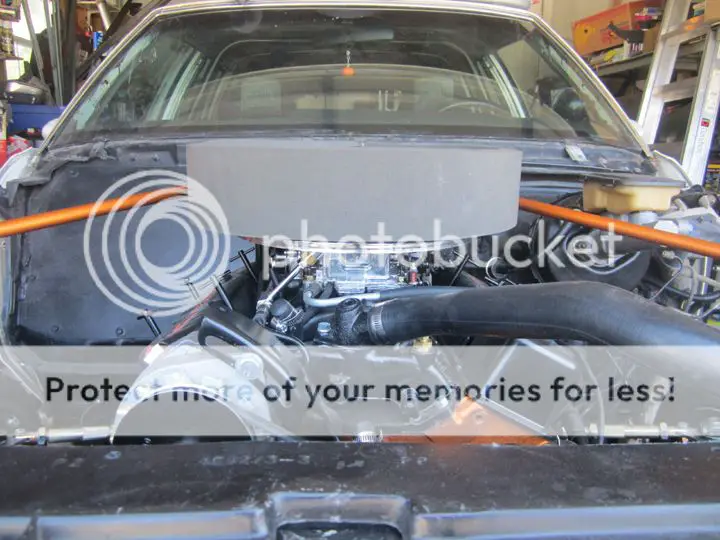
Pictured here is the 85 Wiper motor mocked up. One of the motor's mounting tabs, upper left as pictured, did not line up with the 79's mounting holes, see how it is offset about 3/4". Simply drilling a new hole and using a nut and bolt solved that issue. Everything works great, and having the switch on the column and using the delay system has been really nice.

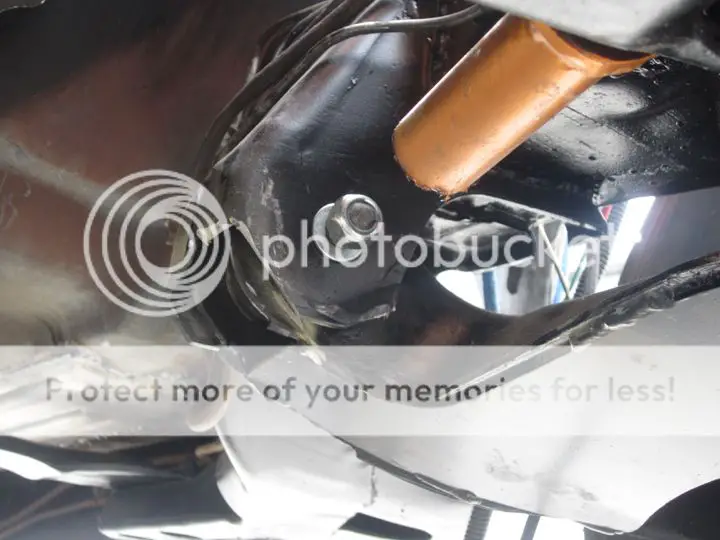
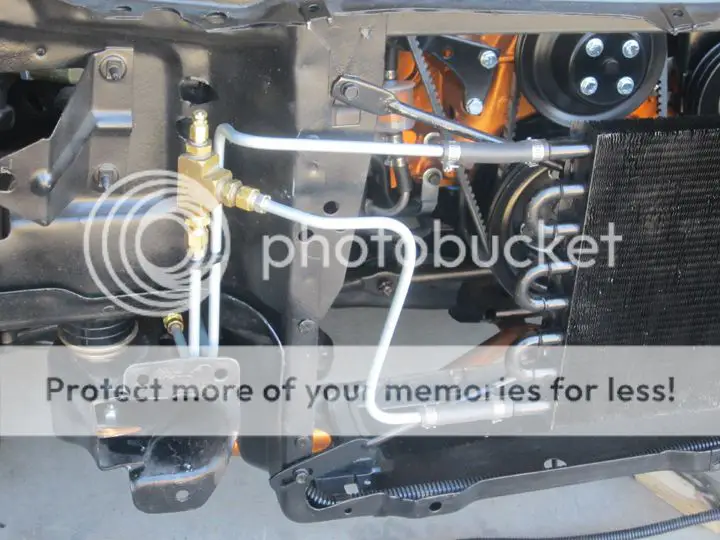
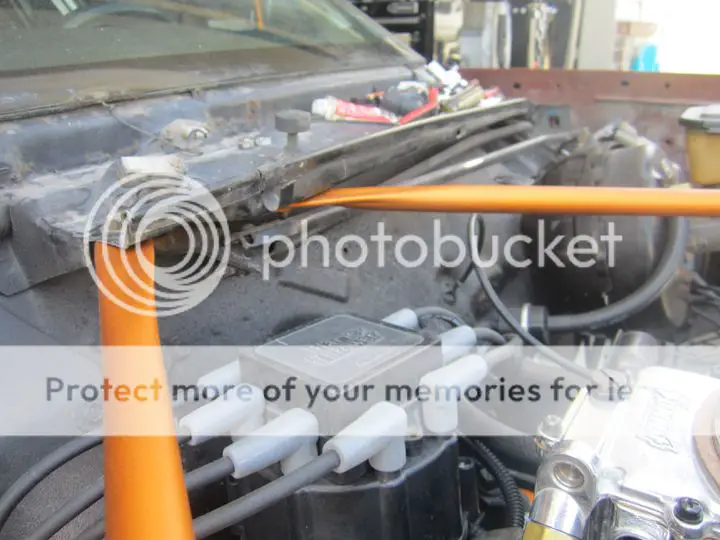
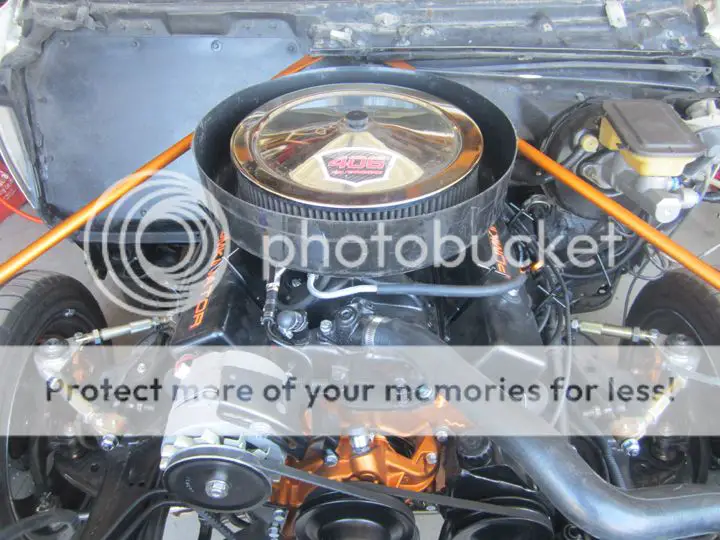
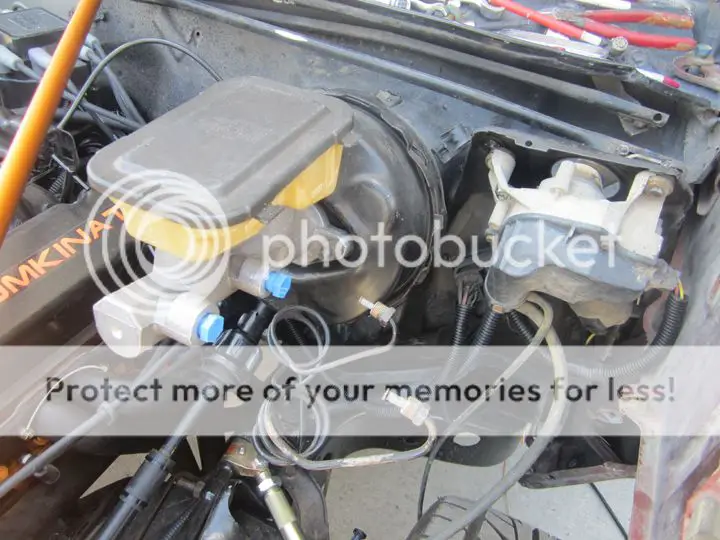
Also pictured here is the later model master cylinder. The 79 came with a small bore iron unit. While at the junkyard I picked up a booster that accepts the later 1 1/8" aluminum master. I ordered the new master from Oreily's, punching an 85 Monte Carlo SS into Oreily's online website search for the part number. Unfortunately the factory g-body brake proportioning valve is mounted down on the frame right next to the header, kind of a dumb place to put it. When I install the disc brake rear axle I'll update all the lines, eliminate the factory valve, and use an aftermarket valve located away from the heat.

mastercyl01.jpg
 

SRD art

G-Body Guru
Jun 16, 2011
550
442
63
St. George, UT
Installation of the newer column did require one slight mod- the mounting plate was mostly flat and the 79 firewall curves back on the lower right as pictured. A few light taps with a hammer curved the plate to match the firewall contour and all the bolts then lined up fine. As I said before, overall this was an easy install.

column001.jpg


Once all the wiring and fitting it in place was done, I prepped the ugly brown 85 steering column by hitting it with 320 grit paper, then a quick once over with wax and grease remover and I rattle canned it with semi gloss black. My Grant steering wheel replaced the goofy factory unit.

column002.jpg


Here's the final install. I'll be keeping my eye out for a column from a floor shift car here in GA, as I never saw one in the junkyards in Utah...

column003.jpg
 

SRD art

G-Body Guru
Jun 16, 2011
550
442
63
St. George, UT
Unfortunately I had to sell the 5.3 LS engine to help finance all the small stuff you don't think about when putting a car together. I kept the headers though, and will most likely be doing a 6.0 instead. Got a few other things the car needs before I can take on that again. In the mean time...

With the column done I turned my attention back to the engine bay. Remember the broken 406 from page two? I finally got around to seeing what I was up against after the valve spring broke.

piston01a.jpg


Really there was no major damage. The valve licked the piston putting just a tiny dent in it, but nothing more.

piston01.jpg


Another problem I found was that the factory harmonic balancer started to have issues, a good portion of the rubber ring was missing.

balancer01.jpg


This motor had about 70K + miles on it but the cylinders all looked good, it doesn't burn oil and holds between 50 and 60 lbs of oil pressure so I decided to just clean it up go over the top end.

piston02.jpg


To make sure there wasn't any damage to the cam I pulled it out and inspected it. No damage found so I reinstalled it with a new double roller chain. Then the cover went back on and I added a new balancer. Sitting in a dark corner I've had some heads I experimented on about 15 years ago when I was learning how to port heads. They're just generic GM 400 heads but with the gasket match, improved port flow, blended bowls, new guides and a fresh valve job, this motor was a perfect reason to dust them off and pull 'em off the shelf. I threw those on with the Proform airgap dual plane intake and the new 600 Summit carb. I painted the top end of the engine semigloss black while the bottom end was VHT "Metallic Copper" engine paint. I designed and had printed some stickers and applied a couple to the valve covers. As of 5 months later the stickers haven't been affected by engine heat and still look new.

enginestickers.jpg


engine003.jpg


The cap is not one of those correct-a-caps, I simply bought a universal set of MSD wires where you make them to your own desired length and carefully set them up in a clean way. Here's the specs on the motor...

.030 400 small block Chevy, stock crank and rods with ARP bolts
high pressure oil pump and aftermarket pump drive
8.7:1 Eutectic pistons and plasma moly rings
Comp XE268 cam with true roller timing chain
ported factory heads with 1.5 /1.6 roller tip rockers, Comp's cam matched springs
air gap dual plane intake with Summit 600 Vac secs carb
factory HEI with Pertronix "Flame Thrower" upgrade kit and MSD wires
Hooker full length headers
Moroso alternator overdrive pulley, factory crank and water pump pullies

It's a pretty mild and basic budget build, though I'm guessing it makes about 300-325hp and 400-425 ft lbs at the flywheel. According to Comp Cam's online dyno speculation, it's torque peak should be right around 2200 rpms. Out driving it sure pulls hard from 2200 on up to about 4500, which is perfect for autocross. It'll do for now while I hunt down a decent 6.0 LS donor...
 

SRD art

G-Body Guru
Jun 16, 2011
550
442
63
St. George, UT
Here's one issue I had with the engine, the Hooker headers. I had a well fitting set of Hedman mid length headers on the car before but wanted the slight advantage of a basic long tube so I went with the Hooker name. Hooker doesn't have a specific G body part number, but rather the catalog lists this generic part number as one that "will fit" pretty much any GM chassis, including the listied g-body. I should've been skeptical at that, these headers are total crap. The tube alignment at the flange is off, the oval rather than round holes at the flange don't line up with the gasket at all and look like they would be a flow restriction, and worst of all they don't fit a g-body chassis without modification. In hindsight I should've sent them back, but instead I messed with them to make them work. What a pain it turned out to be.

First off I gasket matched them a bit, radiusing the ends as much as I could without taking too much out of the weld.

exhaust04.jpg


headers001.jpg


Then I had to bang on the driver's side lower outer tube to clear the lower control arm. I didn't want to affect flow too much so I only dented it in about 1/4", but it wasn't enough...

headerfit002.jpg


I then got up underneath and trimmed the control arm mount several times until the header would finally fit without touching the frame. I had to whack off a pretty good chunk. Remember the braces I made for this area? Yeah there was no way they'd fit with these headers either. I didn't want to remove the bolts to get them out because I was under a time constraint and removing the bolts meant that the control arm, spring, and shock would have to come out and be re-installed, so I simply cut them out. I was pretty disappointed to have to do this.

headerfit001.jpg


All in all I was very disappointed with them. I guess you have to buy Super Comps instead of their street header to get any sort of quality and decent fit. Boo on Hooker for being a big enough company to produce a decent product but rather to cut costs puts out garbage. I certainly wouldn't recommend them for anyone with a g-body.
 

SRD art

G-Body Guru
Jun 16, 2011
550
442
63
St. George, UT
Here are my trans and power steering coolers. The trans cooler came off a parts truck I bought for some parts for my Suburban, and the ps cooler of a 90's Caddy in the junkyard.

The factory transmission lines had been worked and re-worked, so I decided to start over and bought some straight tube and some fittings and bent some new ones. These tuck up close to the block, cross over to the frame near the fuel pump, then follow the contour of the frame towards the radiator support, passing under it near the mount bushing. From there they curve back up and over to the cooler, which is mounted to the Buick Regal radiator support X bracing. Ideally the electric trans temp sensor should be mounted in the pan, but since I didn't have a welder for a bung at home I improvised a little with some old fittings I had on hand. It does the job for now, and I just assume the trans is a few degrees hotter than the gauge reads.

translines01.jpg


After cleaning thoroughly and repainting it black, the ps cooler was fairly easy to make work. I had to re-bend the factory metal tube to go the direction I needed, but mounting worked out perfect by using the front triangulated brace I made. I trimmed a hole to match the cooler in the bottom of the plastic factory fan shroud so the fan actually sucks air through it. It worked out great for just a few bucks from the junkyard.

steercooler01.jpg
 

SRD art

G-Body Guru
Jun 16, 2011
550
442
63
St. George, UT
My 14 year old son started to take a bit of interest here, so I had him clean and prep the engine compartment braces I pulled from a junkyard 75 El Camino. He did a great job with them, and went on to help me with some other things for the rest of the build. This did something to him, as we arrived here in GA he's really gotten into cars and we've started working on one of my Novas I decided to give to him. We should make a lot of progress on it this summer. http://www.pro-touring.com/showthre...a-RS-Nova-teenager-build&highlight=tangermean

These braces fit great, they already had nuts welded on one end, so all I had to do was drill two holes in the cowl panel to make them work. Here's a few fitment pics... Again, a very cheap alternative to aftermarket.

fenderbrace01.jpg


fenderbrace04.jpg


fenderbrace03.jpg


fenderbrace02.jpg
 

SRD art

G-Body Guru
Jun 16, 2011
550
442
63
St. George, UT
In this post I wanted to share how I fabricated a way to effectively seal the carb to the hood on a really tight budget using some really basic materials.

First off, I had this bucket laying around. You can buy it from WalMart for about $6.00. Mine was well used and had a crack near the top so instead of trashing it I went green and recycled it. :) There are several designs of these buckets, so make sure to get one that is fairly rigid and has a large enough base to allow the air cleaner to breathe well.

cowlind01.jpg


Step one is to cut a large hole in the bottom, about 12" in dia. Then cut the bottom away from the top, in my case it was about 5" tall from the bottom.

cowlind02.jpg


I then grabbed an old "flat" base 14" air cleaner bottom I had laying around which came on an old parts car. I've seen several of these in junkyards over the years. I used a metal blade on my jig saw and trimmed the center out, creating a large flat washer that had a 1/4" turned up lip on it making it plenty rigid.

cowlind03.jpg


I then placed the ring upside down under the plastic tub bottom, then placed the base for my Summit 14" dropped base air cleaner on top of the tub and used 4 fairly flat self tapping trim screws to hold the sandwich together. Rivets can be used too, but I like to keep things easy to change later on if need be.

cowlind05.jpg


cowlind04.jpg


Here it is at this point mounted on the carb....

cowlind06.jpg


For the seal I got some 1/2" thick foam with scrim backing to the length of the dia of the tub from the local upholstery shop. The ends were sewn together to make a round doughnut of foam. I then carefully cut the foam in half length wise so I could fold it in half. You have to be careful to not cut the scrim backing as this keeps it as one unit rather than two foam rings stuck together.

cowlind07.jpg


cowlind09.jpg


Here it is slipped over the base. The second photo shows it after some black interior paint. The hood holds it in place and it works great. Yeah, it's sort of rednecky, but for the most part the foam covers the ugly base and gives it a nice clean professional look for cheap cheap.

cowlind10.jpg


cowlind11.jpg
 

SRD art

G-Body Guru
Jun 16, 2011
550
442
63
St. George, UT
My factory tank had a lot of rust in it, and over the course of driving it a couple years before tearing the car down it had sprung several small pin hole leaks that I patched with gas tank patch kits from auto parts stores. This was only a temp band-aid so I got this new gas tank from Rock Auto for the rebuild. Their price spanked everyone else. A g-body forum member warned me after he saw that's where I bought it from that he had bought two of these wagon tanks from them and neither fit. I found this was the case with mine too, the filler tube wasn't even close. Luckily sheet metal flexes easily, and a few careful tugs and test fits on it, it lined up fine. I then pulled it back out, installed my sending unit and it was good to go back in. The factory fuel line was pretty rusty, so I custom fabricated the fuel line using a roll of 3/8" aluminum tubing from Summit and mounted it with some insulated clamps. The line was carefully routed away from exhaust in the front and rear, something of a problem with the factory line and a lowered car with headers.

fueltank01.jpg


Finally the car was ready to fire up for the first time. I didn't let it run long as there was plenty more to do, but it was pretty exciting to hear it run after 8 months and a complete disassembly.

http://www.youtube.com/watch?v=Lwa_1-q13qk&feature=player_embedded

Not long later I had all fluids filled, the carb adjusted, and the car running great. At this point I was running out of time to get ready to move across the country very quickly. The car was crazy loud inside and I wanted at least some degree of creature comfort for the drive so I addressed the interior, sort of.
 

SRD art

G-Body Guru
Jun 16, 2011
550
442
63
St. George, UT
Original plans were to get a new complete dash cover, new carpet kit, have the seats reupholstered, do some custom work on the nice factory door panels I found in the junkyard, and replace the headliner. However most of my remaining budget had been spent getting the car to this point so I had to temporarily improvise. I couldn't afford dynamat so I found some foil lined mat at Lowe's. Cost me about $40 for enough to do the whole floor. All in all, I'm not sure it really helped much. Really I just need a different muffler to begin with, lol!

I didn't want the interior to look stupid or have the sun reflect off it while driving, so I broke down and decided to spend the $9.00 at Walmart to buy one 3x5' roll of that ultra cheap crap automotive carpet. Of course it wouldn't contour to the floor very well so I put to work the training I got during my internship at Kirkham's Upholstery in American Fork, UT. BTW Utah folks, they do great custom automotive work http://www.kirkhamupholstery.com/.

First step was covering the trans tunnel. Where the shape and contour changed I made a few cuts to help it lay flat...

carpet0012.jpg


Now onto taking what was left over from the roll and fitting the floor areas...

carpet002.jpg


I used my kids' sidewalk chalk (lol) and calculated where to make pie cuts and sew together...

carpet008.jpg


This is what the bottom looks like after sewing. I used my wife's Kenmore home machine with a wide stitch and a denim needle...

carpet003.jpg


To make everything look nice and finished I used some material I had left over from another project. I decided to trim it with a hidden stitch. This is a relatively easy process. First I cut a length of material roughly 2" wide. You line this up on the edge of the TOP of the carpet and sew the length about 3/8" inward.

carpet007.jpg


Then you simply fold that trim material over itself and snug under the carpet. Very carefully sew the length right in front of the trim. The stitch gets tucked down against the edge of the trim and the pile of the carpet hides the stitch. It's virtually invisible and looks very clean...

carpet006.jpg


This is what it looks like on the back side...

carpet005.jpg


Here's the final product. One 3x5' roll barely covered the front floor area. On the outer edges the sill plates covered the rough areas. I used pro-grade interior glue brushed on to hold it all in place. For a little over $9 plus a little time, it looks a bazillion times better then the thrashed factory carpet which has long since gone to the land fill. Some cheap $15 black rubber backed protective floor mats topped it all off. Eventually it will be replaced by an aftermarket carpet kit, but it was good enough for the road trip and has held up great so far....

carpet001.jpg
 

SRD art

G-Body Guru
Jun 16, 2011
550
442
63
St. George, UT
For door panels, my car had some real winners from the factory. They were light blue and pretty puffy. These photos were taken just after I bought the car. The lower plastic used to be the same shade blue as the vinyl. Eeeew! :)

Doorpanel01.jpg


Doorpanel02.jpg


I found a great grandpa fresh 4-door Cutlass in the junkyard. This car had a broken diesel motor, but it only had 79,*** miles on the clock and it literally looked like an old man's car. Even smelled like that aftershave they used, you know, like the smell in those old school barber shops. I grabbed all 4 door panels from this car. Too bad they were red, so I put Roman to work again, and he did a fantastic job prepping and spraying them with interior black paint. Eventually I want to do custom panels but these really look great for now. Below is a shot of the first red panel after painting black.

Earlier in the year I bought a few yards of black headliner material from the local fabric store when it was on a great sale. I had hoped to get it in the car for the trip too but I just plain ran out of time so it's in storage back in Utah for now.

Doorpanel03.jpg


Doorpanel04.jpg
 
Status
Not open for further replies.

GBodyForum is a participant in the Amazon Services LLC Associates Program, an affiliate advertising program designed to provide a means for sites to earn advertising fees by advertising and linking to amazon.com. Amazon, the Amazon logo, AmazonSupply, and the AmazonSupply logo are trademarks of Amazon.com, Inc. or its affiliates.

Please support GBodyForum Sponsors

Classic Truck Consoles Dixie Restoration Depot UMI Performance

Contact [email protected] for info on becoming a sponsor