Make sure headers are completeley tight so you don't blow out your gaskets. I've always hat problems with breathers and oil caps i just stick pcv valves in em and/or run them to the carb or whatever.
82 Old Nutless to not so Nutless
- Thread starter Pedrolif
- Start date
You are using an out of date browser. It may not display this or other websites correctly.
You should upgrade or use an alternative browser.
You should upgrade or use an alternative browser.
- Status
- Not open for further replies.
Looking at picking up a set of new valve covers from speedway for around $50 (guestimate including shipping) that are single hole covers. They wont be dented, they might be chrome... but it will only be one hole each side which is good.Make sure headers are completeley tight so you don't blow out your gaskets. I've always hat problems with breathers and oil caps i just stick pcv valves in em and/or run them to the carb or whatever.
Anyways, last night, bought parts, ate pizza with family and did nothing on the Cutlass. This night, realized to drop in my new fuel pump rod I had to drop it in from the bottom.
 Stupid sleeve wouldn't drop through the block, so... flip it over, remove pan, remove pump, place in new rod with a bit of break in lube just cause and carry on.
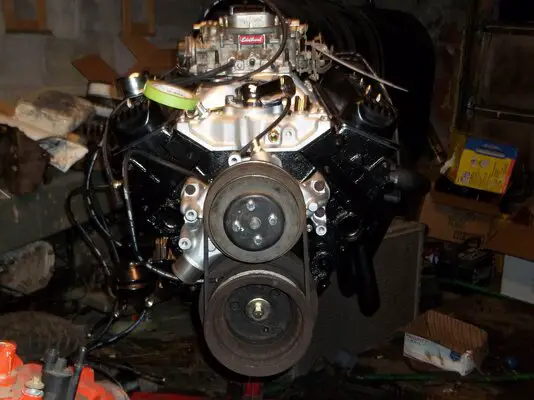
5/16 x 3/4" bolts for the water pump pulley with lock washers and a snug fitting belt and that bit is done with for the break in. Still debating on replacing the pulleys with new ones. The lower is going to go. Plenty of rust and a hole! Just not sure if new is in order or swipe both pulleys of the 305 when I get it out.
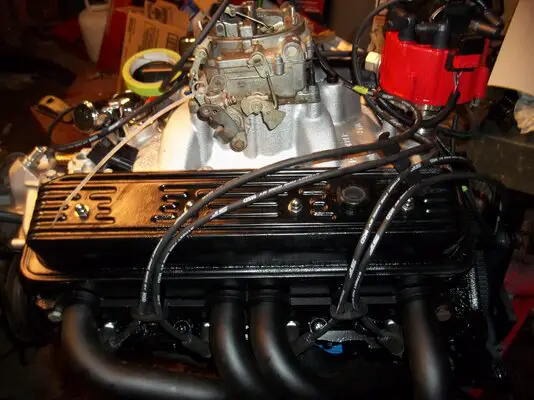
Lightly placed the distributor and put one header back on to get a feel for what wire routing will be. Tape marks are possible cut points to shorten wires. Gaping hole is a PCV valve that well... stock for it is supposed to be straight up. But that puts an ungodly thick hose going up in the air and to the front of the carb. Wires still don't look like good placement to me. Could run the front two under the middle pipes and run all four up the back side of the block. They're plenty long enough for it.
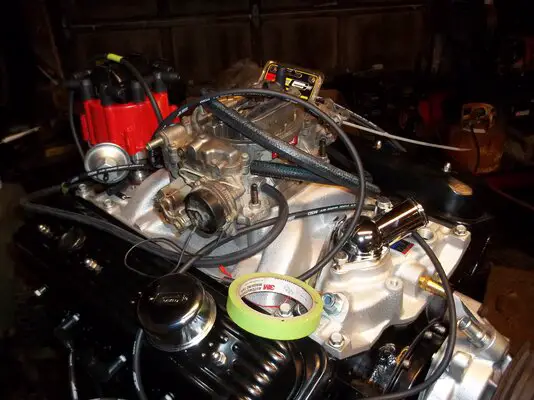
I'm leaning towards water temp sensor in the front under the gooseneck instead of the side of the block, oil pressure is probably going to end up in the back under the distributor, but I swear the 305 has one down on the drivers side of the block somewhere not hooked up. Carb studs will be changed out to short studs, quite possibly "custom" with acorn nuts to match the valve covers. Should still replace those rusty old bolts on the water pump with new ones or just paint them with a brush. Black dots on an "aluminium" water pump probably wont look good, nor would stainless.
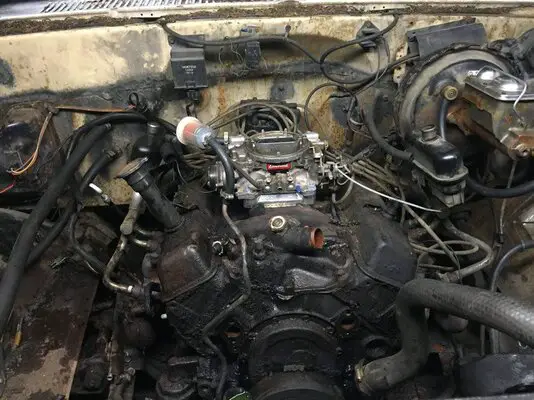
Considering we started here in a C20, and it will end up in here
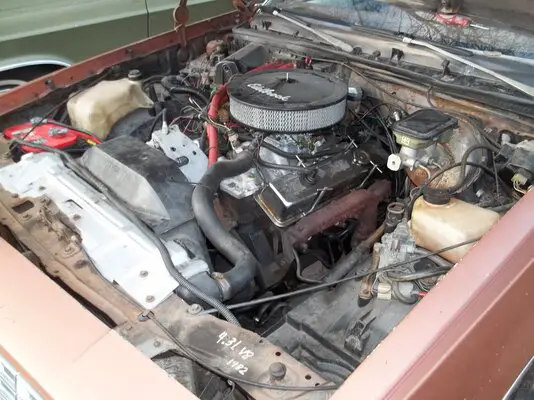
I'll be happy. But I will say this. It's damn cheaper to buy new cheap valve covers then the adapter to put older covers on vortec heads. Otherwise I would just use my black Edelbrock covers to match the air cleaner. And now back to gaining inspiration from you guys and this wonderful Guinness Nitro IPA.

My weekend:
Day 1: Clean up the driveway at Mike's house to squeeze the front of my Cutlass into the garage.
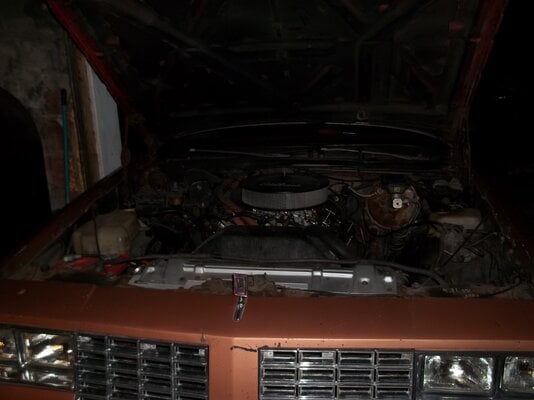 It fits! With no room to fit through the door on the passengers side and no room to walk around the car on the drivers side.
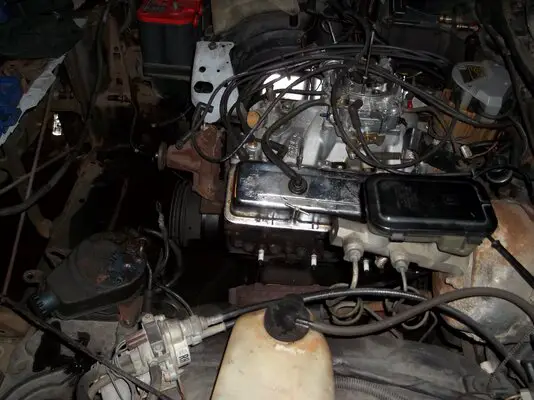 Take out the rad, disconnect everything to make room to pull out the motor/trans in one pull.
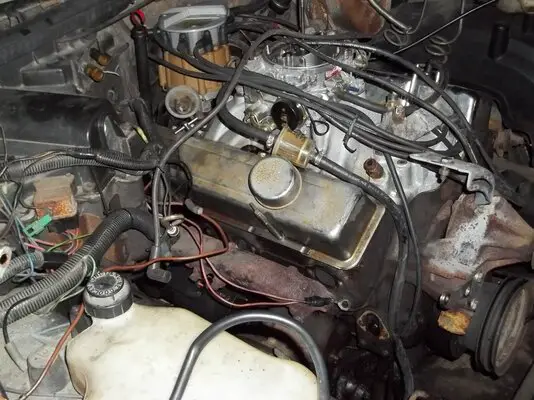
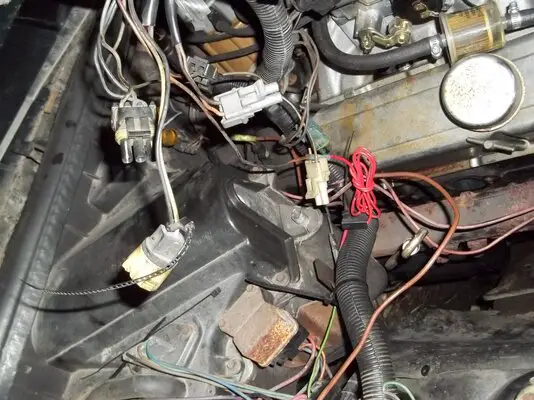 The spare wires need some attention. Out of that whole mess on the passengers side, there's four wires I need to reconnect. The two for the starter that need to be fixed (love twisting cut wires together and wrapping them in 3' of tape...), the Hot for the electric choke (red bundle of wire), power to the distributor (not shown but also spliced with 3' of tape). Drivers side has all of three wires. Tach from the firewall, Water Temp dummy light, and Oil dummy light. The rest of the loose pigtails need to find a hiding spot or I need to just figure out how to disconnect the whole dame engine bay harness and which connections I still need to keep plugged in. Few going to the heater box may be needed, but which ones?
 And took a picture of the stamp on my new transmission. Still need to look it up just for fun and figure out its year range.
Day 1: Clean up the driveway at Mike's house to squeeze the front of my Cutlass into the garage.
 It fits! With no room to fit through the door on the passengers side and no room to walk around the car on the drivers side.
 Take out the rad, disconnect everything to make room to pull out the motor/trans in one pull.
 The spare wires need some attention. Out of that whole mess on the passengers side, there's four wires I need to reconnect. The two for the starter that need to be fixed (love twisting cut wires together and wrapping them in 3' of tape...), the Hot for the electric choke (red bundle of wire), power to the distributor (not shown but also spliced with 3' of tape). Drivers side has all of three wires. Tach from the firewall, Water Temp dummy light, and Oil dummy light. The rest of the loose pigtails need to find a hiding spot or I need to just figure out how to disconnect the whole dame engine bay harness and which connections I still need to keep plugged in. Few going to the heater box may be needed, but which ones?
Day 2: Ordered new one hole Chrome Valve Covers with baffles off Amazon for little over $40 (thank you guy that never mailed me my damn book, that gift card came in handy). Got the motor and trans out. But...
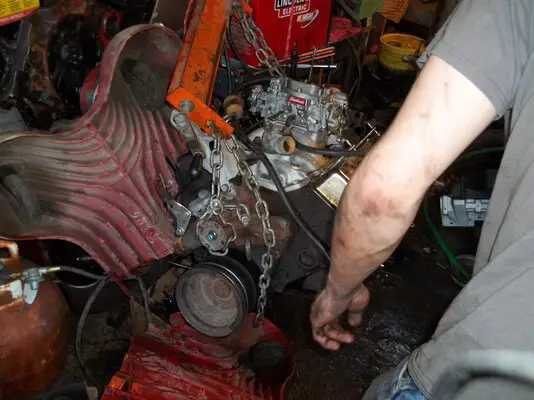
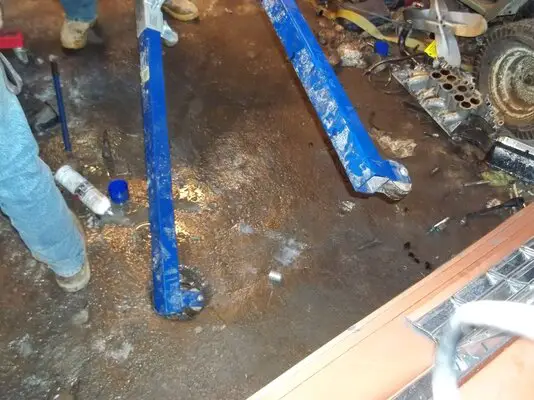
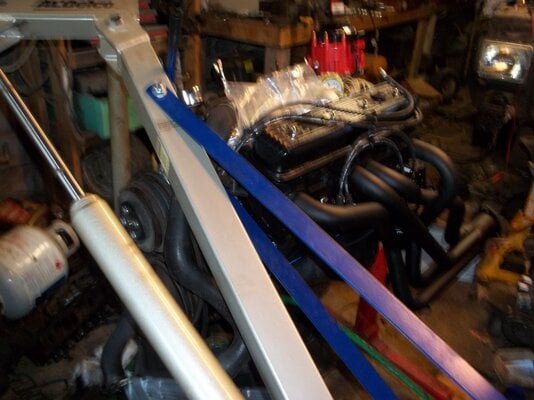
Damn drain in the floor kinda set the motor down hard. The creeper no longer creeps. But luckily only ended up with a scratch in the paint.
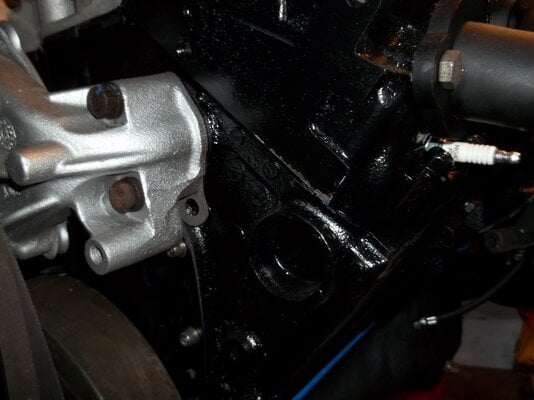
Had to shim the waterpump pulley with a couple of washers, but got the belt grooves to line up like they should. And then we bolted on a transmission after deciding to keep the flexplate that was already installed on the motor. The one that came with the transmission was a little smaller. Did put on the torque converter that came with the transmission. Not sure what it is, but it's black, and already had fluid in it. Hopefully it's Dex/Merc... hm... maybe I should have drained it. Well, it's red fluid at least.
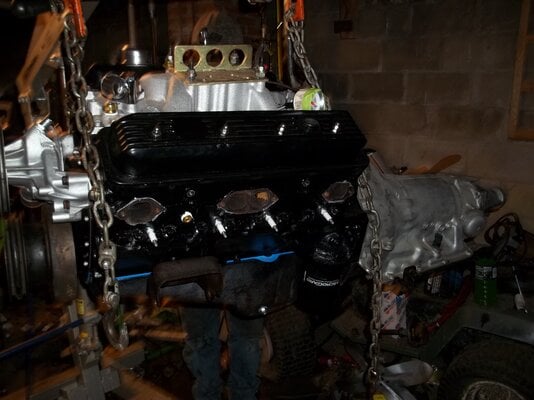
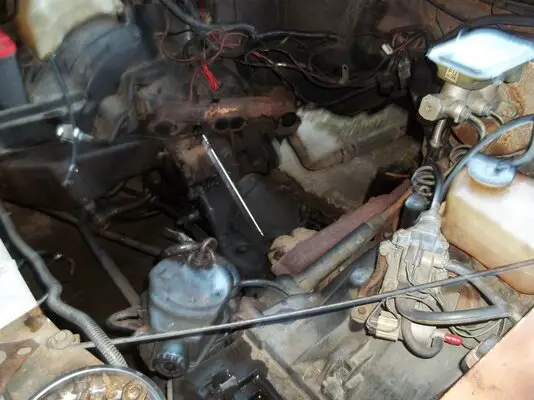 Cut the front section of pipes off from the exhaust. Maniflolds still on in that pic, but now they're on the ground. New Headers to go in that hopefully fit around the stock steering shaft. Manufacturer claims they fit all G bodies in the correct range, so fingers crossed and we shall see.
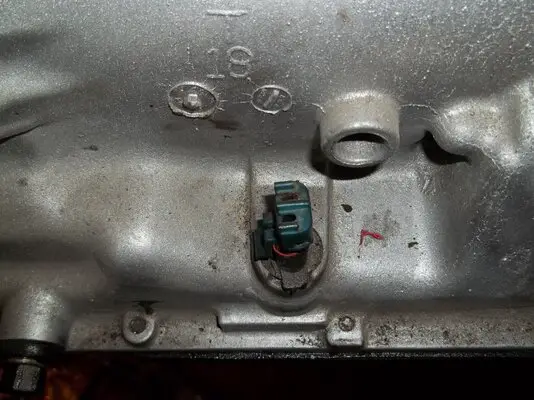
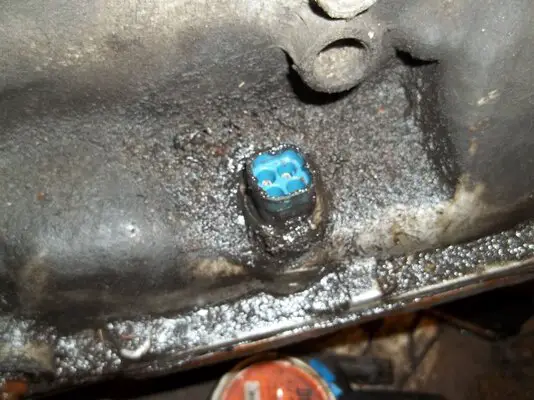 Transmission is turning out to be a little more complicated then anticipated, but I'm not surprised. The one on the left is the new one (which the kickdown cable is plugged off on and had different long cooler line fittings, right is the old with a 4 prong (3 pins) socket. I'm guessing it's park/neutral safety switch and just realized possibly the wire for the electronic locking torque converter? It is a C transmission. They are electronic, right?
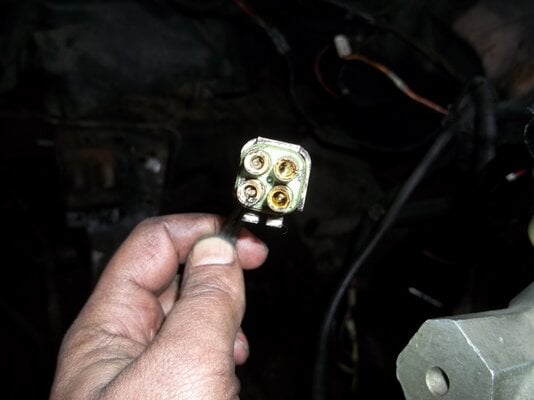 The plug that's currently part of the wiring harness. If I don't need it for the new transmission, I can just replace the one wire that's cut off the old plug. Maybe even snag one of the "spare" plugs from the deleted emissions crap and use it there.


Damn drain in the floor kinda set the motor down hard. The creeper no longer creeps. But luckily only ended up with a scratch in the paint.

Had to shim the waterpump pulley with a couple of washers, but got the belt grooves to line up like they should. And then we bolted on a transmission after deciding to keep the flexplate that was already installed on the motor. The one that came with the transmission was a little smaller. Did put on the torque converter that came with the transmission. Not sure what it is, but it's black, and already had fluid in it. Hopefully it's Dex/Merc... hm... maybe I should have drained it. Well, it's red fluid at least.

 Cut the front section of pipes off from the exhaust. Maniflolds still on in that pic, but now they're on the ground. New Headers to go in that hopefully fit around the stock steering shaft. Manufacturer claims they fit all G bodies in the correct range, so fingers crossed and we shall see.
 Transmission is turning out to be a little more complicated then anticipated, but I'm not surprised. The one on the left is the new one (which the kickdown cable is plugged off on and had different long cooler line fittings, right is the old with a 4 prong (3 pins) socket. I'm guessing it's park/neutral safety switch and just realized possibly the wire for the electronic locking torque converter? It is a C transmission. They are electronic, right?
 The plug that's currently part of the wiring harness. If I don't need it for the new transmission, I can just replace the one wire that's cut off the old plug. Maybe even snag one of the "spare" plugs from the deleted emissions crap and use it there.
Other misc. crap that happened today:
Ordered new power steering pump with res on it just cause
Ordered new p.s. pressure line cause I'm losing fluid somewhere and new is better
Found out my drive shaft has probably never been out. Took the U Bolts off it to drop the drive shaft before pulling the motor/trans and it would not budge. Debating on leaving it or heat it and beat it and replace the U Joint.
Also found out this thing was shoddily put together. Motor mount bolts were only snugged down, transmission wasn't even bolted down, just sitting on the mount. On their defense, the bolt holes didn't line up, so I'll have to fix that some how. Maybe widen the slotted holes on the mount so they stretch far enough to actually be usable. There's also way too many body shims for the fenders. Drivers side isn't even flush with the rest of the cab. Put that on the fix it later list. Exhaust manifold bolts were only snug. Was about to have two fall out on the pass side.
Mucked up my front clip a little. My engine hoist needs a longer boom.
Fixed the vacuum (really that's how you spell it? sheesh...) line going to the transmission, just kinda bent it straighter to match the lines of the block and transmission. Now it lines up nicely and has a much shorter hose on the tail end of it.
Decided I need to buy new transmission lines. Cut up lines and rubber hose with hose clamps just don't do it for me. Now I just need to order some and put them in.
While I had the empty engine bay, decided to look at all the plugs and zip tied the majority of them to the harness going to the computer. Pulled the one wire going to the electric choke out and fixed the wire going to the dis with a butt connector. One down, three to go. Starter wires that are way too long, I'm looking at you.
Also kinda damaged my starter pulling the motor out. It got hung up on the motor mounts, we lifted some more, still hung, drop it, shake it, still hung... Eventually got the whole mess free, but put a nice crack in the aluminium of the starter. It had a dead spot anyways so was going to get replaced but still... was hoping to use it to at least fire it up for the break in.
Picked up electric fan and fan controller. No more mechanical fan taking up space and cutting off fingers in the engine bay. I do still have all my fingers though, which is good. It should fit nicely in the cavity infront of the radiator. Even if the O'really? catalog says it doesn't fit my car. It's bigger then the two listed and still smaller then my radiator core, it'll fit.
Still on the list, replace courtesy lamps with LEDs to match the dome light, find out if my speedo drive needs to be swapped out (might be important), get new tires to replace the weather cracked dry rotted tires, order in the rest of the cheap gauges I need to customize my dash from long sweep to real guages, make a plate to hold gauges and rip apart the dash to get it all installed. I'm sure there's more, but work is in seven hours so it's time to stop rambling and get to sawing wood.
 Just to share. And this post needed a pic.
Ordered new power steering pump with res on it just cause
Ordered new p.s. pressure line cause I'm losing fluid somewhere and new is better
Found out my drive shaft has probably never been out. Took the U Bolts off it to drop the drive shaft before pulling the motor/trans and it would not budge. Debating on leaving it or heat it and beat it and replace the U Joint.
Also found out this thing was shoddily put together. Motor mount bolts were only snugged down, transmission wasn't even bolted down, just sitting on the mount. On their defense, the bolt holes didn't line up, so I'll have to fix that some how. Maybe widen the slotted holes on the mount so they stretch far enough to actually be usable. There's also way too many body shims for the fenders. Drivers side isn't even flush with the rest of the cab. Put that on the fix it later list. Exhaust manifold bolts were only snug. Was about to have two fall out on the pass side.
Mucked up my front clip a little. My engine hoist needs a longer boom.
Fixed the vacuum (really that's how you spell it? sheesh...) line going to the transmission, just kinda bent it straighter to match the lines of the block and transmission. Now it lines up nicely and has a much shorter hose on the tail end of it.
Decided I need to buy new transmission lines. Cut up lines and rubber hose with hose clamps just don't do it for me. Now I just need to order some and put them in.
While I had the empty engine bay, decided to look at all the plugs and zip tied the majority of them to the harness going to the computer. Pulled the one wire going to the electric choke out and fixed the wire going to the dis with a butt connector. One down, three to go. Starter wires that are way too long, I'm looking at you.
Also kinda damaged my starter pulling the motor out. It got hung up on the motor mounts, we lifted some more, still hung, drop it, shake it, still hung... Eventually got the whole mess free, but put a nice crack in the aluminium of the starter. It had a dead spot anyways so was going to get replaced but still... was hoping to use it to at least fire it up for the break in.
Picked up electric fan and fan controller. No more mechanical fan taking up space and cutting off fingers in the engine bay. I do still have all my fingers though, which is good. It should fit nicely in the cavity infront of the radiator. Even if the O'really? catalog says it doesn't fit my car. It's bigger then the two listed and still smaller then my radiator core, it'll fit.
Still on the list, replace courtesy lamps with LEDs to match the dome light, find out if my speedo drive needs to be swapped out (might be important), get new tires to replace the weather cracked dry rotted tires, order in the rest of the cheap gauges I need to customize my dash from long sweep to real guages, make a plate to hold gauges and rip apart the dash to get it all installed. I'm sure there's more, but work is in seven hours so it's time to stop rambling and get to sawing wood.

Haha this is a funny thread. All this broken, rusty, unhooked, leaky, smokey and cutty stuff sucks while we're doing it, but once you get it fired up and drive it on it's own power.....it was all worth it.
Plan for tonight is to go put it back together and maybe fire it up if it's not too late. Still have to work at 6:30 in the morning. Not sure what the transmission sensor is for or what will come of it not being hooked up, but only one way to find out.
Dug into the trans-sensor. 4plug is for lock up convert, 2plug seems to be from some '70s Transmission Spark Control dingis (which is a real word apparently) to control emissions in third gear. Which might fit with the age range of the th350 uni-case I have. Still have not figured out what year it is. Numbers stamped into the side with a google search gave me nothing. No page results at all. Should check the case for more casting numbers but...
 It's in. After way too long. What you can't see is that I removed the whole front clip/bumper to get the hoist close enough to get it seated. What I found in the process is that it may have indeed been in a slight fender bender. Front section of the driver side frame, the circle gap on the bottom, not so circle. Didn't take pictures of it. Next time I'm up there I'll take some pics of the "spacers" they used for the bumper shock absorbers or whatever they call them. Did manage to break off one plastic nub on each side marker light trying to get the thing clips off and drop the motor hard on the cross member. Oil filter is dented now, and I seem to be leaking all that new oil I put in. From somewhere I've not discovered yet. Not sure if all engine hoists are so touchy to letting the pressure off them, but the stock AC Delco hoist with a beam not long enough for a G-body from O'Really? sure does go from slow to fast... fast. For the record, I was not manning the hoist at the time. But still, next time around, I'm buying one with a longer boom and if possible not as touchy. I still have a '68 Chrysler to pull a motor out of. The nose on that thing is much longer than the "nutless".
Also, power steering pump is backwards from what was in there. Mount holes are on the wrong side to use the bracket that's on it. Line is different, but installed it anyways hoping I can twist it around backwards and make it work. Going to look up more PS pumps at work tomorrow and see if I can match my old one to a new one. Possibly buy a roll of 1/4" brake lines and some fittings and make my own trans cooler lines. Maybe worry about it later. Funds are running out, as is available cash on the credit card. Thankfully pay day is just a day away now.
Other things I'm lacking.. My own garage. Showed up tonight to find a tool kit missing from the front seat of the Cutlass, which is bad because my U-bolt caps and screws were sitting on that case. Can't find them. Wanted to replace the U-joint anyways just cause but fna.... That and all my tool sets that I brought up there are lacking pieces now. Garage needs a thorough cleaning or I'll be in the mood to just dump my socket sets on the floor and go buy a few new sets after this and never leave them elsewhere after this. Well, I won't be leaving them in someone else's garage without them being locked in my trunk after this regardless. /endrant I blame the beer.
Still to do: beat the drive shaft free, install new U-bolts and clamps for the drive shaft, replace filter maybe oil pan (yay pull the motor back out!) try to line up the transmission mount with the bolt holes (buy the Energy Suspension one with multiple bolt holes maybe?), install electric fan and wire it in, finish dressing the motor (alternator still needs to go back on and belts and new valve covers and PS pump and carb and misc lines) put the front end back on (maybe after the break in), fit headers, cut and weld exhaust to fit headers and eliminate the leak on the driver's side where it bends to go over the rear axle, install new starter that better fit, run transmission lines. .. what am I missing... custom dash, but that can come after burning off all 4 weather cracked tires. One tire at a time. Some day it may end up posi. And after this, boy I can't wait to shim a rear diff. Oh yes. And sleep. Sorry for the book. Right now I'm just
  and
and  . With luck I'll make it to work in 5.5 hours. But at least the motor is in.

Also, power steering pump is backwards from what was in there. Mount holes are on the wrong side to use the bracket that's on it. Line is different, but installed it anyways hoping I can twist it around backwards and make it work. Going to look up more PS pumps at work tomorrow and see if I can match my old one to a new one. Possibly buy a roll of 1/4" brake lines and some fittings and make my own trans cooler lines. Maybe worry about it later. Funds are running out, as is available cash on the credit card. Thankfully pay day is just a day away now.
Other things I'm lacking.. My own garage. Showed up tonight to find a tool kit missing from the front seat of the Cutlass, which is bad because my U-bolt caps and screws were sitting on that case. Can't find them. Wanted to replace the U-joint anyways just cause but fna.... That and all my tool sets that I brought up there are lacking pieces now. Garage needs a thorough cleaning or I'll be in the mood to just dump my socket sets on the floor and go buy a few new sets after this and never leave them elsewhere after this. Well, I won't be leaving them in someone else's garage without them being locked in my trunk after this regardless. /endrant I blame the beer.
Still to do: beat the drive shaft free, install new U-bolts and clamps for the drive shaft, replace filter maybe oil pan (yay pull the motor back out!) try to line up the transmission mount with the bolt holes (buy the Energy Suspension one with multiple bolt holes maybe?), install electric fan and wire it in, finish dressing the motor (alternator still needs to go back on and belts and new valve covers and PS pump and carb and misc lines) put the front end back on (maybe after the break in), fit headers, cut and weld exhaust to fit headers and eliminate the leak on the driver's side where it bends to go over the rear axle, install new starter that better fit, run transmission lines. .. what am I missing... custom dash, but that can come after burning off all 4 weather cracked tires. One tire at a time. Some day it may end up posi. And after this, boy I can't wait to shim a rear diff.
 Oh yes. And sleep. Sorry for the book. Right now I'm just
  and
and  . With luck I'll make it to work in 5.5 hours. But at least the motor is in.
Today, hooked shift linkage back up.
Stared at the driveshaft, it didn't move.
Changed oil filter, it's still full... so that wasn't the slow drip after the motor came down "gently".
Fought with a starter, then fought with the torque converter cover. The cover is going to get a diet soon and lose a quarter inch of steel, but the starter is bolted on. (Watch your fingers)
Teased some wires, then they teased me. Looks like I'll be playing with some spaghetti in a day or three, but first I'll crimp those dam wires a little better and fix the broken one coming leading to the alternator coming off the starter. It worked that way before, it will work for a little longer.
Was going to call it a night, but Michael had just vacuumed out the intake, so figured why not plop the carb back on it.
Took some photos, but my camera ate them. Nope, not a Polaroid, it won't spit them out.
Past bed time, damn you forums and your endless amounts of reading. After work, temp fixed a few wires to get rid of twisted/taped connections going to the starter and alternator. Tried to fit headers... I'll work on that my next day off. Painted the old alt cover with one coat, maybe two, aluminum paint. Installed alternator. Shimmed alt (belt still curves back to it off the water pump pulley, but it's better). Bolted down the carb and installed crap throttle cable bracket. Stared at my poor car and forgot my camera. Nothing photo worthy anyways.
Tomorrow, swap power steering pumps and install. Paint headers while at work if Michael remembers to bring them in. Check the box under my motor to see if it's still leaking oil. And god dammit! Finish making my plug wires! Aside from not having exhaust on it and no distributor or wires, it's ready to fire. Well... installing the radiator and fan would help with longevity, but... I want to hear it run.
Tomorrow, swap power steering pumps and install. Paint headers while at work if Michael remembers to bring them in. Check the box under my motor to see if it's still leaking oil. And god dammit! Finish making my plug wires! Aside from not having exhaust on it and no distributor or wires, it's ready to fire. Well... installing the radiator and fan would help with longevity, but... I want to hear it run.
- Status
- Not open for further replies.
Similar threads
- Replies
- 1
- Views
- 92
- Replies
- 5
- Views
- 367
- Replies
- 13
- Views
- 438
GBodyForum is a participant in the Amazon Services LLC Associates Program, an affiliate advertising program designed to provide a means for sites to earn advertising fees by advertising and linking to amazon.com. Amazon, the Amazon logo, AmazonSupply, and the AmazonSupply logo are trademarks of Amazon.com, Inc. or its affiliates.

