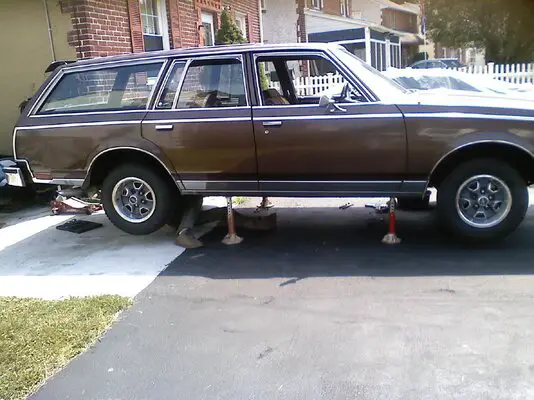
A rotisserie would help greatly. I like the thought of being able to flip the body around and gain access to all those difficult nooks and crannies and you wouldn't have to contort yourself as much. Just my humble opinion.that’s the goal honestly. I just havnt gotten that far yet, I only started this Thursday. I was thinking of building a rotisserie but might just settle for a stand like I did with my elcamino before.
83 cutlass cruiser build.
- Thread starter mikeselky85
- Start date
You are using an out of date browser. It may not display this or other websites correctly.
You should upgrade or use an alternative browser.
You should upgrade or use an alternative browser.
- Status
- Not open for further replies.
A rotisserie would help greatly. I like the thought of being able to flip the body around and gain access to all those difficult nooks and crannies and you wouldn't have to contort yourself as much. Just my humble opinion.
agreed, my only biggest concern is where to mount it. The front should be easy, but the back has no body mounts currently Due to the rust.
Ahh...point well made. No attachment points in the rear. That could make it difficult. So, in effect, you would still need to repair those areas before attempting to mount the body on a rotisserie..agreed, my only biggest concern is where to mount it. The front should be easy, but the back has no body mounts currently Due to the rust.
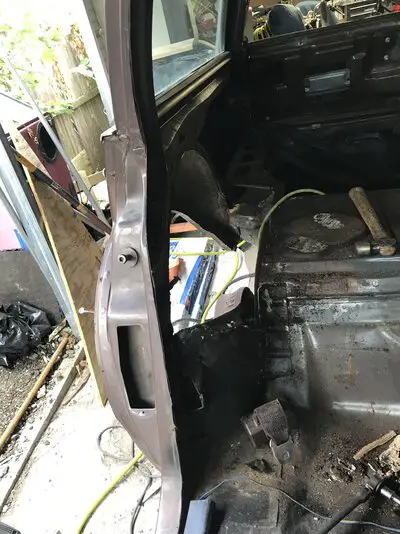
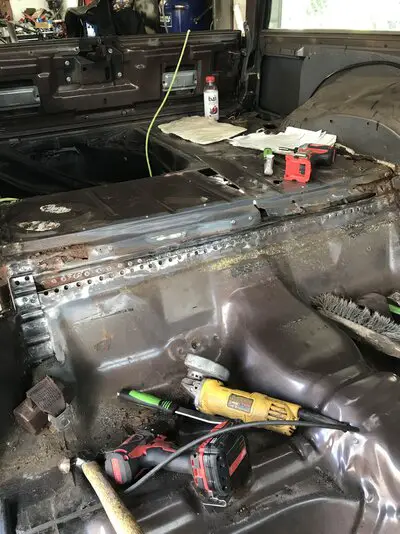
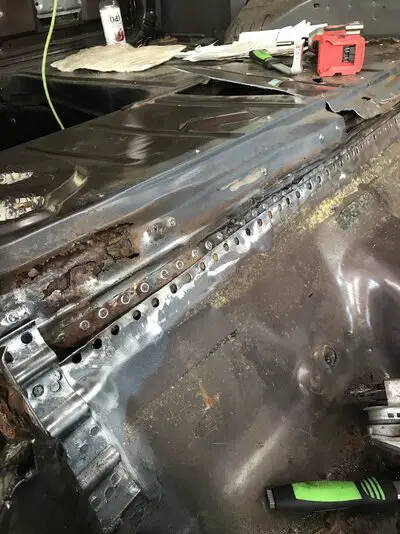
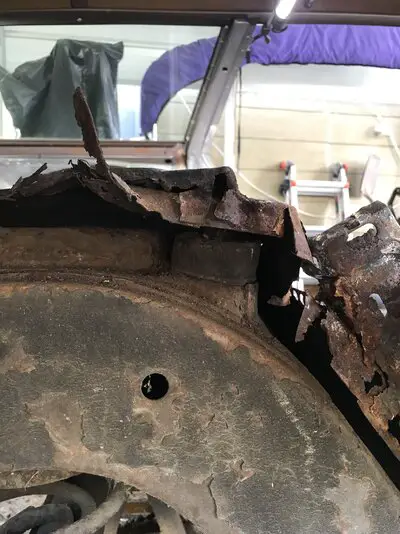
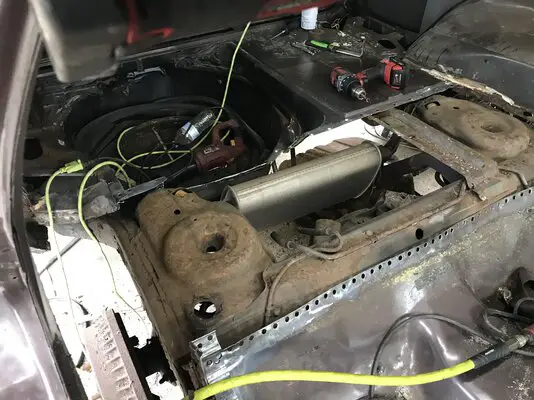
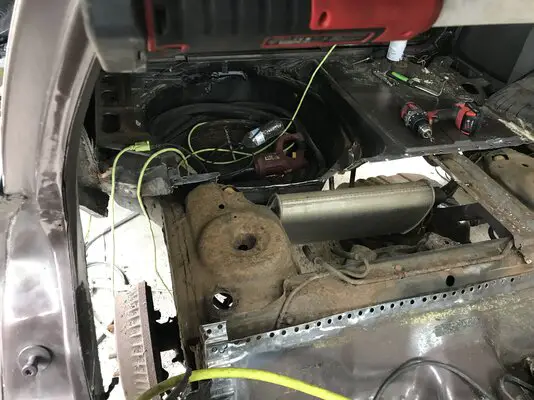
Well today I got a little further into the rust. Ripped the passenger inner tire well out and pulled up the rear floor section that will have to be fabricated. At this point I’m getting tired of seeing and drilling out spotwelds haha. In the last picture you can see the rust underneath, both body supports were gone.
Attachments
-
 58612807-CAA1-4FCE-9502-1BD1AB9CD02F.jpeg1.8 MB · Views: 194
 -
 B771D591-A3E7-47F6-8CB1-BC7EE2EE0473.jpeg1.9 MB · Views: 204
 -
 B6B98D80-B1FF-43AC-949F-2D7369157F8B.jpeg1.7 MB · Views: 210
 -
 57A913C2-80A8-4A5E-923F-41994A2D1A92.jpeg1.7 MB · Views: 214
 -
 68D79BF2-641D-462A-8D07-A57C4A553706.jpeg3 MB · Views: 210
 -
 625331F3-D25F-4461-BDB9-F10DEE612C01.jpeg2.8 MB · Views: 205
 -
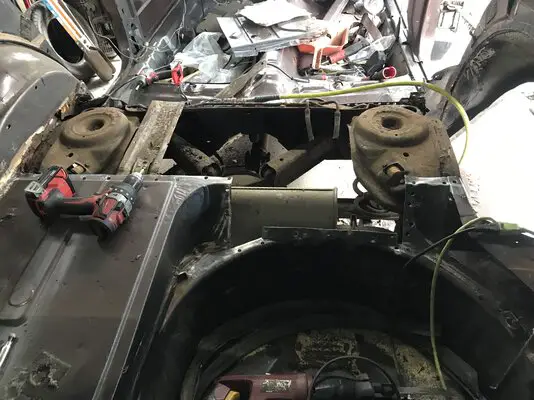 869B02DA-74E4-4691-A223-B8F1785499B5.jpeg2.8 MB · Views: 186
 -
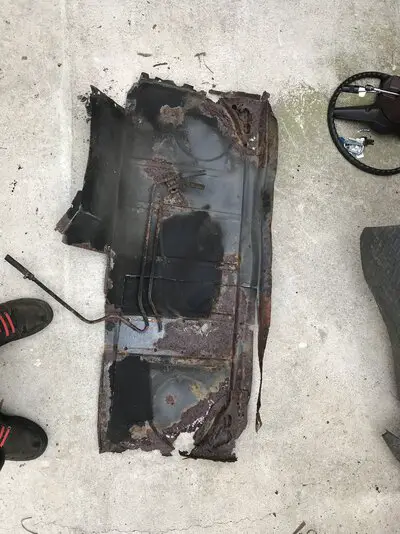 20498099-A539-45EE-81F0-8BCE3B0CEF0C.jpeg2.7 MB · Views: 207
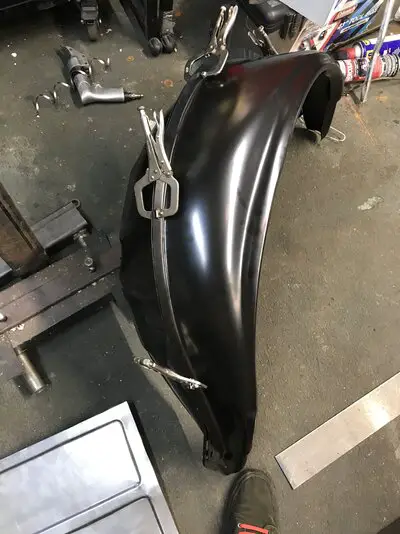
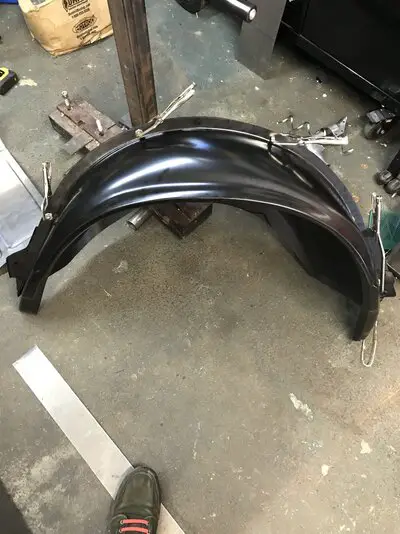
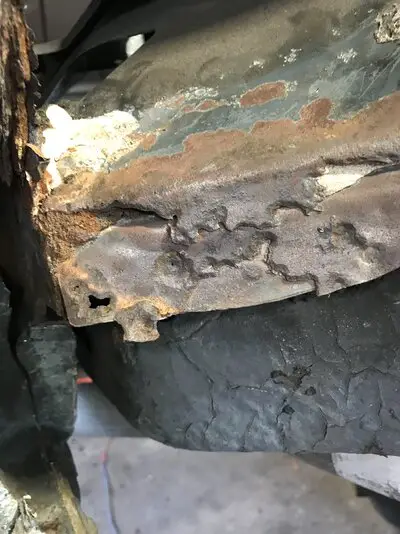
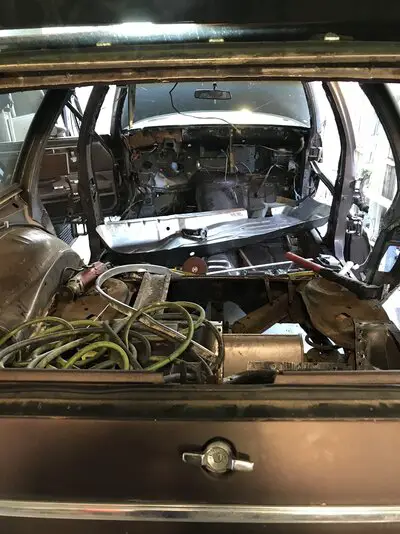
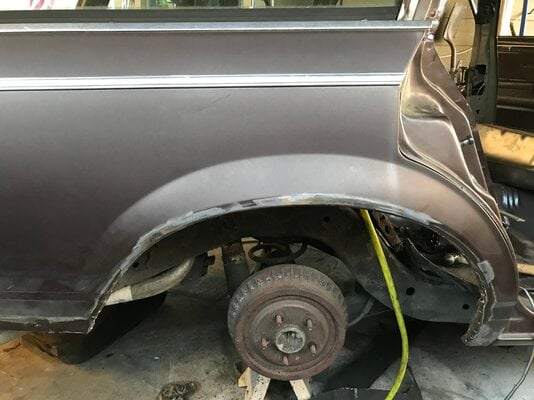
Well got most of the inner/ outer wheel well out, that sucker was glued to the quarter. Hopefully the Monte wheel well fits okay with some fabrication. You can see the amount of rust that is going into the body mount behind wheel well too. So that’s also on the agenda once I pull the frame.
Attachments
-
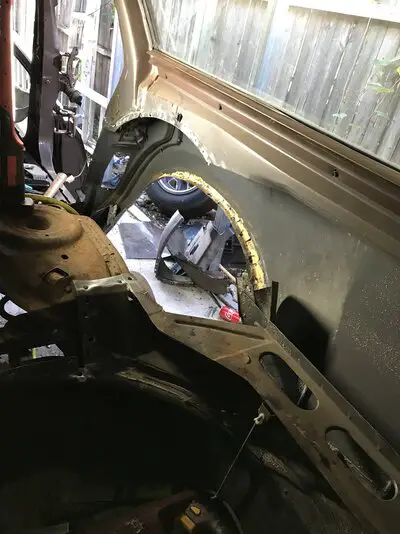 DAC0375F-B9E8-4677-AB67-C31DFC43B445.jpeg1.5 MB · Views: 182
 -
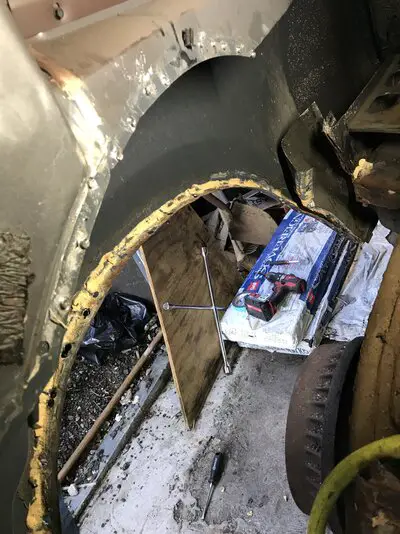 F6010ADD-059D-46EF-A4B8-EF0C0F8BF781.jpeg1.8 MB · Views: 198
 -
 00C7B602-F447-41F7-829A-782E337FBBF9.jpeg1.4 MB · Views: 190
 -
 911C7E65-6264-4E0B-81EE-82BFC125723D.jpeg1.6 MB · Views: 191
 -
 33F2B265-5528-4BC4-9A29-C5166E49F70D.jpeg2.4 MB · Views: 199
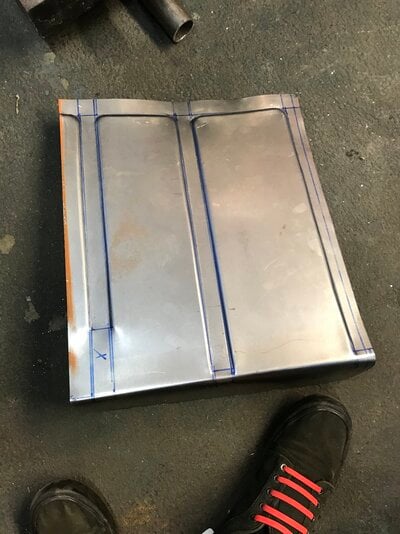
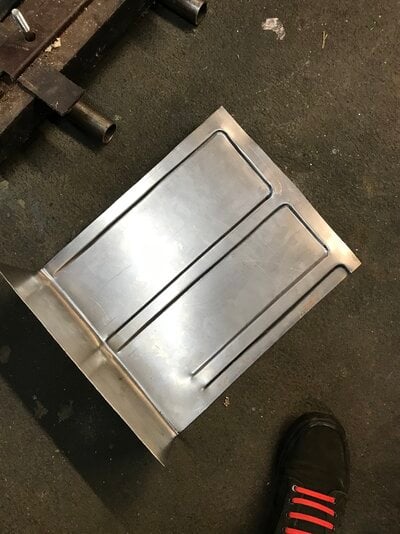
Started fabricating the rear floor panel in 5 sections. It was the only way I can fit it into my bead roller. Still waiting for my shrinker/ stretcher to come in so that I can remove the warp in the panel too. After that, the panels will all get welded into one and installed.
Attachments
Wow, that car looks waaaaay better from the outside than it's underside. You're onto a 'full in' with this. Keep up the good work.
I've hunted for a solid color Cutlass Cruiser, with no success, but I have to admit that I would not tackle what you are - more power to you and get r dun!! 🙂🙂
I've hunted for a solid color Cutlass Cruiser, with no success, but I have to admit that I would not tackle what you are - more power to you and get r dun!! 🙂🙂
Wow, that car looks waaaaay better from the outside than it's underside. You're onto a 'full in' with this. Keep up the good work.
I've hunted for a solid color Cutlass Cruiser, with no success, but I have to admit that I would not tackle what you are - more power to you and get r dun!! 🙂🙂
that is absolutely true. It had some serious issues that looked like it came from a poor rust repair job on the pass. Inner tire well. As I pulled it apart I could see some random welded in pieces that were not factory, but also the rust was never treated too.
This was not planned to go this far into the job, but my wife really likes out wagon. So I want to keep it on the road for a while longer.
Also here’s a pic from 8 years about today when we bought it. Brake line blew on test drive and the guy knocked a few hundred off the price haha
Attachments
Good luck, Mike,
We're all rooting for you. It is an ambitious project, no doubt, but I'm sure you know what you're getting yourself into. You seem to enjoy fabrication and working with metal...much like a sculptor or an artist. Just to let you know, we're all here for moral support and we won't try to discourage you.
We're all rooting for you. It is an ambitious project, no doubt, but I'm sure you know what you're getting yourself into. You seem to enjoy fabrication and working with metal...much like a sculptor or an artist. Just to let you know, we're all here for moral support and we won't try to discourage you.
Wow, that car looks waaaaay better from the outside than it's underside. You're onto a 'full in' with this. Keep up the good work.
I've hunted for a solid color Cutlass Cruiser, with no success, but I have to admit that I would not tackle what you are - more power to you and get r dun!! 🙂🙂
that is absolutely true. It had some serious issues that looked like it came from a poor rust repair job on the pass. Inner tire well. As I pulled it apart I could see some random welded in pieces that were not factory, but also the rust was never treated too.
This was not planned to go this far into the job, but my wife really likes out wagon. So I want to keep it on the road for a while longer.
Also here’s a pic from 8 years about today when we bought it.
Good luck, Mike,
We're all rooting for you. It is an ambitious project, no doubt, but I'm sure you know what you're getting yourself into. You seem to enjoy fabrication and working with metal...much like a sculptor or an artist. Just to let you know, we're all here for moral support and we won't try to discourage you.
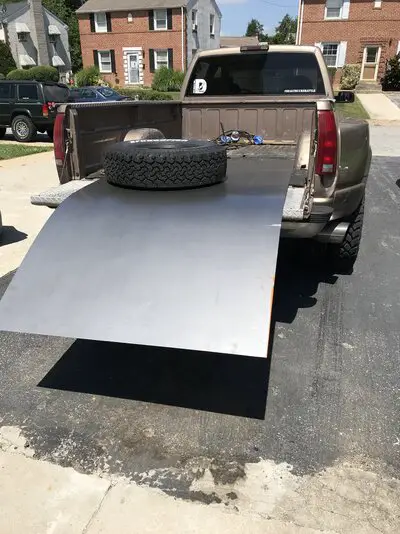
thanks bud. Not my first project, but it is my biggest one yet. And I love metal work, it’s kinda of relaxing in a way. And here’s a nice 4x8’ sheet of 18 gauge to become rear floor, door skins, etc...
Attachments
- Status
- Not open for further replies.
Similar threads
- Replies
- 0
- Views
- 93
- Replies
- 3
- Views
- 235
- Replies
- 8
- Views
- 381
GBodyForum is a participant in the Amazon Services LLC Associates Program, an affiliate advertising program designed to provide a means for sites to earn advertising fees by advertising and linking to amazon.com. Amazon, the Amazon logo, AmazonSupply, and the AmazonSupply logo are trademarks of Amazon.com, Inc. or its affiliates.


