Astro Van Engine Swap (Completed)
- Thread starter jrm81bu
- Start date
You are using an out of date browser. It may not display this or other websites correctly.
You should upgrade or use an alternative browser.
You should upgrade or use an alternative browser.
- Status
- Not open for further replies.
Re: Astro Van Engine Swap
If You Only Want To Run One Post I Can Catch It On This Site Too Bud Its Probably Easier Just Doing One Then Two Ha Ha But Yeah Im Still Interested In It I Just Got My Brother His Donor Van So Our
Swap Is Coming Soon Too Hopefully Before the Snow Comes!! So Yeah Ill Stay tuned Here And On MR LEave Me A note On where To Catch It So I Dont Miss It HaHa
Re: Astro Van Engine Swap
As promised, i'm going to start updating this thread. I've gottten the van here but haven't really started on it yet. Threw a battery in to check things out and the fuel pump isn't running and the fuel gauge is pegged past full. It's been sitting a LONG time so i'm not surprised if the pump is shot but find it a bit odd the guage isn't reading either. Oh well, on with some pics.
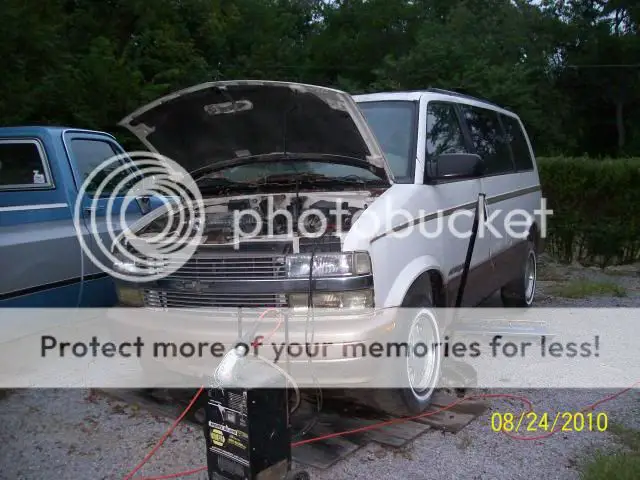
Kinda low miles for a 96, mostly due to sitting.

Clean interior other than the damn mouse droppings. At least it doesn't stink(real bad).

As promised, i'm going to start updating this thread. I've gottten the van here but haven't really started on it yet. Threw a battery in to check things out and the fuel pump isn't running and the fuel gauge is pegged past full. It's been sitting a LONG time so i'm not surprised if the pump is shot but find it a bit odd the guage isn't reading either. Oh well, on with some pics.

Kinda low miles for a 96, mostly due to sitting.

Clean interior other than the damn mouse droppings. At least it doesn't stink(real bad).

Re: Astro Van Engine Swap
Alright, I finally got something done on the van. The fuel that was in the pump was so bad it messed up the pump and the sending unit. I put in a new pump and managed to clean the sender and get it working again 😀 . I fired it up and ran it threw the gears, it at least has 1st and reverse. Also looks like the charging system is still good.
Since everything seems to be in working order, I started the engine swap. I don't have any real big details yet. I pretty much just started unbolting stuff. If I come across anything note worthy I will post about it. Anyway here's some pics of where i'm at now.
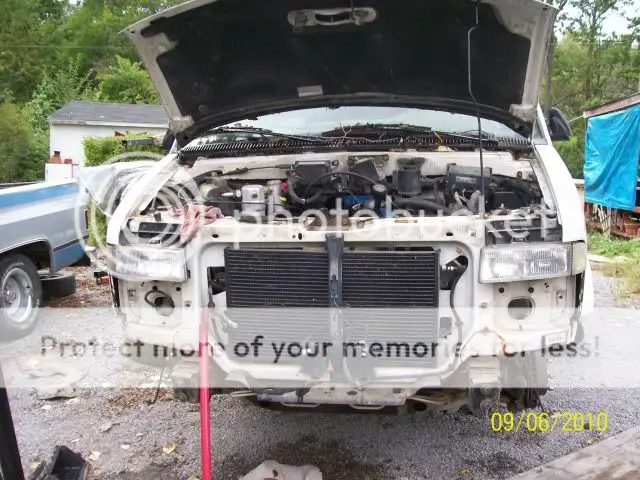
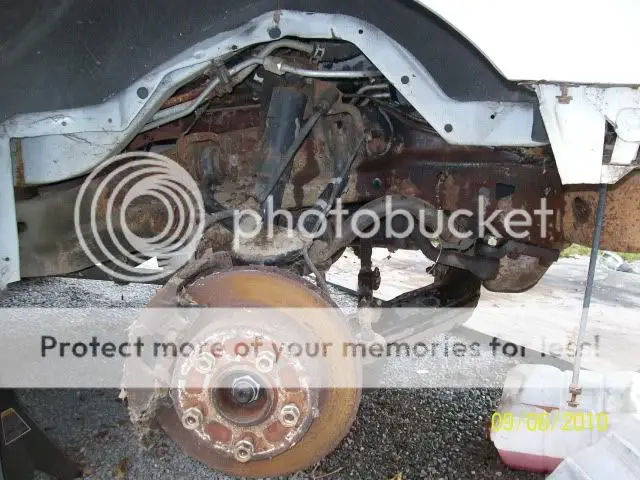
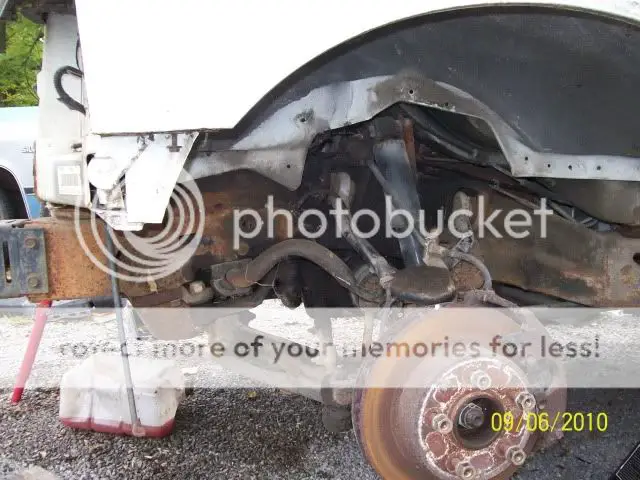
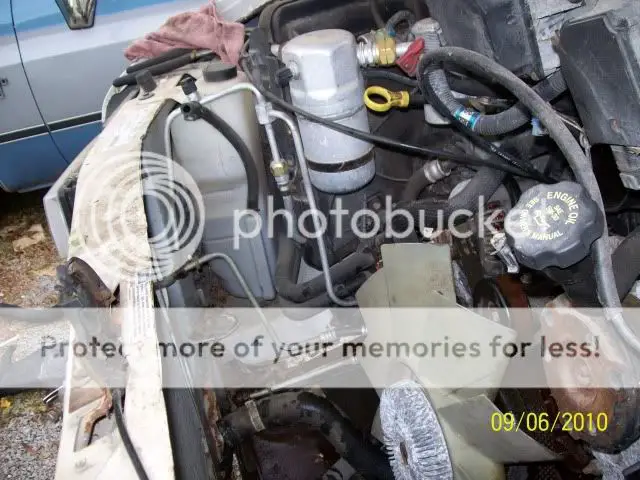
I've already moved the wiring harness and broke loose the brake lines. I also pullled the power sterring lines off the hydroboost. Oh and I disconnected the sterring shaft also.
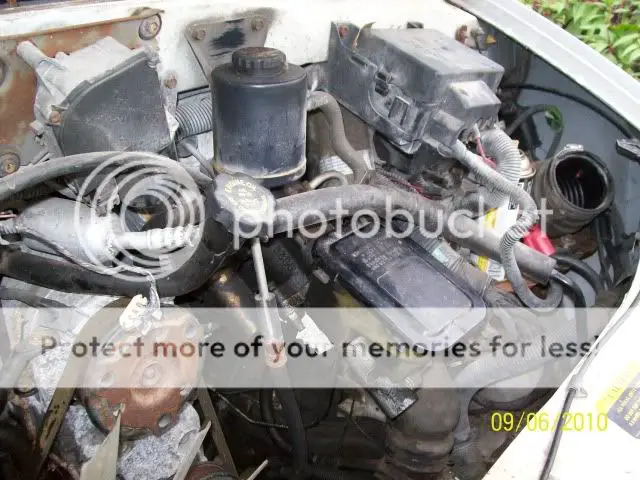
Alright, I finally got something done on the van. The fuel that was in the pump was so bad it messed up the pump and the sending unit. I put in a new pump and managed to clean the sender and get it working again 😀 . I fired it up and ran it threw the gears, it at least has 1st and reverse. Also looks like the charging system is still good.
Since everything seems to be in working order, I started the engine swap. I don't have any real big details yet. I pretty much just started unbolting stuff. If I come across anything note worthy I will post about it. Anyway here's some pics of where i'm at now.


I've already moved the wiring harness and broke loose the brake lines. I also pullled the power sterring lines off the hydroboost. Oh and I disconnected the sterring shaft also.

Re: Astro Van Engine Swap
Yes sir this is gonna be a fun one, lol. Originally I had planned on putting the sub-frame on moving dollies and sliding out the side after It was unbolted. Then I though maybe I would just attach some caster directly to the sub-frame. However as it stands I plan to lower the body onto "something" then move the cherry picker out of the way and roll it out the front on it's own tires(with a jack on the back of the sub-frame. The problem with this is, what i had planned to set the body on isn't gonna work as planned. So we had to improvise at the last minute, it now consists of one 55 gallon drum in the center on body cross support(it actually held by itself but I didn't trust it), and we also added two jackstands on top of two cinder blocks in an area that the sub-frame used to reside.
I don't think I'm doing that great of job detailing this extraction but for anyone planning on doing this it is pretty straight forward. You can compare my pics to what you see in front of you to get a better idea of what I removed. The biggest pain so far was(finding and removing) a few brackets that held the fuel lines to the engine and transmission. The wiring harness will go with the sub-frame, however I left the ac lines(because of the rear heat/ac) attached to the body. The problem with that was the harness was wrapped around the rear ac line so I had to remove a bunch of the connectors on the underside to be able to flop them around the ac line. Well here's some more pics.
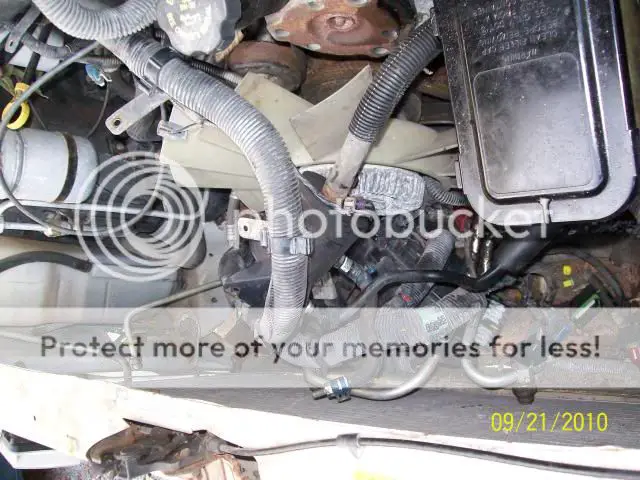
This is what it looked like under the hood with everything ready to drop.
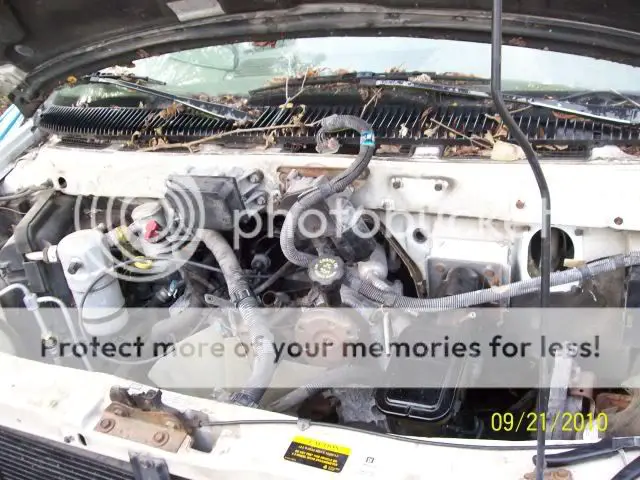
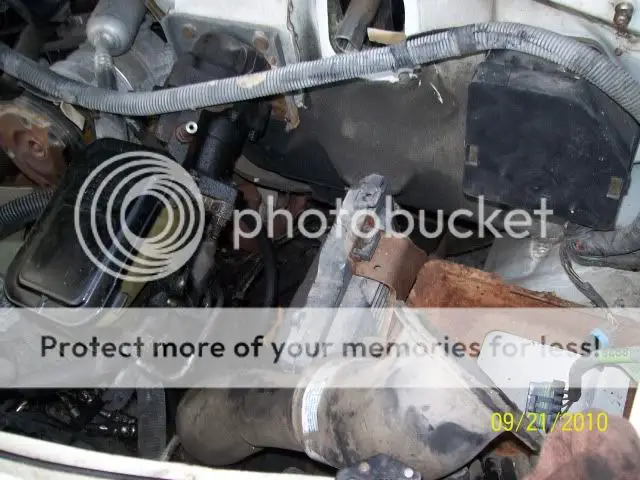
You can see the wiring harness tha was attached to the firewall stuffed down in there.
After playing around with a few ideas, this is what we came up with to lift the body.
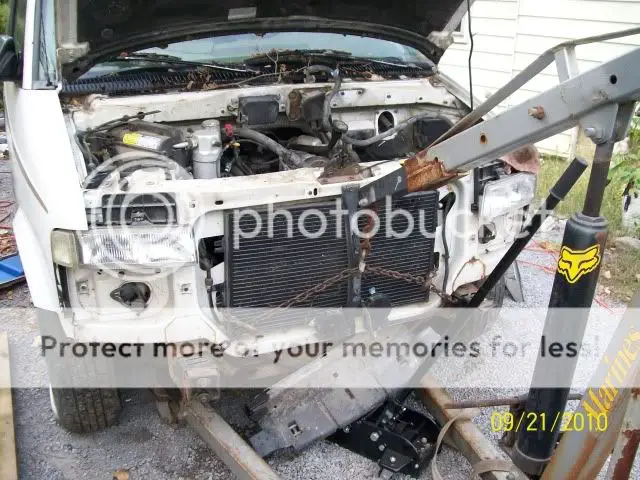
Well it's up, now what, lol!?!
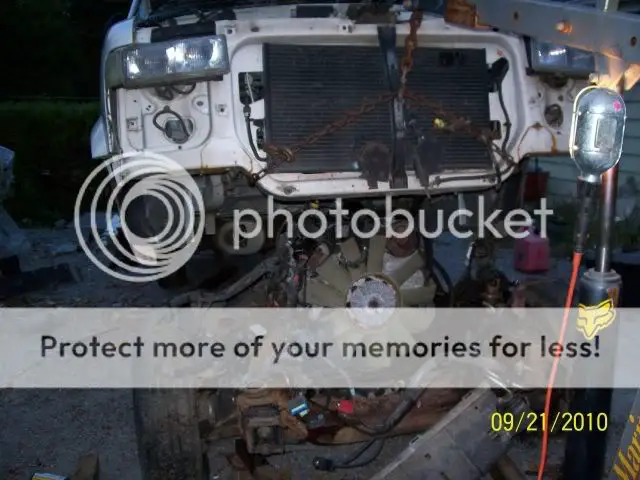
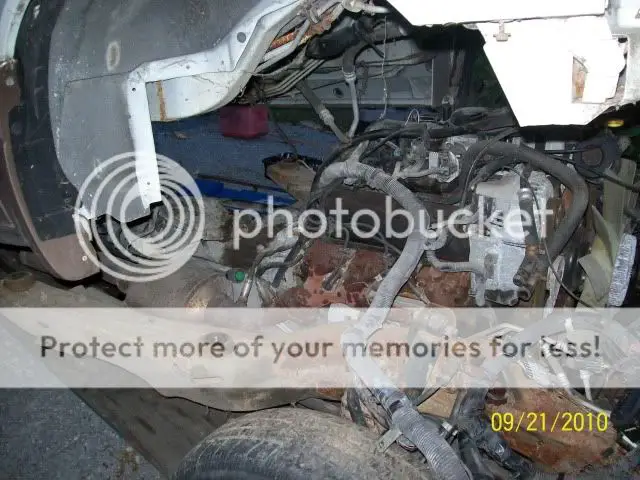
Yes sir this is gonna be a fun one, lol. Originally I had planned on putting the sub-frame on moving dollies and sliding out the side after It was unbolted. Then I though maybe I would just attach some caster directly to the sub-frame. However as it stands I plan to lower the body onto "something" then move the cherry picker out of the way and roll it out the front on it's own tires(with a jack on the back of the sub-frame. The problem with this is, what i had planned to set the body on isn't gonna work as planned. So we had to improvise at the last minute, it now consists of one 55 gallon drum in the center on body cross support(it actually held by itself but I didn't trust it), and we also added two jackstands on top of two cinder blocks in an area that the sub-frame used to reside.
I don't think I'm doing that great of job detailing this extraction but for anyone planning on doing this it is pretty straight forward. You can compare my pics to what you see in front of you to get a better idea of what I removed. The biggest pain so far was(finding and removing) a few brackets that held the fuel lines to the engine and transmission. The wiring harness will go with the sub-frame, however I left the ac lines(because of the rear heat/ac) attached to the body. The problem with that was the harness was wrapped around the rear ac line so I had to remove a bunch of the connectors on the underside to be able to flop them around the ac line. Well here's some more pics.
This is what it looked like under the hood with everything ready to drop.


You can see the wiring harness tha was attached to the firewall stuffed down in there.

After playing around with a few ideas, this is what we came up with to lift the body.

Well it's up, now what, lol!?!


Re: Astro Van Engine Swap
Today I got a lot of parts switched over from the original engine to the new one. The new engine came out of an S10 or Blazer so there was quite a bit that need swapping. Had hoped to get it dropped into the subframe but didn't. I plan on picking ups ome new parts for it tomorow, plugs,wire, thermostat, etc. It will be a lot easier to do this stuff now instead of after it is in. Thought you guys might get a kick out of seeing how the body is propped up.
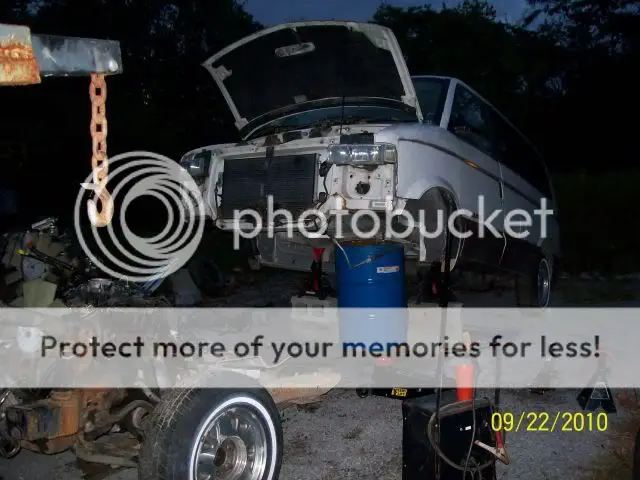
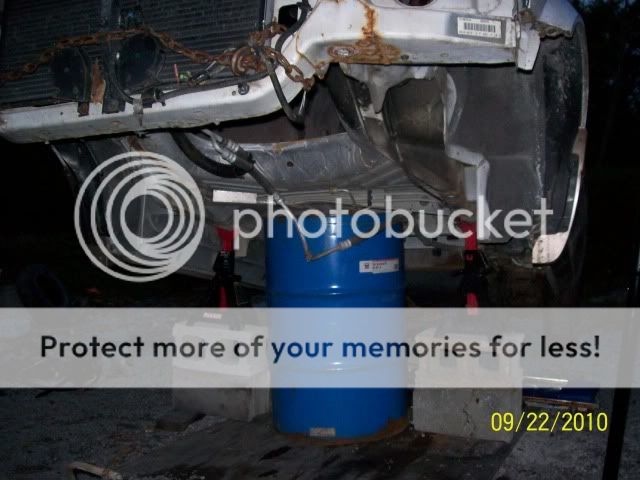
Kinda scary but that drum supported all the weight on a trial run so, it should be alright for another day or two, lol.
Today I got a lot of parts switched over from the original engine to the new one. The new engine came out of an S10 or Blazer so there was quite a bit that need swapping. Had hoped to get it dropped into the subframe but didn't. I plan on picking ups ome new parts for it tomorow, plugs,wire, thermostat, etc. It will be a lot easier to do this stuff now instead of after it is in. Thought you guys might get a kick out of seeing how the body is propped up.


Kinda scary but that drum supported all the weight on a trial run so, it should be alright for another day or two, lol.
Re: Astro Van Engine Swap
you once again proved where there is a will there's a way...awesome job and I hope you have a few friends helping you
you once again proved where there is a will there's a way...awesome job and I hope you have a few friends helping you
Re: Astro Van Engine Swap
Ha ha, ya i'm stubborn like that. Pertty much just me and my brother.
Ya a lift would be a lot easier.
Ya the drums are strong unless you hit them in the side. It's pretty stable the way it is. I had planned on using a drum on each side with strong wood going across, but that didn't work out.
pontiacgp said:you once again proved where there is a will there's a way...awesome job and I hope you have a few friends helping you
Ha ha, ya i'm stubborn like that. Pertty much just me and my brother.
kris_tol said:sick man good job seems hard with out a lift
Ya a lift would be a lot easier.
axisg said:looks OK to me.
Seriously, I have seen less support hold more weight. And I know those drums are tough.
Ya the drums are strong unless you hit them in the side. It's pretty stable the way it is. I had planned on using a drum on each side with strong wood going across, but that didn't work out.
- Status
- Not open for further replies.
Similar threads
- Replies
- 6
- Views
- 234
- Replies
- 3
- Views
- 148
- Replies
- 0
- Views
- 162
GBodyForum is a participant in the Amazon Services LLC Associates Program, an affiliate advertising program designed to provide a means for sites to earn advertising fees by advertising and linking to amazon.com. Amazon, the Amazon logo, AmazonSupply, and the AmazonSupply logo are trademarks of Amazon.com, Inc. or its affiliates.

