Headlight Upgrade???

Status
Not open for further replies.
it is simple and I think Daniel is trying very hard to sell his product...I have 2 bi-xenon bulbs for my hi/lo and 2 H1 Hid for my high beams. I have Hella lenses which give a pattern beam so they don't blind anyone and I can easily see where I'm going.
 
Speaking of headlight upgrades...I'm new here but as I was looking for a solution to something else I stumbled across this page. I had the same problem as you fellas; wanting a headlight upgrade but wanting something different. I see these (in Ludacris's words from the "Same Damn Time" song) GUUHAUBAGE *ss pre-fab 4x6 headlights they sell on ebay and a few others sites and they're awful...so, if you'll refer to this link you'll be able to see myself and a few other folks have found an alternative solution to the matter at hand.
http://www.turbobuick.com/forums/thread ... st-2870780 :idea:
 
another plus with the Hella lenses is they are glass. I'm running the 55 watt hid's and if the lenses were plastic they'd be melted by now.
 
I got an email from someone thinking I was blowing smoke with my idea of 4x6 projectors...lol. I just love doubters...don't you?
 

Attachments

  • Photo0043.jpg
    Photo0043.jpg
    494.4 KB · Views: 842
This pic was before I aimed them...
There was alot of work that went into getting these lights mounted intot he buckets...reason why is that the headlight was modified on the sides (my factory original H1 Halo Pilot light has the halo option) so I had to modify the headlight bucket so that the headlight bucket would clear both sides of the halo bulbs and wiring...here are some pictures...
 

Attachments

  • Photo0087.jpg
    Photo0087.jpg
    127.2 KB · Views: 802
  • Photo0088.jpg
    Photo0088.jpg
    157.4 KB · Views: 808
  • Photo0082.jpg
    Photo0082.jpg
    581.4 KB · Views: 817
  • Photo0083.jpg
    Photo0083.jpg
    638.9 KB · Views: 826
  • Photo0084.jpg
    Photo0084.jpg
    635.4 KB · Views: 801
@83CANNON---Do you have anymore pics or info regarding that setup?
 
...and here are the res of the pics.
My suggestion in doing this is use a a Dremel or even if you use grip pliers and two pair of regular pliers like I did, MAKE...THE...EDGES...CLEAN!!!!!!!!!!!!!!!! If you don't, they will do nothing but rub, scrape, and carve into your front nose clip and make aiming your headlights a pain. And if your aiming mounts are already weak??? Be ready to buy some more. PLEASE DONT BUY THOSE CHEAP *ss AUTOZONE AIMING SCREWS!!!!!!!! Jut go ahead and spend the moneyto buy quality one's. YOur not going live past 120 anyway so who cares. I did clean up most of the burs and spurs that were on my headlight bucket. My headlight buckets had they're fair share of weather wear on them so they were okay to bend and break. If you do this manually tho...your forearms are going to be bigger than with the excersises you do already...lol. It took me a good 3-4 hours to just jump in and trial and error these headlights...oh AND at the time the sun came up later AND this car was my daily driver. So yea...I had to go ahead and do the do asap! But man...once I got them in...smdh! It ws like I was behind the wheel of a '85 Lexus LS430 (reffering to the headlights of course). I doubt if I ever go back to halogens again.
The pics I put up of the pattern don't do them justice at all. They have such a residual lighting to where...okay how they're aimed in the pics were just mock up. But then I didn't want folks to catch on to the beam pattern; plus, I wanted to cover more surface area with them. So I aimed them up and have the two beam lines slightly overlapping each other. The effects are just gorgeous! I can hit an expressway sign from at least .75 miles...no kidding; AND see the beam pattern. That's just how sharp the line is.

This is done with using only a H1 Morimoto projector and Phillips...something a rather bulbs. I have to look at my order sheet and see what the bulbs are. Only 35 watts and the color is 4300K. I can pull up to a clown with 5500K, 6K, 8K, the suns surface K...and outshine him in brightness and distance.

Thanks to Caesar Rowinski and the fellas at The Retrofit Source for the hardware...also like to thank the folks at Lightwerkz for the work. This was Lightwerkz first project of it's kind for the company. Lol...feels cool being a trendsetter.
 

Attachments

  • Photo0085.jpg
    Photo0085.jpg
    475.2 KB · Views: 802
  • Photo0086.jpg
    Photo0086.jpg
    545.9 KB · Views: 806
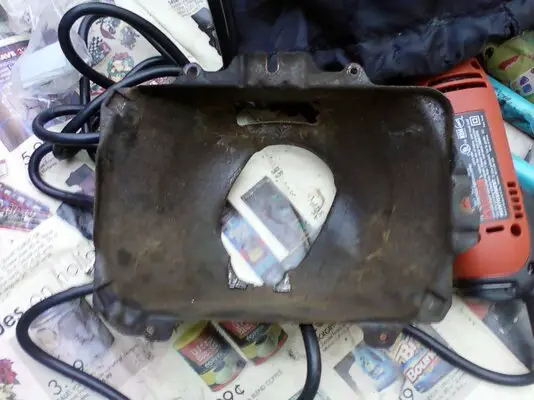
Yeah so I had a Dremel and the damn tip of it wouldn't act right...so I had to use my hands. Wait that didn't come out right...neither did that.
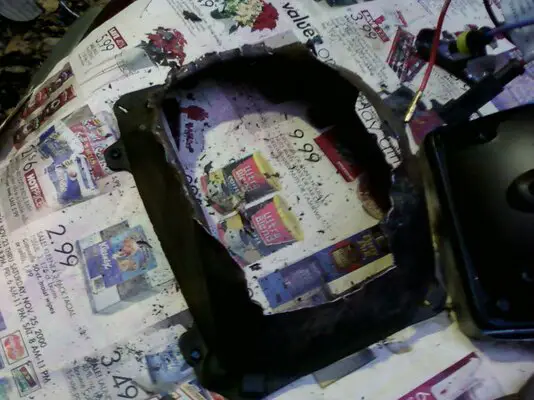
But My Dremel failed and I had to resort to using hand power. I got a pair of smal grip pliers, a big head pair of angled pliers, and a small pair of regular anlged pliers. These all played they're own part in the metal fabrication of the headlight bucket. The grip pliers tore into the bucket (due to the squared corners) and the big pliers tore big pieces of the bucket away as I needed. The small pair of pliers took care of the small curled pieces.
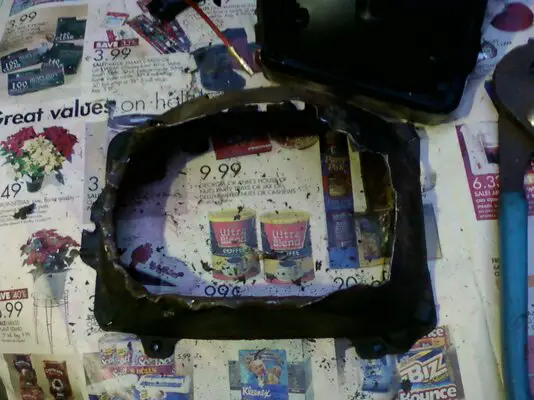
The bucket was even warped a little bit from all of the grown man I was putting on it but still fit the shape of the headlight with a little massaging.

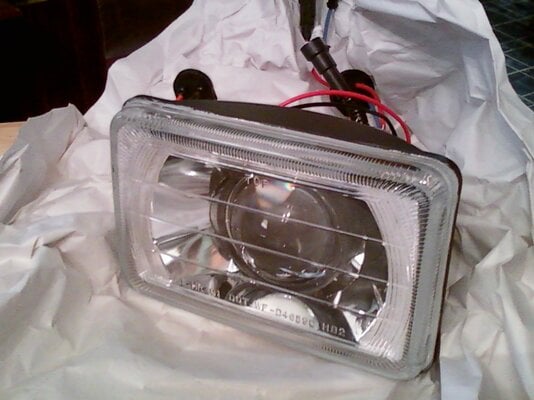
AGAIN...WHAT YOU WANT TO DO IS MAKE SURE YOU HAVE ENOUGH BUCKET LEFT TO HOLD THE HEADLIGHT...FIT THE SPRING...AND BE AIMED!!!!!!!!!!!!!!!!!!!!!!!!!!!!!!!!!!!!!!!!!!!!!!!!!!!!!!!!!!!!!!!!!!!!!!!!!!!!

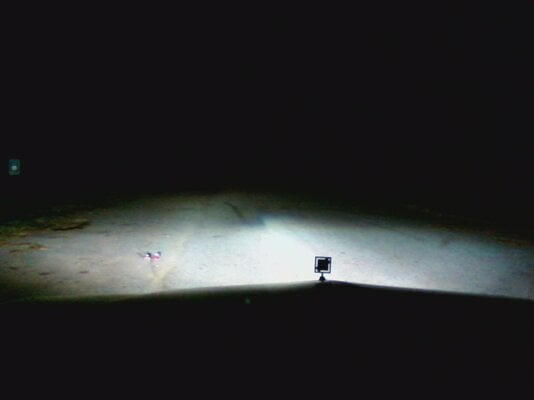
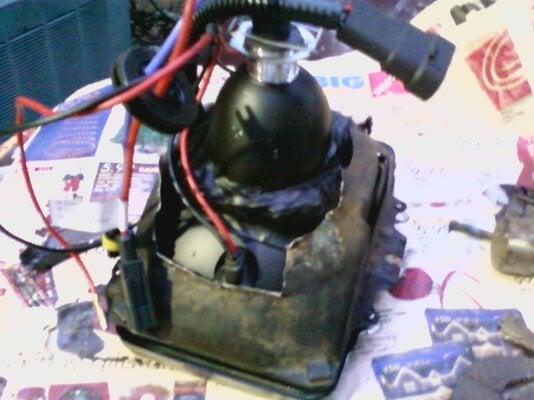
Once I got everything in place and cut that driverside headlight on for the first time into my backyard...man...I almost shed a tear (in my Jim Carrey crying face). It popped on, warmed up, and even when I flashed the higbeam (into one side... :roll:
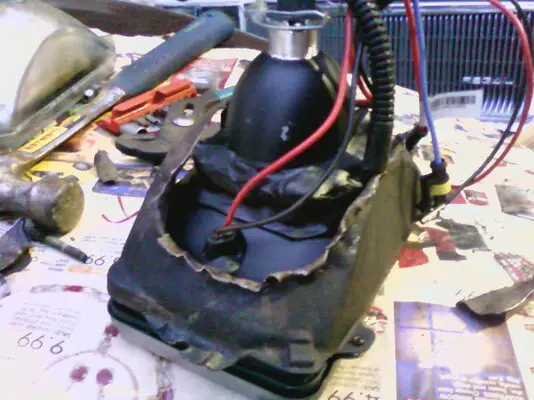
) the selenoid flicked and highbeams were amazing! I wired up the other side and now have to flick the highbeams twice for high...twice again THEN cut them off and back on for regular lighting...yea I know so I just don't cut the damn things on. But The Retrofit Source said it could be my relay and they would look into it so no biggie.

The only issue I've had was my highbeam light staying on...ok who cares. I do but egh, the wiring, headlights, and wiring harnesses are all at a safe temp and working fine. The bulbs are at 35 watts so nothing is really too hot.

And just think...Im so behind. Most of you guys have running *ss motors, paint, fram offs, brand new rubber you just bought. And all you need now is to upgrade your headlights. I myself have the headlights...and damn near need a new car lmao...heck, my car hasn't run in a few months actually. But I'm working on a few other things for it. Mainly my music. Been thinking about two or maybe even four Hertz component sets...just don't want to cut into anything sacrificing the original interior.
 
Status
Not open for further replies.

GBodyForum is a participant in the Amazon Services LLC Associates Program, an affiliate advertising program designed to provide a means for sites to earn advertising fees by advertising and linking to amazon.com. Amazon, the Amazon logo, AmazonSupply, and the AmazonSupply logo are trademarks of Amazon.com, Inc. or its affiliates.

Please support GBodyForum Sponsors

Classic Truck Consoles Dixie Restoration Depot UMI Performance

Contact [email protected] for info on becoming a sponsor