Hey BUDDy 😀 .....I'm gonna be putting a tpi in my 87 elco,almost have all nessasry components!!! If you are looking to get rid of those "extra" runners let's strike up a deal!!! Seriosly be expecting you pm to to get blown up with "how did you's"lmfao.SUBSCRIBED!
IROC Wagon Project
- Thread starter ssbrewskyaz
- Start date
You are using an out of date browser. It may not display this or other websites correctly.
You should upgrade or use an alternative browser.
You should upgrade or use an alternative browser.
- Status
- Not open for further replies.
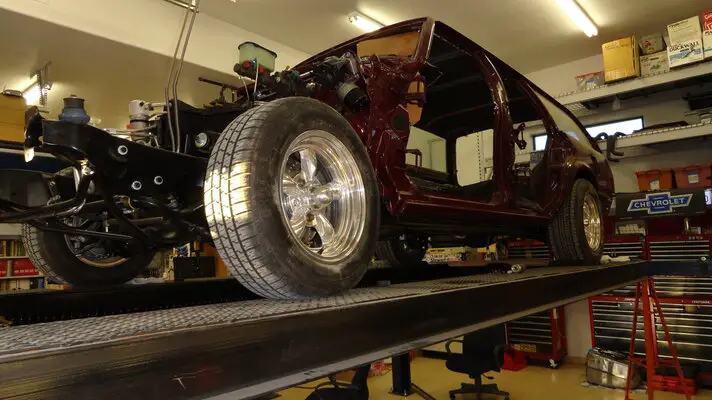
Finally got the lift put back together, this consists of pushing the ramps back together and setting the rolling jacks back in place. It was necessary to make these modifications in order for the Malibu wagon body to fit between the ramps so I could use the lift to raise and lower the body on the chassis. Will be nice to have my lift back operational, really gonna have to build me one of those body carts one of these days.
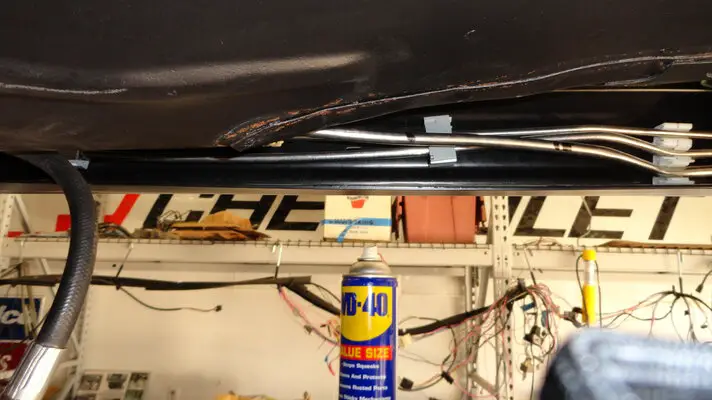
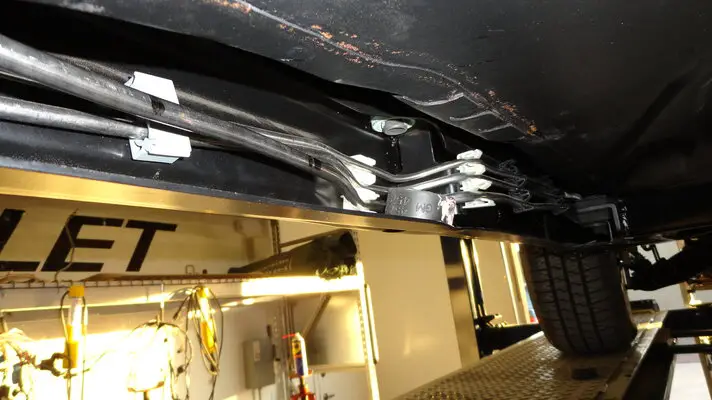
That done, I had the Mrs. help me push the wagon up on the lift so I could finish installing the rest of the body cushions and bolts. Sat there on my rolling chair looking at the bottom of the car now sitting on the chassis, that’s when I noticed the heat I had used in the interior to pound out some dents had blistered the paint on the bottom. That's easy to fix, but then I noticed the latest assembly situation. Amazing the things you don't see when you're not looking, and then, almost as if a Simpson Ha Ha, it stares me right in the face. That fuel filter that I so carefully placed on the chassis, is now hidden by the body. Yikes!

After the proverbial Simpsons “Doh”, I set out to remediate the issue by first taking all the body bolts loose and all the left side bolts out completely. Don’t have photos of me placing my five foot jack stands in strategic locations so I could let the lift down and jack up one side of the car (really wasn’t in the mood), but that’s what I did until I finally had access to the fuel filter. I took the fuel filter out and let the car back down on the chassis.
To say I was pissed would be a stupid thing to say but needless to say I was. How in the world can a person miss this little detail? Well, when the body and chassis are in two different bays, it certainly comes down to out of sight, out of mind. Normally I don’t share my boners with the masses but I figured what the hell, I don’t have anything to prove other than I’m human. The real reason is I’m hoping that this helps at least one person not make the same mistake. Note to self; the body covers most of the mid section on the “C” channel frame members dummy.
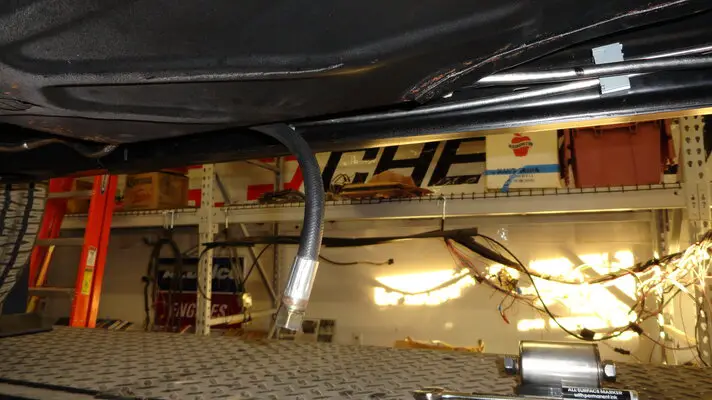
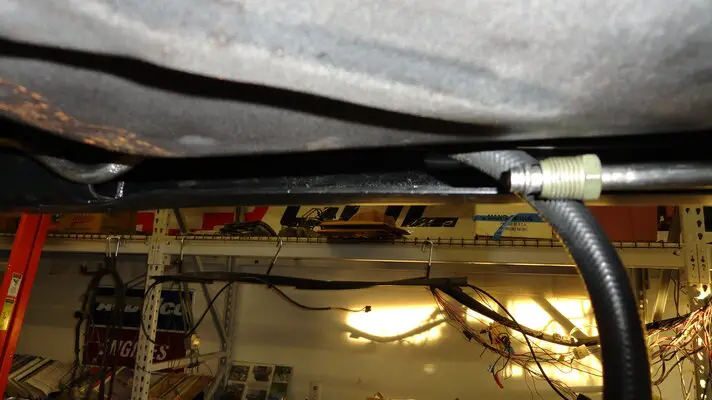
So, even though I wish it were closer to the tank, I cut the forward-most line and will move the fuel filter closer to the front of the car. I ordered a five and a half inch long Fuel Injection hose with 16mm female ends on both ends. I’ll use a union and a short length of tubing from where the fuel filter was, to where it’s going to be now. No one will be able to see it hidden behind the body, (that’s really not the point). The hose will make it easier to replace the fuel filter and also absorb some of the harmonics created by the fuel pump. Probably should have considered this in the first place. Yeah, that’s it, it’s a design enhancement. NOT
😳 :arrow: :arrow: :arrow:
That done, I had the Mrs. help me push the wagon up on the lift so I could finish installing the rest of the body cushions and bolts. Sat there on my rolling chair looking at the bottom of the car now sitting on the chassis, that’s when I noticed the heat I had used in the interior to pound out some dents had blistered the paint on the bottom. That's easy to fix, but then I noticed the latest assembly situation. Amazing the things you don't see when you're not looking, and then, almost as if a Simpson Ha Ha, it stares me right in the face. That fuel filter that I so carefully placed on the chassis, is now hidden by the body. Yikes!

After the proverbial Simpsons “Doh”, I set out to remediate the issue by first taking all the body bolts loose and all the left side bolts out completely. Don’t have photos of me placing my five foot jack stands in strategic locations so I could let the lift down and jack up one side of the car (really wasn’t in the mood), but that’s what I did until I finally had access to the fuel filter. I took the fuel filter out and let the car back down on the chassis.
To say I was pissed would be a stupid thing to say but needless to say I was. How in the world can a person miss this little detail? Well, when the body and chassis are in two different bays, it certainly comes down to out of sight, out of mind. Normally I don’t share my boners with the masses but I figured what the hell, I don’t have anything to prove other than I’m human. The real reason is I’m hoping that this helps at least one person not make the same mistake. Note to self; the body covers most of the mid section on the “C” channel frame members dummy.
So, even though I wish it were closer to the tank, I cut the forward-most line and will move the fuel filter closer to the front of the car. I ordered a five and a half inch long Fuel Injection hose with 16mm female ends on both ends. I’ll use a union and a short length of tubing from where the fuel filter was, to where it’s going to be now. No one will be able to see it hidden behind the body, (that’s really not the point). The hose will make it easier to replace the fuel filter and also absorb some of the harmonics created by the fuel pump. Probably should have considered this in the first place. Yeah, that’s it, it’s a design enhancement. NOT
😳 :arrow: :arrow: :arrow:

Attachments
I understand your frustration about the fuel filter issue, but its good to see the body back on the frame.
So any way, I'm over the fuel filter planning issue. Just reinforces where the saying "The best laid plans of mice and men" comes from.
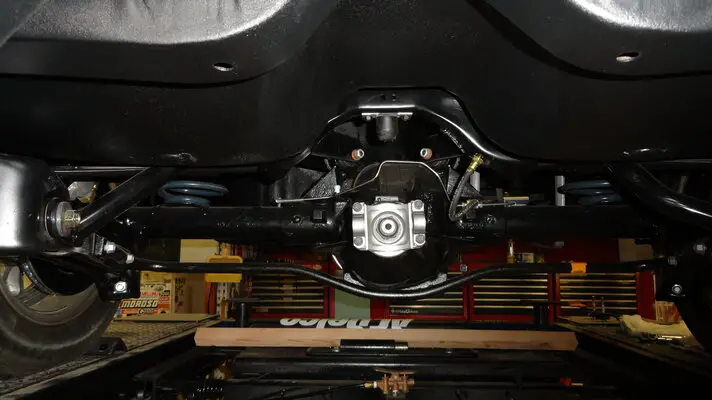
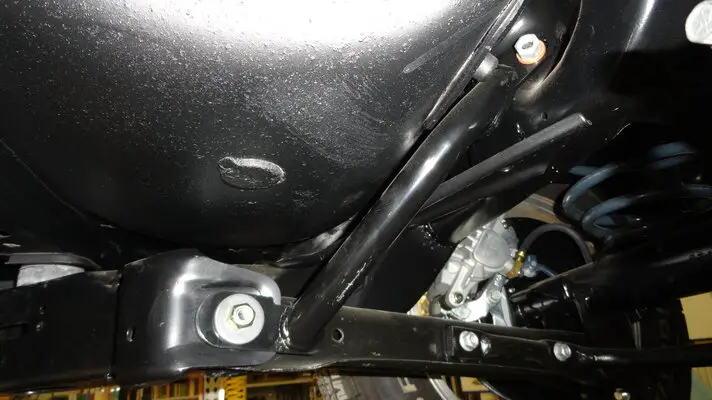
Now that there’s some weight on the chassis, I can finally torque all the suspension bolts. Control arms, trailing arms and etc. Does anyone know what the length of the drive shaft for a standard G-Body wagon with a 200R4 is? Has anybody had a custom drive shaft made recently?
May end up loosing the Edelbrock bars or at the very least, they'll need to be flatened out a bit to clear the Flowmaster mufflers.

Attachments
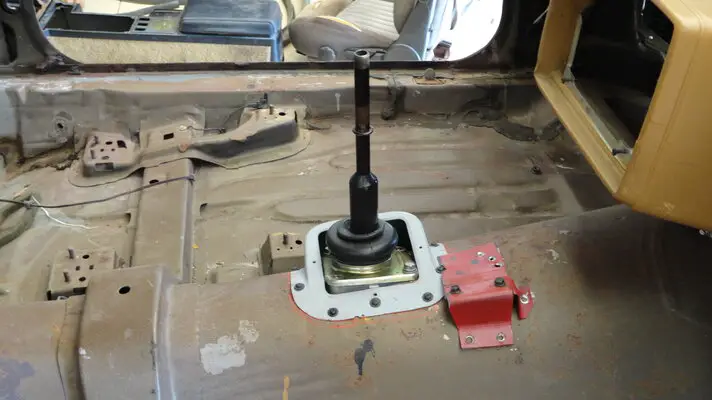
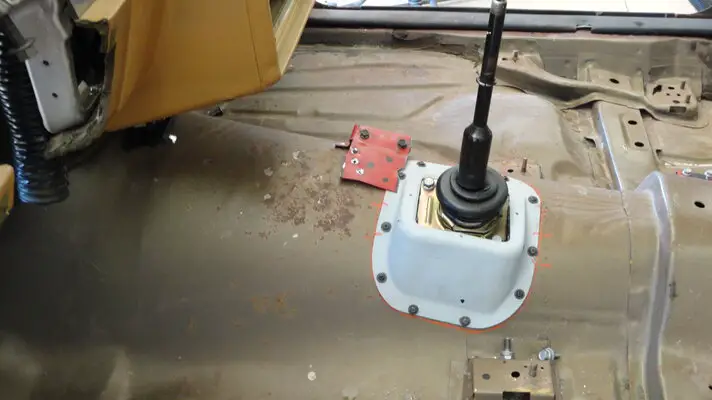
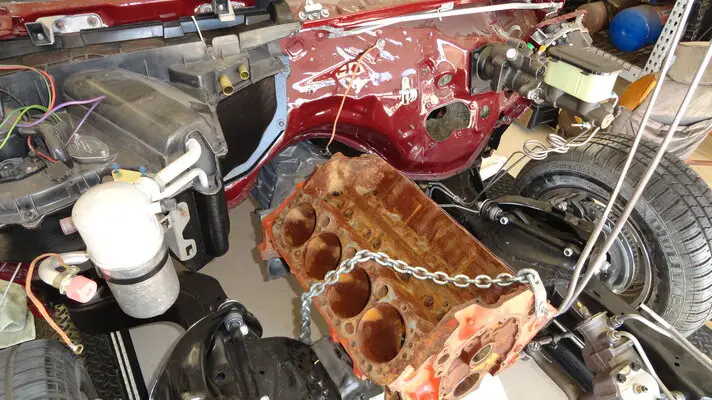
Well I’ve been putting this off for a while now .I needed to know where the shifter would come up through the floor so I can weld the console mounts to the tunnel. Also need to locate where the park brake handle bracket needs to go so I can weld it to the floor and reinforce it. So this was the weekend I loaded a dummy engine and transmission in the car so I can get on with the interior preparations.
Pretty straight forward really, load an engine and trans in the car representative of what you’re going to use. For me it’s a Gen 1 small block with an IROC T5 Borg Warner five speed using a canted IROC bellhousing. Didn’t get photos of the bottom but I don’t think I’m done under there any ways.
The shifter comes off with four bolts so I’m thinking I’m going to rivet the tunnel adapter instead of having screws through the sheet metal. One thing’s for certain; I’m not riveting the piece in until I know it doesn’t have to come out again. Would be my luck I’d have to adjust the console and would have to drill out a bunch of rivets.
:arrow: :arrow: :arrow: :wink:
Attachments
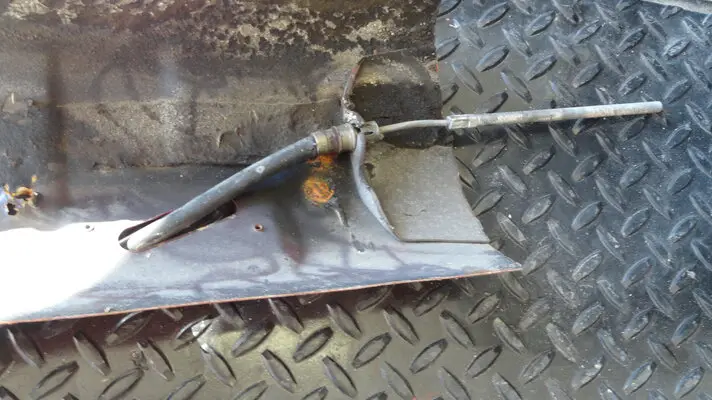
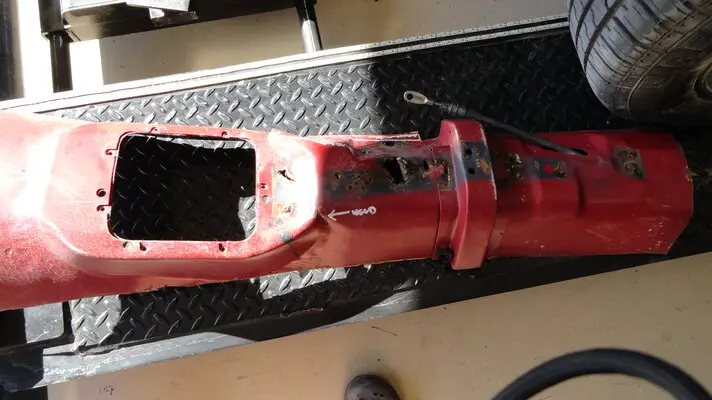
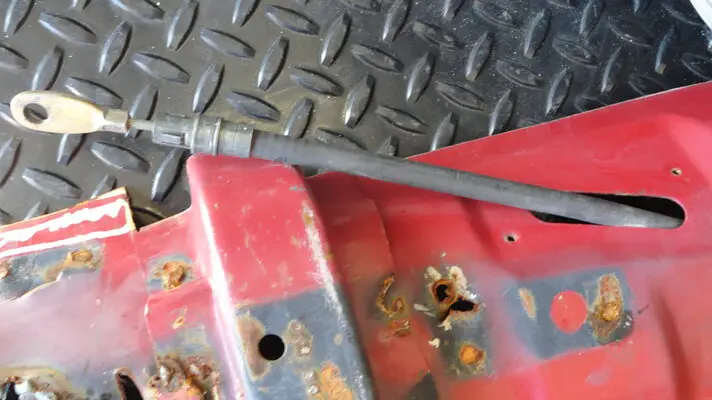
The next thing is to cut the hole for the park brake cable and weld the cable retainer to the bottom of the floor. This sounds difficult but once the park brake handle is mounted, this is merely a matter of grinding off some paint and brushing up on my sheet metal welding skills which I might add, ain’t all that good. Worst case scenario, I have to weld some holes up.
As seen in the photos, I have factory IROC templates to go by. This helps immensely. No sense in reinventing the wheel if you don’t need to. …
:arrow: :arrow: :arrow: :wink:
As seen in the photos, I have factory IROC templates to go by. This helps immensely. No sense in reinventing the wheel if you don’t need to. …
:arrow: :arrow: :arrow: :wink:
Attachments
This project of yours still amazes me. I definitely think that you're going to have some people scratching their heads, wondering if you have some kind of rare factory built car that they've never seen.
Is the shifter hump the stock piece for a Malibu? Also, I'm really interested to see how you do the parking brake setup. If I understand correctly, you're installing a Camaro park brake handle between the front seats, is that right? How will the brake cables be routed? Are you going to have to have custom cables made to get the correct cable length? This conversion you're doing is pretty neat.
Is the shifter hump the stock piece for a Malibu? Also, I'm really interested to see how you do the parking brake setup. If I understand correctly, you're installing a Camaro park brake handle between the front seats, is that right? How will the brake cables be routed? Are you going to have to have custom cables made to get the correct cable length? This conversion you're doing is pretty neat.
- Status
- Not open for further replies.
Similar threads
- Replies
- 9
- Views
- 578
- Replies
- 0
- Views
- 380
- Replies
- 2
- Views
- 162
GBodyForum is a participant in the Amazon Services LLC Associates Program, an affiliate advertising program designed to provide a means for sites to earn advertising fees by advertising and linking to amazon.com. Amazon, the Amazon logo, AmazonSupply, and the AmazonSupply logo are trademarks of Amazon.com, Inc. or its affiliates.


