My 87 442’s turn

john87442

Master Mechanic
Supporting Member
Mar 9, 2021
305
327
63
Geneva ohio
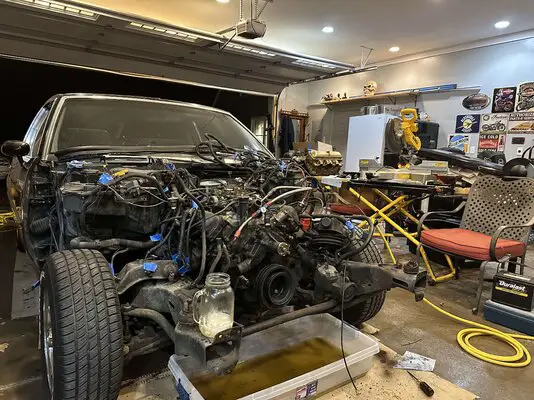
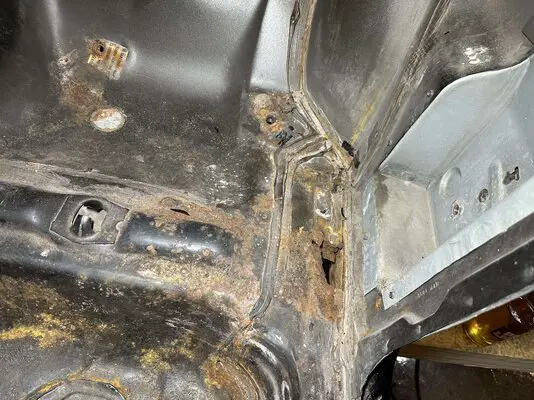
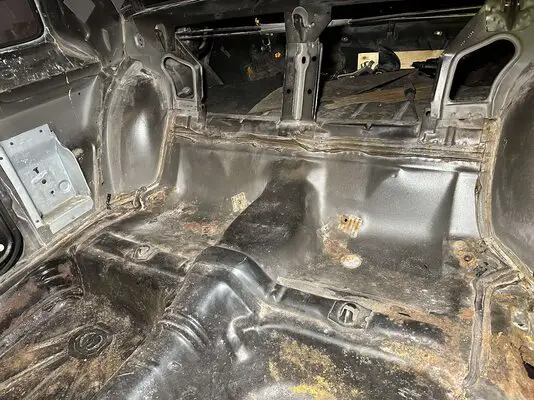
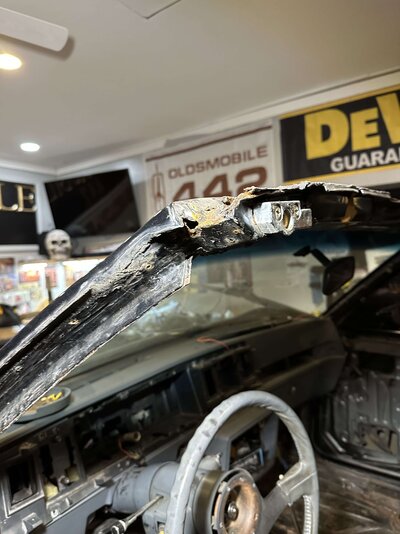
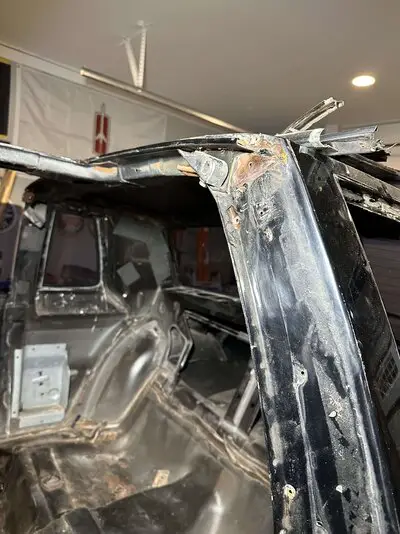
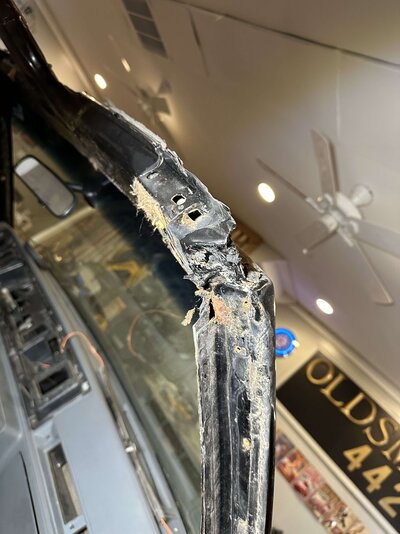
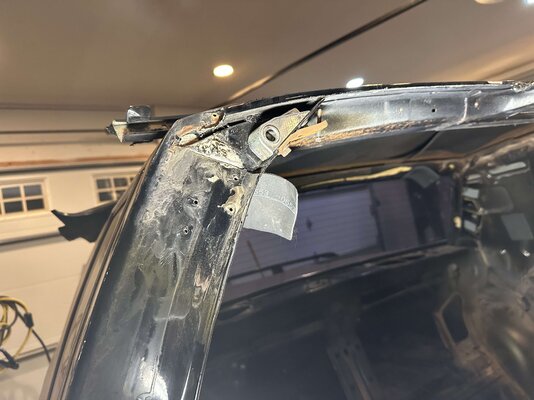
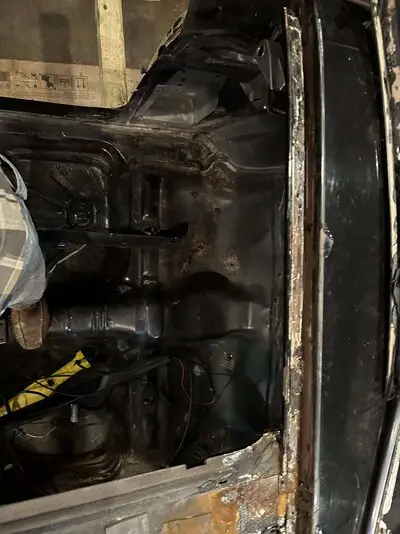
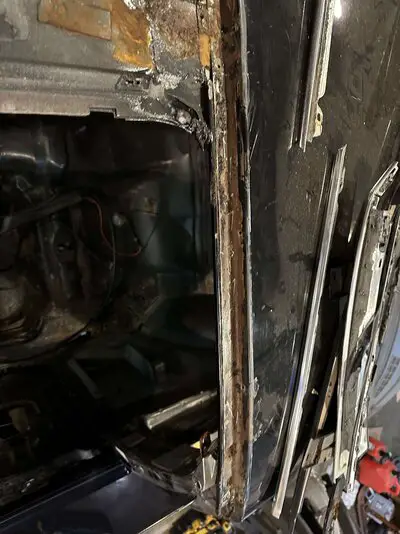
So finally got the day off today and decided it’s time to start the restoration of the most important thing in my life… this beautiful piece of Oldsmobile history. In 1987 I was a senior and in my best friend had a 86 442. I always new I would have one. In 97 I bought this one. It needed a good restoration and I did. Every body panel replaced, rebuild the 307 because of emissions I couldn’t get crazy, new carpet and every piece of rubber replaced. Beautiful new paint job. Then after the restoration about a couple years the fights between me and the wife were too much… I caved and sold it. Thirty years later with no wife I found it after digger through some old paperwork and traced the vin online. I nagged the owner so much he finally gave up. I paid ten grand and she was mine again… I apologized while driving her home for ever letting her go and now she’s getting a frame of restoration. A 1969 olds 350 going to power this beauty with all the suspension upgrades and 4 wheel disc. Hutch has been such an inspiration with all his efforts and information. Looking forward to posting more as I proceed. I ask a lot of questions and everyone here is more than helpful. I appreciate everyone’s help… if I could I’d say grab a beer out of the fridge and let’s talk g bodies.
 

Attachments

  • B0A3BCB2-9463-4E9E-BD87-1343D86DCC18.jpeg
    B0A3BCB2-9463-4E9E-BD87-1343D86DCC18.jpeg
    1.2 MB · Views: 108
  • Like
Reactions: 10 users

69hurstolds

Geezer
Supporting Member
Jan 2, 2006
8,090
17,302
113
I learned a long time ago to KEEP the cars you like. Which is kinda a problem after a while. Glad you got yours back and things worked out the way they did for you.
 
  • Like
Reactions: 1 user

maxi426

Apprentice
Sep 20, 2018
86
82
18
Congratulations on getting your car back. I'll be watching for progress reports.
 

69hurstolds

Geezer
Supporting Member
Jan 2, 2006
8,090
17,302
113
Glad you mentioned oldsofb and his videos. He does a jam up job on those videos. I meant to go back and offer some historical update information on his gage modifications in the comment section for the good of the viewership and your postings prompted me to go do that.

Now get to work!
 
  • Like
Reactions: 1 users

john87442

Master Mechanic
Supporting Member
Mar 9, 2021
305
327
63
Geneva ohio
Got another day off today so more work.. love being in the garage. I was worried about the t- tops and what was under the seals so got to work on them. I believe I won’t have to replace the whole header panel but just a couple of pieces. Definitely need to hit it with some rust encapsulation…. I’ll post all the pics. Then I moved on to taking more interior items out and removing the seals and wires going to the back. Vacuum up the rust and access… ok another rust hole on driver side. I’ve gotten some great advice from Nick,rabbithole, and 69hurstolds always has great advice along with others on how to tackle this issue… I’m definitely needing to bend some new metal so the new pan will fit. I didn’t get the dash out yet but it appears at this point a new a pillar and maybe a little metal work in that drivers side door pillar. Good progress for the day… sanity renewed but bank account is going to go down a bit as I head in to order some parts. I’ll try to include the pics now but just know I’m a total product of the 80s and not technical with even the simple stuff.
 

Attachments

  • EAA23BA6-7C0B-43C8-B01B-2EC4B7670387.jpeg
    EAA23BA6-7C0B-43C8-B01B-2EC4B7670387.jpeg
    1.8 MB · Views: 84
  • EBCD58BC-C562-4B57-A886-2F0447715102.jpeg
    EBCD58BC-C562-4B57-A886-2F0447715102.jpeg
    1.2 MB · Views: 76
  • DC284626-EEAC-4553-AC45-818693F5CA57.jpeg
    DC284626-EEAC-4553-AC45-818693F5CA57.jpeg
    2.1 MB · Views: 78
  • 5B70E28D-DD15-4903-8F23-F03A7CC73262.jpeg
    5B70E28D-DD15-4903-8F23-F03A7CC73262.jpeg
    1.9 MB · Views: 77
  • 7CD41CB6-44D1-404A-A240-86A9DC48DBC8.jpeg
    7CD41CB6-44D1-404A-A240-86A9DC48DBC8.jpeg
    1.8 MB · Views: 74
  • 544BFAB7-27FA-48A7-BC6C-2F397C17071C.jpeg
    544BFAB7-27FA-48A7-BC6C-2F397C17071C.jpeg
    1.6 MB · Views: 77
  • 84E051F6-CC8F-480E-9DAF-625AC66EBF7C.jpeg
    84E051F6-CC8F-480E-9DAF-625AC66EBF7C.jpeg
    1.5 MB · Views: 90
  • 3246CE56-45E6-4D66-9369-CA0A6583479D.jpeg
    3246CE56-45E6-4D66-9369-CA0A6583479D.jpeg
    530.8 KB · Views: 82
  • FD86ABCD-62EE-4B21-B81E-0CBA1AA6EA7E.jpeg
    FD86ABCD-62EE-4B21-B81E-0CBA1AA6EA7E.jpeg
    815.2 KB · Views: 84
  • E46DCF5B-F358-4069-ABCB-69038D18CE1D.jpeg
    E46DCF5B-F358-4069-ABCB-69038D18CE1D.jpeg
    662.8 KB · Views: 90
  • 50FB5423-8882-4992-B47F-22ABFA288A41.jpeg
    50FB5423-8882-4992-B47F-22ABFA288A41.jpeg
    739.7 KB · Views: 85

john87442

Master Mechanic
Supporting Member
Mar 9, 2021
305
327
63
Geneva ohio
More pics of t tops
 

Attachments

  • 6E32818F-5A86-4BDB-A474-A7ADAC9349D6.jpeg
    6E32818F-5A86-4BDB-A474-A7ADAC9349D6.jpeg
    504.3 KB · Views: 76
  • 49769318-10CD-43D8-ABCD-1DB839666B28.jpeg
    49769318-10CD-43D8-ABCD-1DB839666B28.jpeg
    673.3 KB · Views: 76
  • B071EA3B-0CDE-4BD7-BD89-E0EB2A7F3CF7.jpeg
    B071EA3B-0CDE-4BD7-BD89-E0EB2A7F3CF7.jpeg
    811.1 KB · Views: 72
  • 69EC6727-C770-4D14-BF98-22618651A026.jpeg
    69EC6727-C770-4D14-BF98-22618651A026.jpeg
    754.5 KB · Views: 76
  • 0B0C7EA9-D087-4651-BBE7-3326B159A407.jpeg
    0B0C7EA9-D087-4651-BBE7-3326B159A407.jpeg
    1.2 MB · Views: 76
  • B9A0672D-522E-4A60-843A-DCF00BC7088B.jpeg
    B9A0672D-522E-4A60-843A-DCF00BC7088B.jpeg
    778.3 KB · Views: 75

john87442

Master Mechanic
Supporting Member
Mar 9, 2021
305
327
63
Geneva ohio
Maybe it’s hard to orient the pics as to what I’m trying to show but it’s from an angle of looking down on the t tops. I believe it’s possible to remove the front metal where the seal sits by drilling out spot welds and replacing just the metal pieces however if not I know I can replace the whole piece… more work more $$
 
  • Like
Reactions: 1 user

69hurstolds

Geezer
Supporting Member
Jan 2, 2006
8,090
17,302
113
Find a pile of $$$. Looks like it's not a horror show like some. But still gonna be some work.
 
  • Like
Reactions: 1 user

ck80

Moderator
Moderator
Supporting Member
Feb 18, 2014
5,742
9,111
113
Your real moment of truth so to speak will be when you get it opened up and get a peek into the a-pillar areas. Remember, water always goes somewhere in a downwards direction, and, these cars suffered from both the worst of the early recycled steel years and lack of advanced rust proofing on inner surfaces.
 

john87442

Master Mechanic
Supporting Member
Mar 9, 2021
305
327
63
Geneva ohio
Yeah ya know the more I think about it it just makes sense to replace everything with new steel so you know what you have. This is the second time I’ve had this car apart in 25 years so I’m thinking it’s better to take more time to just do it all. It’s not like I’ll have it ready this summer anyway with my schedule. The only thing to do now is find that pile of money.
 

GBodyForum is a participant in the Amazon Services LLC Associates Program, an affiliate advertising program designed to provide a means for sites to earn advertising fees by advertising and linking to amazon.com. Amazon, the Amazon logo, AmazonSupply, and the AmazonSupply logo are trademarks of Amazon.com, Inc. or its affiliates.

Please support GBodyForum Sponsors

Classic Truck Consoles Dixie Restoration Depot UMI Performance

Contact [email protected] for info on becoming a sponsor