On the 'mildly' Cheap SS Monte Carlo chasing a 9.0___

Progress.

As always, slower than I originally thought.

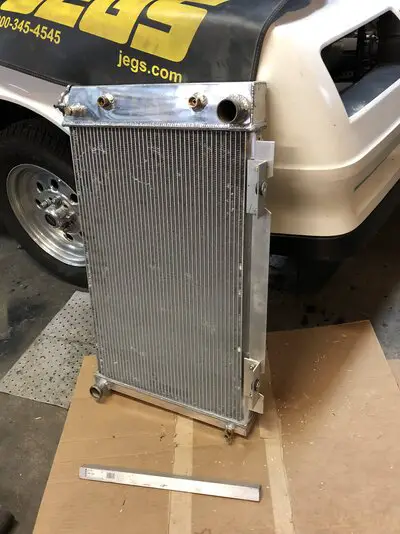
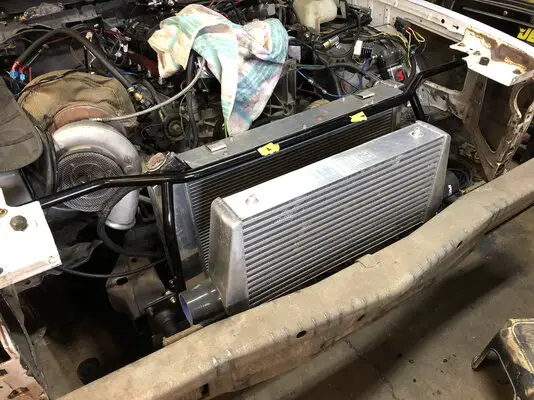
I made both the upper lower a radiator mounting bracket from some aluminum scraps that I had. I installed nutserts into the top and the bottom of the radiator to attack both brackets.

EB1E2260-E99E-47FE-83BB-46A289BD7B76.jpeg
FADD96B0-B11F-44EB-92A0-8480E1A35C8E.jpeg
F70D1713-FD39-49BD-815A-457F17DA457E.jpeg
EF1BC323-BB20-4607-B6BA-75070F5DA267.jpeg


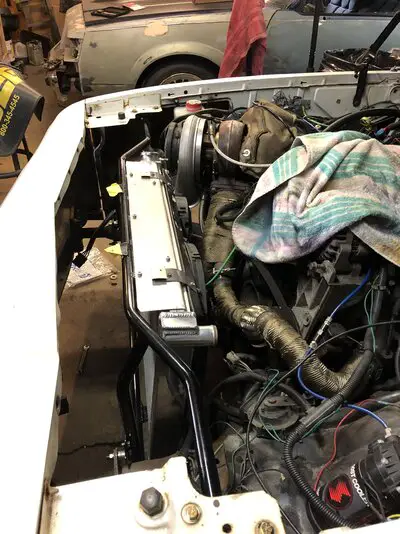
I plan to have the lower support tig’d just so there are less bolts to loosen. And I will change out the upper fan shroud mounts - that are a couple of strips of roof flashing lol. On the winning side, the radiator and fan assembly can be installed as an assembly very easily. I’m sure of this because I had it in and out about 25 times for mock up - Geesh!

Another win is the increase in clearance. I moved the radiator ahead approximately 3 inches which makes for a ton more room to access boostie items.

I have the intercooler roughed in, but still working on it. I believe this is going to be the biggest win. This setup has allowed me to mount the intercooler much higher, meaning directly behind the grill. This should give a TON more air flow. I had planned to ‘full tilt’ with cutting holes in the bumper and bumper cover to help with this. But after consulting with my son, he begged me not to cut up the bumper cover.

So I’m really hoping that the improved Intercooler location along with the larger turbo slows down my inferno of intake temps. I’d love to see them stay below 160 degrees without the meth injection. Presently it takes a pint of meth to keep them below 200 at the big end of the track. Perhaps I can repurpose the meth pump as a windshield washer pump haha.

B79A744C-1A68-44A3-9379-F6C8BD876F2B.jpeg
AC0DD6C3-4F08-4883-A403-2DB60C3F9970.jpeg
 

Attachments

  • 4C33D01A-AF92-4594-82C6-D7A092F0F421.jpeg
    4C33D01A-AF92-4594-82C6-D7A092F0F421.jpeg
    1.4 MB · Views: 85
  • 7A304E33-CAE8-4232-AF6B-6A92F4594899.jpeg
    7A304E33-CAE8-4232-AF6B-6A92F4594899.jpeg
    1.4 MB · Views: 91
Did ur car originally have a center bumper support bracket that went to the core support?
 
  • Agree
Reactions: Texas82GP
Did ur car originally have a center bumper support bracket that went to the core support?

I'm not 100% sure of what part you're asking about, but nothing attached to the bumper. I had the aero piece behind the grill that I have shown in previous posts - I hole sawed a bunch of holes in it for air flow that ultimately did nothing. I had a vertical piece/bracket that went front that to the upper cover. I can take pics of the old setup if you'd like as they are on the ground presently.

Dad... don't be a hack.

Ok mom, but you told me that if I was good at something, then I should stick to it 😉
 
I'm not 100% sure of what part you're asking about, but nothing attached to the bumper. I had the aero piece behind the grill that I have shown in previous posts - I hole sawed a bunch of holes in it for air flow that ultimately did nothing. I had a vertical piece/bracket that went front that to the upper cover. I can take pics of the old setup if you'd like as they are on the ground presently.


Ok mom, but you told me that if I was good at something, then I should stick to it 😉
This. I think the hood release catches on this.


Screenshots_2022-01-30-14-23-11.png

Also fwiw on the track holes in your bumper is useless for an A2A. It is basically just a heat sink. Not enough time for it to cool off.
 
I used to have one of those. I cut it up and ended up discarding the scraps. But that does not attach to my bumper. Kinda funny, I'm building the equivalent presently. It holds the bumper cover and attaching piece in place.
 
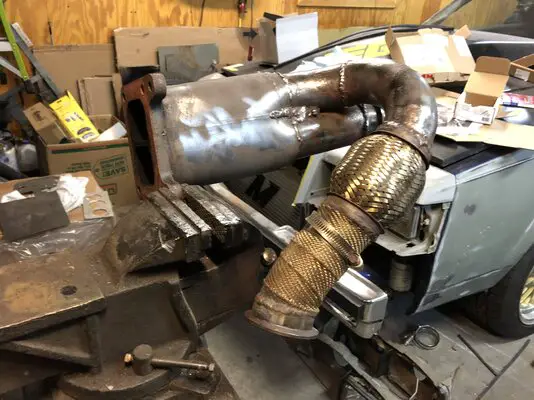
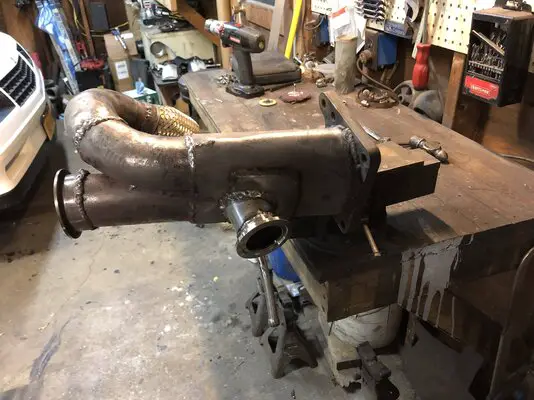
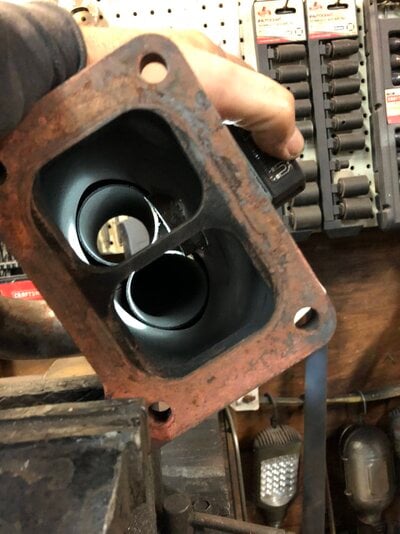
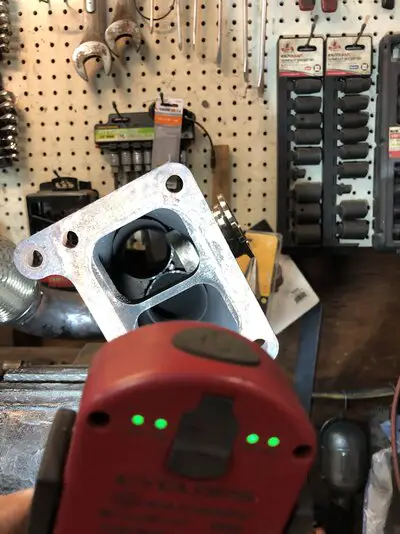
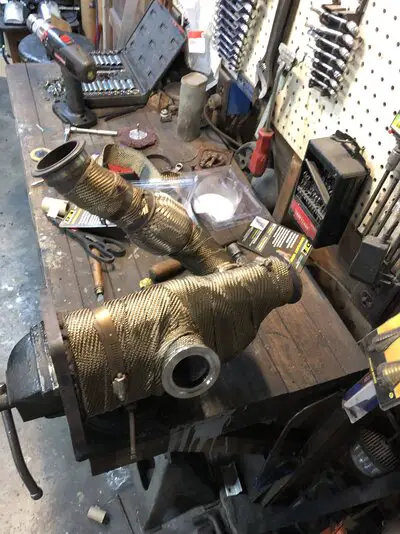
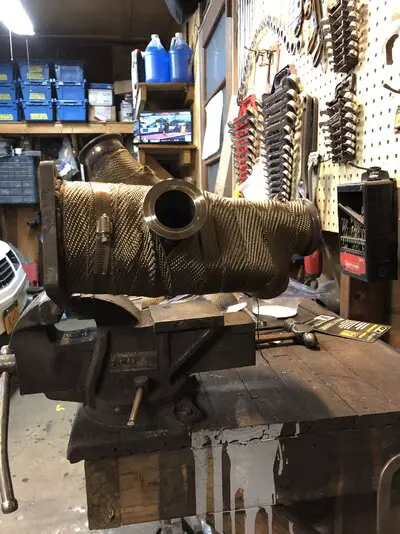
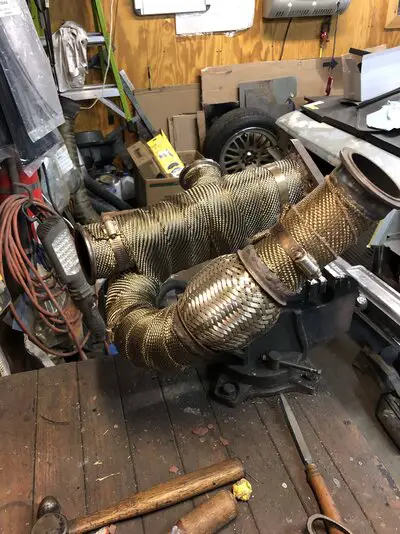
I’ve referenced this thing several times - the world’s worst hot side.

I had a plan to completely revamp it and do away with the piece of 4” pipe squeezed into fitting on the T6 flange. I discovered that the wastegate flange, that was welded closed over this past summer, was close to being almost 1/2 covered by the interior pipes. I’m assuming that is why it made 18-20psi in a 4lb spring haha. I decided to retry it with a 60mm gate rather than the previous 44mm. I cut out the interior pipes to expose the gate exit and angled the gate exit about 15-20 degrees.

It looks alot better wrapped hehe.
 

Attachments

  • 487227DE-EA16-453A-A146-AC55A898B549.jpeg
    487227DE-EA16-453A-A146-AC55A898B549.jpeg
    1.2 MB · Views: 85
  • 657DA37A-CE02-4338-804E-2D984AB2B247.jpeg
    657DA37A-CE02-4338-804E-2D984AB2B247.jpeg
    1.2 MB · Views: 94
  • 054E4F74-BC21-466D-95CC-8ED790505653.jpeg
    054E4F74-BC21-466D-95CC-8ED790505653.jpeg
    1.1 MB · Views: 94
  • 882C59C7-9F2B-4226-963E-18FC0A5510EE.jpeg
    882C59C7-9F2B-4226-963E-18FC0A5510EE.jpeg
    1.1 MB · Views: 90
  • DCD6BBC5-6041-4DB4-8B1E-F774FD721FBB.jpeg
    DCD6BBC5-6041-4DB4-8B1E-F774FD721FBB.jpeg
    1.4 MB · Views: 88
  • 02612465-87B6-4E45-B8F6-89D9C2723AA8.jpeg
    02612465-87B6-4E45-B8F6-89D9C2723AA8.jpeg
    1.4 MB · Views: 91
  • 7069B70C-E3DC-4238-94F0-054ECD6F2D32.jpeg
    7069B70C-E3DC-4238-94F0-054ECD6F2D32.jpeg
    1.6 MB · Views: 86
I’ve referenced this thing several times - the world’s worst hot side.

I had a plan to completely revamp it and do away with the piece of 4” pipe squeezed into fitting on the T6 flange. I discovered that the wastegate flange, that was welded closed over this past summer, was close to being almost 1/2 covered by the interior pipes. I’m assuming that is why it made 18-20psi in a 4lb spring haha. I decided to retry it with a 60mm gate rather than the previous 44mm. I cut out the interior pipes to expose the gate exit and angled the gate exit about 15-20 degrees.

It looks alot better wrapped hehe.

It looks like an improvement. Let's hope it does what you need.
 
It looks like an improvement. Let's hope it does what you need.
Hope so. I’ve never been concerned about being able to control the boost to a very low level. Much of anything less than 15psi on a 3-4lb spring will work.

Hopefully the chinesium S488 will get r done at 20psi or so.
 
Last edited:

GBodyForum is a participant in the Amazon Services LLC Associates Program, an affiliate advertising program designed to provide a means for sites to earn advertising fees by advertising and linking to amazon.com. Amazon, the Amazon logo, AmazonSupply, and the AmazonSupply logo are trademarks of Amazon.com, Inc. or its affiliates.

Please support GBodyForum Sponsors

Classic Truck Consoles Dixie Restoration Depot UMI Performance

Contact [email protected] for info on becoming a sponsor