

Progress on the '78 (56k obliteration)
- Thread starter Doober
- Start date
- Status
- Not open for further replies.
Just so happens I had a little box waiting for me today when I got home 😀

Didn't have a complete set of front arm bolts, and there were no trailing arm bolts, so we just ordered both sets new.
Didn't have a complete set of front arm bolts, and there were no trailing arm bolts, so we just ordered both sets new.
Rust converter is on the frame, and the two lower a-arms are finally painted/finished. The converter calls for 48 hour cure time, which happens to work out nicely since the g/f and I are going to Cedar Point tomorrow 😀 Today I'm going to work on removing some of the suspension from the '81.


The frame is FINALLY done 🙂 I also have put the body in the barn to start prepping it for the frame.

Even though I've found I have a bit more work ahead than expected, I still made progress yesterday. I'm pretty sure I found all my "problem" areas, and plan on patching them... some sooner than others. I've cut most of the rusty metal out as well...
Front left kick panel

Front right kick panel

HVAC area

Misc. floor spots


Trunk floor


Passenger side rocker

Rear seat, driver side

This one is the doozy... the brace that runs across the floorpan for the #4 mounts (just in front of the rear wheels) on the passenger side is toast, as is the rocker area it was welded to.


This and the rocker panels are currently my first priority, I can pretty readily do most of the rest after the body is on the frame. The passenger kick panel area on the '81 seems to be in good shape, so long as it isn't rusting from inside, so for now I plan on using that.
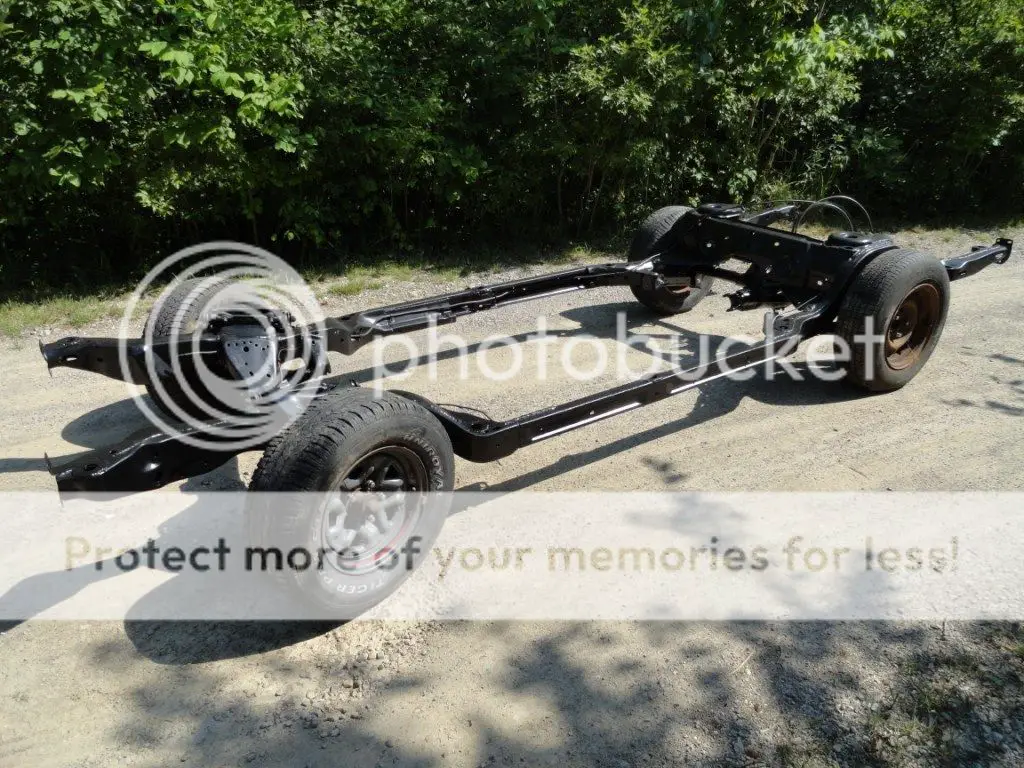
I'm putting the suspension (or the bulk of it) on the frame for the '78 today, it should be rolling by tonight.
Even though I've found I have a bit more work ahead than expected, I still made progress yesterday. I'm pretty sure I found all my "problem" areas, and plan on patching them... some sooner than others. I've cut most of the rusty metal out as well...
Front left kick panel
Front right kick panel
HVAC area
Misc. floor spots
Trunk floor
Passenger side rocker
Rear seat, driver side
This one is the doozy... the brace that runs across the floorpan for the #4 mounts (just in front of the rear wheels) on the passenger side is toast, as is the rocker area it was welded to.
This and the rocker panels are currently my first priority, I can pretty readily do most of the rest after the body is on the frame. The passenger kick panel area on the '81 seems to be in good shape, so long as it isn't rusting from inside, so for now I plan on using that.
I'm putting the suspension (or the bulk of it) on the frame for the '78 today, it should be rolling by tonight.
More pics... I'm in AZ but it turns out I'm going back to MI next week for some other stuff, but plan on getting more done on the '78.
I had to weld another patch up near the front of the rocker panel, and I discovered after I had it almost completely welded up that it was a little too short #-o) Not a major deal, I'm going to have to replace the passenger rocker at some point anyway, the outside portion under the door (not in the door jamb) is really thin.

This is (almost) everything that came out, I couldn't get the rest because it was too far back. Some of that is probably from the kick panel area too. It just occurred to me I didn't get many pictures of the process in that area :x Oh well... it was just basically a flat piece, I did get a picture of the hole and the piece I cut though. The metal just above was also apparently super thin, as I kept poking through with the welder until I had the voltage and speed almost all the way down I did get more pictures of the mount area though.
The hole started showing like this:
By the time I got to good metal, I needed this (actually probably needed to be about 3" longer):


It's ugly as sin, but it'll keep the bugs out! The other side is getting pretty rusty too, I'll probably wind up taking this thing back off the frame sometime down the road to possibly do a full floor pan, along with replacing that channel.
On to the fun pics!


I had to weld another patch up near the front of the rocker panel, and I discovered after I had it almost completely welded up that it was a little too short #-o) Not a major deal, I'm going to have to replace the passenger rocker at some point anyway, the outside portion under the door (not in the door jamb) is really thin.
This is (almost) everything that came out, I couldn't get the rest because it was too far back. Some of that is probably from the kick panel area too. It just occurred to me I didn't get many pictures of the process in that area :x Oh well... it was just basically a flat piece, I did get a picture of the hole and the piece I cut though. The metal just above was also apparently super thin, as I kept poking through with the welder until I had the voltage and speed almost all the way down
I did get more pictures of the mount area though.The hole started showing like this:
By the time I got to good metal, I needed this (actually probably needed to be about 3" longer):
It's ugly as sin, but it'll keep the bugs out! The other side is getting pretty rusty too, I'll probably wind up taking this thing back off the frame sometime down the road to possibly do a full floor pan, along with replacing that channel.
On to the fun pics!


And remember this was what I started with about 3 months previous:

I also realize I missed a few updates on this thread.


New cross shaft bolt


I'll let you know once everything is bled 😉 The brake system is together, I may have to re-bleed the master though. I pushed the old fluid out and cleaned the gunk out of the reservoir. All the brake lines/hoses are brand new, along with the fuel lines. It was a major chore getting the line into the frame at the rear because it's such a sharp turn going through the crossmember. Besides that I would probably just bend my own lines again and save $100 or so. It'll be living its life in the dry AZ climate so I'm not worried about salt/rust. I'm headed back up this weekend to do more work on the car, along with my parents' house (they're working on getting moved out to AZ too).
- Status
- Not open for further replies.
Similar threads
GBodyForum is a participant in the Amazon Services LLC Associates Program, an affiliate advertising program designed to provide a means for sites to earn advertising fees by advertising and linking to amazon.com. Amazon, the Amazon logo, AmazonSupply, and the AmazonSupply logo are trademarks of Amazon.com, Inc. or its affiliates.