Quarter Panel Body work…

Status
Not open for further replies.

Rktpwrd

Builder of Cool Shjt
Supporting Member
Feb 2, 2015
4,155
23,834
113
Calgary, Alberta, Canada
Rktpwrd do you care to comment, since you are an expert on bodywork and on the 80 Cutlass?

There’s not really much for me to contribute at this point as it’s been pretty well addressed at this point. (Late to the party as usual)

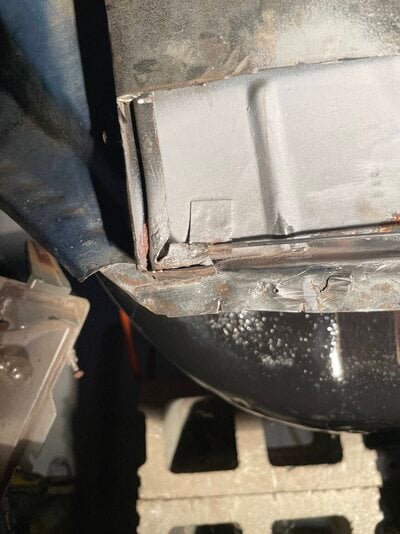
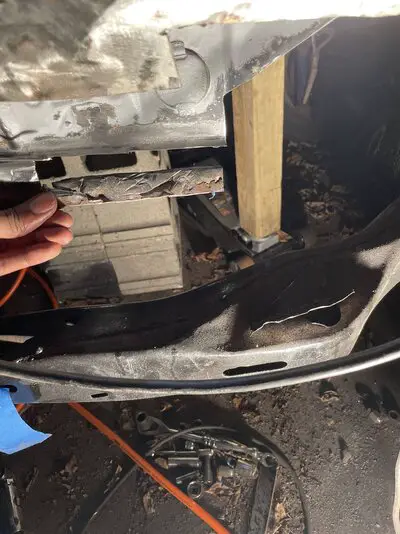
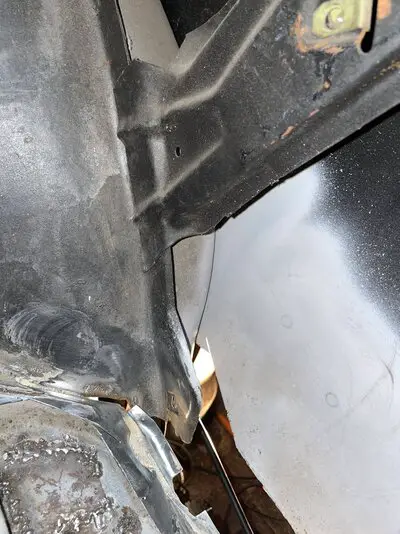
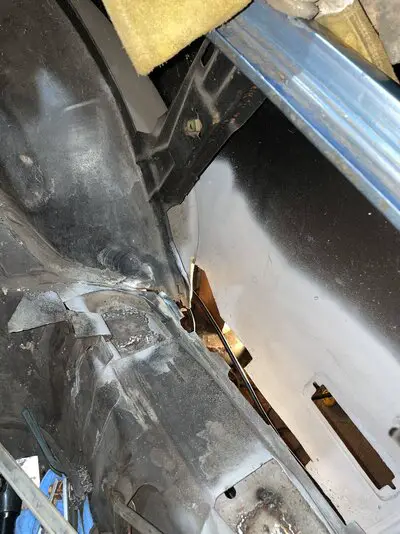
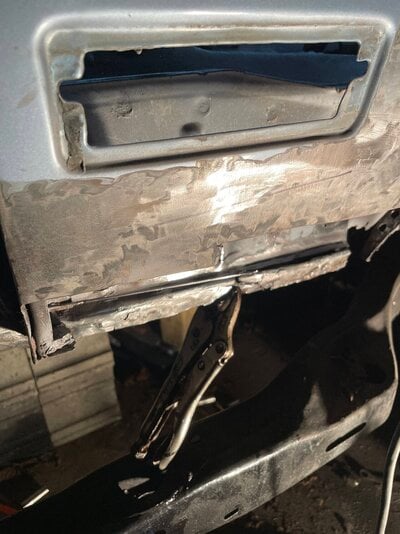
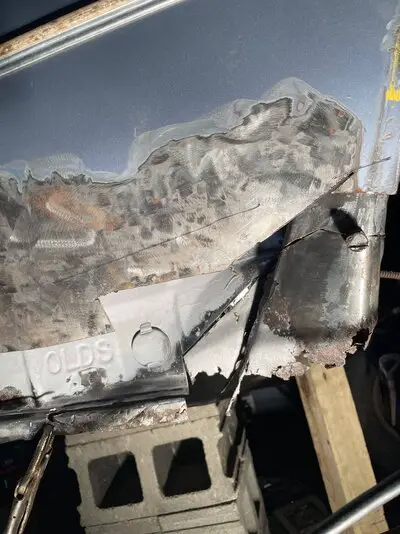
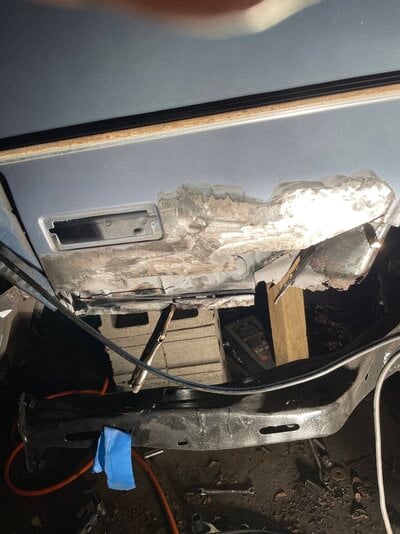
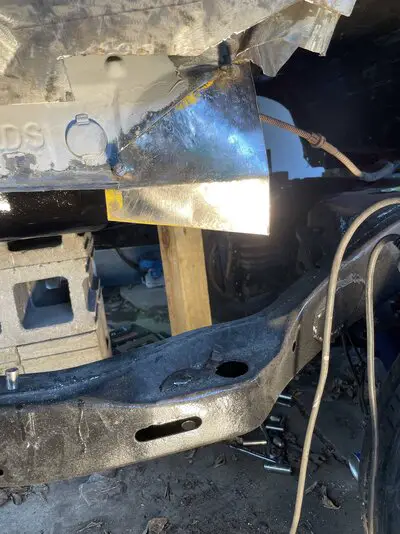
The suggestions as made by Ribbedroof and abbey castro have it covered and right. The substance you’re encountering is in fact the factory seam sealer. If the plan is to re-spot weld in this area, I like to protect the surfaces with a quality epoxy primer first, then pre punch the holes in the new panel where the spot welds are to be placed.

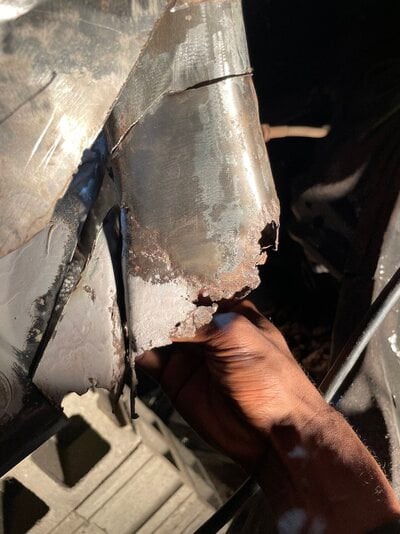
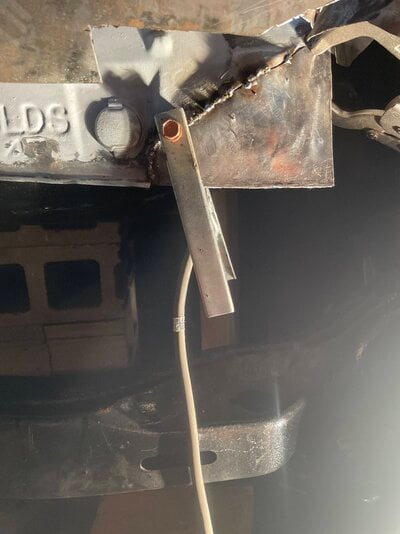
You will not be able to weld to the inner panel with the epoxy in those particular spots, so once I figure out where the new panel is going to sit, I mark through the punched spot weld holes, and remove the epoxy from those areas. Position, clamp, weld, and grind flush. Then lay in a nice even bead of a QUALITY 2 part seam sealer ensuring good coverage. I know the area in question, and know that it’s going to be incredibly difficult to do, but it is what it is.
Where there’s a will, there is a way.
You just have to find it.
 
  • Like
Reactions: 11 users

Hotboyrn84

Apprentice
May 1, 2012
54
38
18
I’d get the body back down on the frame before doing the repair in the roof area.
Definitely my thought too… I added those pictures but I’m just doing the wheel well areas now cause the space is slightly easier to get to off the frame. Then I’ll drop it finish the captured nuts and then do the upper quarter.
 
  • Like
Reactions: 1 user

Hotboyrn84

Apprentice
May 1, 2012
54
38
18
The OEs used a sealer that was welded through in places like the quarter panel pinchwelds (still do sometimes, though most new stuff is weld-bonded with an adhesive). That sealer between the pinchwelds is where rot often starts.

As for the brushed-on sealer...it's crap. I worked with a guy that loved it, put it on everything....BUT it dries out over time and cracks away.

I would use either a bare-metal sealer like 3M 8310, or a urethane over primed metal. The 3M 8310 is an epoxy and can be applied to clean bare steel. I'm sure others have a similar product, I know Kent makes a panel sealer-adhesive product that both bonds and seals.

As for panel bond, it's for non-structural panels. Proper use requires both parts to be ground to bare metal, then a bead is placed on each panel, and brushed out to COMPLETELY cover the bare metal. Then another bead is run on one panel, and the assembly is clamped until cured. The only panel bond failures I've seen were due to improper prep....metal exposed, adhesive over e-coat, insufficient adhesive.
Also question… ur thoughts on lead solder filling the factory gap between the quarter and roof panels?
 

Ribbedroof

Comic Book Super Hero
Supporting Member
Jan 4, 2009
4,865
6,894
113
Wellston, OK
Also question… ur thoughts on lead solder filling the factory gap between the quarter and roof panels?
Every time we remove lead from a seam, we find rust. So not a fan of it. A good fibreglass reinforced filler should be fine, and has the advantage of being waterproof compared to conventional talc-based fillers. I also weld the seam fully, rather than just using the OE spotwelds.
 
  • Like
  • Winner
Reactions: 4 users

Hotboyrn84

Apprentice
May 1, 2012
54
38
18
Emergency…. The lower quarter on both sides is 98% rusted out rear of the wheel well… so I’m lost on the exact structure… is there a metal boxed brace inside of the lower quarter above the the welds? In the photo you see the 2% that was left… how far did the brace go and what did it weld to on the other end?

Did it shot on like a 90 degree up to the bracing pictured in the last two photos? Anyone that see this have a 78-80 and can peek in there and maybe take a pic?
 

Attachments

  • image.jpg
    image.jpg
    1.6 MB · Views: 127
  • image.jpg
    image.jpg
    1.7 MB · Views: 111
  • image.jpg
    image.jpg
    1.5 MB · Views: 112
  • image.jpg
    image.jpg
    2 MB · Views: 116
  • image.jpg
    image.jpg
    1.8 MB · Views: 114

Hotboyrn84

Apprentice
May 1, 2012
54
38
18
Better pics with what was on the car that I have cut off…

The last one there is the sheet metal and then that inner brace of boxed sheet metal I assume runs the length to the inner wheel well?
 

Attachments

  • image.jpg
    image.jpg
    1.5 MB · Views: 108
  • image.jpg
    image.jpg
    1.8 MB · Views: 114
  • image.jpg
    image.jpg
    1.8 MB · Views: 120
  • Like
Reactions: 1 user

Hotboyrn84

Apprentice
May 1, 2012
54
38
18
Trim weld grind cool repeat trim weld grind cool repeat 🤷🏾‍♂️
 

Attachments

  • image.jpg
    image.jpg
    1.3 MB · Views: 115

Hotboyrn84

Apprentice
May 1, 2012
54
38
18
Still really confused on how they did this bottom quarter panel since mine is completely rusted… the inner quarter seems to have a boxed brace n I’m wondering how that looked as u go forward towards the rear wheel well… there are arrows from left to right. That’s the rear passenger quarter at the bottom behind the rear wheel
 

Attachments

  • 0D26BAD8-15D9-4A3C-9041-171F1542F866.jpeg
    0D26BAD8-15D9-4A3C-9041-171F1542F866.jpeg
    35.8 KB · Views: 102
  • Like
Reactions: 1 user
Status
Not open for further replies.

GBodyForum is a participant in the Amazon Services LLC Associates Program, an affiliate advertising program designed to provide a means for sites to earn advertising fees by advertising and linking to amazon.com. Amazon, the Amazon logo, AmazonSupply, and the AmazonSupply logo are trademarks of Amazon.com, Inc. or its affiliates.

Please support GBodyForum Sponsors

Classic Truck Consoles Dixie Restoration Depot UMI Performance

Contact [email protected] for info on becoming a sponsor